|
Working with Send Android Broadcast Process [Early Adopter] |
  
|
Working with Send Android Broadcast Process [Early Adopter]
|
Working with Send Android Broadcast Process [Early Adopter] |
|
Process Purpose
The "Send Android Broadcast" process is used to send a broadcast, outside the MCL application environment, to an interested application within the Android Operating System.
No response is expected from the component receiving the broadcast.
This process ONLY applies to Android target devices.
![]()
Be aware that this process is based on a specific Android function (= sendBroadcast) which is NOT developed/managed by MCL.
This function can be changed, at any moment, without MCL knowledge, so we recommend you check the Android developer support page for specific information on this function and examples.
![]()
This is a Beta process that must be enabled in the "Tools" menu - Early Adopter (Beta) option. Once enabled, it becomes available in the "Others" processes group.
It requires MCL-Client 4.10P120 or higher.
When you add a process, you are required to define its settings. This occurs in the process's properties window which is displayed automatically after having added the "Send Android Broadcast" process. In this case, the properties window includes several tabs - "General", "Send" and "Error".
If any subsequent edition is required, double-click the process to open its properties window and enter the necessary modifications.
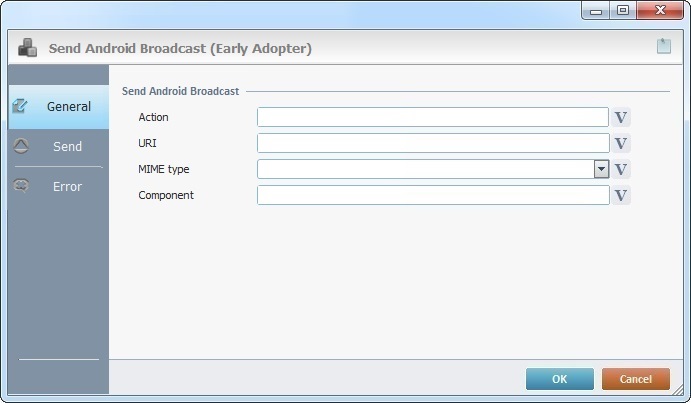
"General" tab
 .
.
Fill in the following options:
Send Android Broadcast |
|
Action |
Define the general action to be performed - enter an explicit action string directly OR click |
URI |
Define the data to operate on. Enter the intended target data in URI format OR click |
MIME type |
If required, specify the MIME type of the intended target data. If this option is left empty, the type is inferred by the data itself. |
Component |
If required, explicitly define the component that will handle the action/intent. Enter it OR click |
Proceed to the "Send" tab.
"Send" tab
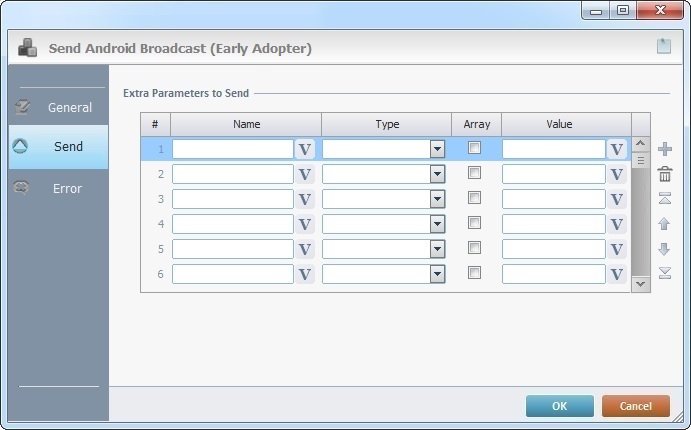
Fill in the following options:
Extra Parameters to Send |
|
Name |
Enter the name of the intended extra parameter OR click |
Type |
Select the type of the extra parameter from the drop-down. |
Array |
Check the corresponding check box, if you want to send the parameter value(s) as an array. |
Value |
Enter a value for the extra parameter OR click |
Use the editing icons to the right of the table to move the rows up and down and to delete or add more rows.
Click the "Error" tab to continue.
"Error" tab
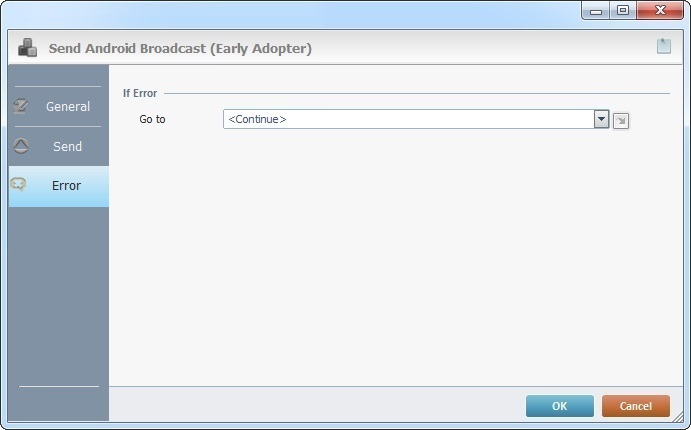
Fill in the available option:
If Error |
|
Go to |
Select a target location from the drop-down OR the
|
Detail of a ![]() window:
window:
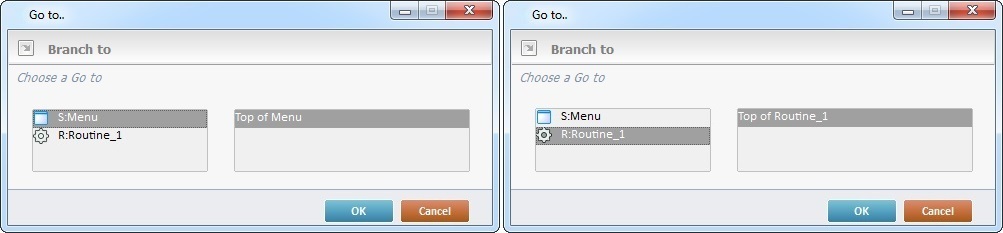
"S:Menu" is a screen included in the same program as the process.
"R:Routine_1" is a routine included in the same program as the process.
If required, use the![]() icon to attach any relevant notes to this process. Click it and enter your notes in the resulting text box. These notes will be displayed in the corresponding "Actions" tab or "Process" window (in the "Notes" field) and in the "Developer Report".
icon to attach any relevant notes to this process. Click it and enter your notes in the resulting text box. These notes will be displayed in the corresponding "Actions" tab or "Process" window (in the "Notes" field) and in the "Developer Report".
After filling in the required options, click ![]() to conclude.
to conclude.
The added process is displayed in the corresponding "Actions" tab or "Process" window.