Editing a Table |
  
|
Editing a Table |
|
Overview
You can alter the structure/properties of the table(s) you have created. This, however, implies the loss of the data you have already entered.
To Edit the Structure of a Table
Step-by-step
1. Open the "Local Database" module.
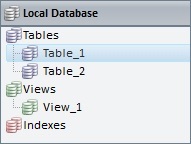
2. In the "Tables" section, right-click the table with the structure you want to edit.
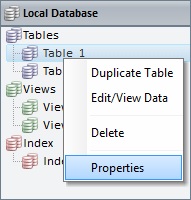
3. Click "Properties" to open the selected table's properties window.
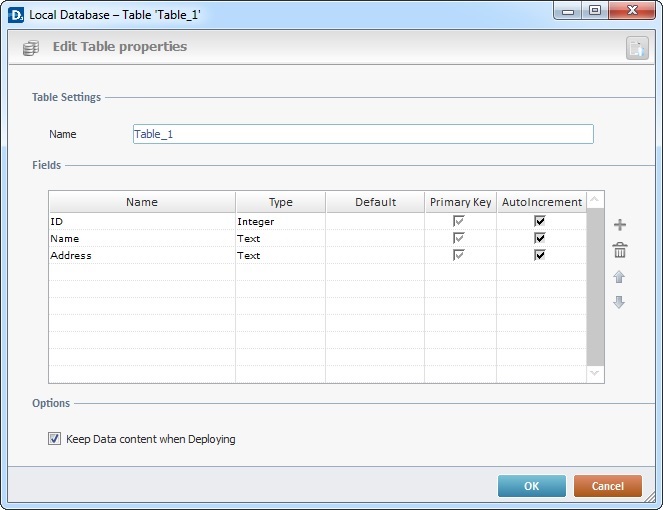
4. Edit the following fields, as required:
Table Settings |
|
Name |
Maintain or modify the table's name. |
Fields |
|
Name |
Maintain or enter a new name for the required field(s) |
Type |
Maintain or select another data type. |
Default |
Maintain, remove or enter a new default value. |
Primary Key |
Maintain or check/uncheck the required fields as primary keys. |
AutoIncrement |
Maintain or check/uncheck the required fields to enable/disable the automatic increment. |
Options |
|
Keep Data content when Deploying |
Maintain or check/uncheck the option regarding table content. |
5. If required, use the editing icons to the right of the table to add more rows, move the rows up and down and/or to delete the selected row.
6. If you want to, click ![]() (on the window's upper right corner) to open the "Edit/View Data" window and view/edit the data contained in the selected table.
(on the window's upper right corner) to open the "Edit/View Data" window and view/edit the data contained in the selected table.
7. Click ![]() to apply your modifications.
to apply your modifications.
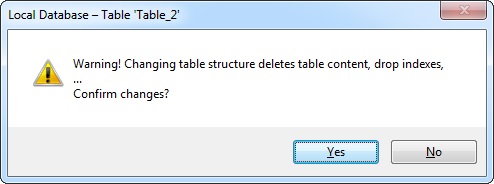
8. Confirm the editing operation.