|
Working with Set Label Process |
  
|
Working with Set Label Process
|
Working with Set Label Process |
|
Process Purpose
The Set Label process is used to create a name tag in a specific process line. It marks a precise point in the code for other processes in the "Branch Processes Group" to call for it.
When you add a process, you are required to define its settings. This occurs in the process's properties window which is displayed automatically after having added the Set Label process.
If any subsequent edition is required, double-click the process to open its properties window and enter the necessary modifications.
Proceed as follows:
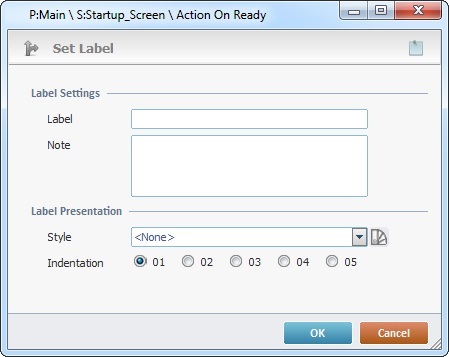
Label Settings |
|
Label |
Attribute a name to the label. |
Note |
If relevant, add notes to the label. |
Label Presentation |
|
Style |
If required, use comment rows to surround the label. Select an available style ("Warning"; "Long-Dashes"; "Small_Dashes"; "Stars" or "Dots") from the drop-down list OR click |
Indentation |
The Indentation is used as a visual aid. It helps to understand the hierarchy of a sequence of processes. Select the position, within the "Actions"/"Routine"/"Procedure"/"Event" tab, that the label will occupy. Each of these radio buttons represents an indentation to the right.
Each indentation represented by a radio button is affected by the "Indent +" and "Indent -" options available in the right-click menu of a process or the
Each process that is added is affected by the indentation of the previous process (the indentation set in this option – if the previous process is a “Set Label” process - or a customized indentation).
|
If required, use the icon on the upper right corner of the properties window:
![]() Use the icon to attach any relevant notes to this process. Click it and enter your notes in the resulting text box. These notes will be displayed in the corresponding "Actions" tab or "Process" window (in the "Notes" field) and in the "Developer Report".
Use the icon to attach any relevant notes to this process. Click it and enter your notes in the resulting text box. These notes will be displayed in the corresponding "Actions" tab or "Process" window (in the "Notes" field) and in the "Developer Report".
After filling in the required options, click ![]() to conclude or
to conclude or ![]() to abort the operation.
to abort the operation.
The added process is displayed in the corresponding "Actions" tab or "Process" window.
![]()
The label that was defined by this Set Label process can be used as a target destination and can be considered “private” or “public” depending on the context.
Examples:
If a label is set in a local procedure, it can only be called from within that local procedure (private).
If the setting of a label occurs within a screen or a control's event, it can only be called from within that event (private).
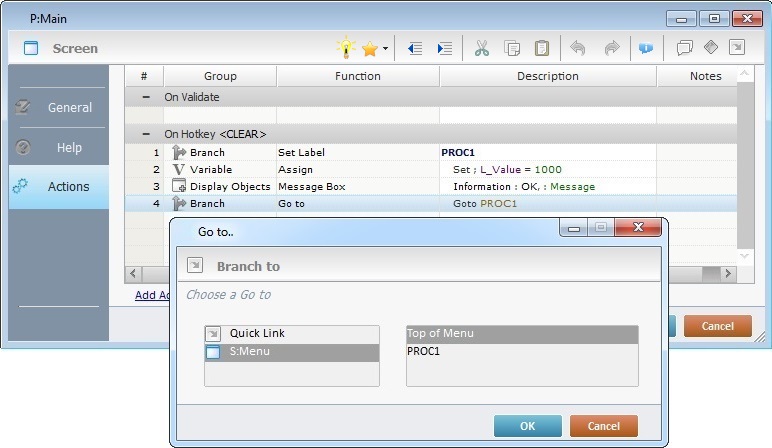
If a Set Label process is added to a routine, a "routine in" or a "routine out", you can set that label as "public" (it can be called from within that or other routines, as well as from events) or as "private" (only called from within the routine or "routine in"/"routine out" that includes the label).
When adding a label into a routine, a "routine in" or a "routine out", the corresponding properties window, includes another option:
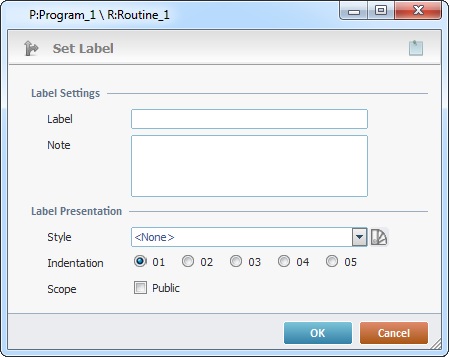
By default, any added labels are private.
If you want to set a label's scope as "public", check the "Public" option.
![]()
Remember to click the screen or routine (in the Quick Link column) that includes the label. It is the only way to have it selectable.
![]()
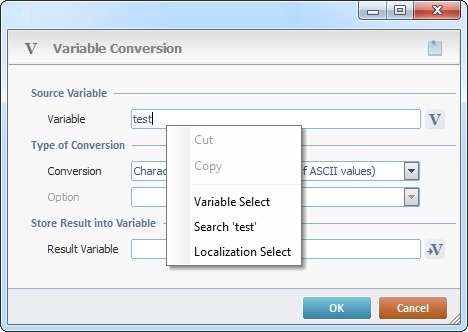
Use the right click in MCL-Designer's input boxes to access certain features regarding the input box's option as well as general actions such as "Copy"; "Paste"; "Search".
Ex: If you right-click the "Variable" input box (included in a "Conversion's" properties window), you are provided with the "Search..."and "Variable Select" options.
If you right-click another input box, it will provide other possibilities.