|
Creating a Data File |
  
|
Creating a Data File
|
Creating a Data File |
|
Overview
Data files are an important component of a program and must have a well thought out structure.
To Create a Data File
Step-by-step
There are two ways to create a data file:
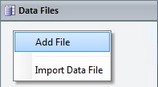
| • | Directly in the "Data Files" module. |
Right-click anywhere, within that module and click "Add File" in the resulting menu.
OR
Whatever the path used, it opens a properties window and this is where the creation/setting up of a data file takes place.
Step-by-step
By default, the data file's properties window opens with the "General" tab.
1. Start by attributing an alias (internal MCL-Designer reference name) to the data file in the “File Alias” box.
2. Enter the data file's name in the “Physical File Name” option.
3. Select the file type in the “Type” option from the drop-down list ("Capture"; "Lookup" or "Print"). See Data File Types.
4. Define the sorting field(s) in the “Sort on” box from the drop-down list ("None"; "Field 1"; "Fields 1 + 2"; "Fields 1 + 2 + 3" and "Fields 1 + 2 + 3 + 4").
5. Select a field separator character (such as (I) Pipe, (") Quotes, (,) Comma, etc) in the“Field Separator” option.
6. Select the character that separates records in “Record Separator” from the drop-down list ("CR+Lf"; "CR" or "Lf").
CR + LF |
Moves the cursor to the beginning of the next line. |
CR |
(Carriage Return) Moves the cursor to the beginning of the same line. |
LF |
(Line Feed) Moves the cursor to the next line, to the the same position. |
7. At this point, define the data file's "Advanced Settings".
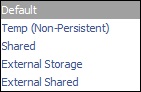
Define the location, within the device, of the data file ("Default"; "Temp (Non Persistent)"; "Shared"; "External Storage" or "External Shared") in the "Location" box:
|
Default |
Default storage disc space for files accessible only to the application. |
Temp (Non Persistent) |
Files are lost every time the RAM is cleaned up. |
|
Shared |
Internal storage disc space for files shared across applications. |
|
External Storage |
External storage disc space for files accessible only to the application. |
|
External Shared |
External storage disc space for files shared across applications. |
8. Decide the data file format in the “Encoding” option ("Ansi<Default>" or "UTF-16 Without BOM").
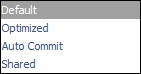
9. Define the file mode in the “Mode” drop-down list ("<Default>"; "<Optimized>"; "<Auto Commit>" or "<Shared>"):
|
Default |
No explicit file close (for Windows CE devices). |
Optimized |
No file close is performed. An explicit file close needs to happen whenever necessary. |
|
Auto Commit |
File is automatically closed after write. |
|
Shared |
File is always closed after access. |
10. Go to the "Design" tab to create the necessary fields of your data file.
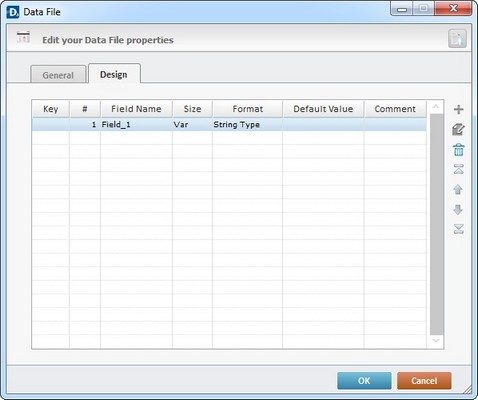
11. The table presents default information ("Field_1" with its settings) and you can perform several operations:
a. To add more fields, click ![]() (located on an editing bar to the right of the tab)and continue to step 12.
(located on an editing bar to the right of the tab)and continue to step 12.
b. To modify the default "Field_1" settings, click ![]() (located on an editing bar to the right of the tab) OR double-click the field you want to modify and continue to step 12.
(located on an editing bar to the right of the tab) OR double-click the field you want to modify and continue to step 12.
c. If you want to maintain the suggested settings, click ![]() to conclude the data file addition.
to conclude the data file addition.
![]()
Use the editing bar to the right of the "Design" tab to add (![]() ); edit (
); edit (![]() ); delete (
); delete (![]() ) and move (
) and move (![]()
![]()
![]()
![]() )the data file fields.
)the data file fields.
OR
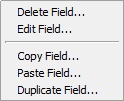
Right-click the field you want to modify and select the appropriate option.
|
Delete Field... |
Deletes the selected field. |
Edit Field ... |
Opens the selected field's “Edit a Field of a Data File” window. |
|
Copy Field... |
Copies the selected field. Conclude by clicking "Paste Field...". |
|
Paste Field... |
Must be preceded by a "copy field". Pastes the copied field. |
|
Duplicate Field... |
Duplicates the selected field. |
Performing options a. and/or b. opens the corresponding “Edit a Field of a Data File” window.
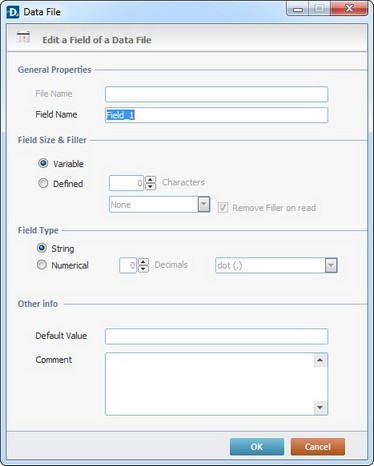
12. Enter a new field name in the “Field Name” box.
13. Define the field's size by checking one of the available options:
"Variable"
Checking this option means that the size of the field can variate.
"Defined"
If you check this option,you must, then, specify the number of characters allowed in the field and customize the field format by selecting a filler option from the drop down list. To remove these "filler" elements during a read operation, check the "Remove Filler on read".
14. Define the "Field Type" by either checking the “String” (alphanumerical) option or “Numerical”. Checking this last option implies defining the number of decimals as well as the decimal separator character (“comma (,)” or “dot (.)”).
15. As a further option, define a “Default Value” for the field and add some comments that describe that field in the “Comment” box.
16. Click ![]() to apply your choices and return to the "Design" tab
to apply your choices and return to the "Design" tab
17. Add as many fields as necessary.
a. Click ![]() to open the corresponding “Edit a Field of a Data File” window.
to open the corresponding “Edit a Field of a Data File” window.
b. Fill in the available options (steps 12 to 15).
c. To apply your choices for each field and return to the "Design" tab, click ![]() .
.
18. When all the required fields have been created, click ![]() in the "Edit your Data File properties" window to conclude the operation.
in the "Edit your Data File properties" window to conclude the operation.
![]()
To assist in the creation/edition of a data file field, you can also use the right-click menu (in the "Design" tab of the "Edit your Data File properties" window)and select the appropriate option.