Navigating the Resources Module |
  
|
Navigating the Resources Module |
|
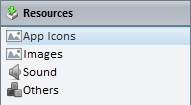
![]() The Resources module includes all the resources that are available to be used in the project. It consists of four sections: "App Icons","Images", "Sound" and "Others".
The Resources module includes all the resources that are available to be used in the project. It consists of four sections: "App Icons","Images", "Sound" and "Others".
|
App Icons |
The "App Icons" section includes the default project icons provided by MCL-Designer V4 to be used throughout the project. |
Images |
This section contains the images that are added to the project. Use jpeg,jpg and/or png files for project development. |
|
Sound |
This section includes added sounds. Use wav files for project development. |
|
Others |
The "Others" section groups all the non image/non sound resources. |
|
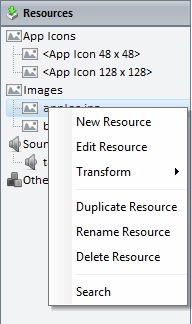
Use the right-click menu to access options that are related to the selected resource. |
These are the available right-click menu options:
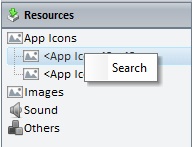
If you right-click "App Icons" or any of the resources contained in that section. |
||
|
The "Search" option is the only one available. This section includes project default images that cannot be removed or edited in any way (all added images go to the "Images" section). Clicking this option opens a search window. See Detail of Search. |
|
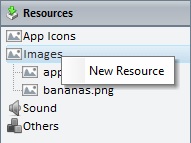
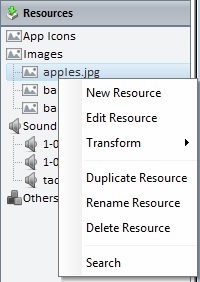
If you right-click "Images", "Sound" and/or "Others". |
||
|
The "New Resource" option is used to add a resource to the "Resources" module. See To Add a Resource. Regardless of the section title you click, you can add all sorts of resources. MCL-Designer will identify/group them in the appropriate section.
The "New Resource" option is also available if you right-click an empty space in the "Resources" module. |
|
If you right-click the resources contained in the "Images", "Sounds" and "Others" sections. |
||
|
New Resource |
Use this option to add a new resource. See To Add a Resource. |
Edit Resource |
Click this option if you want to edit the selected resource. If you select an image for editing, this option opens your default PC editor. |
|
Transform |
Use this option to rotate (90o, 180o or 270o) or flip (horizontal or vertically) the selected image file. This option is NOT available for sound resources. |
|
Duplicate Resource |
Click it to duplicate the selected resource. The result is a duplicate resource with the same name as the original resource with an incremented number. |
|
Rename Resource |
Use it to rename the selected resource. Once the resource's name is set to edit mode, enter the new name, click <Enter> and, then, <yes> in the confirmation window. |
|
Delete Resource |
This option removes the selected resource from your current project. |
|
Search |
Click this option to open a "Search" window. See Detail of Search. |
|
|
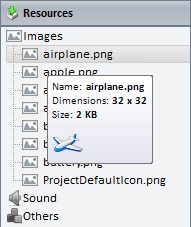
Preview some properties of an image resource file (name, dimensions and size) by mouse hovering it. |
Use one of the following:
a. Right-click one of the sections (Images, Sound or Others) or the empty space of the"Resources" module.
b.Click ![]() .
.
c. In the resulting OS browse window, browse and select the required resource.
OR
•Use the “Drag-and-Drop” mechanism – Drag a resource file from an OS browse window and drop it in the Resources area.
![]()
Use the Drag-and-Drop mechanism to add image resources to screens in the project. Open the "Resources" module, drag the required image resource from the "Images" section and drop it on the intended screen.
Any added image is always sent backward in relation to any other object in the screen.
If the added object and the object already on the screen are both image resources, you can alternate their position and send one of the image resources forward/backward, as required.
You can add image resources to the "Resources" module but you can also add them to objects that require images, in their corresponding properties window. To do so, proceed as follows:
Step-by-step
1. Click ![]() in the "image" box of an object's properties window, whenever available.
in the "image" box of an object's properties window, whenever available.
![]()
This opens a window with tabs that contain image resources ("Theme", "Designer Resources", "Project Resources", My Pictures" and a tab representing the folder you previously used as a source for an image import.
In the case of the image below, it is the "C:\...\Pictures\" tab).
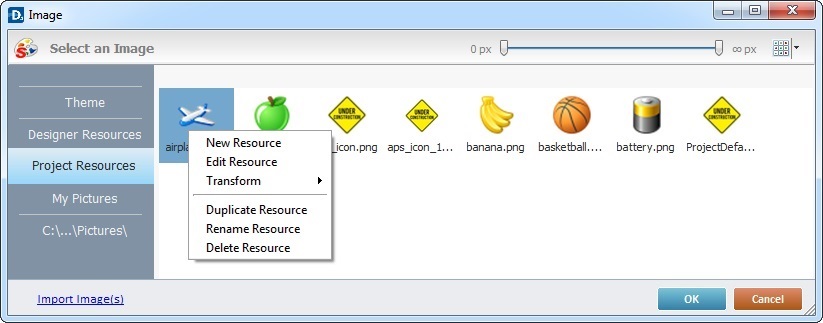
2. This window allows you to control the displayed images and provides further options:
a. Click ![]() and select the most appropriate view ("Large Icons", "Medium Icons" and "Small Icons").
and select the most appropriate view ("Large Icons", "Medium Icons" and "Small Icons").
b. Use ![]() to filter the image display according to the defined resolution.
to filter the image display according to the defined resolution.
c. Right-click an existing image resource to open a menu with several options. The available options vary according to the resource's location (the tab that includes the selected image).
Below are all the possible options:
|
New Resource |
Opens an OS browse window. Browse for an image, select it and import it into the tab that is currently open. |
Edit Resource |
Opens your default image editor. Edit the selected image. |
|
Transform |
Allows you to rotate (90o, 180o or 270o) or flip (horizontal or vertically) the selected image file. |
|
Duplicate Resource |
Duplicates the selected image. The duplicate has the same name as the original resource plus an incremented number. |
|
Rename Resource |
Sets the image's name into "edit" mode. Enter the new name and click <Enter> in your PC keyboard. |
|
Delete Resource |
Deletes the selected image. Click |
3. Open the tab that contains the image you want to use.
4. Select the image.
![]() To avoid image display issues, make sure that the dimension of the selected image resource and the target object's area are almost the same.
To avoid image display issues, make sure that the dimension of the selected image resource and the target object's area are almost the same.
5. Click ![]() to save your image choice and return to the properties window.
to save your image choice and return to the properties window.
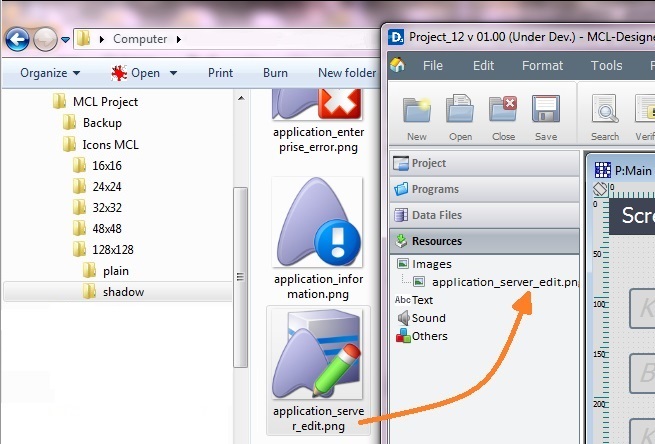
To Import an Image Resource
Instead of selecting an image from the available tabs, you can import the required image from an outside source (the image resource will be displayed in the "Project Resources" tab and the "Resources" module).
Step-by-step
1. Click ![]() (located on the lower left) to open an OS browse window.
(located on the lower left) to open an OS browse window.
2. Select the image you want to import and click ![]() .
.
No matter which tab you had open when you clicked ![]() , the imported image is placed in the "Project Resources" tab.
, the imported image is placed in the "Project Resources" tab.
3. If you want to add the imported image to the selected object, select it (in the "Project Resources" tab)and click ![]() to apply.
to apply.
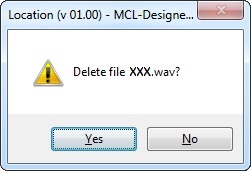
To Delete a Resource
Use one of the following:
a. Select the resource you want to delete.
b. Click <Delete> in your PC keyboard.
c. Click ![]() to confirm the delete operation.
to confirm the delete operation.
OR
a. Right-click the resource you want to delete.
b.Click ![]() .
.
c. Click ![]() to confirm the delete operation.
to confirm the delete operation.