|
Associating Events to a Screen or a Control |
  
|
Associating Events to a Screen or a Control
|
Associating Events to a Screen or a Control |
|
Overview
An event is a specific action performed by the operator, which triggers actions within the application. These actions, which are defined by the programmer, are designated, in the MCL-Designer environment, as processes. See Adding and Editing Processes.
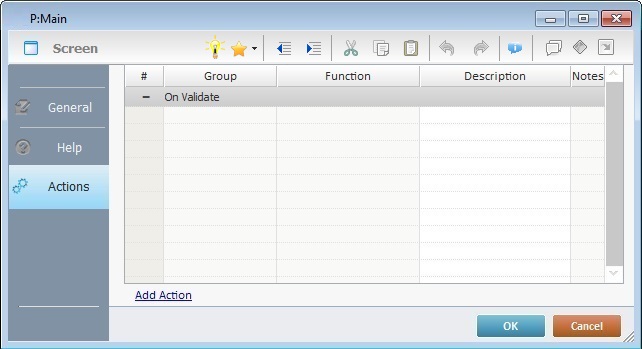
There is always a default event associated to a screen ("On Validate") or a control (depending on the control).
Events can be added to a screen. However, only some controls allow for the addition of events.
List of Events available:
On Change
On Click
On Hotkey
On Ready
On Validate
On RFID Tag Read (See On RFID Tag Read)
On Power
On Timer - This event is an exception. It occurs due to the "lack of activity" on the part of the operator. It triggers an action (process) after a specified time frame.
On Button # - This event is only associated to the "Advanced List Box" control, if the control contains button elements in its style.
On Barcode Read (See On Barcode Read)
On NFC Tag Read (See On NFC Tag Read)
For more information regarding the events associated to either screens or controls refer to:
To Add Events
Step-by-step
1. Go to the "Actions" tab of either screen or specific control (in the properties window).
The image below illustrates all the steps to take when adding an event.
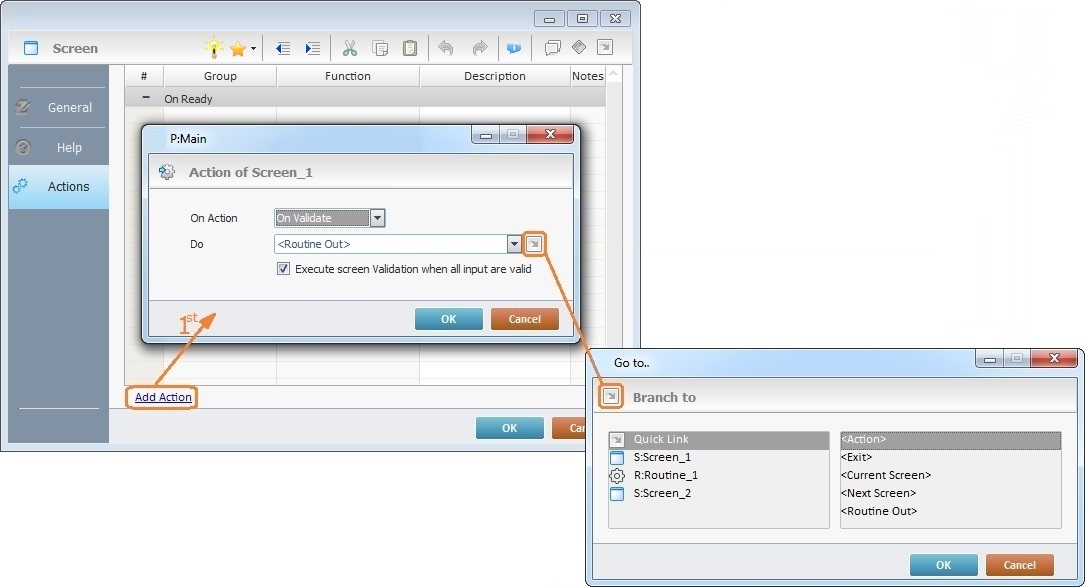
2. Click ![]() (at the bottom of the "Actions" tab) and open an edition window.
(at the bottom of the "Actions" tab) and open an edition window.
![]() If the
If the ![]() option is not present in the "Actions" tab, that means other events cannot be added. You can only add processes to the default event. See Adding and Editing Processes.
option is not present in the "Actions" tab, that means other events cannot be added. You can only add processes to the default event. See Adding and Editing Processes.
3. In the "On Action" box, select an event from the drop-down list.
![]()
Remember that not all the events are available in each screen or control. The drop-down list varies according to the element (screen or specific control) that is receiving the event.
4. The "Do" option offers several target locations to advance the application to (ex: "Next Screen"; "Exit" or even a specific routine). Either select a destination from the drop-down list or click ![]() and select one of the options available in he "Branch to" window. If you select from the
and select one of the options available in he "Branch to" window. If you select from the ![]() list, click
list, click ![]() to apply your choice and return to the edition window.
to apply your choice and return to the edition window.
![]()
If you intend to add processes to this event, select the "<Action>" option. See Adding and Editing Processes.
![]() If the selected event is "On Validation", make sure that the "Execute screen Validation when all input are valid" option is checked.
If the selected event is "On Validation", make sure that the "Execute screen Validation when all input are valid" option is checked.
5. In the edition window, click ![]() to apply your options.
to apply your options.
All of the events (whether default or added ones) are displayed in the tree view (in the "Programs" module).
If you right-click an event, displayed in the tree view, you access the "Delete" option.

Double-clicking an event opens the properties window of the element it is inserted in (screen or control), directly in the "Actions" tab. This enables the adding of processes to that event.
See Adding and Editing Processes.