|
Host |
  
|
Host
|
Host |
|
Overview
The "Host" tab contains project information regarding communication settings (host profiles) via MCL-Net V4, Web Services and/or TCP/IP.
There are default host profiles ("Primary_Server" and "Secondary_Server") and both use an MCL-Net V4 server.
These options can be edited during project development (only unpublished projects can have their settings edited).
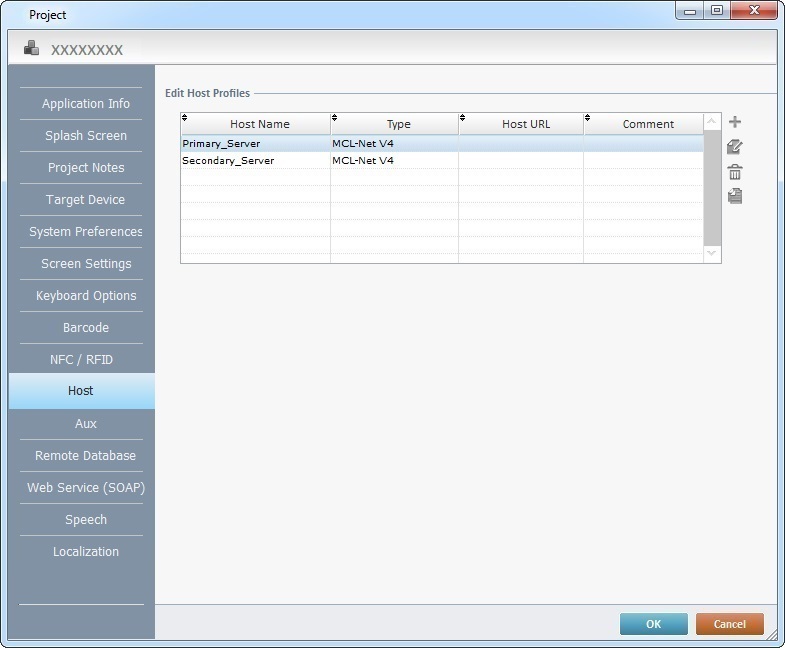
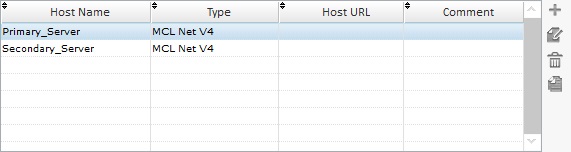
This tab includes a table with all the available host profiles in the project.
Host profiles can be added, deleted,edited or copied by using the ![]() buttons located to the right of the table.
buttons located to the right of the table.
![]() The communication between application and host can be synchronous or asynchronous. Consider the best type of communication for your project when creating a host profile (server type selection) because it will affect the application's workflow. Check the details/behavior of a synchronous and an asynchronous communication within the MCL environment.
The communication between application and host can be synchronous or asynchronous. Consider the best type of communication for your project when creating a host profile (server type selection) because it will affect the application's workflow. Check the details/behavior of a synchronous and an asynchronous communication within the MCL environment.
Synchronous Communication |
Asynchronous Communication |
|
Details |
•Occurs in real time •Is executed in the foreground •Is affected by a defined time out (in the host profile) |
•May or may not occur in real time •Is executed in the background •Application/host connection guaranteed by a background mechanism •The time out and/or the retries (defined in the host profile) affect the background mechanism |
Behavior |
The application workflow stops until communication between application and host is successful or a communications error is established (ex: after a time out runs out) |
The application workflow does NOT stop The data being sent/received is put "in queue" and a background mechanism takes care of the communication to the host |
Host profiles can be created in the "Host" tab of the "Project Properties" window but, also, within the processes included in the Host Services, Web Services and Remote Database process groups.
See Working with Host Services Processes Group OR Working with Web Services Processes Group OR Working with Remote Database Processes Group.
Step-by-Step
1. Use one of the following to access the host profiles table:
a. Open the "Project" menu (located in the Menu Bar), select the "Properties" option and open the "Host" tab. The existing host profiles are displayed in a table.
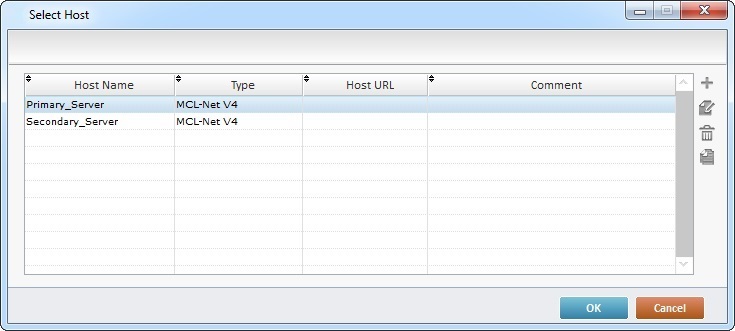
b. Click ![]() (if available) in the properties window of a Host related process. This opens another window with a table displaying the host profiles that can be used with the currently open process.
(if available) in the properties window of a Host related process. This opens another window with a table displaying the host profiles that can be used with the currently open process.
2. Click ![]() (located to the left of the table) to open the properties window of the new host profile.
(located to the left of the table) to open the properties window of the new host profile.
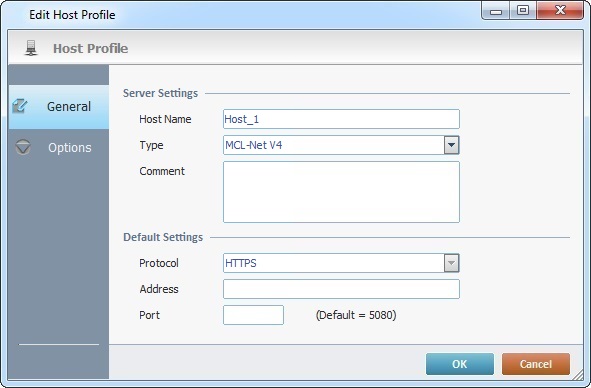
3. In the "General" tab (open by default), fill in the following options:
Server Settings |
|
Host Name |
Enter a name for the new host profile or maintain the suggestion. |
Type |
Define the type of server to be used: MCL-Net V4 - An MCL product. This server type is used in the default "Primary" and "Secondary" servers. Its default port is 5080. Web Service - This server type is always selected for host profiles used to call web services. When selected, this option enables the "Protocol" field. The displayed default port value depends on the selected protocol.
TCP IP - This server type uses a TCP IP socket on a specific port. |
Comment |
As an option, add comments to the host profile connection. |
Default Settings |
|
Protocol |
Select the appropriate Protocol (HTTP or HTTPS) from the drop-down list. (Not available for TCP/IP server type). |
Address |
Enter the IP address for the host connection. |
Port |
Enter the required port or use the default value in parentheses. The displayed default value relates to the selection of server type and/or protocol (ex: A "Web Service" server type requires port "80" for an HTTP protocol and port "443" for an HTTPS protocol). |
4. Open the "Option" tab. The available options depend on the selected server type.
If "MCL-Net V4" was the selected server type, proceed as follows:
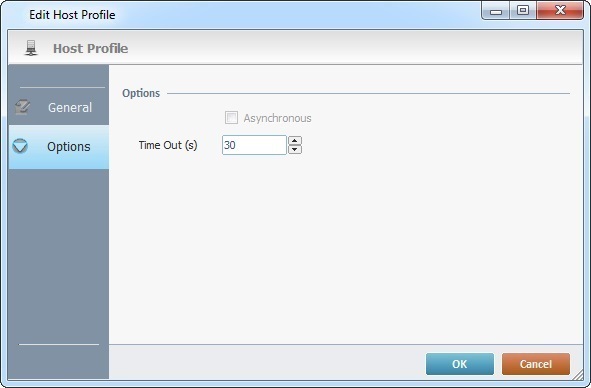
Asynchronous |
Not applicable to an "MCL-Net V4" server type. The "MCL-Net V4" server uses synchronous communication. |
Time Out (s) |
Define a time out (in seconds) for the data communication to occur. |
If "Web Service" was the selected server type, the following options are available:
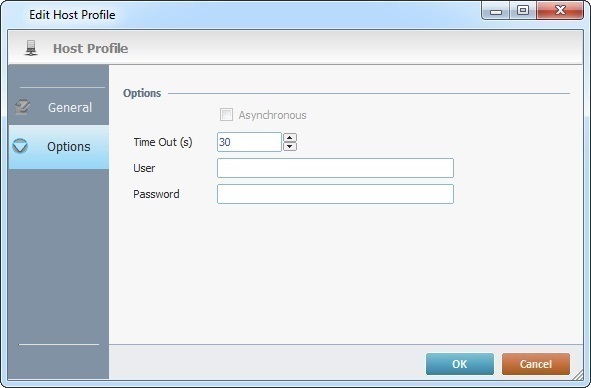
Asynchronous |
Not applicable to a "Web Service" server type. The "Web Service" server uses synchronous communication. |
Time Out (s) |
Define a time out (in seconds) for the data communication to occur. |
User |
If required by the called web service, enter a user name for a basic or digest authentication. |
Password |
If required by the called web service, enter a user password for a basic or digest authentication. |
If "TCP IP" was the selected server type, define the following:
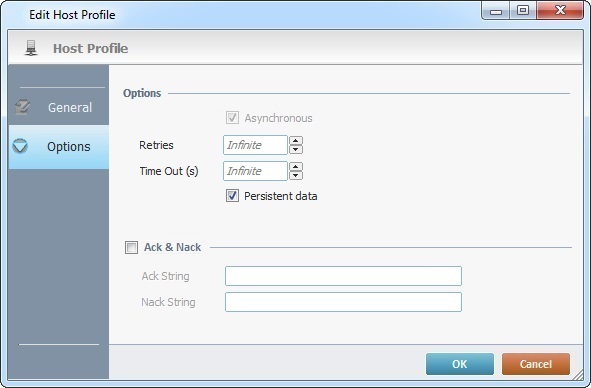
Asynchronous |
NOT editable - asynchronous data communication is a "TCP IP" feature. |
Retries |
In case of unsuccessful data communication, define the number of retries to perform before dropping a message (no more communication attempts for that message) and moving on to the next message in queue. Not applicable if the option is inactive. |
Time Out (s) |
Define a time out (in seconds) for the data communication to occur. Not applicable if the option is inactive. |
Persistent Data |
Check this option if you want the data being sent to be written in the device's disk (and deleted after it is sent). If the option is left unchecked, it means that the data is stored in temporary memory and will be lost in case of a device reboot. Not applicable if the option is inactive. |
Ack & Nack |
Check this option to enable the acknowledgment character (Ack) and negative acknowledgment character (Nack). The "Ack String" and "Nack String" options become active. The "Ack String" is used as a response in case the server successfully receives the message. The "Nack String" is used as a response in case the server wants the device to resend the message. Not applicable if the option is inactive. |
Ack String |
Define the Ack String for a positive data acknowledgment. This string will be returned by the receiver to acknowledge a good data reception and inform that more data can be sent. |
Nack String |
Define the Nack String for a negative data acknowledgment. This string will be used by the receiver to inform the sender that the data needs to be resent. Not applicable if the option is inactive. |
5. Click ![]() to conclude or
to conclude or ![]() to abort the operation.
to abort the operation.
Step-by-Step
1. Use one of the following to access a host profiles table:
a. Open the "Project" menu (located in the Menu Bar), select the "Properties" option and open the "Host" tab. The existing host profiles are displayed in a table.
b. Click ![]() (if available) in the properties window of a host related process. This opens another window with a table displaying the host profiles that can be used within the currently open process.
(if available) in the properties window of a host related process. This opens another window with a table displaying the host profiles that can be used within the currently open process.
![]()
Consider the host profile you want to edit before choosing a or b to open a host profile table. If you open the "Host" tab, you will view all the project's host profiles. If you use a process to open a host profiles table, only the compatible host profiles to that process will be available.
2. Select the host profile you want to edit.
3. Click ![]() (located to the left of the table) to open the corresponding properties window.
(located to the left of the table) to open the corresponding properties window.
3. Edit the required options in the tab(s).
4. Click ![]() to apply your changes.
to apply your changes.
To Delete a Host Profile
1. Use one of the following to access a host profiles table:
a. Open the "Project" menu (located in the Menu Bar), select the "Properties" option and open the "Host" tab. The existing host profiles are displayed in a table.
b. Click ![]() (if available) in the properties window of a Host related process. This opens another window with a table displaying the host profiles that can be used within the currently open process.
(if available) in the properties window of a Host related process. This opens another window with a table displaying the host profiles that can be used within the currently open process.
![]()
Consider the host profile you want to delete before choosing a or b to open a host profile table. If you open the "Host" tab, you will view all the project's host profiles. If you use a process to open a host profiles table, only the compatible host profiles to that process will be available.
2. Select the host profile you want to remove.
3. Click ![]() (located to the left of the table).
(located to the left of the table).
4. Click ![]() in the resulting window to confirm the deletion.
in the resulting window to confirm the deletion.