|
Working with Case & Branch Process |
  
|
Working with Case & Branch Process
|
Working with Case & Branch Process |
|
Process Purpose
The Case & Branch process has a wider range of comparison values/variables than the Test & Branch process. It enables the comparison between one and multiple values/variables and, therefore, requires as much points in the code (labels, routines, screens, etc) as the number of comparisons.
When you add a process, you are required to define its settings. This occurs in the process's properties window which is displayed automatically after having added the Case & Branch process.
If any subsequent edition is required, double-click the process to open its properties window and enter the necessary modifications.
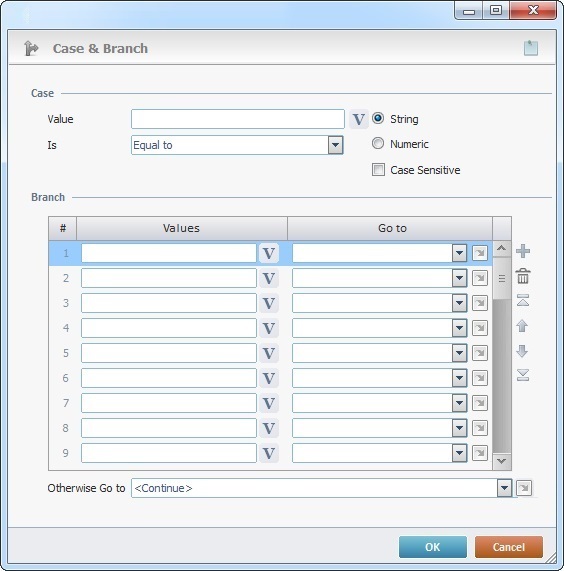
Fill in the following options:
Case |
|
Value |
Define the first value to compare by entering it on the box or click |
Is |
Define the comparison criteria by selecting an option from the drop-down list. |
String or Numeric |
Define the type of comparison. Decide whether the comparison is based on "String" or "Numeric" values/variables. If the "String" option is selected, it activates the "Case Sensitive" feature. |
Case Sensitive |
This option is activated if the previously selected option is "String". If checked, this option forces a lower/upper case comparison. |
Branch |
|
Values column |
Define the values to be compared with the first value. Enter them on each row or click |
Go to column |
Select a destination for each value, from the drop-down list or the |
Otherwise Go to |
Select a destination from the drop-down list or the |
Use the editing icons to the right of the table to move the rows up and down and to delete or add more rows.
Detail of a ![]() window:
window:

"S:Menu" is a screen included in the same program as the process.
"R:Routine_1" is a routine included in the same program as the process.
If required, use the icon on the upper right corner of the properties window:
![]() Use the icon to attach any relevant notes to this process. Click it and enter your notes in the resulting text box. These notes will be displayed in the corresponding "Actions" tab or "Process" window (in the "Notes" field) and in the "Developer Report".
Use the icon to attach any relevant notes to this process. Click it and enter your notes in the resulting text box. These notes will be displayed in the corresponding "Actions" tab or "Process" window (in the "Notes" field) and in the "Developer Report".
After filling in the required options, click ![]() to conclude or
to conclude or ![]() to abort the operation.
to abort the operation.
The added process is displayed in the corresponding "Actions" tab or "Process" window.
![]()
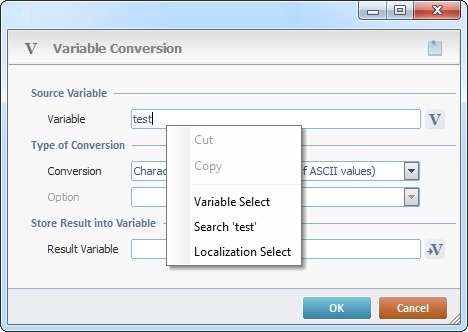
Use the right click in MCL-Designer's input boxes to access certain features regarding the input box's option as well as general actions such as "Copy"; "Paste"; "Search".
Ex: If you right-click the "Variable" input box (included in a "Conversion's" properties window), you are provided with the "Search..."and "Variable Select" options.
If you right-click another input box, it will provide other possibilities.