|
Barcode |
  
|
Barcode
|
Barcode |
|
Overview
This tab displays the Barcode Scanner profiles contained within a project and allows you to define the global settings for those profiles.
When a project is created, a barcode scanner profile is automatically generated (General scanner profile).
The barcode scanner profile(s) can be edited during project development (only unpublished projects can have their settings edited).
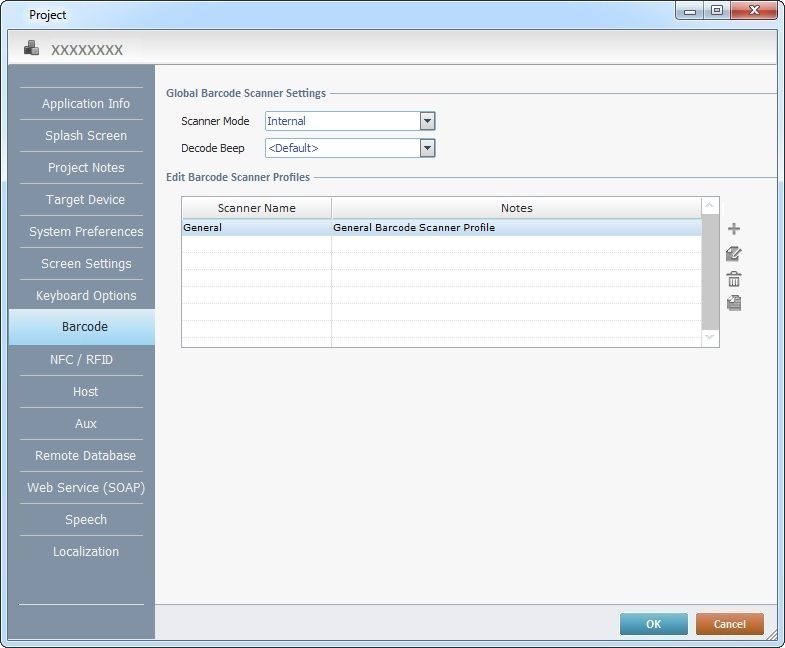
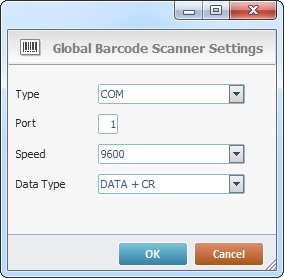
The “Global Barcode Scanner Settings” section refers to the barcode scanner to be used by the target device and affects all the barcode scanner profiles in the current project:
Global Barcode Scanner Settings |
|||
Scanner Mode |
Select the best option for your project. The selected mode is applied to all the barcode scanner profiles in the current project.
External - Select this option if you want to use an external scanner connected to the device via an RS-232 port (COM port) or a USB port. Next, use the
Internal - Select this option if there is NO need for an external scanner - the barcode scan is performed by the device's own barcode reader. |
||
Decode Beep |
Select the preferred option from the drop-down list (<Default>; <Yes>; <No>).
This is also valid for Windows Mobile/CE devices that have a hardware beeper. |
||
Edit Barcode Scanner Profiles |
|||
•The default scanner profile, "General", includes generic scanner settings and is editable. •Use the icons located to the right of the table to, respectively, add, delete, edit and/copy barcode scanner profiles. To have more details on creating/editing a Barcode Scanner profile, see To Create a Barcode Scanner Profile below and To Edit a Barcode Scanner Profile. |
|||
Click ![]() to apply the modifications OR proceed to another tab.
to apply the modifications OR proceed to another tab.
To Create a Barcode Scanner Profile
Step-by-step
1. Use one of the following to open the table with the existing scanner profiles:
a. Open the "Barcode" tab of the current project's properties window (Project menu ,in the Menu Bar>Properties option>Barcode tab).
b. Click ![]() in the "Input Barcode's" properties window.
in the "Input Barcode's" properties window.
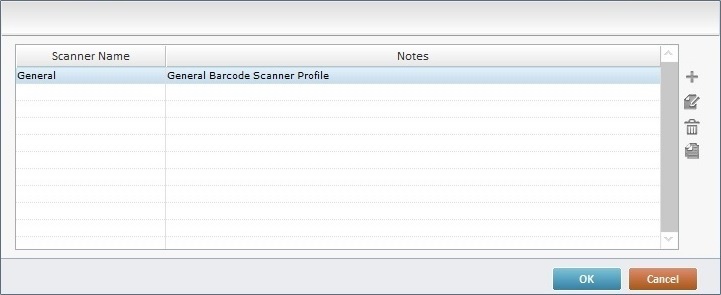
2. Click ![]() (located to the right of the table).
(located to the right of the table).
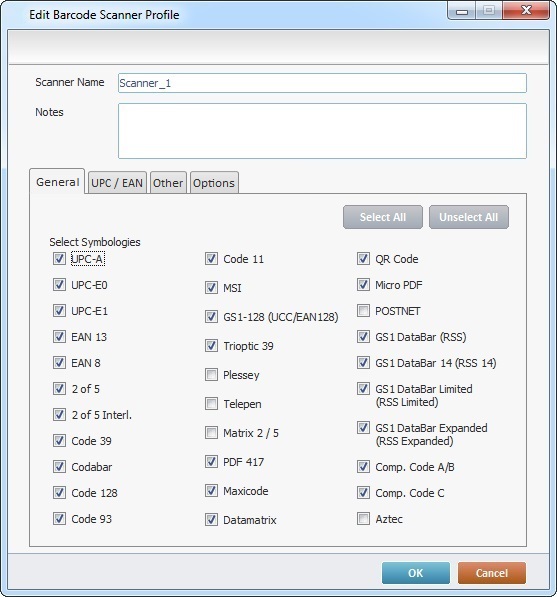
3. In the "Scanner Name" box, maintain the suggestion or enter a name for the new scanner profile.
A profile name is a logical name given by the developer and used to easily identify a profile for later use.
4. If relevant, fill in the "Notes" box.
5. Construct a profile by going to each tab (General>UPC/EAN>Other>Options) and selecting the required options.
Detail of the "General" Tab
|
The "General" tab is open by default. Check the required options from the available list of barcode symbologies.
It is recommended to only select the symbologies that will actually be used. Selecting symbologies that will not be used may lead to low performance in barcode scanning.
If you intend to allow "GS1 Databar" type symbologies in the current project, consider the following listed symbologies: (1) GS1 DataBar (RSS) (2) GS1 DataBar 14 (RSS) (3) GS1 DataBar Limited (RSS Limited) (4) GS1 DataBar Expanded (RSS Expanded)
You must first select (1) to enable the "GS1 DataBar" subtypes and, then, select the required subtype(s): •Ex: (1) checked + (2) checked + (4) checked = the "GS1 DataBar 14 (RSS14)" and "GS1 DataBar Expanded (RSS Expanded)" subtypes are enabled. •Ex: (1) checked + (2) checked + (3) checked + (4) checked= all subtypes are enabled. •Ex: (2) checked + (3) checked = "GS1 DataBar" type symbologies are NOT enabled.
This procedure is an exception, all other symbologies only require their own checking to be enabled/allowed in the current project.
Use the Click |
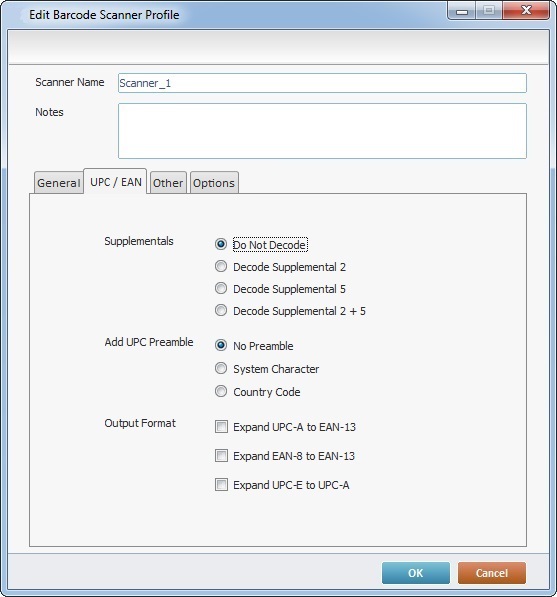
Detail of the "UPC/EAN" Tab
|
Check the required options according to the profile that is being created. Click |
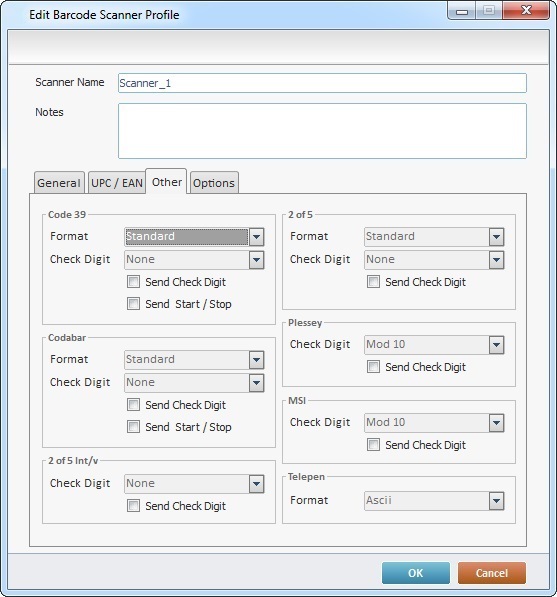
Detail of the "Other" Tab
|
Check the required options according to the profile that is being created. Click |
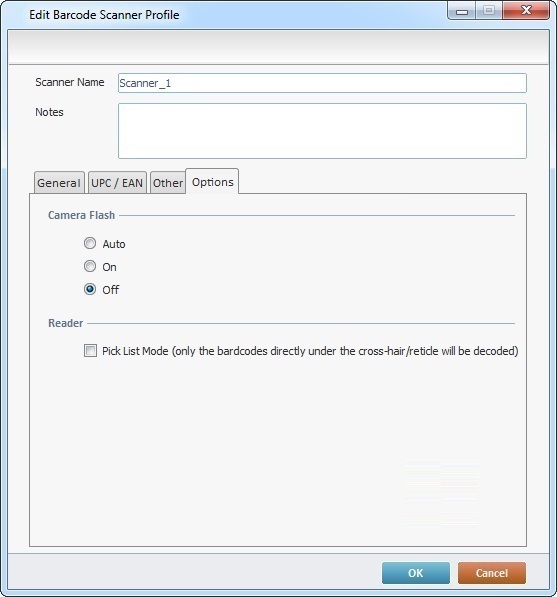
Detail of the "Options" Tab
|
Check the intended options according to the defined target device:
•The "Camera Flash" options affect the devices that use their camera to read barcodes (ex: Samsung devices) in which case you should manage the use of the flash during the barcode read.
•The "Pick List Mode" only affects the devices that use compatible "imager barcode scanners" (ex: Zebra devices and some Panasonic devices).
|
6. Back in the "Scanner Profile List", click ![]() to apply the selected options.
to apply the selected options.
To Edit a Barcode Scanner Profile
1. Use one of the following to open the "Scanner Profile List":
a. Open the "Barcode" tab of the project's properties window (Project menu ,in the Menu Bar>Properties option>Barcode tab).
b. Click ![]() in the "Input Barcode's" properties window.
in the "Input Barcode's" properties window.
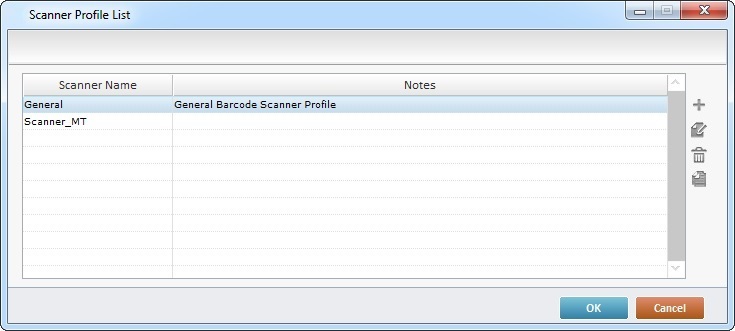
2. Access the barcode scanner profile you want to edit. Double-click the intended scanner profile OR select it and click ![]() .
.
3. Maintain or edit the available options in the "General", "UPC / EAN", "Other" and "Options" tabs, as required by the project.
4. Click ![]() to conclude or
to conclude or ![]() to abort the operation.
to abort the operation.
![]()
The operator should proceed as follows to achieve best Barcode Reading performance: •Press the device's scanner button/trigger firmly when reading the intended barcode. •Continue to press the scanner button/trigger until the "Input Barcode" has read/validated the scanned barcode and, only then, release the scanner button/trigger.
When performing multiple barcode reads, the operator may notice that the reading beam is triggered a few milliseconds after the pressing of the scanner button/ trigger. This is normal and relates to the defined barcode validation process.
|