|
Creating an RFID Profile |
  
|
Creating an RFID Profile
|
Creating an RFID Profile |
|
Process Purpose
To use the RFID feature, it is necessary to create profiles with the appropriate settings.
![]()
Check the necessary steps to create an RFID program in To Create an RFID Program.
To Create an RFID Profile
Step-by-step
1. Use one of the following to open the table with the existing RFID profiles:
a. Open the "RFID" tab of the current project's properties window (Project menu ,in the Menu Bar>Properties option>RFID tab).
b. Click ![]() (available in the properties window of the "Set RFID Profile" and "Set Read Mode" processes).
(available in the properties window of the "Set RFID Profile" and "Set Read Mode" processes).
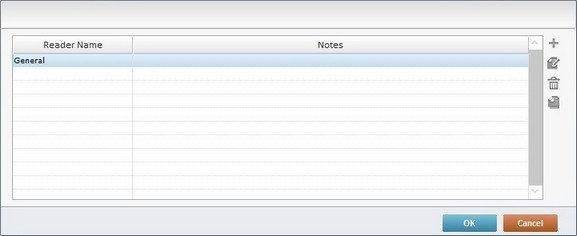
2. Double-click the table to open the "RFID Profile" window OR select the intended RFID profile and click ![]() (located to the right of the corresponding table).
(located to the right of the corresponding table).
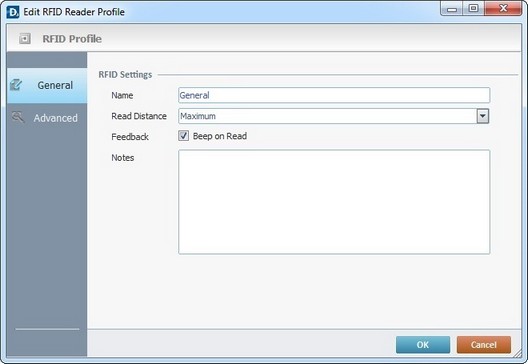
3. Fill in the "General" tab (which is open by default).
Enter the RFID profile's name in the "Name" box.
A profile name is a logical name given by the developer and used to easily identify a profile for later use.
4. Select the appropriate reading range for the reader from the "Read Distance's" drop-down list (Short; Medium or Maximum).
5. If you require a confirmation beep after the read, check the "Beep on Read" option.
6. If relevant, add notes to the RFID Profile in the "Notes" box.
7. If you want to customize the profile even further, continue to the "Advanced" tab. If not, go to step 9.
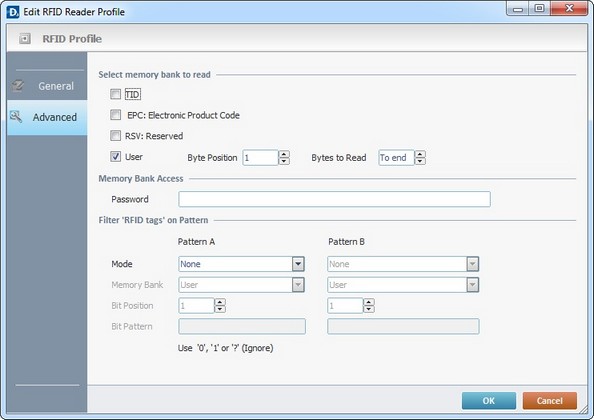
8. Fill in/select the following options available in the "Advanced" tab.
Select memory bank to read |
|
TID |
Check this option to enable the reading of the Tag Identification memory bank of an RFID tag. |
|
|
EPC: Electronic Product Code |
Check this option to enable the reading of the Electronic Product Code memory bank of an RFID tag. |
RSV: Reserved |
Check this option to enable the reading of the Reserved memory bank of an RFID tag. |
User |
Check this option to enable the reading of the User memory bank of an RFID tag. |
Byte Position |
Select the initial reading position within the tag's data string. |
Bytes to Read |
Define the number of bytes to read within the tag's data string. To read the data string to the end, leave the default value at "0". |
Memory Bank Access |
|
Password |
If required, enter a password to access the memory banks within the RFID tags. |
Filter "RFID Tags" on Pattern |
|
If required, define two filter patterns to read the RFID tags. Maintaining the "None" default option means that the options below are not active. |
|
Pattern A |
Mode: None - Default option. Include - Check this option to create a filter pattern to include tags during reads based on the options below ("Memory Bank"; "Bit Position" and " Bit Pattern"). Exclude - Check this option to create a filter pattern to exclude tags during reads based on the options below ("Memory Bank"; "Bit Position" and " Bit Pattern").
Memory Bank - Select the memory bank to be used in the Pattern A filter (User, Reserved, EPC, TID).
Bit Position - Select the initial bit position to be used in the Pattern A filter.
Bit Pattern - Enter the required value to be used in the Pattern A filter. |
Pattern B |
Mode: None - Default option. Include - Check this option to create a filter pattern to include tags during reads based on the options below ("Memory Bank"; "Bit Position" and " Bit Pattern"). Exclude - Check this option to create a filter pattern to exclude tags during reads based on the options below ("Memory Bank"; "Bit Position" and " Bit Pattern").
Memory Bank - Select the memory bank to be used in the Pattern B filter (User, Reserved, EPC, TID).
Bit Position - Select the initial bit position to be used in the Pattern B filter.
Bit Pattern - Enter the required value to be used in the Pattern B filter. |
9. Click ![]() to conclude or
to conclude or ![]() to abort the operation.
to abort the operation.
To Edit an RFID Profile
Step-by-step
1. Use one of the following to open the table with the existing RFID profiles:
a. Open the "RFID" tab of the current project's properties window (Project menu ,in the Menu Bar>Properties option>RFID tab).
b. Click ![]() (available in the properties window of the "Set RFID Profile" and "Set Read Mode" processes).
(available in the properties window of the "Set RFID Profile" and "Set Read Mode" processes).
2. Double-click the intended RFID profile OR select it and click ![]() (located to the right of the corresponding table).
(located to the right of the corresponding table).
3. Edit the "General" and/or "Advanced " tabs as required.
4. Click ![]() to apply your modifications and conclude the editing.
to apply your modifications and conclude the editing.