MCL-Net License Transfer |
  
|
MCL-Net License Transfer |
|
Overview
There are 2 license products available for MCL-Net - a "standard" MCL-Net license (MCL-Net Std) and a "professional" MCL-Net license (MCL-Net Pro), each one with its own services.
An MCL-Net Pro license with a currently enabled MCL Support Service provides the additional service of license replacement.
Ex: If the PC/server where you have installed/activated an MCL-Net Pro license (with an active MCL Support Service) starts to malfunction, you can transfer the license to another PC/server.
An MCL-Net Pro license replacement requires:
•the canceling of the MCL-Net Pro license in your MCL-License Manager account (to disassociate the license from the PC/server it was installed in).
•the reactivation of the MCL-Net Pro license (to install/activate the license in another PC/server).
![]()
License Transfer is NOT a perpetual service. It is ONLY available for MCL-Net Pro licenses with an active MCL Support Service and for a limited number of times.
![]() License Transfer is NOT included in the MCL Support Service for MCL-Net Std licenses but, if necessary, you can purchase/associate an MCL-Net Std - Instant Service add-on to your MCL-Net Std license and execute one (1) license transfer to another PC/server.
License Transfer is NOT included in the MCL Support Service for MCL-Net Std licenses but, if necessary, you can purchase/associate an MCL-Net Std - Instant Service add-on to your MCL-Net Std license and execute one (1) license transfer to another PC/server.
![]()
You have ten days to activate a canceled MCL-Net license in a new PC/server. The countdown starts as soon as the license is canceled in MCL-License Manager.
After this period, the license is permanently deactivated.
Step-by-step
1. Log in to your MCL-License Manager account ("Licenses" page).
![]() You can enter https://license.mcl4e.com/mclls/licensing/login.html in your Internet browser to open MCL-License Manager OR you can use the links provided by received MCL emails.
You can enter https://license.mcl4e.com/mclls/licensing/login.html in your Internet browser to open MCL-License Manager OR you can use the links provided by received MCL emails.
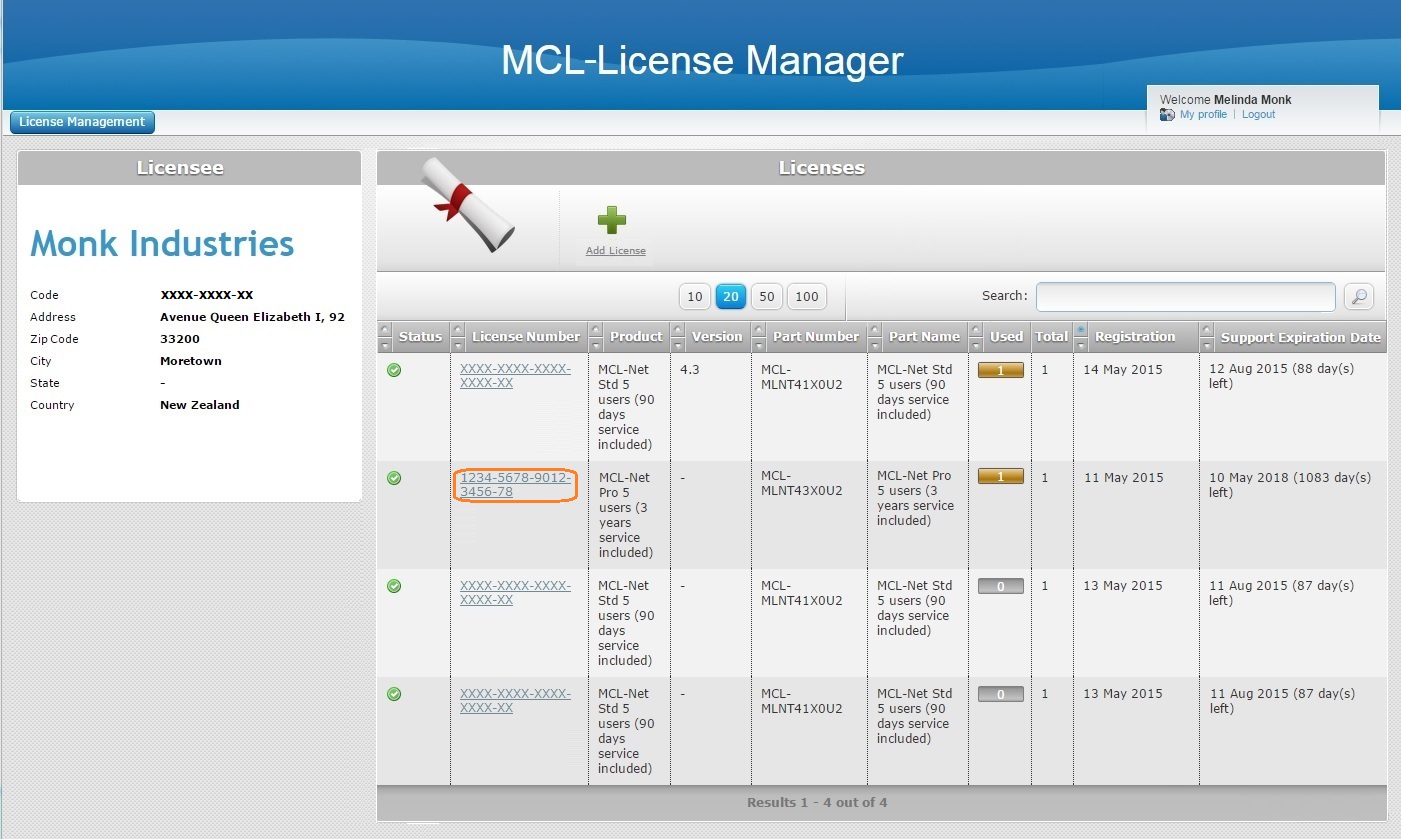
2. Click the number of the MCL-Net license you want to transfer to another PC/server (displayed in light blue).
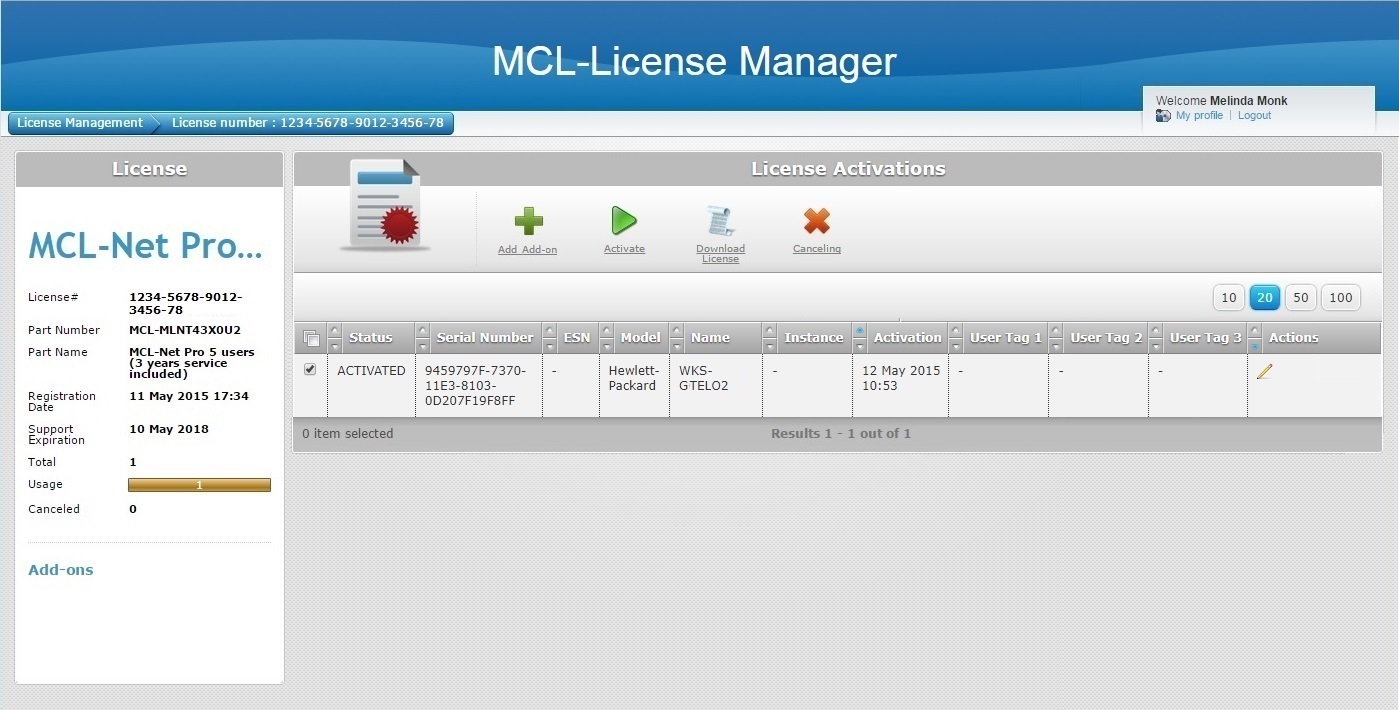
3. Check the ![]() of the PC/server that is associated to the MCL-Net license to be transferred and click
of the PC/server that is associated to the MCL-Net license to be transferred and click  .
.

This window displays the following information:
•the serial number of the PC/server where the license is installed/activated.
•the name and model of the PC/server where the license is installed/activated.
•the instance field refers to the number of times that the selected license has been canceled/reactivated
4. Check the provided details to confirm this is the actual license you want to transfer and click ![]() .
.
 updt
updt
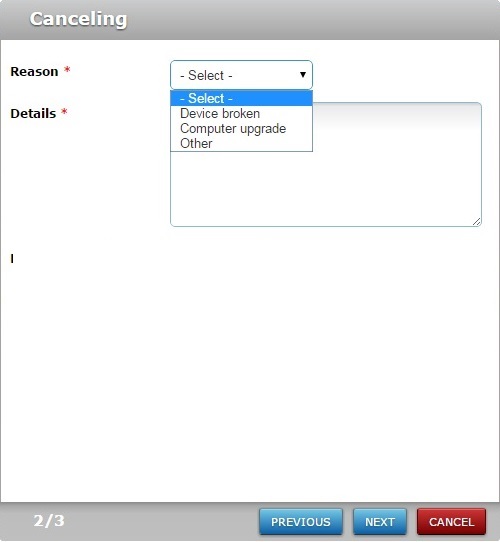
5. Fill in the following options (fields marked with an asterisk are mandatory):
Reason* |
Select the reason for the license cancellation/transfer from the drop-down. |
Details * |
Describe the situation that led to the license cancellation/transfer. |
6. Click ![]() .
.
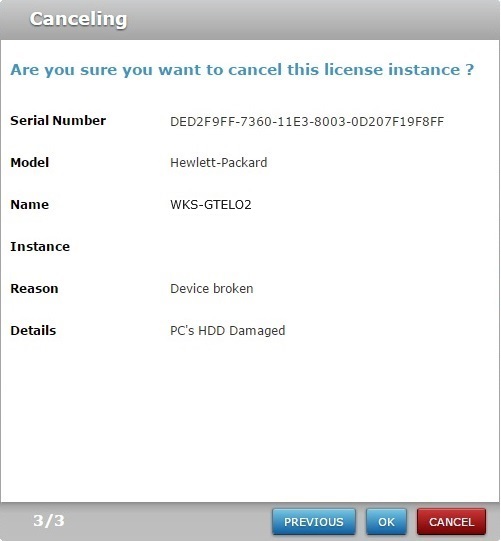
7. Click ![]() to conclude.
to conclude.
If required, use the ![]() to return to the previous screen or click
to return to the previous screen or click ![]() to abort the cancellation.
to abort the cancellation.
At this point, the selected MCL-Net Pro license is canceled and you can install MCL-Net in another PC/server and activate the canceled license.
8. In the new PC/server, run the MCL-Net installer file (you can download it from our website) and follow the instructions provided by the MCL-Net installation/activation wizard.
Refer to the MCL-Net User Guide for more information on this procedure.
9. When you reach the point in the wizard where you must define the license you want to activate, enter the license number of the previously canceled MCL-Net Pro license unit.
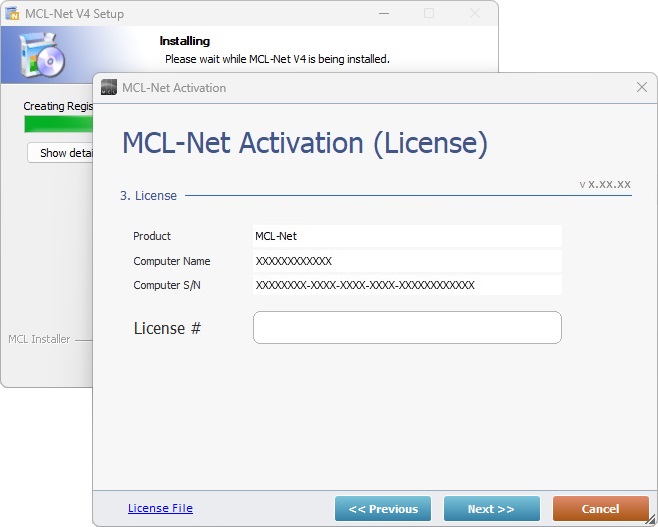
10. Conclude the MCL-Net installation/license activation.
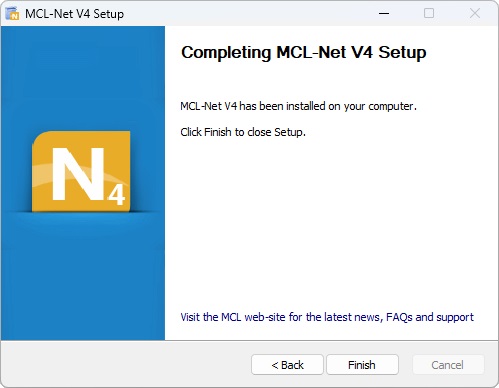
The license has been reactivated, meaning, it is associated to another PC/server and ready for use.
In your MCL-License Manager account, the reactivated license's "License Activations" page displays the transfer.

The page includes information on:
•the PC/server that was previously associated to the MCL-Net Pro license.
•the PC/server that is currently using the MCL-Net Pro license.
•the replacement/activation dates.