Add-on Addition to an MCL-Net License |
  
|
Add-on Addition to an MCL-Net License |
|
Overview
An MCL-Net (perpetual) license contains 2 types of service - a limited number of users and MCL Support Service (ex: includes access to MCL software updates during a predefined time period).
If required, you can expand these services in the form of add-ons, meaning, you can add users to an MCL-Net PC/server (= a PC/server with an active MCL-Net master license) and/or you can extend MCL Support Service availability.
Ex: If you add 5 additional users to an MCL-Net PC/server where you already activated an MCL-Net license with 25 users, the total number of users for that PC/server will increase to 30.
The add-on is associated to an MCL-Net license (which becomes a master license) in your MCL-License Manager account.
The MCL-Net master license you associate the add-on to must be registered and enabled in your MCL-License Manager account but it does NOT have to be activated in a PC or server at the time of the add-on addition.
After the purchase of an add-on, you receive an email (subject: "Add-on Delivery Notification") with information regarding that product and a link to MCL-License Manager.
We recommend you save this email because some of its details will be used in the add-on addition (ex: the add-on activation code).
![]()
The purchased add-on MUST be compatible with the (perpetual) master license you want to associate it to, meaning, it must be of the same type (Std or Pro). For instance, if the master license is an MCL-Net Pro license, the add-on must also be an MCL-Net Pro add-on, NOT an MCL-Net Std add-on.
![]()
When adding an add-on to extend MCL Support Service to an MCL-Net master license, you must make sure the add-on is of the same type (Pro or Std) but, you must also match the number of add-on users to the currently available users in the master license (= the license's predefined users + any additional users from previously added add-ons) to apply the service extension. This may require the association of more than one add-on to a master license.
Ex: If the master license has a total of 30 users (MCL-Net license with 25 users and an associated add-on with 5 users = 30 users), you can associate one MCL Support Service Add-on with 25 users and another MCL Support Service Add-on with 5 users to the master license to match the number of users and enable the MCL Support Service extension.
It is possible to associate the add-on to a license via the "Registration Link" (a link provided by the "Add-on Delivery Notification" email) OR to perform the addition in the target MCL-Net master license's "License Activations" page.
Expand the content of Add-on Addition via Registration Link and/or Add-on Addition in the "License Activations" Page (MCL-License Manager Account) for more details on each method.
Step-by-step
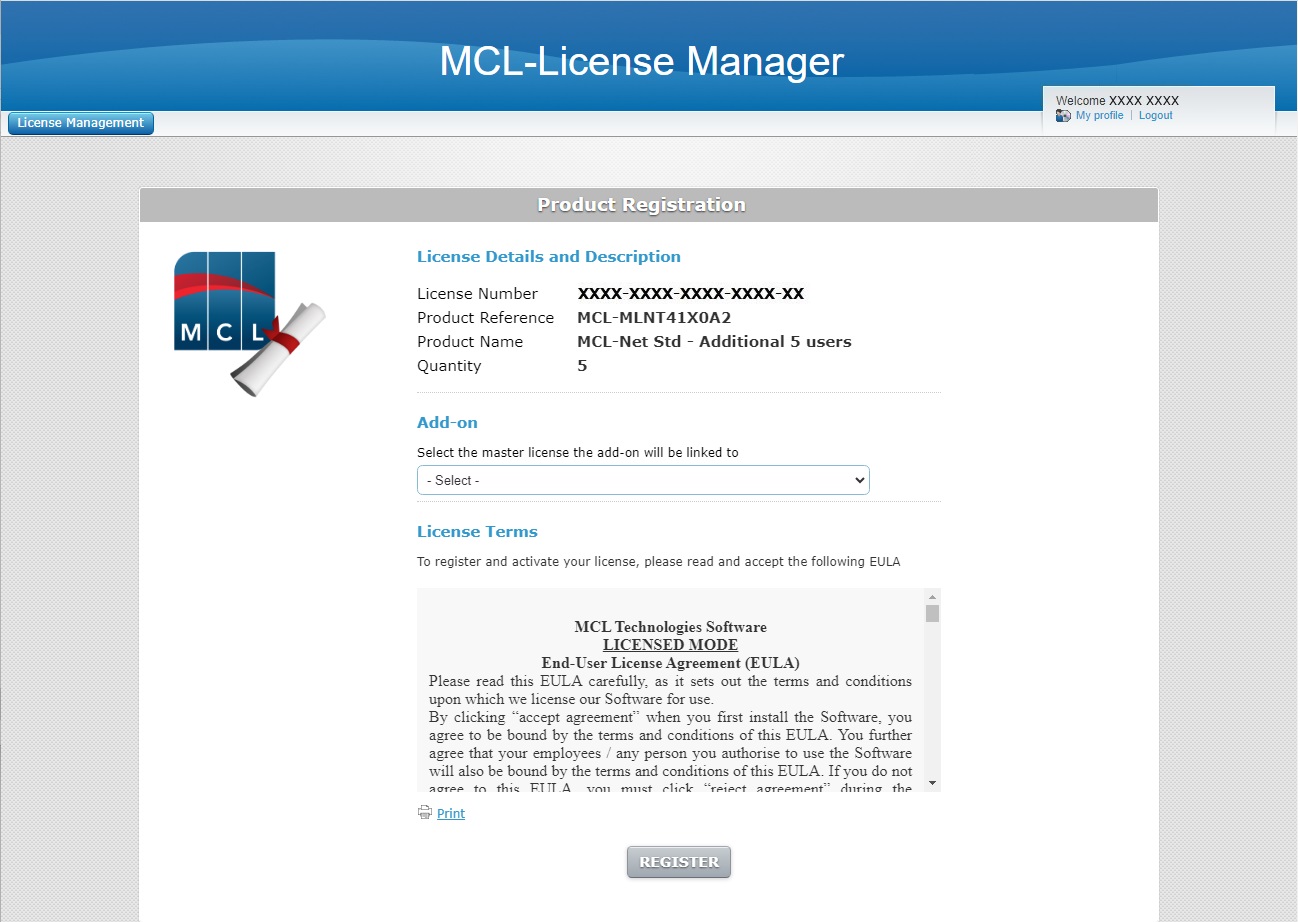
1. Click the link ("Registration Link") provided by the email you receive when purchasing an MCL-Net add-on (subject: "Add-on Delivery Notification"). If your MCL-License Manager account is already open when you do this, you will be redirected to the page below. If not, you are required to log in to your account first.
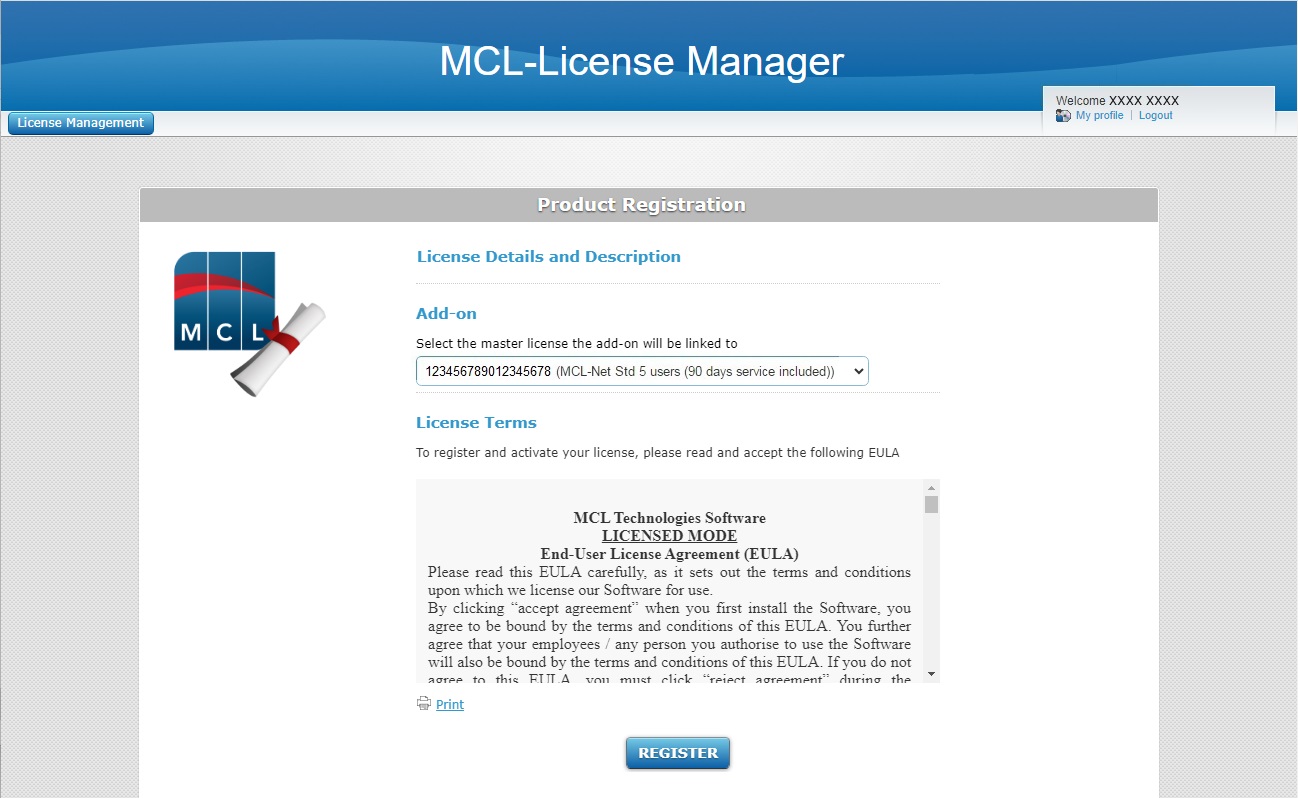
2. Select the license that will include the new add-on from the drop-down. The drop-down only displays licenses that are compatible with the new add-on (ex: an "MCL-Net Std" type add-on can only be added to an "MCL-Net Std" type license).
3. Read the "EULA" regarding the new MCL-Net add-on (scroll down to access the text and activate the If required, click
4. Click
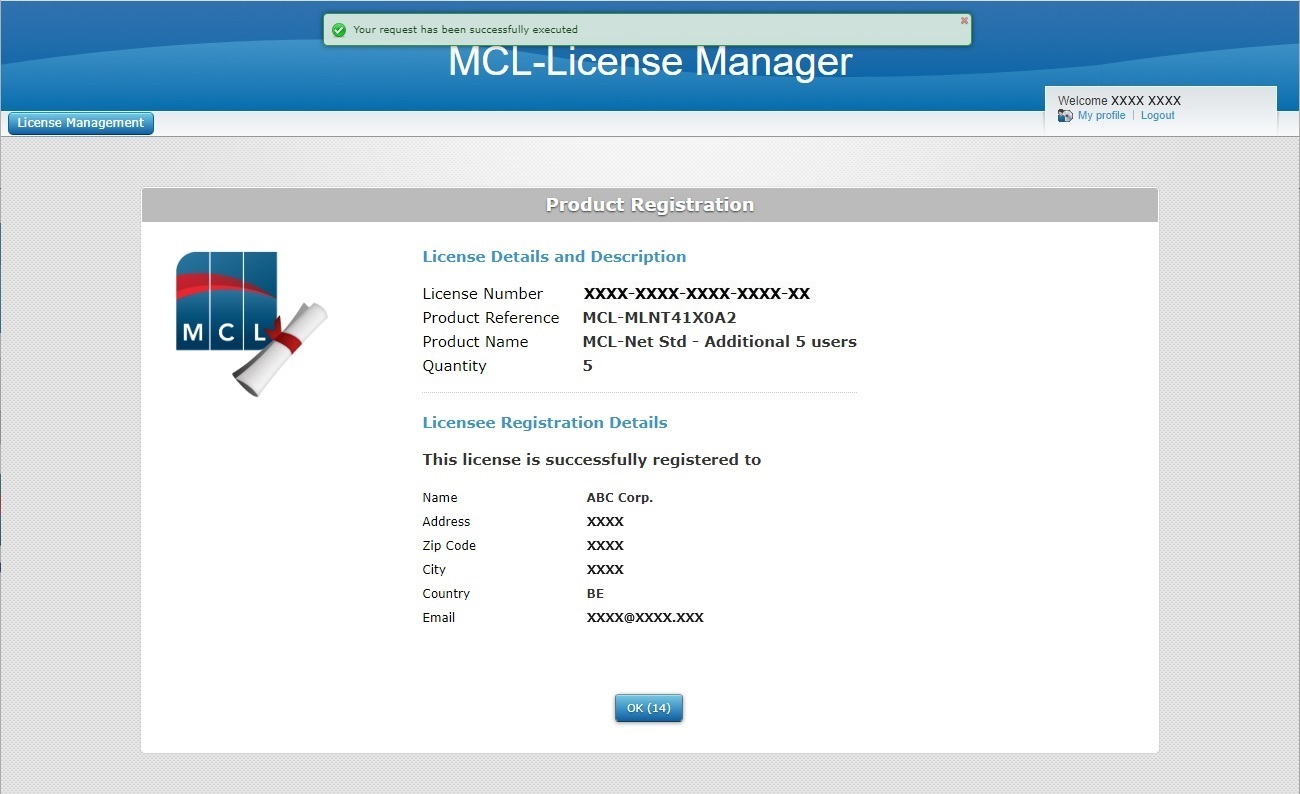
At this point, you receive an email (subject: "Add-on Activation") with the product name, product reference, add-on number and the master license number as well as a link ("License administration") to access MCL-License Manager.
The next page displays add-on and company/licensee details.
5. Click
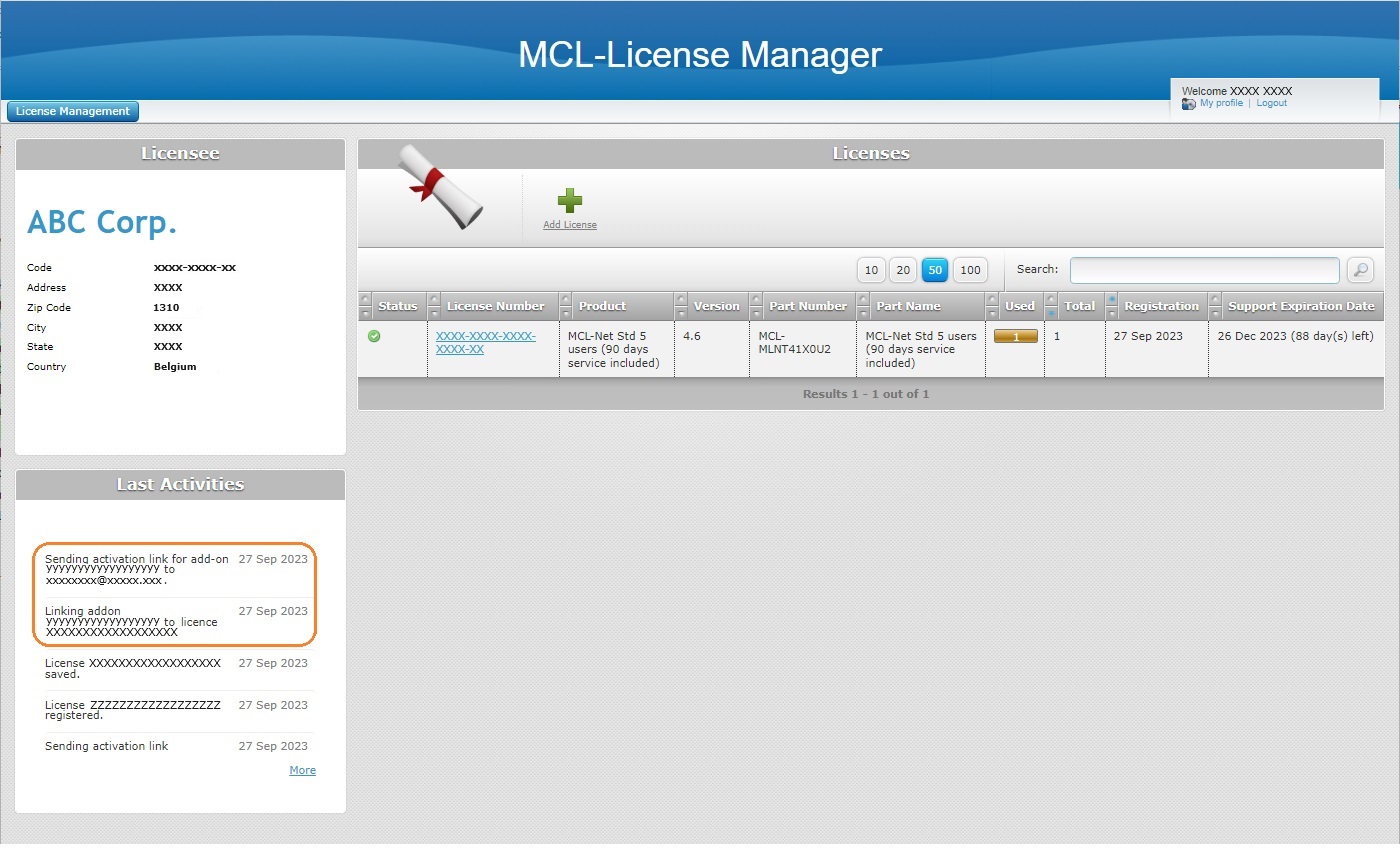
6. Click the number (displayed in light blue) of the master license you selected earlier to open the corresponding "License Activations" page and check the license addition.
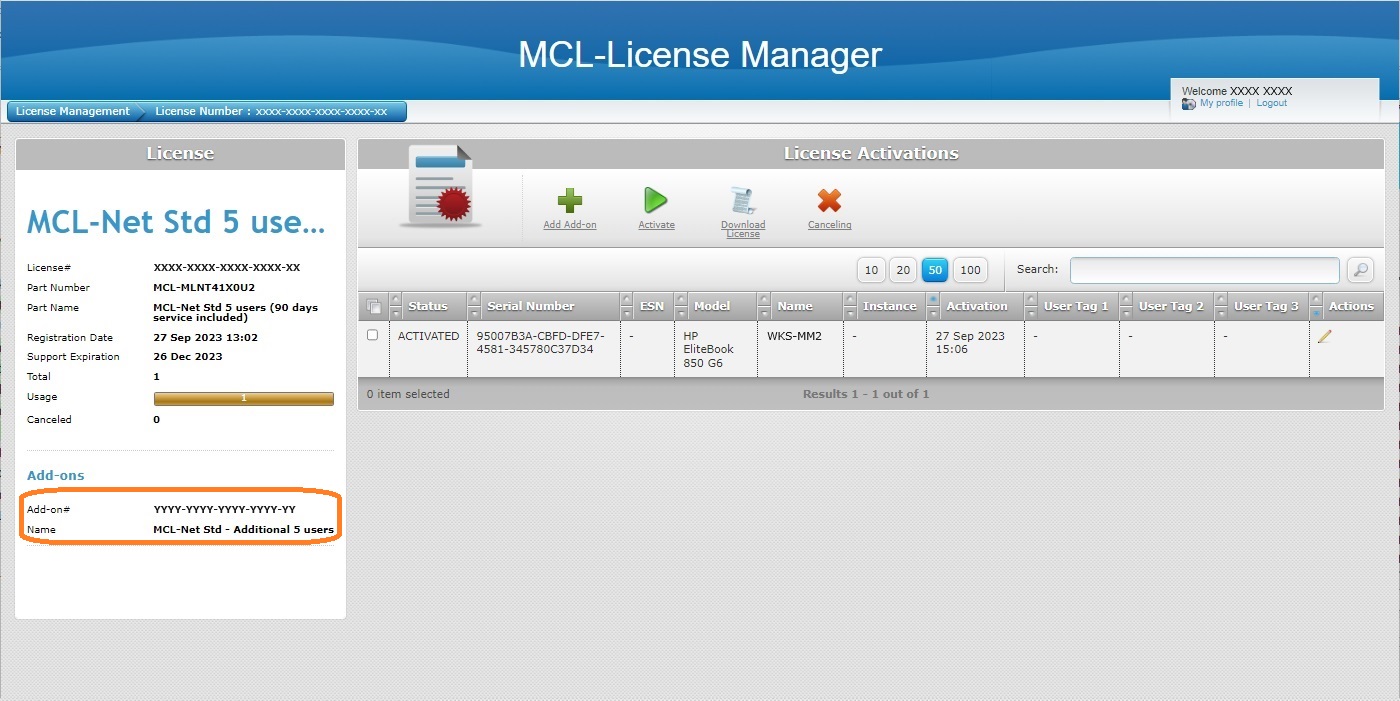
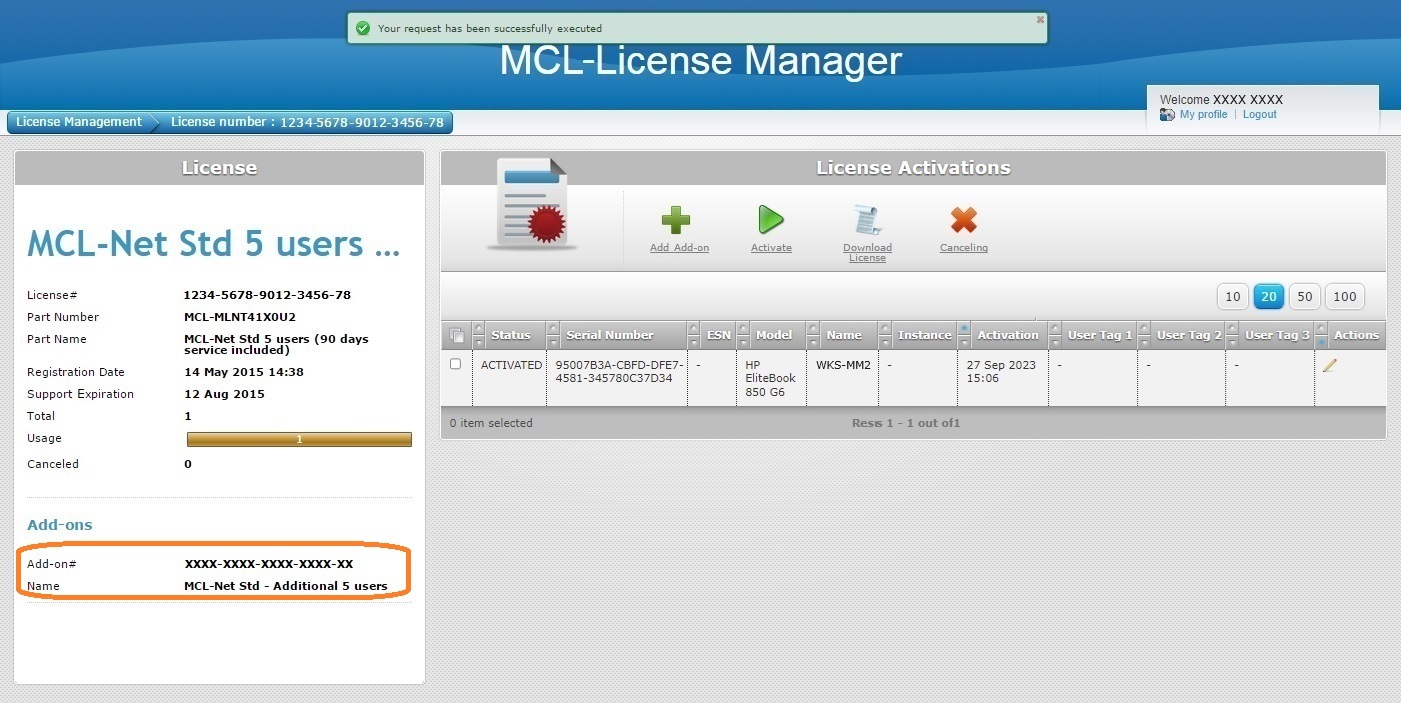
The add-on details are displayed in the left panel, in the "Add-ons" section.
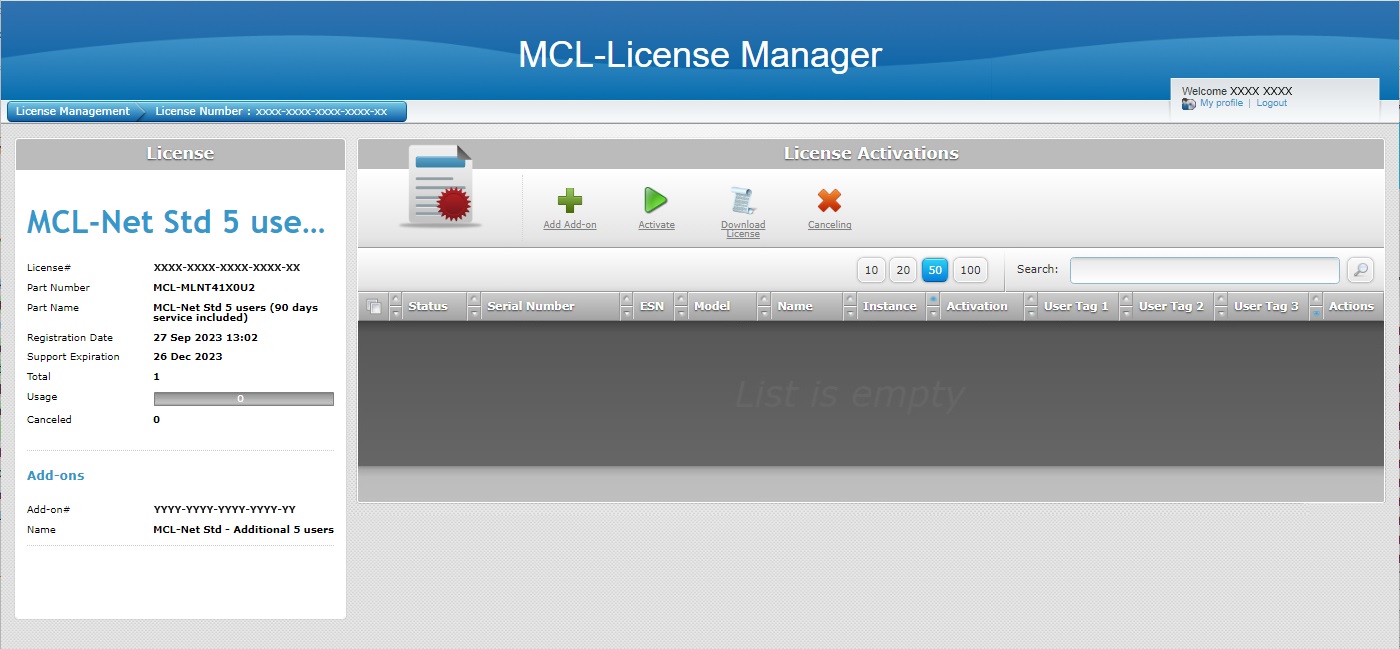
You can link an add-on to a license that is registered in your MCL-License Manager account but has not been activated in a PC/server yet. The view of the inactive license's "License Activations" page is different. It only displays license related information in the left panel and the table, which is supposed to display information on the PC that has MCL-Net installed, is empty. If you have associated your add-on to an inactive license, the following steps can be performed after the master license is active in a PC/server. Refer to the MCL-Net User Guide for more details on license activation.
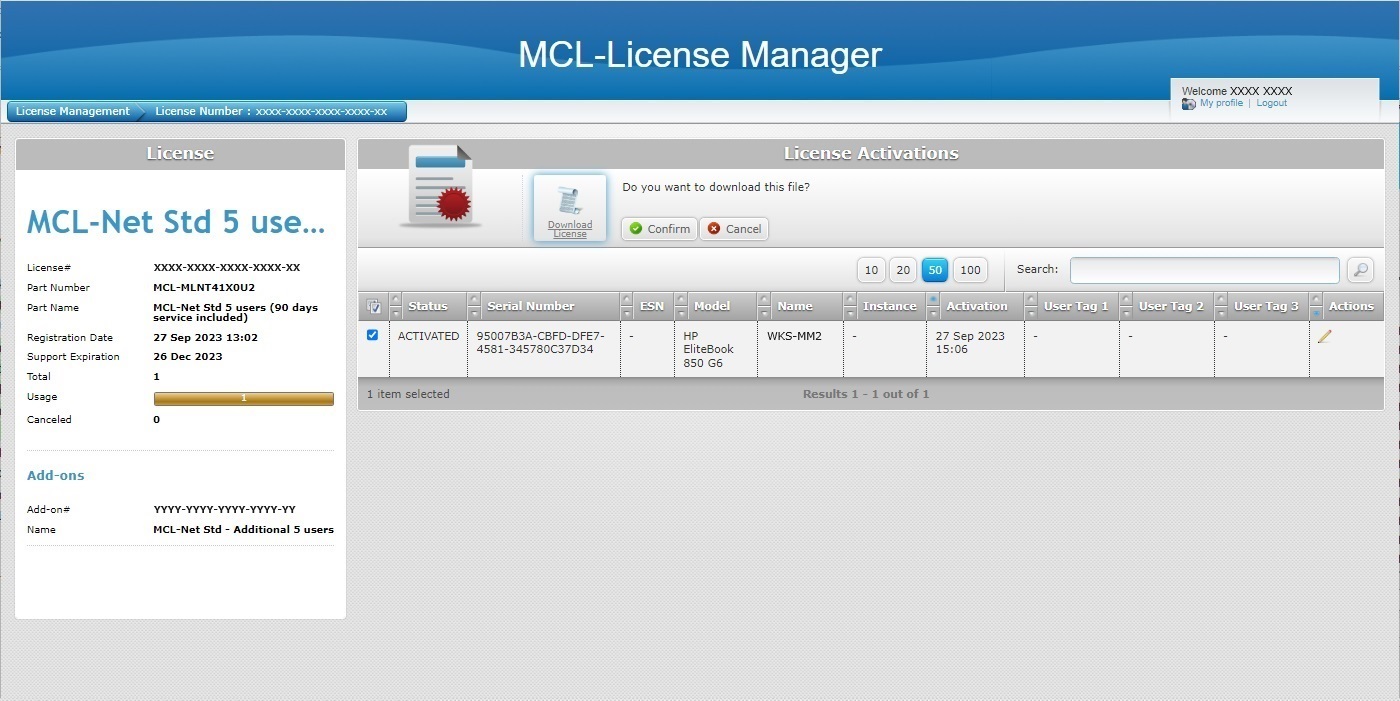
7. Check the MCL-Net master license's
8. Click
9. Click
10. Place the downloaded file in the license folder "MCL4" (C:/ProgramData/MCL-Technologies/MCL4).
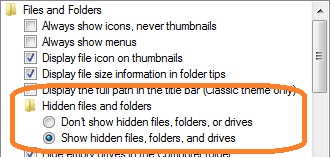
The "MCL4" folder may be hidden, so make sure your Folder Viewing properties are set to view hidden files and folders. Ex: In a PC with Windows 10, open the "Folder Options" window (Control Panel > Folder Options) and check the corresponding option:
11. Restart MCL-Net to apply the add-on addition/update the license: •If MCL-Net is running as a service, stop and restart that service. •If MCL-Net is set to run as an application, close the application and launch it again.
The addition is now available within the MCL-Net license.
|
Step-by-step
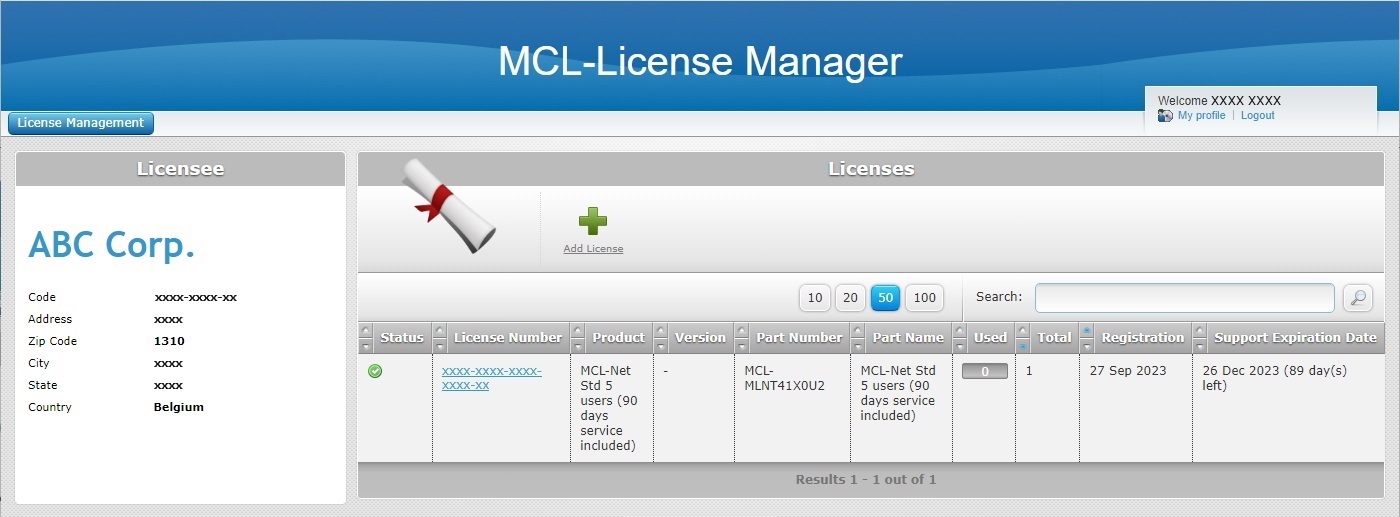
1. Open your MCL-License Manager account ("Licenses" page).
2. Click the number of the MCL-Net license you want to associate the add-on to (displayed in light blue).
3. Click
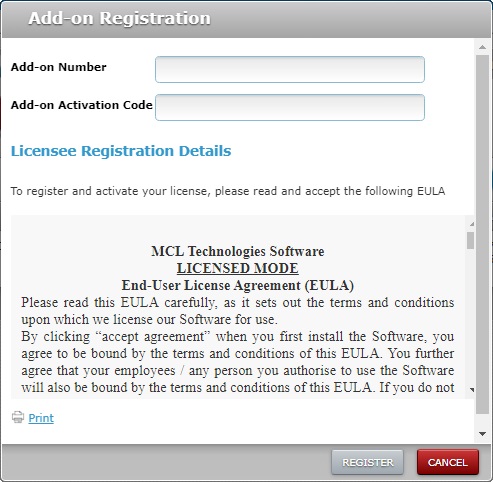
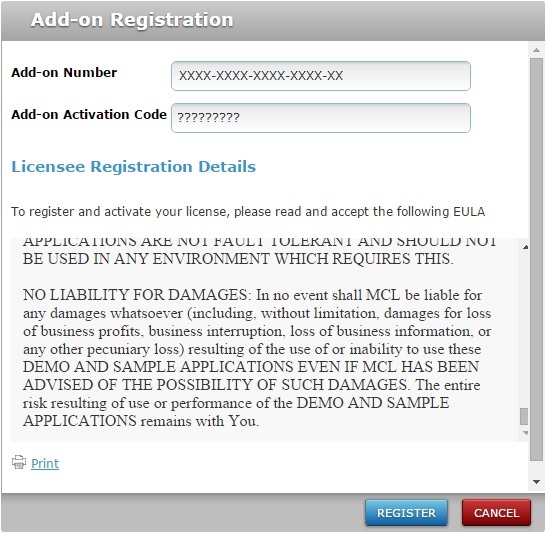
4. Enter the add-on number and activation code (information provided by the "Add-on Delivery Notification" email).
5. Read the "EULA" terms regarding the new add-on (scroll down to access the text and activate the If required, click
6. Click
The add-on details are displayed in the left panel, in the "Add-ons" section.
You can link an add-on to a license that is registered in your MCL-License Manager account but has not been linked to a PC/server yet. The view of the inactive license's "License Activations" page is different. It only displays license related information in the left panel and the table, which is supposed to display information on the PC that has MCL-Net installed, is empty. If you have associated your add-on to an inactive license, you can wait for the master license to be activated in a PC/server to perform the next steps. Refer to the MCL-Net User Guide for more details on license activation.
7. Check MCL-Net license's
8. Click
9. Click
10. Place the downloaded file in the license folder "MCL4" (C:/ProgramData/MCL-Technologies/MCL4).
The "MCL4" folder may be hidden, so make sure your Folder Viewing properties are set to view hidden files and folders. Ex: In a PC with Windows 10, open the "Folder Options" window (Control Panel > Folder Options) and check the corresponding option:
11. Restart MCL-Net to apply the add-on addition/update the license: •If MCL-Net is running as a service, stop and restart that service. •If MCL-Net is set to run as an application, close the application and launch it again.
The addition is now available within the MCL-Net license.
|