Editing a Site |
  
|
Editing a Site |
|
Overview
The site's details are editable. This editing can occur at Admin Dashboard level but also at Site Dashboard level, meaning, the Site Manager can also view and edit the details of the site(s) he manages. For more details on Site Dashboard editing, see Editing Site Details.
Step-by-step
1. Click ![]() (on the Admin Dashboard's "Control Panel") to access the "Site Management" page.
(on the Admin Dashboard's "Control Panel") to access the "Site Management" page.
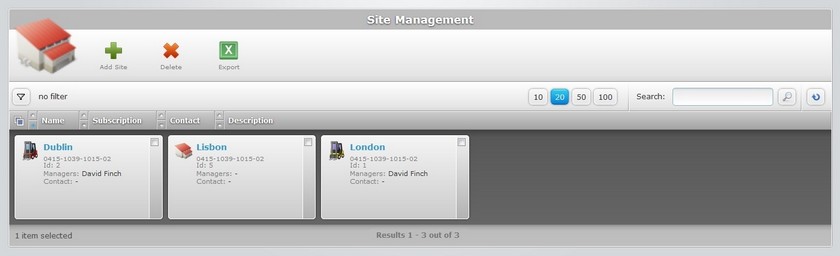
2. Select the site you want to edit by clicking its name (which is displayed in light blue). This opens the corresponding "Site Details" page.
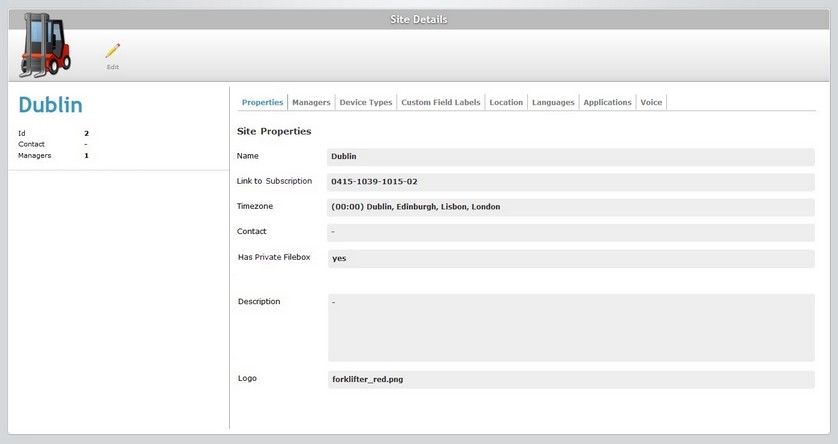
3. Click ![]() to set the page to "edit mode".
to set the page to "edit mode".
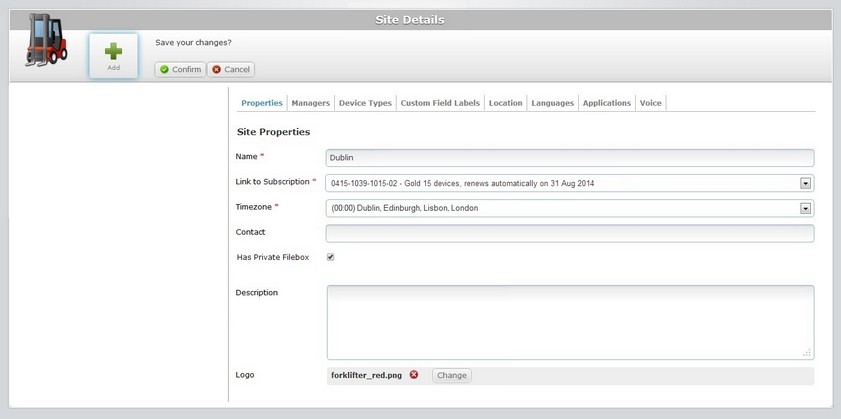
4. Edit the information in the fields/tabs, as necessary. The fields marked with an asterisk are mandatory, meaning, they must always contain information.
If you, specifically, want to:
| • | Add a site manager, go to the "Managers" tab and proceed as described in Adding a Site Manager to a Site. |
| • | Add roles to an operator, go to the "Applications" tab and fill in the available fields. See Applications Tab. |
| • | Upload files to the voice profiles, go to the "Voice" tab (this tab is only available if the subscription includes Voice services)and proceed as described in "Adding a Site" - Voice Tab. |
1. Click ![]() OR double-click the "Logo" field.
OR double-click the "Logo" field.
![]()
2. Click ![]() to search for an image file.
to search for an image file.
3. In the resulting OS file explorer window, select the desired file image.
4. Click ![]() to upload the logo.
to upload the logo.
![]()
The logo is displayed in the corresponding site's Site Dashboard.
To remove the image file, click the corresponding ![]() .
.
To change the logo, click ![]() and repeat the image file selection (steps 2, 3 and 4).
and repeat the image file selection (steps 2, 3 and 4).
![]()
Before attempting to do any of these actions (adding, removing or changing a logo) do not forget to set the page to "edit mode" (step 1). It is the only way to access the necessary buttons.
5. Once you have edited the required fields, click ![]() to apply the modifications.
to apply the modifications.