|
How to Work with Global Events |
  
|
How to Work with Global Events
|
How to Work with Global Events |
|
Overview
A Global Event is a set of processes that includes a timer so you can define a repetition cycle for that set of processes. In other words, the global event is executed in a loop.
The repetition cycle does not consider the time the device spends in "sleep" mode.
A Global Event is associated to the project and not to a single program, meaning, it can start at the same time as the application or be called from any of the project's programs. It does not enable operator/device interaction (it is executed without operator interference) so, you cannot add screens and/or controls to it, only processes that do NOT call for controls. Ex: Processes from the "Display Controls" group cannot be added to a global event, except the "Message Box" process (with an associated time out).
Global Events that have been created within an MCL-Designer project are reusable in other MCL-Designer projects. The global event is exported into the Library (an MCL-Designer folder that stores exportable elements such as data files, programs, global events, screens, etc.) and, when required, is imported (from Library) into another project or projects.
There are specific processes that deal with global events (to call for the global event, to reset its repetition cycle and/or to pause it). They are included in the "Other" group of processes. To access the processes related to global events, click ![]() on the "Process" tab. All the processes included in the "Other" group are displayed below, in the "Process Display Section".
on the "Process" tab. All the processes included in the "Other" group are displayed below, in the "Process Display Section".
For more information on each process, see:
Working with Global Event Start/Resume Process
Working with Global Event Reset Process
Working with Global Event Pause Process
The "Global Events" module displays the global events being used in your current project and provides options to manage them. To access these options, use the right click menu.
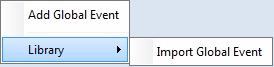
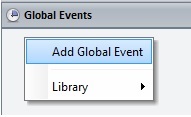
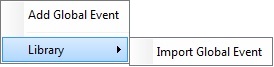
Within the "Global Events" module, right-click an empty area to access these option:
|
Use it to add a global event. See To Add a Global Event. |
Mouse over "Library" and click "Import Global Event" to import a global event into your current project. See To Import a Global Event. |
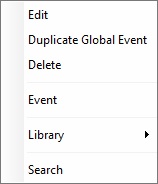
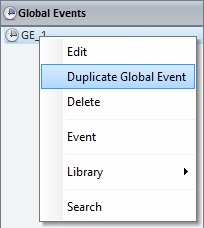
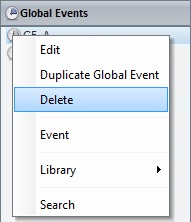
If you right-click an existing global event, you access the following options:
|
Edit |
Click this option to edit the selected global event's properties. See To Edit a Global Event.
|
Duplicate Global Event |
Use this option to duplicate the selected global event. See To Duplicate a Global Event. If the selected global event is a "locked" global event (not editable and identified with a |
|
Delete |
This option deletes the selected global event. |
|
Event |
Use this option to gain direct access to the selected global event's "Event" tab. This option is inactive if the selected global event is a "locked global event" (marked with a |
|
Library |
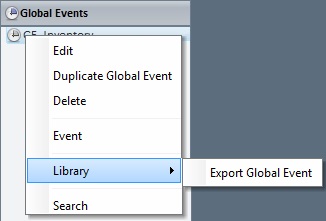
Use this option to access "Export a Global Event" and export the selected global event:
a. Mouse over the "Library" option.
b. Click "Export Global Event". c. Proceed with the export - See To Export a Global Event.
If the selected global event is a "locked" global event (identified with a |
|
Search |
Use this option to search for the occurrences of the selected global event within the current project. See Detail of Search. |
![]()
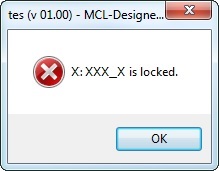
Some of the right-click menu options are not applicable if the global event in question is a previously imported global event that is "locked" (an Export option - see To Export a Global Event to Library). A "locked" global event is not editable so certain operations (related to a global event's duplication, export or settings/content edition) are NOT executable.
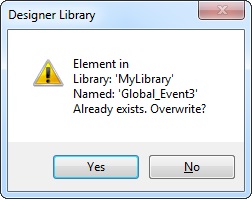
If you right-click a "locked" global event (identified with a ![]() ) and select options that relate to its edition, you get the following message:
) and select options that relate to its edition, you get the following message:
The adding of a global event requires two major operations - the creation of the global event's structure and the adding of processes to that structure. These processes will depend on the global event's purpose.
As an alternative, you can import a global event you have created in another project and exported into the "Library Manager". To do so, right-click the module's empty area, mouse over the "Library" option and click "Import Global Event". If that imported global event was previously locked during its export from another project, you will NOT be able to edit it after import,in the destination project.
![]()
By definition, a global event is not supposed to receive any user input. Therefore, screens/controls are NOT allowed in a global event.
![]()
Create short Global Events so they do not take long to execute and run the risk of interfering with the application flow.
Step-by-step
1. Go to the "Global Events" module.
2. Right-click the module's empty area to open the corresponding menu.
3. Click "Add Global Event" to open the corresponding properties window.
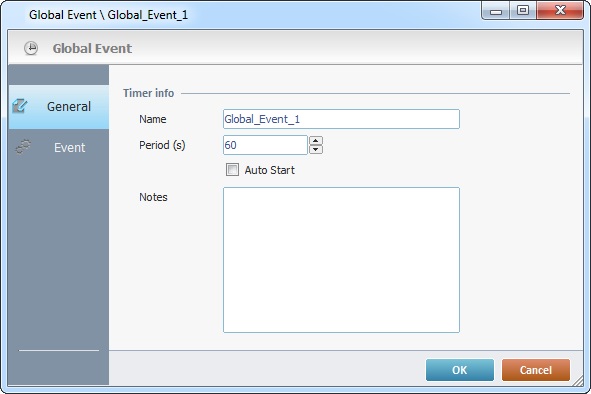
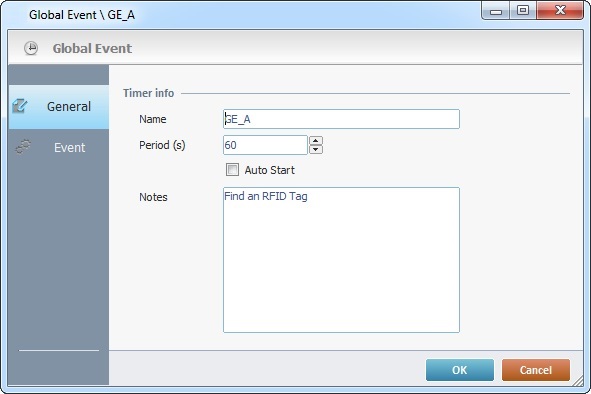
4. Maintain the suggested name or enter a new one in the "Name" option.
5. In the "Period" option, define the repetition cycle (in seconds). Enter a value or use the arrows.
6. If required, check the "Auto Start" option. This means that the global event starts at the same time as the application.
7. If required, enter any relevant notes concerning the new global event.
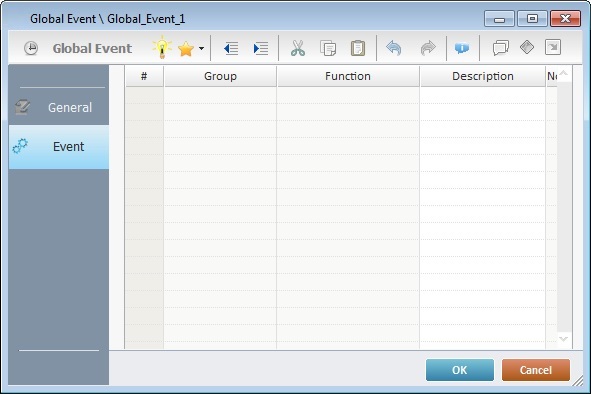
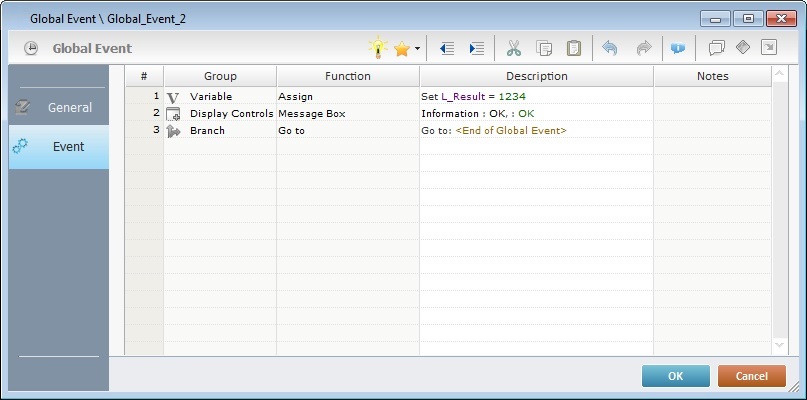
8. Open the "Event" tab.
9. Add the required processes. Use the drag-and-drop mechanism, the window's editing bar (the ![]() button), the selected row's right-click menu ("Add/Insert..." option) OR double-click an empty row to open a process list.
button), the selected row's right-click menu ("Add/Insert..." option) OR double-click an empty row to open a process list.
See Adding Processes to Routines, "Routine In", "Routine Out", Local Procedures or Global Events.
10. Click ![]() to apply OR
to apply OR ![]() to abort the operation.
to abort the operation.
Step-by-step
1. In the "Global Events" module, right-click the global event you want to duplicate.
2. Click "Duplicate Global Event".
The selected event is duplicated. It is displayed in the "Global Events" module, with the same name as the original plus an incremental number. You can rename it (see To Edit a Global Event below).
This option is NOT applicable to a "locked" global event.
During project development, you can edit the properties of a global event but also add, edit or delete the processes included in it.
The exception is "locked" global events because they are NOT editable.
Step-by-step
1. In the "Global Events" module, use one of the following to open the global event's properties window:
a. In the "Global Events" module, double-click the global event you want to edit (this opens the ""Event" tab of the global event's properties window directly).
Proceed to step 3.
OR
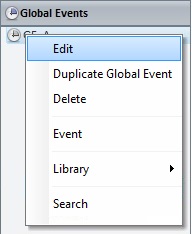
b.Right-click the global event you want to edit and click "Edit", in the resulting menu (this opens the ""General" tab of the global event's properties window directly).
Proceed to step 2.
2. In the "General" tab, edit the necessary fields:
Timer Info |
|
Name |
Maintain or edit the global event's name. |
Period(s) |
Maintain or define another time period (in seconds) for the global event's repetition cycle. |
Auto Start |
Check/uncheck this option to activate/deactivate the global event's automatic start (the global event starts at the same time as the application). |
Notes |
Maintain or edit the information you entered concerning the global event. |
3. In the "Event" tab, edit as required:
•If you want to add/delete,copy, comment, etc., the processes, use Drag-and-Drop from the "Process Tab", the Editing Bar and/or the right-click menu. See Editing Processes.
•If you want to edit the properties of a specific process, double-click the intended process or use the "Edit" option of its right-click menu to open the corresponding properties window. Make the necessary changes and click the properties window's ![]() to return to the "Event" tab.
to return to the "Event" tab.
4. Once you are done editing, click ![]() to apply your changes in the global event's properties window.
to apply your changes in the global event's properties window.
![]()
Do not forget you CANNOT add screens, controls or processes that call for controls into a global event. The only exception is the “Message Box” (from the “Display Controls” processes group) with a time out.
Step-by step
1. Open the "Global Events" module.
2. Right-click the global event you want to export.
3. In the resulting menu, mouse over the "Library" option and select "Export Global Event" to open the corresponding "Export to Library" window.
If required, select a different source library or rename it by clicking ![]() . See To Define a Library.
. See To Define a Library.
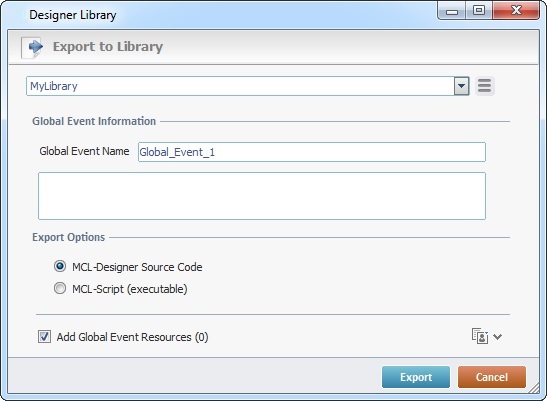
4. Fill in the following options:
Global Event Information |
|
Global Event Name |
Maintain or enter a new name. |
Text Box |
If required, add notes regarding the global event being exported. |
Export Options |
|
MCL-Designer Source Code |
Check this option if you want the settings/content of the global event being exported to be available for editing once it is imported into another MCL-Designer V4 project. |
MCL-Script (executable) |
Check this option if you want to lock the settings/content of the global event being exported. This means that when the global event is imported into another project, it will not be editable. This affects its display in the destination project - only the name will be visible, the original components (routines, local procedures) will not be available in the tree view and the corresponding properties window will not be editable. |
Add Global Event Resources(x) |
If the global event contains resources, check this option to ensure they are included in the export. These resources can refer to image files, sound files, text files, etc. |
![]()
It is possible to append project resources to the global event's export, even though they are not included in the global event.
a. To view all project resources, click ![]() .
.
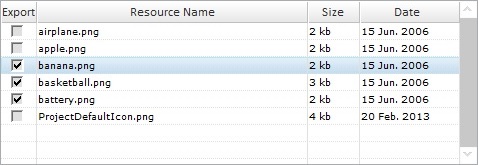
b. Check the project resources you want to include in the export. (If you have checked the "Add Global Event Resources" option, the corresponding resources will be selected when you expand the project's resource list.)
c. If you want, click ![]() to hide the resource list.
to hide the resource list.
5. Click ![]() to conclude the export.
to conclude the export.
The exported global event is available in the Library ("Global Events" section) and ready to be imported into another project.
![]()
As an alternative, you can use a drag-and-drop to initiate an export:
a. Open Library Manager (shortcut key - F4).
b. Drag the global event you want to export and drop it on the Library Manager's window. This opens the corresponding "Export to Library" window.
c. Proceed as described in steps 4 and 5 ("To Export a Global Event to Library").
Example of Export Errors
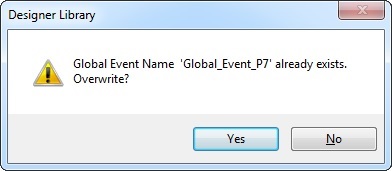
•If the Library already contains a global event with the same name, the following message box appears:
a. Click ![]() to overwrite.
to overwrite.
OR
b. Click ![]() to return to the " Export to Library" window, change the global event's name in the corresponding box and click
to return to the " Export to Library" window, change the global event's name in the corresponding box and click ![]() to conclude.
to conclude.
•If you intend to export a previously imported global event that is locked, the following message box appears:
a. Click ![]() to cancel the action and close the window. It is NOT possible to export a locked element that was included into the project through a previous import.
to cancel the action and close the window. It is NOT possible to export a locked element that was included into the project through a previous import.
Step-by-step
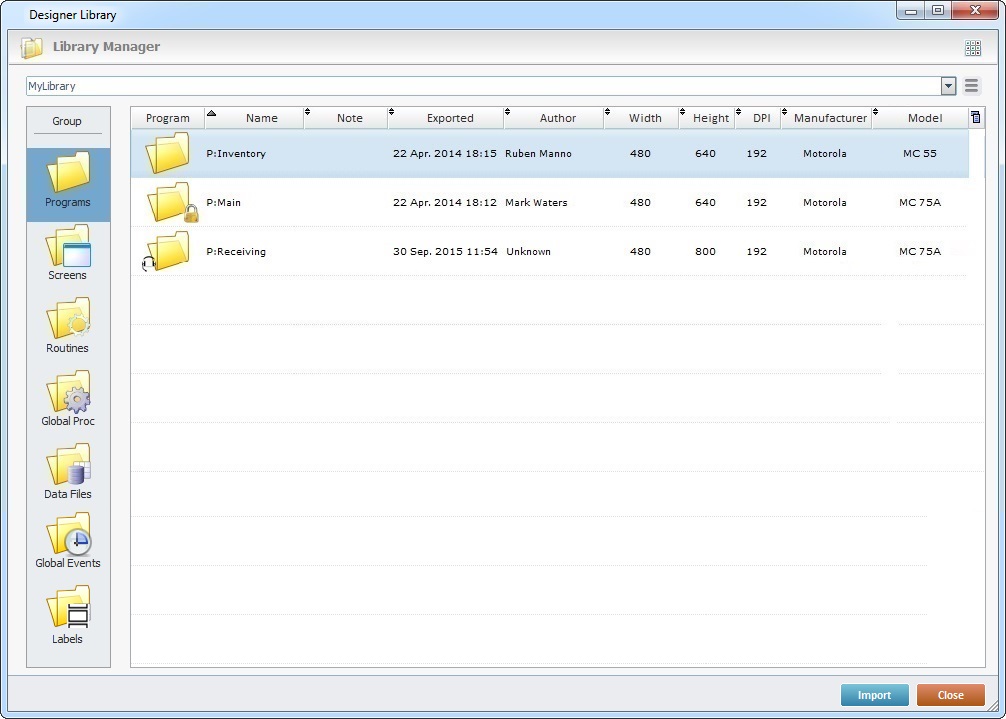
1. Open the destination project and use one of the following to access the "Library Manager" window:
A. Go to the "Menu Bar", click "Tools" and, in the resulting menu, select "Library Manager".
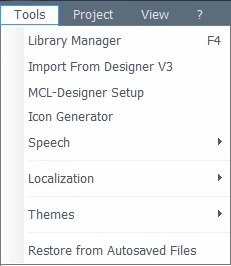
B. Click <F4>.
C. Right click an empty area in the "Global Events" module, mouse over the "Library" option in the resulting menu and select "Import Global Event".
Whichever the option chosen (A, B or C), it opens the "Library Manager" window.
If required, select a different source library or rename it by clicking ![]() . See To Define a Library.
. See To Define a Library.
If you used the A or B option, continue to step 2.
If you used option C, proceed to step 3.
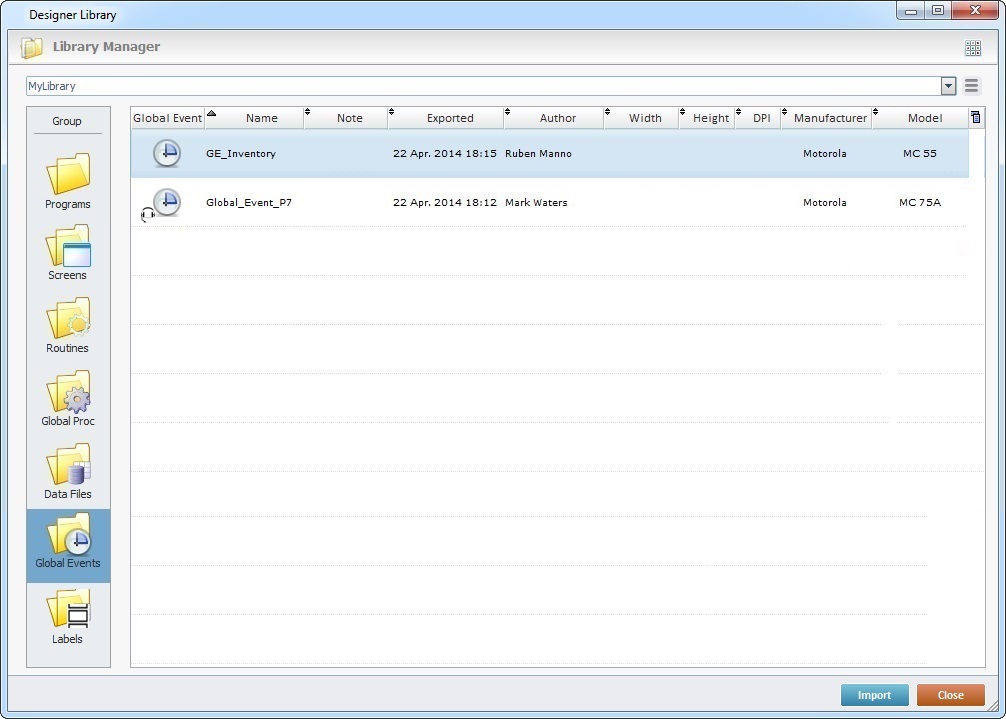
2. Select the element type ("Global Events") you want to import in the "Group" section, to the left.
![]()
"Library" elements that have speech attributes, meaning, that were created within speech projects, are identified with a ![]() (ex: Global_Event_P7).
(ex: Global_Event_P7).
A "speech" element (a program, a screen, a routine, a global procedure or a global event) can only be imported into projects being developed within an MCL-Designer V4 with enabled speech attributes.
3. Use one of the following to access the "Import into Project" window and continue the import operation:
A. Double-click the desired global event.
B. Drag and drop it into the "Global Events" module area.
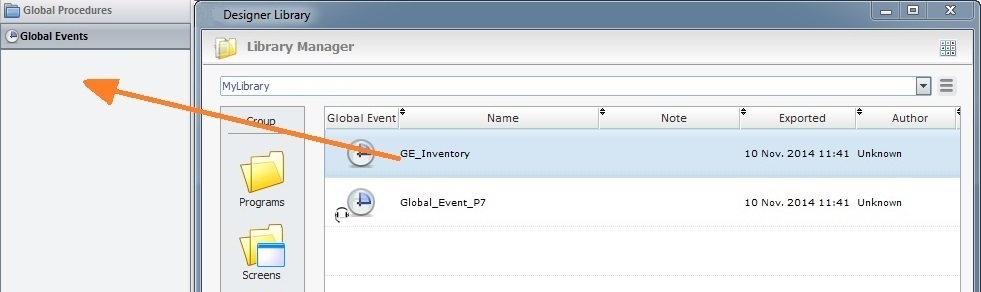
C. Select the intended global event and click ![]() .
.
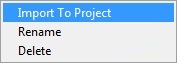
D. Right-click the selected global event and click the "Import to Project" option.
The corresponding "Import into Project" window opens.
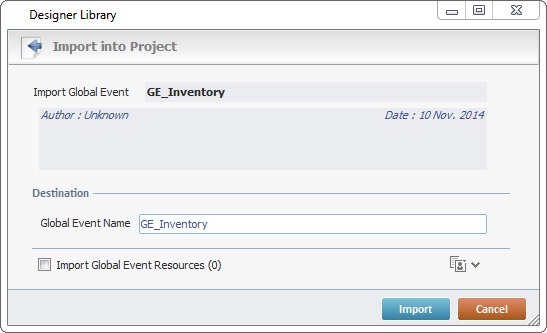
This window displays information that cannot be edited (regarding the global event being imported) and information you can edit (the "Destination" section).
![]() If the destination project contains a global event with the same name as the global event being imported, the name of the imported global event will automatically change to "..._X" ("X "refers to an incremental number.
If the destination project contains a global event with the same name as the global event being imported, the name of the imported global event will automatically change to "..._X" ("X "refers to an incremental number.
![]()
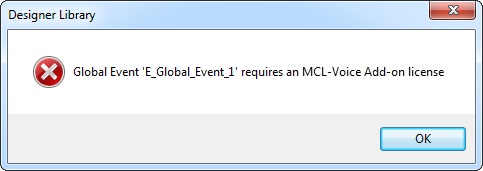
If the global event being imported is a "speech" global event and the target project does NOT have enabled speech features (MCL-Designer V4 does NOT include speech attributes), the "import" operation is aborted.
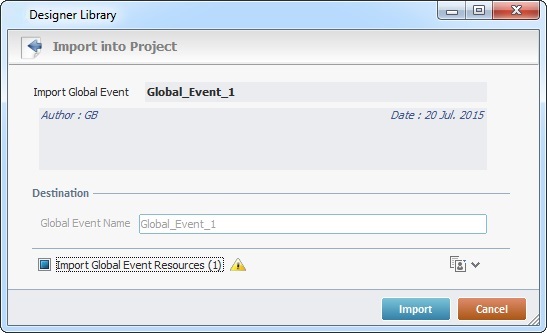
![]() If the global event being imported is "locked" (Export option that turned the selected element into a non-editable element - see To Export a Global Event), you will not be able to edit its name. The option "Global Event Name" will be inactive (displayed in gray).
If the global event being imported is "locked" (Export option that turned the selected element into a non-editable element - see To Export a Global Event), you will not be able to edit its name. The option "Global Event Name" will be inactive (displayed in gray).
You can either opt to change the name of the global event that already exists in the destination project (if it is not locked) and keep both global events OR proceed with the import, in which case, the newly imported global event will overwrite the one that already exists in the destination project.
4. View, maintain or enter new information, as required by the project.
Import Global Event |
Displays the global event's name. NOT editable. |
Displays the global event's author and when it was added to the library. It can also include notes entered during the export into Library operation. NOT editable. |
|
Destination |
|
Global Event Name |
Option only available if the element being imported was NOT previously "locked" during export. Maintain the suggestion or enter a new name for the imported global event. Make sure the target project does not have a global event with the same name or the imported global event will overwrite the one that already exists in the destination project. |
Import Global Event Resources (x) |
If the global event contains resources, check this option to ensure they are included in the import. Their destination is the target project's "Resources" module. |
![]()
It is possible to append project resources (appended during an element's export into the "Library" - see To Export a Program to Library) to the global event's import, even though they are not included in the global event.
a. To view all project resources, click ![]() .
.
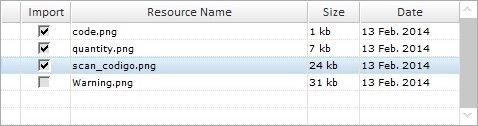
b. Check the project resources you want to include in the import.
c. If you want, click ![]() to hide the resource list.
to hide the resource list.
5. Click ![]() to conclude the global event import.
to conclude the global event import.
The newly imported global event is displayed in the "Global Events" module and available to the current project.
![]() When the import includes language files (containing the imported element's localization tags), check the enabled languages of the destination project. If the imported language files relate to a language that is NOT enabled in the destination project, you have to define it as a project language in the project's Localization (a project properties tab). See Localization.
When the import includes language files (containing the imported element's localization tags), check the enabled languages of the destination project. If the imported language files relate to a language that is NOT enabled in the destination project, you have to define it as a project language in the project's Localization (a project properties tab). See Localization.
Ex: The import of a global event that includes a language file in "Dutch" into a project that only has "French" as an enabled language, will require that you add "Dutch" to the list of project enabled languages (in the Localization tab). If you skip this step, the imported "Dutch" language file will NOT be available for use.
Example of an Import Error
•If the name of the global event to import already exists in the current project, the following message box opens:
a. Click ![]() and replace the existing global event for the newly imported one.
and replace the existing global event for the newly imported one.
OR
b. Click ![]() to return to the " Import into Project" window, change the global event's name in the corresponding box and click
to return to the " Import into Project" window, change the global event's name in the corresponding box and click ![]() to conclude.
to conclude.
Step-by-step
1. In the "Global Events" module, right-click the global event you want to delete.
2. Select “Delete” in the resulting menu.
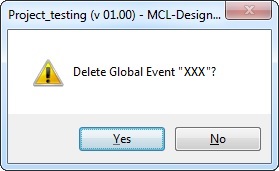
3. Confirm the deletion by clicking ![]() .
.
OR
Select the global event to delete in the "Global Events" module, press the <DEL> key in your PC keyboard and confirm the operation in the resulting window.