|
Editing a Site User Profile |
  
|
Editing a Site User Profile
|
Editing a Site User Profile |
|
Overview
You can edit the details of a site user as well as change site user status, meaning, to enable or disable the site user's profile (depending on current status).
Step-by-step
1. Click ![]() (in the Control Panel section) and, in the resulting row below, select
(in the Control Panel section) and, in the resulting row below, select ![]() to open the "Site Users" page.
to open the "Site Users" page.
2. Click the name of the site user (displayed in light blue) to access the corresponding "Site User Details" page.
3. Click ![]() to set the page to "edit mode".
to set the page to "edit mode".
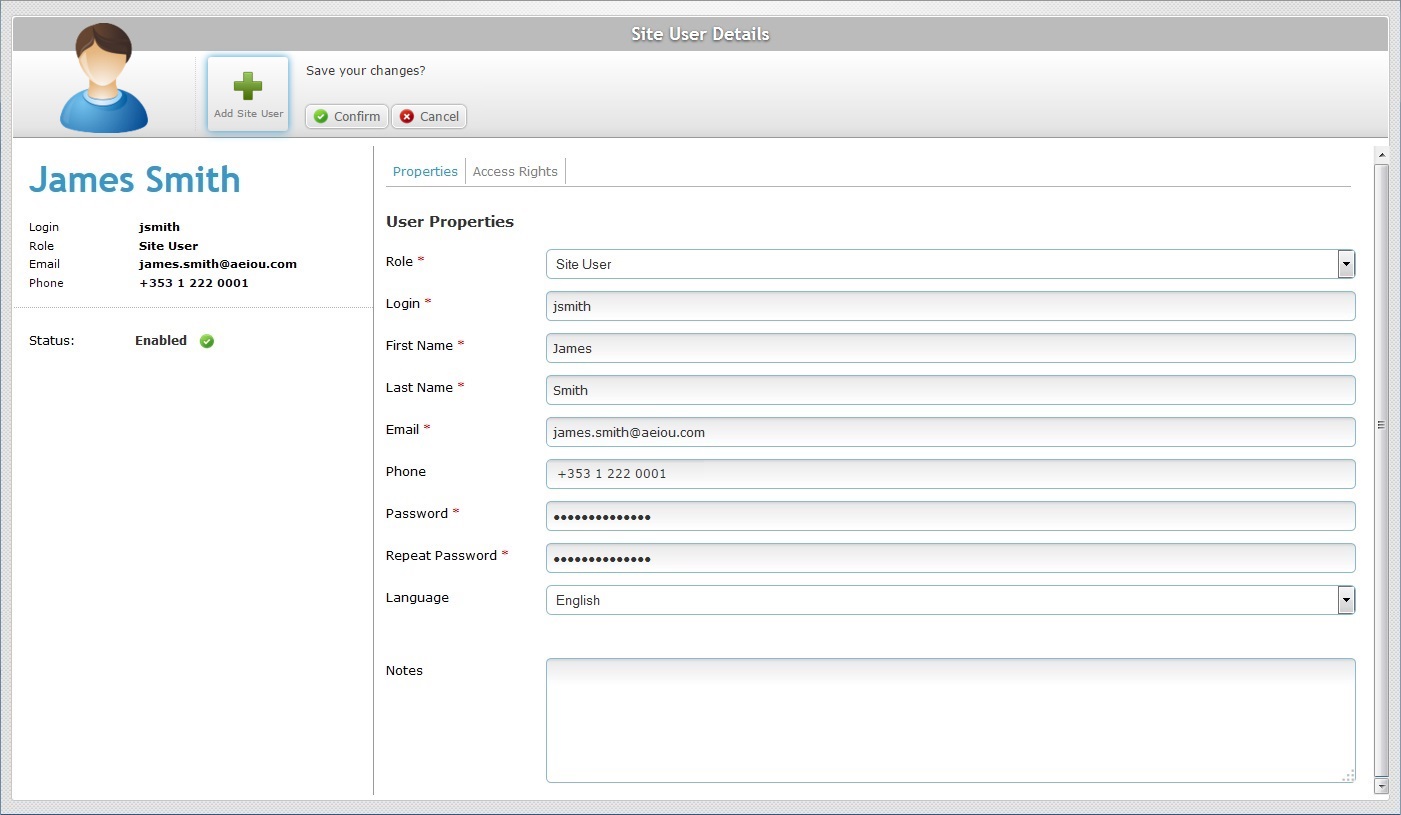
4. Edit the fields according to your requirements:
Role * |
Maintain or edit the site user's role in the site. |
Login * |
Maintain or edit the site user's login to the Site Dashboard or private Filebox. |
First Name * |
Maintain or edit the site user's first name. |
Last Name * |
Maintain or edit the site user's last name. |
Email * |
Maintain or edit the site user's email. |
Phone |
Maintain or edit the site user's phone number. |
Password * |
Maintain or edit the site user's access password. |
Repeat Password * |
If the password was changed, enter the site user's new access password. |
Language |
Maintain or select another language to be used by the site user in the application. |
Notes |
Maintain or edit the existing text. |
5. Proceed to the "Access Rights" tab. If you have finished editing the site user's profile, continue to step 11.
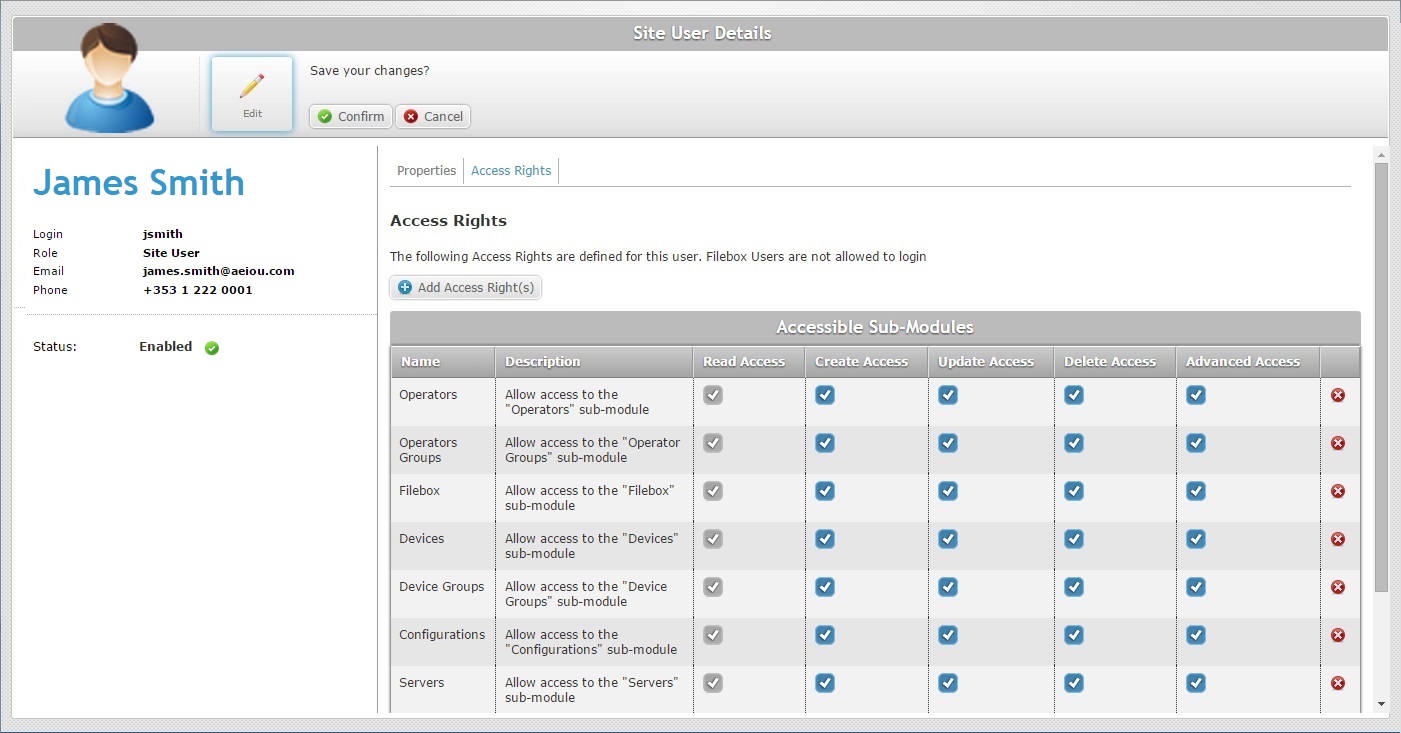
6. If you want to remove access to a particular sub-module, click the corresponding ![]() .
.
If you want to add sub-modules, proceed to step 7.
If you only want to edit the type of access (the operations the site user is allowed to perform in a sub-module), continue to step 10.
If you have finished editing the site user's profile, continue to step 11.
7. Click ![]() .
.
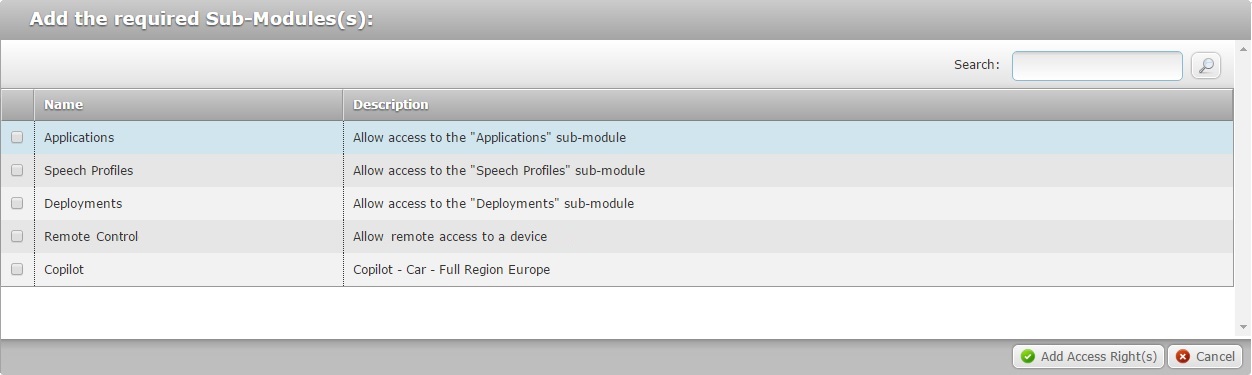
![]() This window only displays the sub-modules that are currently NOT available to the site user.
This window only displays the sub-modules that are currently NOT available to the site user.
8. Select the required sub-module(s) by checking the corresponding ![]() .
.
If necessary, use ![]() to filter the displayed information.
to filter the displayed information.
a. Enter what you want to search for.
b. Click ![]() or press <ENTER> in your PC keyboard to initiate the search.
or press <ENTER> in your PC keyboard to initiate the search.
c. To conclude the search operation, empty the search box and click ![]() or press <ENTER> in your PC keyboard.
or press <ENTER> in your PC keyboard.
9. Click ![]() to apply the modifications.
to apply the modifications.
10. Depending on the tasks you want to allow the site user to perform, check/uncheck the necessary options. See Access Rights and Corresponding Available Tasks.
11. Once you have executed all the required modifications, click ![]() to conclude the edition.
to conclude the edition.
Activating/Deactivating a Site User's Status
A site user can either have an "Enabled" or "Disabled" status. It can be altered at any time. There is more than one option to alter a site user's status:
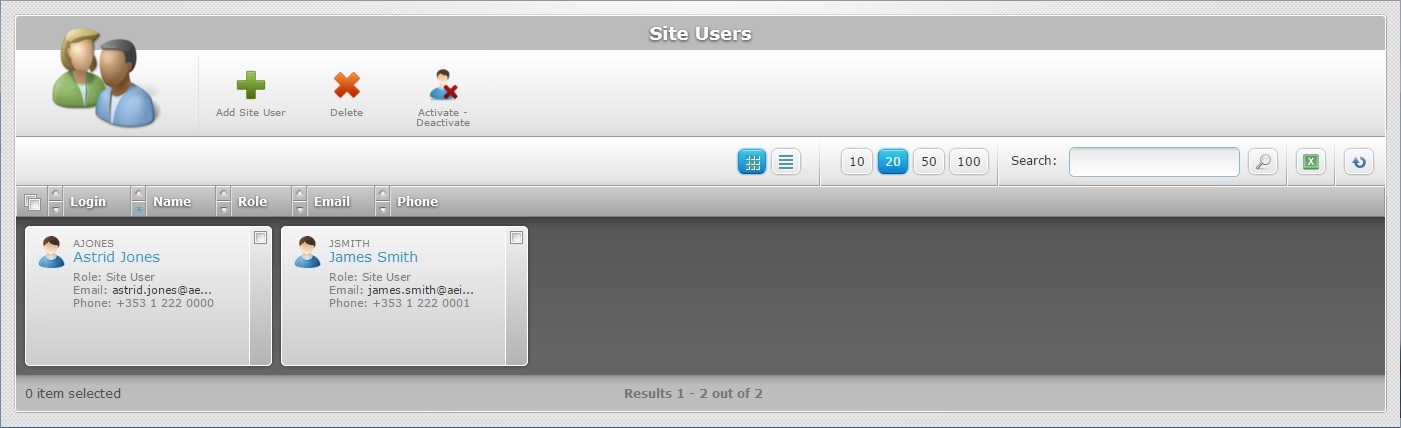
Option A. In the "Site Users" page, using the ![]() button. This option is available in both grid and list view and can be applied to one or more site users at a time.
button. This option is available in both grid and list view and can be applied to one or more site users at a time.
Option B. In the "Site Users" page, using the ![]() button. This option is only available if the page is displayed in list view. The status alteration only affects the corresponding site user.
button. This option is only available if the page is displayed in list view. The status alteration only affects the corresponding site user.
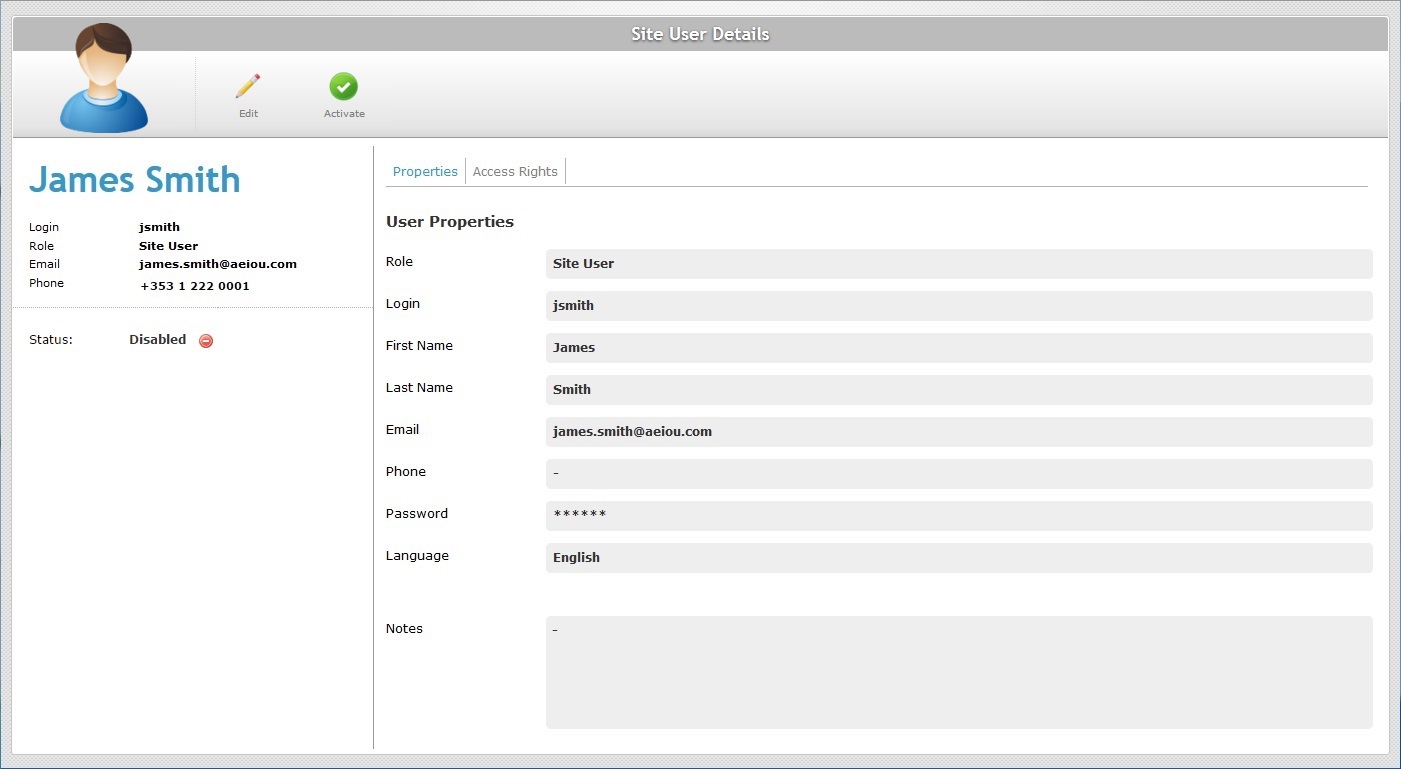
option C. In the "Site User Details" page, using one of the following buttons: ![]() OR
OR ![]() (depending on the site user's current status). Use it to alter a specific site user's status.
(depending on the site user's current status). Use it to alter a specific site user's status.
Option A
Step-by-step
1. Click ![]() (in the Control Panel section) and, in the resulting row below, select
(in the Control Panel section) and, in the resulting row below, select ![]() to open the "Site Users" page.
to open the "Site Users" page.
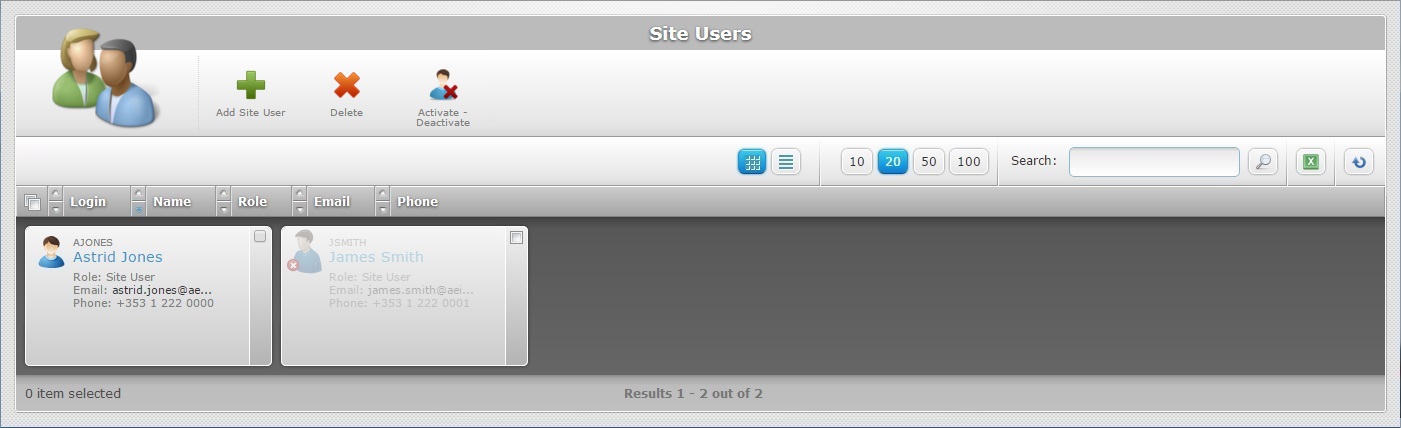
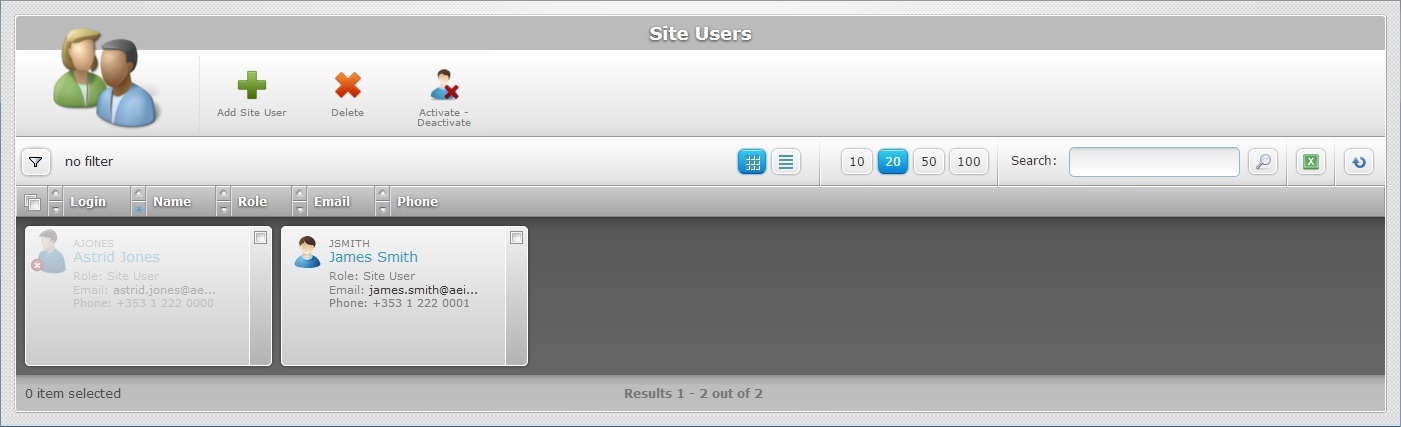
2. Select the site user(s) by checking the corresponding ![]() . You can select site users with different statuses.
. You can select site users with different statuses.
3. Click ![]() .
.
Ex: The selected elements include a site user with an "Enabled" status ("Astrid Jones") and another with a "Disabled" status ("James Smith").
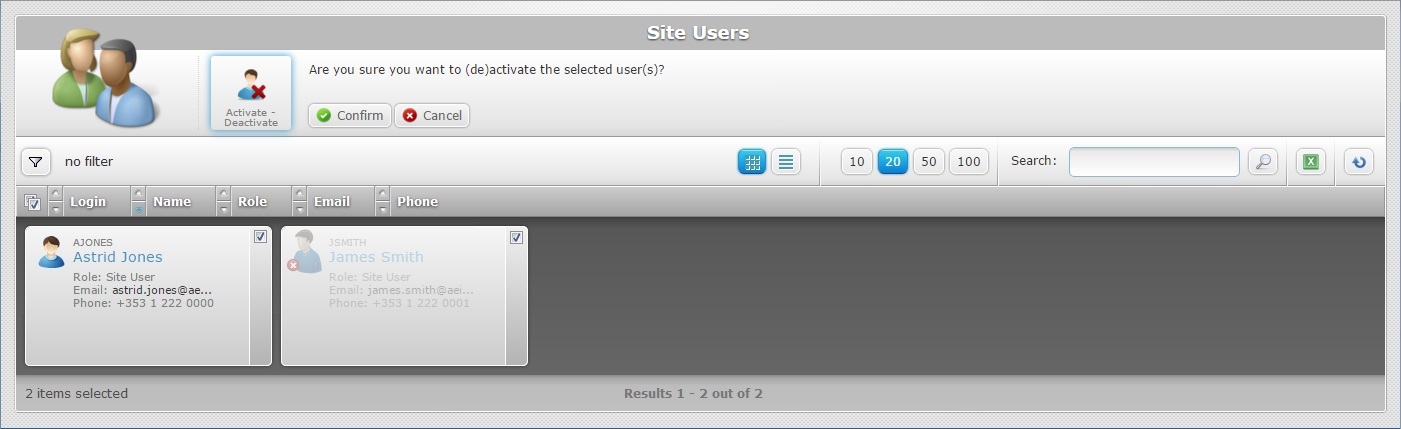
4. Click ![]() .
.
There are only two statuses: "Enabled" and " Disabled". Depending on the selected site users' current status, the new status will be its opposite.
Ex: As a result of the status change operation, the previously "Enabled" site user,"Astrid Jones", has a "Disabled" status and "James Smith" had his status changed to "Enabled".
Option B
Step-by-step
1. Click ![]() (in the Control Panel section) and, in the resulting row below, select
(in the Control Panel section) and, in the resulting row below, select ![]() to open the "Site Users" page.
to open the "Site Users" page.
2. The "Site Users" page displays a grid view, by default. Click ![]() to display the site user information on list view.
to display the site user information on list view.
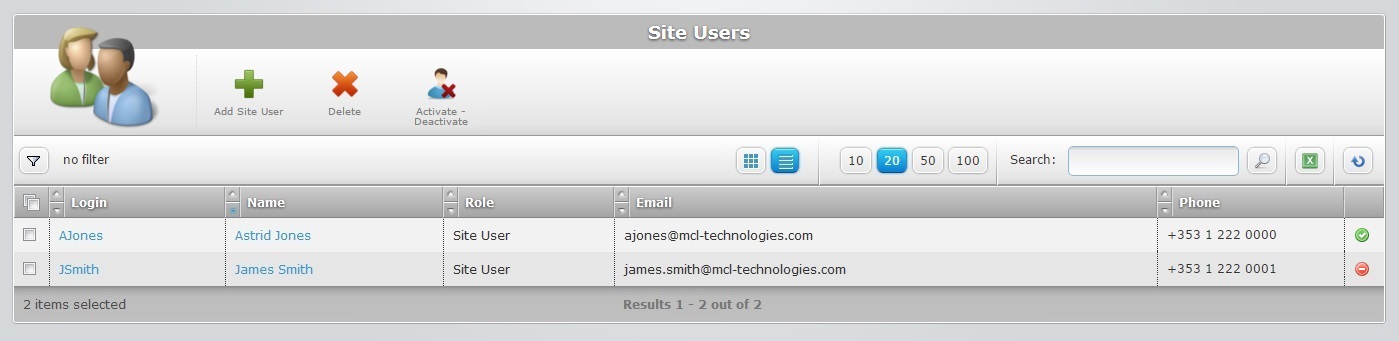
Depending on the site users' current status, you will have one of these buttons available:
![]() The "Deactivate" button is displayed if the user's current status is enabled.
The "Deactivate" button is displayed if the user's current status is enabled.
![]() The "Activate" button is displayed if the user's current status is disabled.
The "Activate" button is displayed if the user's current status is disabled.
3. Click the corresponding button of the site user to have a status change.
If you click ![]() , the site user's status changes immediately to "Disabled" and this button is replaced by the "Activate" button.
, the site user's status changes immediately to "Disabled" and this button is replaced by the "Activate" button.
If you click ![]() , the site user's status changes immediately to "Enabled" and this button is replaced by the "Deactivate" button.
, the site user's status changes immediately to "Enabled" and this button is replaced by the "Deactivate" button.
Option C
1. Click ![]() (in the Control Panel section) and, in the resulting row below, select
(in the Control Panel section) and, in the resulting row below, select ![]() to open the "Site Users" page.
to open the "Site Users" page.
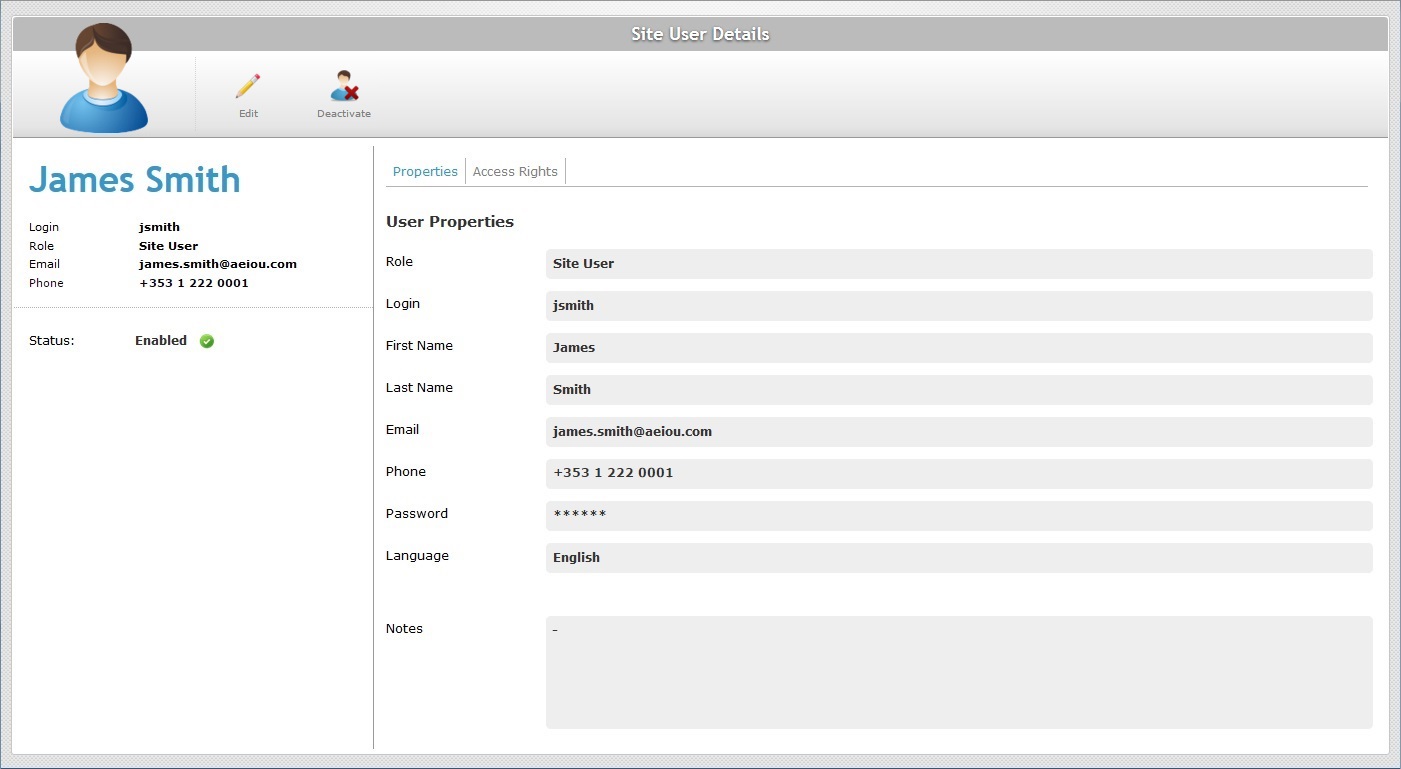
2. Click the name of the site user (displayed in light blue) to access the corresponding "Site User Details" page.
Depending on the site users' current status, you will have one of these buttons available:
![]()
This button is displayed if the site user's current status is "Enabled".
![]()
This button is displayed if the site user's current status is "Disabled".
3. Click the available button.
Ex: "James Smith" has an "Enabled" status, therefore, the available option is the "Deactivate" button.
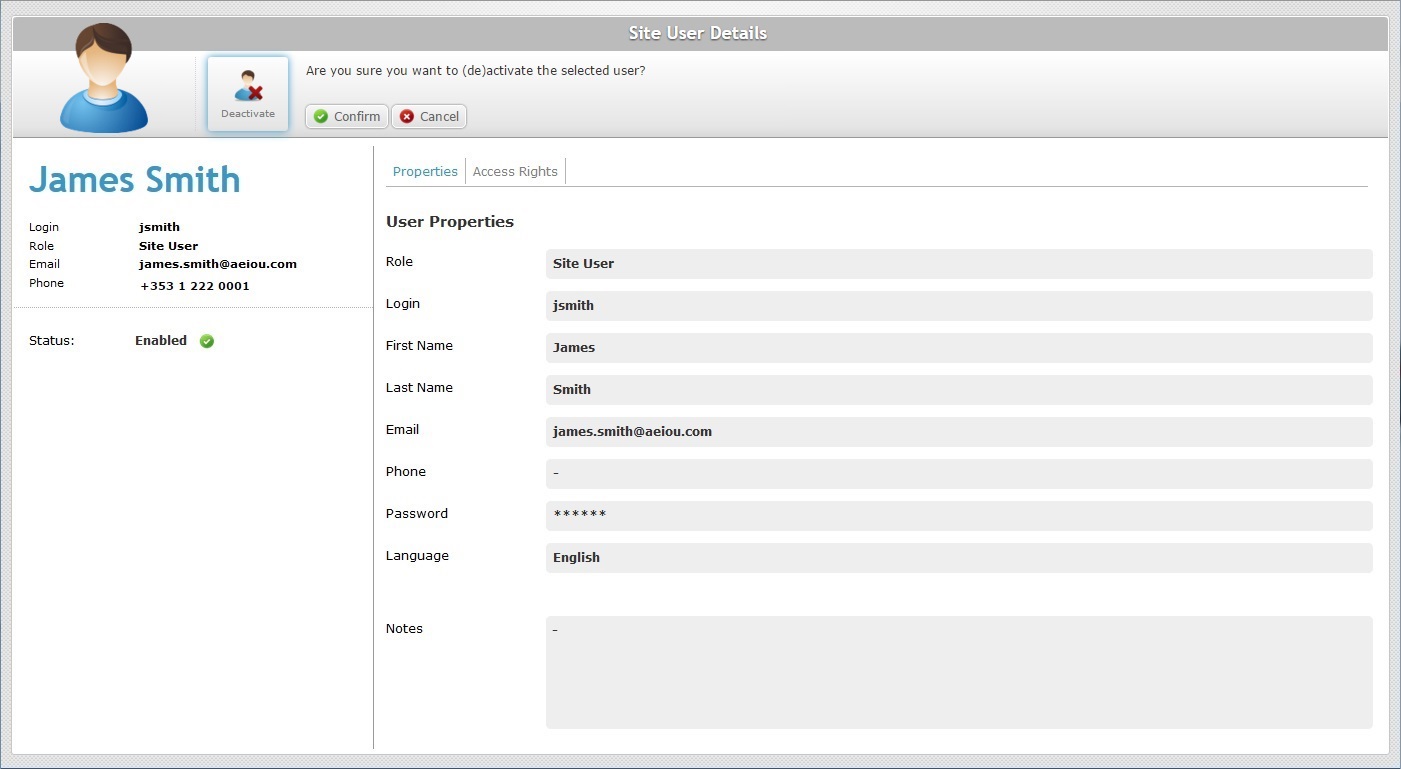
4. Click ![]() to conclude.
to conclude.
Depending on the selected site users' current status, the new status will be its opposite.
Ex: The site user's status is, now, "Disabled" and the available button is the "Activate" button.