|
Editing Account Details |
  
|
Editing Account Details
|
Editing Account Details |
|
Overview
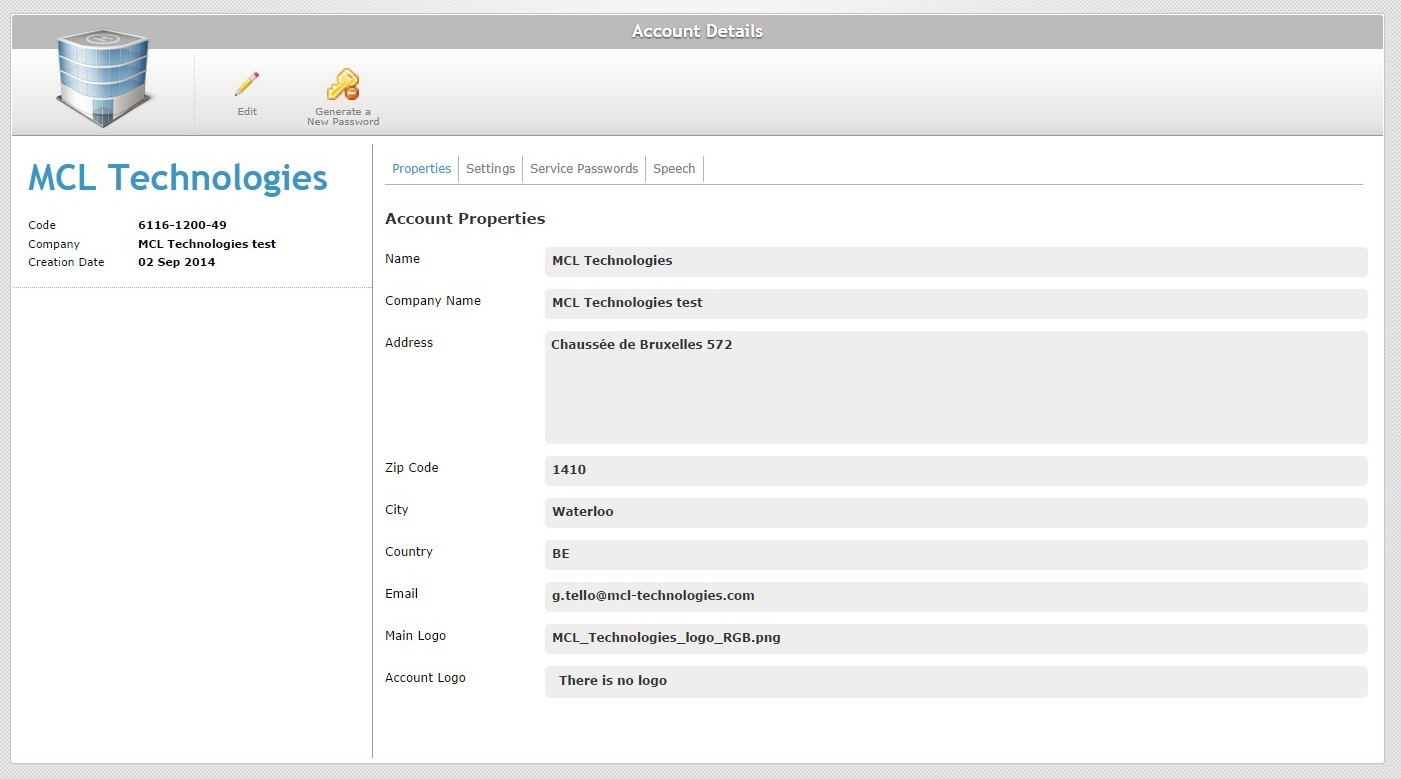
The "Account Details" page provides information on the account. Account details are editable.
![]() The editing of the page's tabs requires setting the page to "edit mode". The exception is the "Service Passwords" tab.
The editing of the page's tabs requires setting the page to "edit mode". The exception is the "Service Passwords" tab.
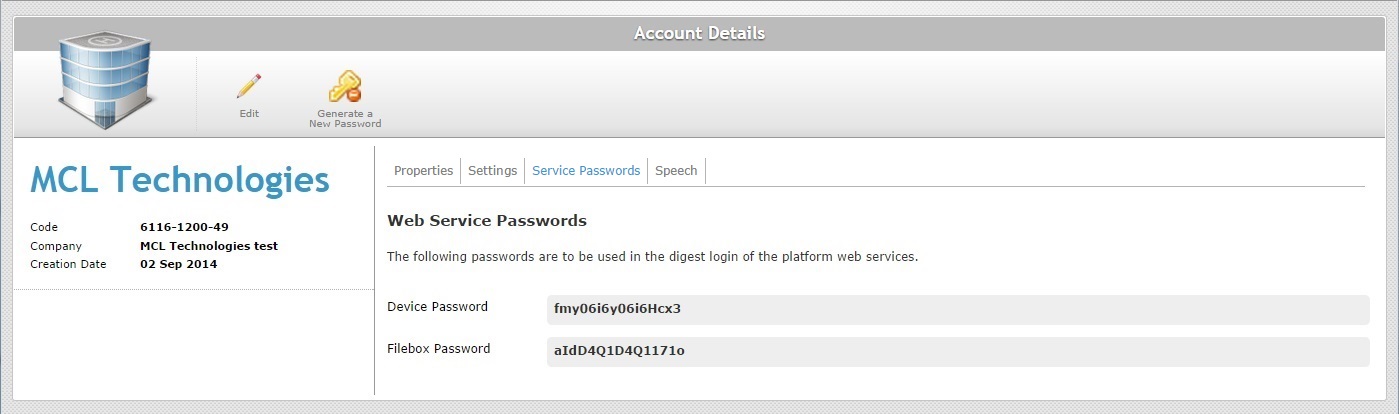
The "Device Password" cannot be edited but you can generate a new "Filebox Password" with the use of the ![]() button which is only available if the page is on "view mode".
button which is only available if the page is on "view mode".
See To Generate a new Filebox Password.
Step-by-step
1. To access the "Account Details" page, click ![]() (in the Control Panel). The resulting page includes 4 tabs ("Properties", "Settings", "Service Passwords" and "Speech" - this last tab is only available if the account is associated to a subscription with Speech services). The "Properties" tab is open by default.
(in the Control Panel). The resulting page includes 4 tabs ("Properties", "Settings", "Service Passwords" and "Speech" - this last tab is only available if the account is associated to a subscription with Speech services). The "Properties" tab is open by default.
2. To edit the page, click ![]() . The page is, now, in "edit mode".
. The page is, now, in "edit mode".
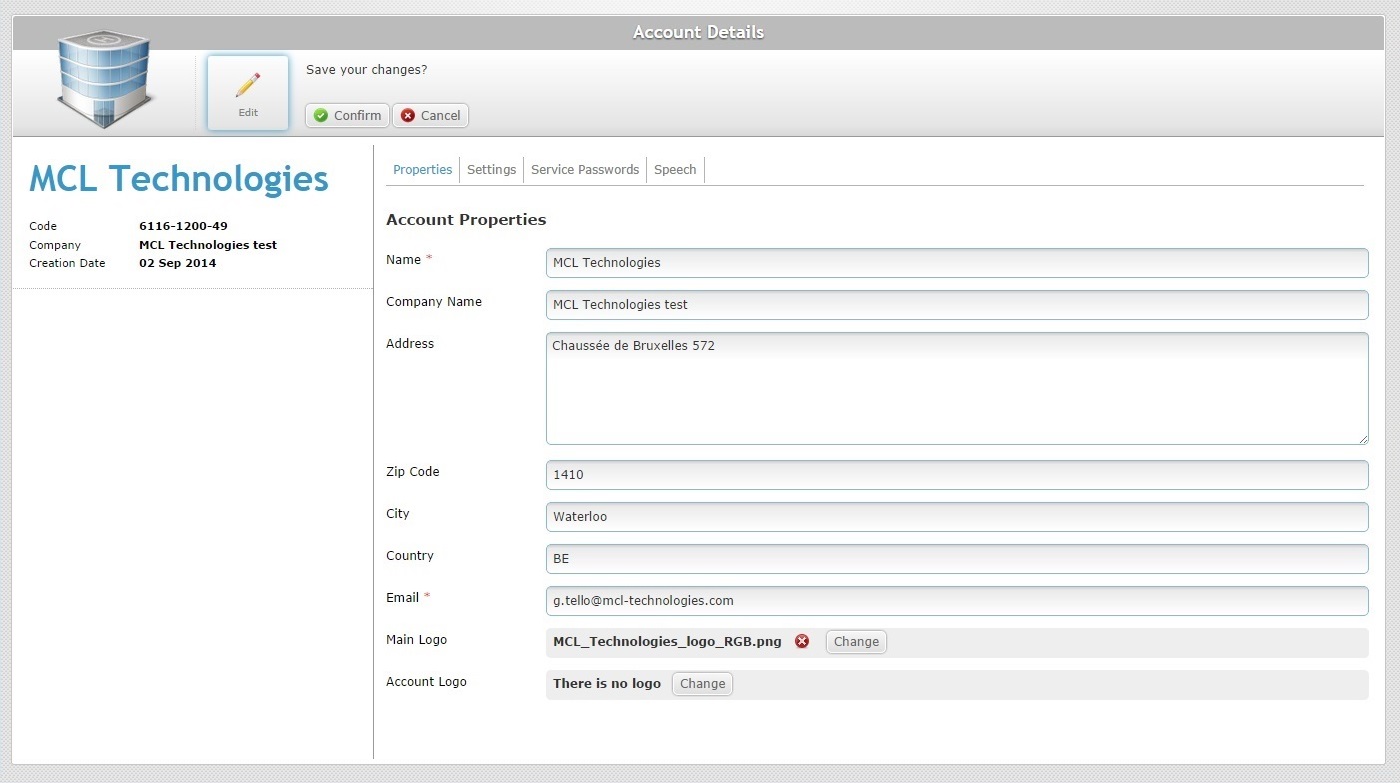
3. If required, edit the active fields of the "Properties" tab. The options marked with an asterisk are mandatory, meaning, they must always contain information.
Name* |
Maintain or edit the account name.
The underscore and/or dash characters are allowed. Start the account's name with an alphabetic character. |
Company Name |
Maintain or edit the company name associated to the MCL-Mobility Platform's account.
The underscore and/or dash characters are allowed. Start the account's name with an alphabetic character. |
Address |
Maintain or edit the address elements: Address Zip Code City Country |
Email * |
Maintain or edit the account owner's email. |
Main Logo |
Maintain, change or remove the company's logo. See To Add/Edit a Main or Account Logo below. |
Account Logo |
Maintain the default logo or substitute it. See To Add/Edit a Main or Account Logo below. |
To Add/Edit a Main or Account Logo
Step-by-step
To add a main or account logo, make sure that the page is set to "edit mode".
a. Click ![]() .
.
![]()
![]()
b. Click the corresponding ![]() button to search for an image file.
button to search for an image file.
c. In the resulting OS File Explorer window, select the desired file image.
d. Click ![]() to upload the logo.
to upload the logo.
![]()
![]()
The added logos are, now, displayed in their corresponding location within every MCL-Mobility Platform page.
To remove an image file, click the corresponding ![]() .
.
To change a logo, click ![]() and repeat the image file selection (steps a, b, c and d).
and repeat the image file selection (steps a, b, c and d).
![]()
Before attempting to do any of these actions (adding, removing or changing a logo), do not forget to set the page to "edit mode" (step 1). It is the only way to access the necessary buttons.
4. Open the "Settings" tab, if it requires editing.
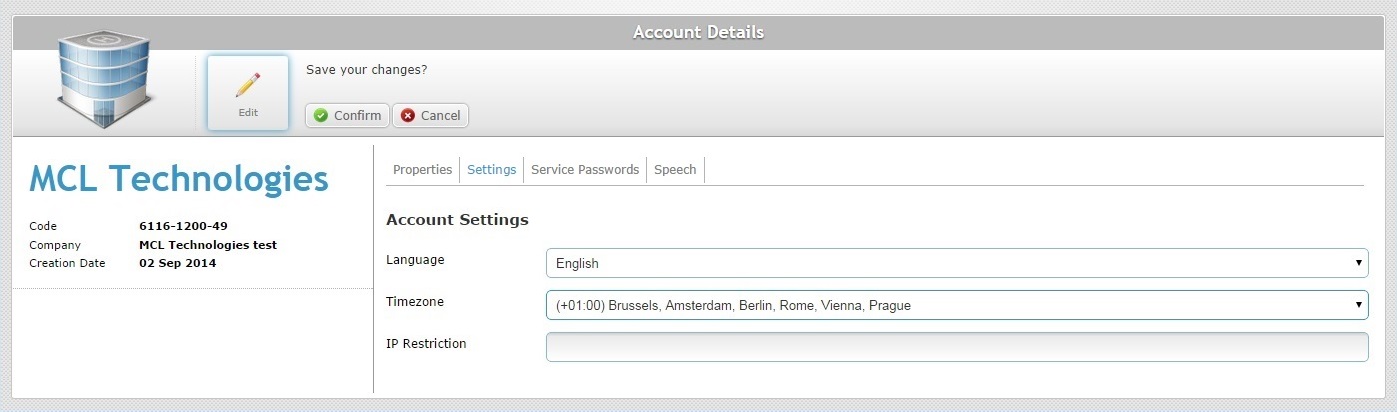
5. Edit the necessary fields:
Language |
Maintain or select another language for the account. |
Timezone |
Maintain or select a different time zone for the account.
|
IP Restriction |
Increase or decrease the authorized IP range that can be used by the Site Manager/Site User profiles to access the account's web interface. |
![]() When adding or removing IP addresses, remember that they must be separated by commas or CIDR notations (ex: 10.3.34.0/24).
When adding or removing IP addresses, remember that they must be separated by commas or CIDR notations (ex: 10.3.34.0/24).
The "Service Passwords" tab has no editable information. The "Device Password" cannot be modified but you can generate a different "Filebox Password". To do so, you must use the ![]() button instead of this step-by-step.
button instead of this step-by-step.
Since this button is located in the page's header, the "Account Details" page must be set to "view mode" NOT "edit mode" - follow the steps described in To Generate a New Filebox Password.
6. If you intend to edit speech parameters, open the "Speech" tab (only available if the account's subscription includes speech services).
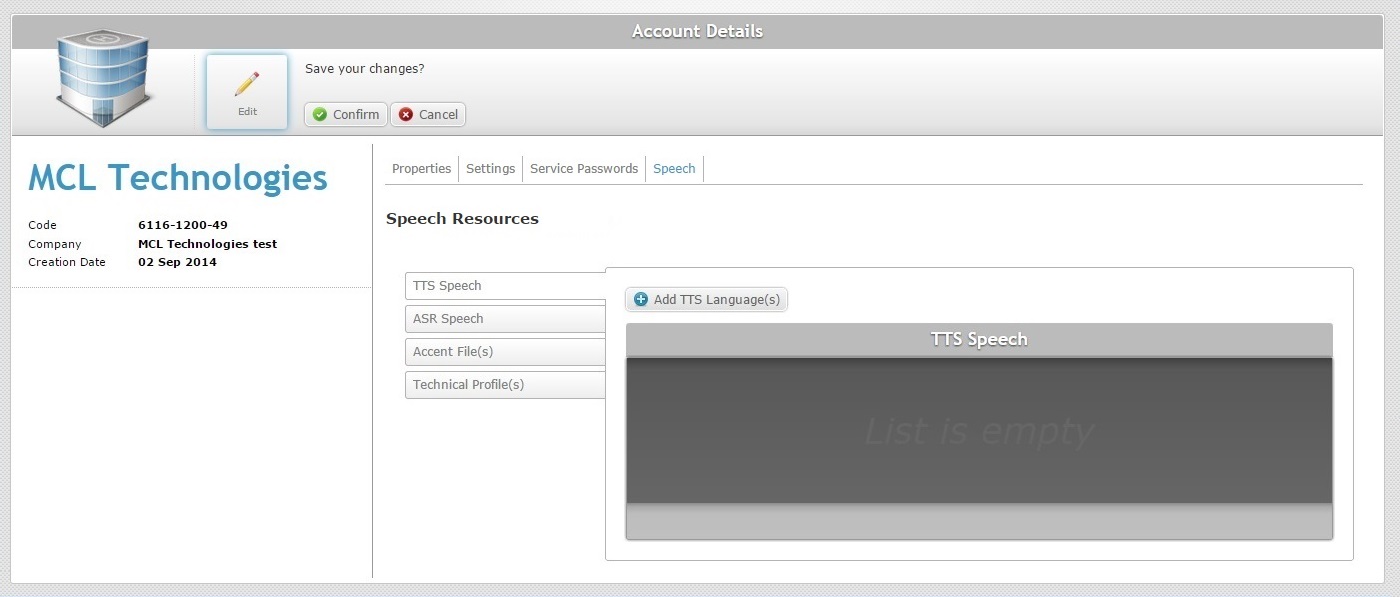
7. Open the side tab you want to edit.
To edit the "TTS Speech" side tab, proceed as follows:
a. Click the "TTS Speech" tab to open it.
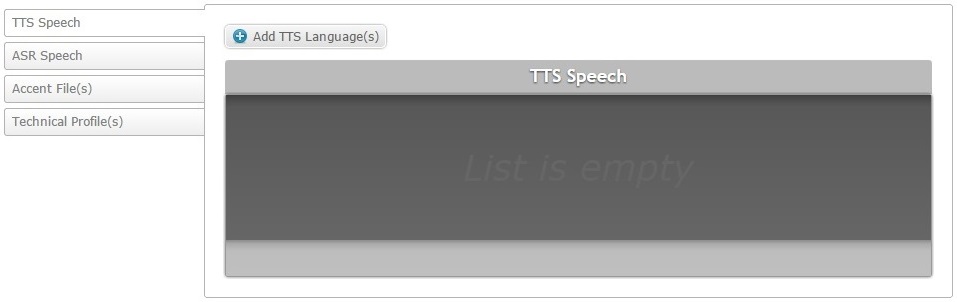
b. Click ![]() to open a window with a list of available TTS Languages (output languages).
to open a window with a list of available TTS Languages (output languages).
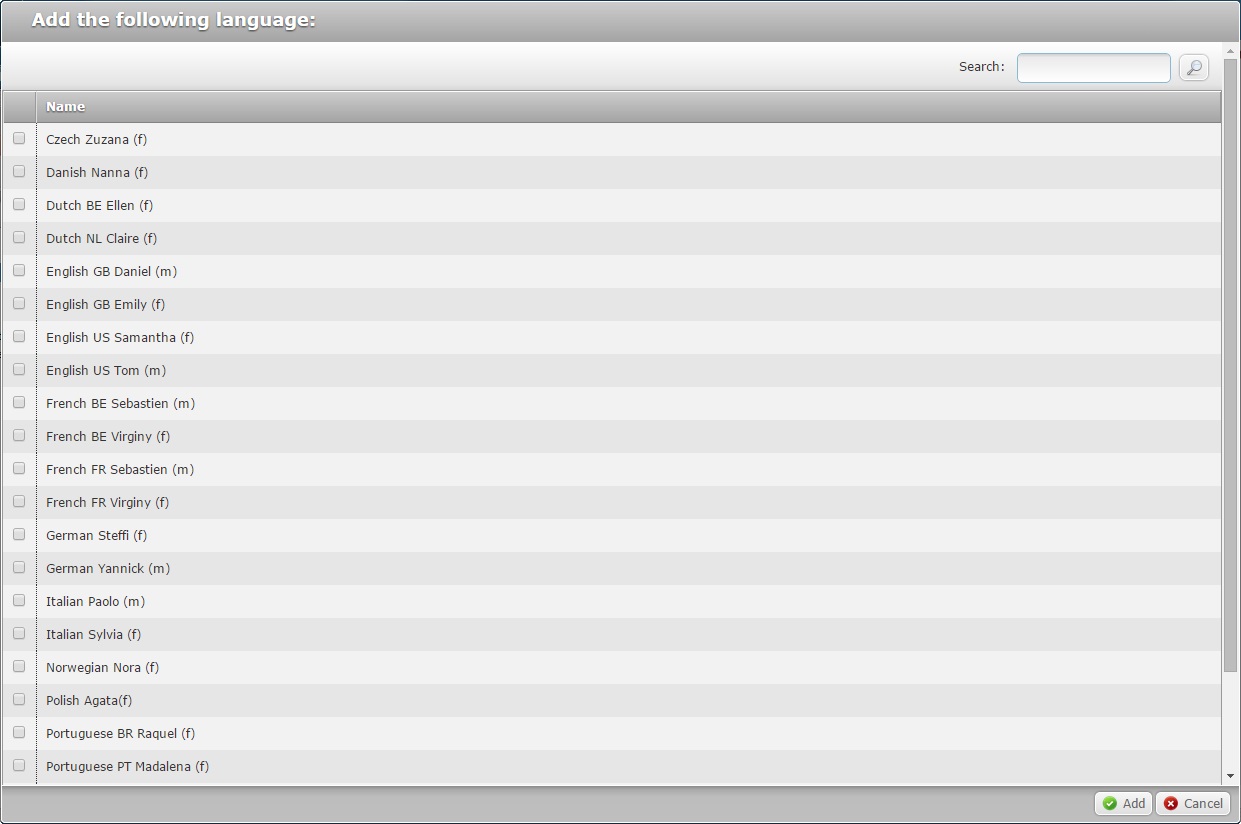
c. If required, use the ![]() to filter the displayed information.
to filter the displayed information.
d. Select the required language(s) by checking the corresponding ![]() .
.
e. Click ![]() to apply your choices.
to apply your choices.
The selected languages are displayed in the "TTS Speech" tab.
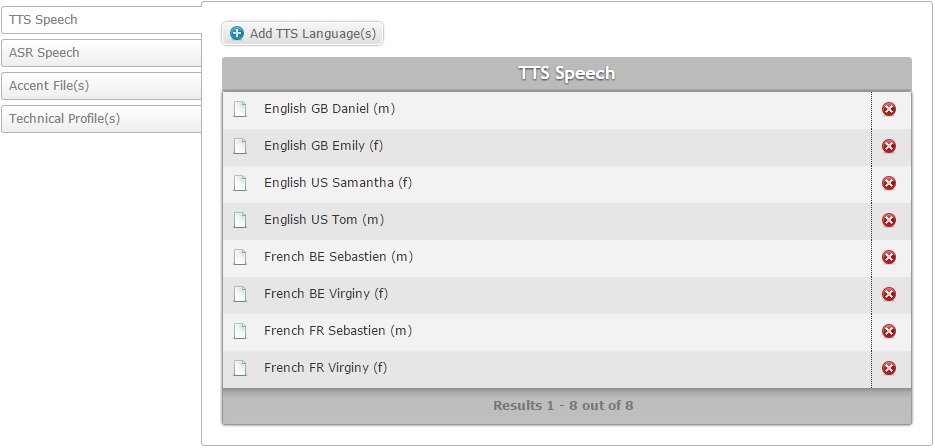
You can, at any moment, delete selected output languages. To do so, click the corresponding ![]() .
.
To edit the "ASR Speech" side tab, proceed as follows:
a. Click the "ASR Speech" tab to open it.
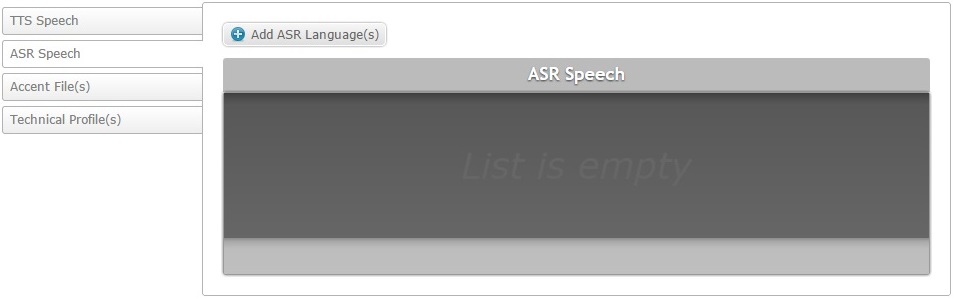
b. Click ![]() to open a window with a list of available ASR Languages (input languages).
to open a window with a list of available ASR Languages (input languages).
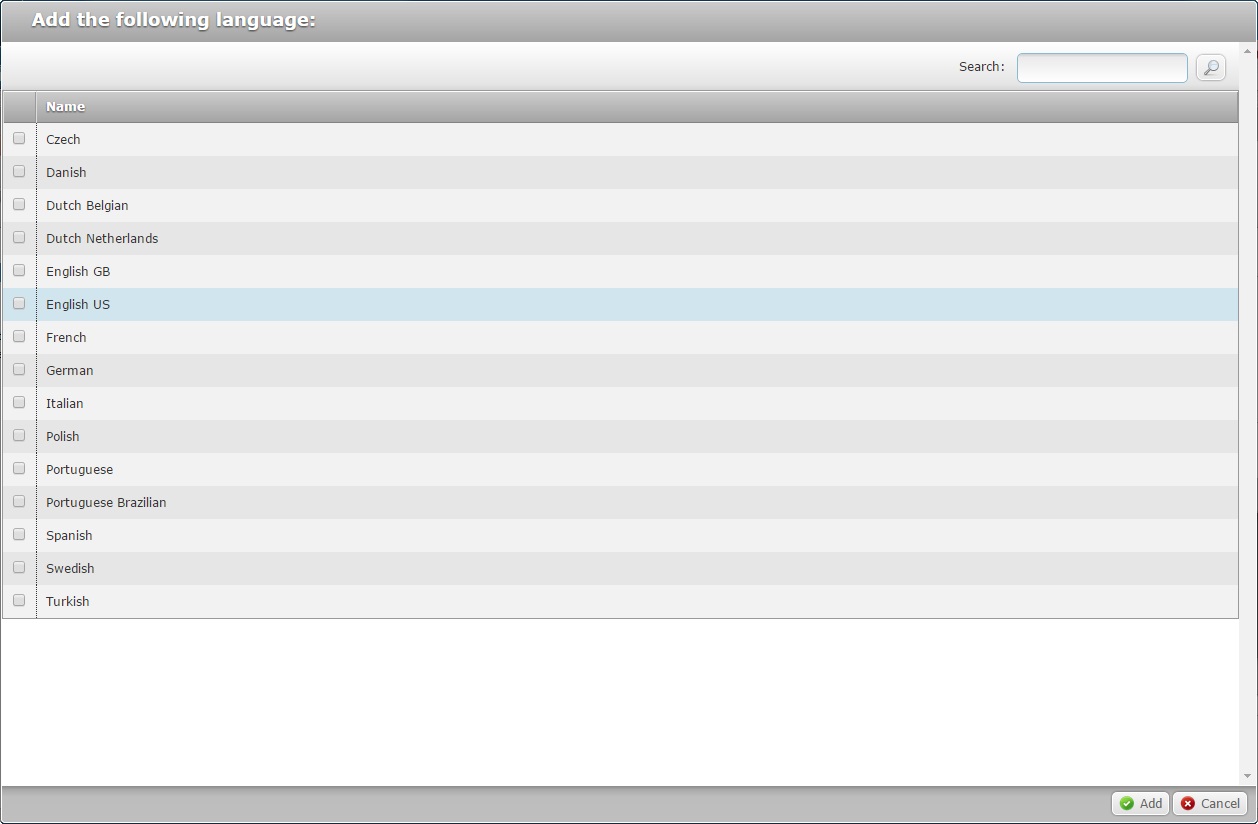
c. If required, use the ![]() to filter the displayed information.
to filter the displayed information.
d. Select the required language(s) by checking the corresponding ![]() .
.
e. Click ![]() to apply your choices.
to apply your choices.
The selected languages are displayed in the "ASR Speech" tab.
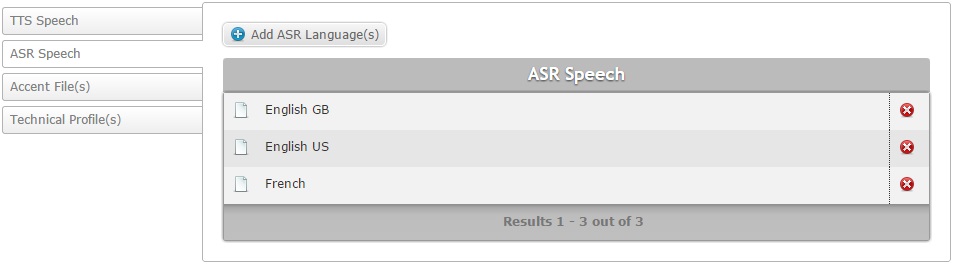
You can, at any moment, delete selected input languages. To do so, click the corresponding ![]() .
.
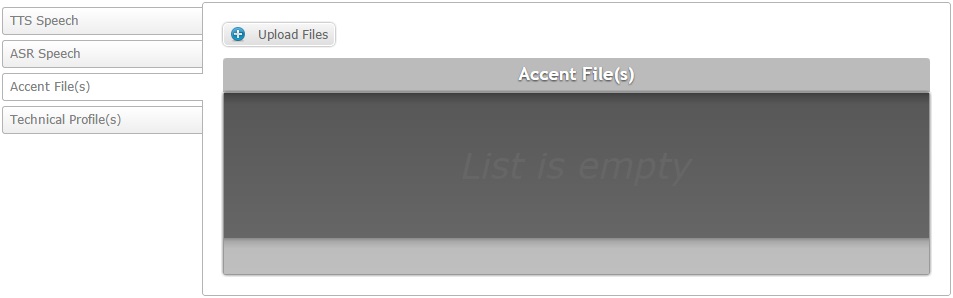
To edit the "Accent File(s)" side tab, proceed as follows:
a. Click the "Accent File(s)" side tab to open it.
b. Click ![]() to open an OS File Explorer window.
to open an OS File Explorer window.
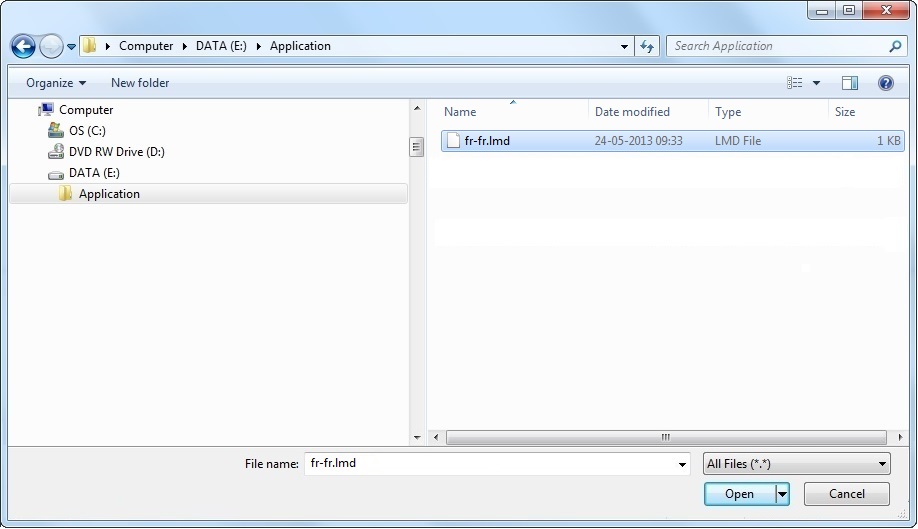
If, for some reason, you close the OS File Explorer window, you can reopen it with the use of the "Upload File" window (it opens at the same time as the OS File Explorer window, in the background). Click that window's ![]() button.
button.
c. Select the appropriate file (with an .lmd extension) and click ![]() .
.
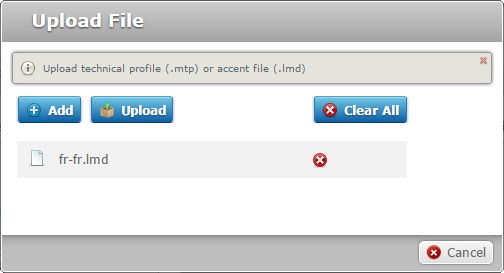
d. If you want to upload more .lmd files (accent files), click ![]() to reopen the OS File Explorer window and select another accent file (step c). Repeat this for every file you want to add.
to reopen the OS File Explorer window and select another accent file (step c). Repeat this for every file you want to add.
If necessary, you can delete added files. To delete one file, click the corresponding ![]() . To delete all added files, click
. To delete all added files, click ![]() .
.
e. Once you are done adding accent files for upload, click ![]() .
.
The selected files are displayed in the "Accent File(s)" tab.

You can, at any moment, delete uploaded accent files. To do so, click the corresponding ![]() .
.
To edit the "Technical Profile(s)" side tab, proceed as follows:
a. Click the "Technical Profiles(s)" side tab to open it.
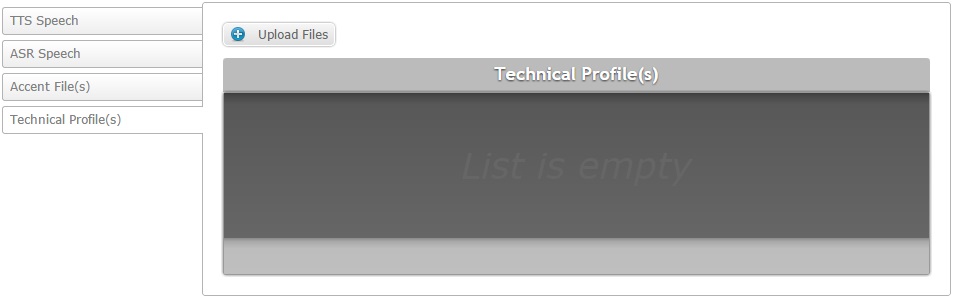
b. Click ![]() to open an OS File Explorer window.
to open an OS File Explorer window.
If, for some reason, you close the OS File Explorer window, you can reopen it with the use of the "Upload File" window (it opens at the same time as the OS File Explorer window, in the background). Click that window's ![]() button.
button.
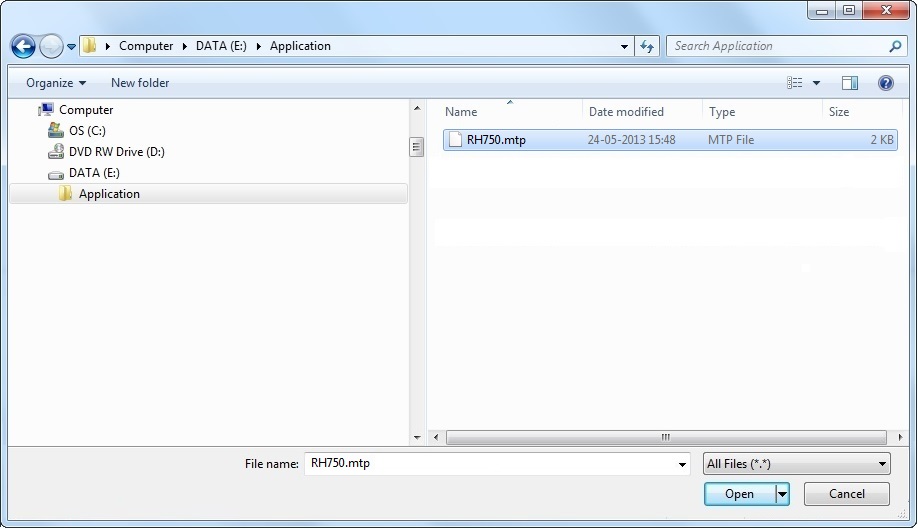
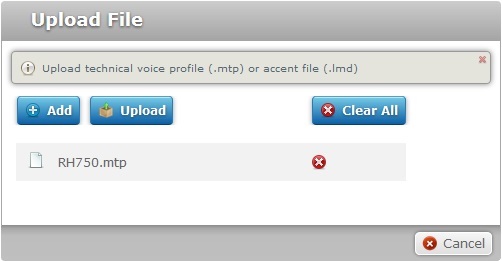
c. Select the appropriate file (with an .mtp extension) and click ![]() .
.
d. If you want to upload more .mtp files (technical profiles), click ![]() to reopen the OS File Explorer window and select another technical profile (step c). Repeat this for every profile you want to add.
to reopen the OS File Explorer window and select another technical profile (step c). Repeat this for every profile you want to add.
If necessary, you can delete added files. To delete one file, click the corresponding ![]() . To delete all added files, click
. To delete all added files, click ![]() .
.
e. Once you are done adding technical profiles for upload, click ![]() .
.
The selected files are displayed in the "Technical Profile(s)" tab.
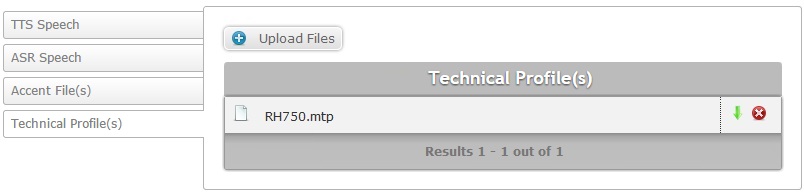
You can, at any moment, delete uploaded technical profiles. To do so, click the corresponding ![]() .
.
If required, you can download uploaded technical profiles. To do so, click the corresponding ![]() .
.
8. Once you have edited the required tabs/fields, click ![]() to save those modifications. The page will be back to "view mode".
to save those modifications. The page will be back to "view mode".
To Generate a New Filebox Password
Step-by-step
1. Click ![]() (on the Control Panel) to access the "Account Details" page. The page MUST be on "view mode".
(on the Control Panel) to access the "Account Details" page. The page MUST be on "view mode".
2. Click ![]() .
.
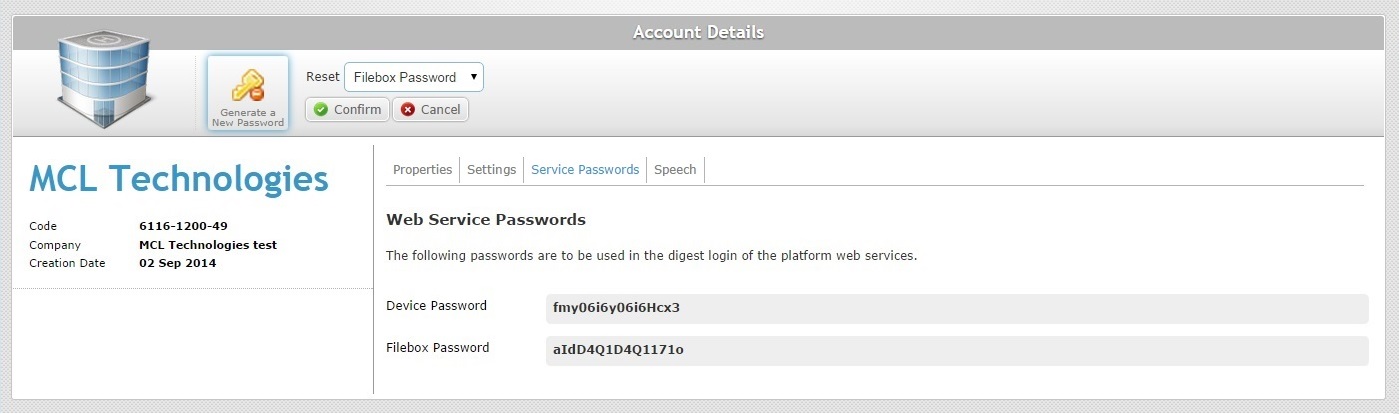
3. Click ![]() to generate a new password for the filebox service.
to generate a new password for the filebox service.
The new password is displayed in the "Service Passwords" tab, in the "Filebox Password" field.