|
Creating an Operator Group |
  
|
Creating an Operator Group
|
Creating an Operator Group |
|
Overview
At operator management level, creating Operator Groups must be the first task to perform. Although the site provides a "Default Operator Group", it is best to create new groups that reflect that particular site's organization (ex: "night shift"; "day shift"," warehouse crew", "Delivery crew").
You can create two types of operator groups:
Speech Operator Groups - groups with speech attributes that contain speech operators.
Non-Speech Operator Groups - groups without speech attributes that include non-speech operators.
Step-by-step
1. Click  (in the Control Panel section) and, in the resulting row below, select
  to open the "Operator Groups" page.
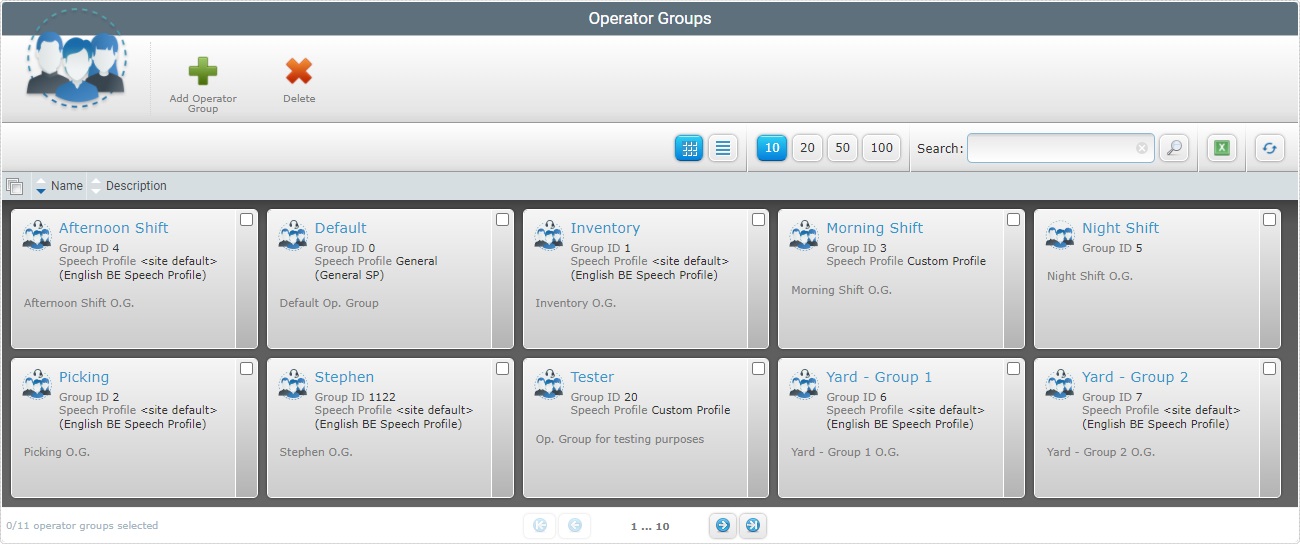
The site provides a default "Operator Group". Its name, "Default" can be changed in the "Operator Group Details" page. For more detailed information, see Editing Operator Group Details.
![]()
It is recommended that you create your own operator groups that should represent the site's internal organization.
2. Click ![]() to open the "New Operator Group" page.
to open the "New Operator Group" page.

3. The "New Operator Group" page automatically opens in edit mode, in the "Properties" tab. Fill in the mandatory fields (marked with an asterisk) and, if required, the remaining fields as well.
Name * |
Enter the name of the operator group (ex: day shift, night shift, Picking, etc.).
•Use alphabetic/numeric characters (a-z; A-Z; 0-9) •Underscore and/or dash characters are allowed •Always start the entity's name with an alphabetic character |
Group ID * |
Enter the operator group's identification number in the site. |
Default Language |
Select the language to be used by the operators included in the group from the drop-down list. |
Custom Field Label 1–>5 |
These field labels can be customized (their designation can be modified according to the information they are supposed to retrieve). Enter the requested information. This customization will only affect the operators included in this operator group. |
Description |
If relevant, enter information regarding this particular operator group. |
4. Go to the "Access Rights" tab.
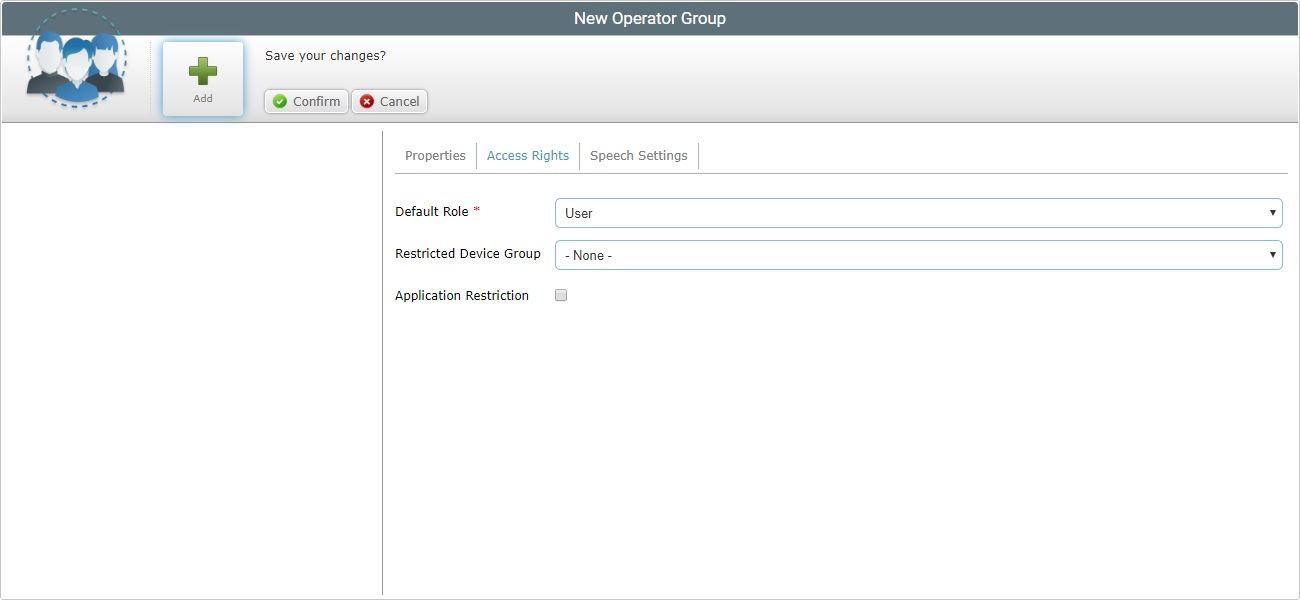
5. Fill in the mandatory field (marked with an asterisk) and, if required, the remaining fields as well.
Default Role * |
Select a role in the application(s) for the operator group from the drop-down list. |
Restricted Devices |
As an option, limit the operator group to only work with a particular device group. Select a device group from the drop-down list or maintain "-None-", meaning, without device restriction. |
Application Restriction |
Check this option if you want to limit the operator group's access to only certain selected applications. See Detail of Application Restriction. This restriction will be managed via the MCL Operator Login application installed in the device. When an operator belonging to this operator group logs in to this device, he/she will only access the allowed applications. See MCL Operator Login Application. |
6. Go to the "Speech Settings" tab.
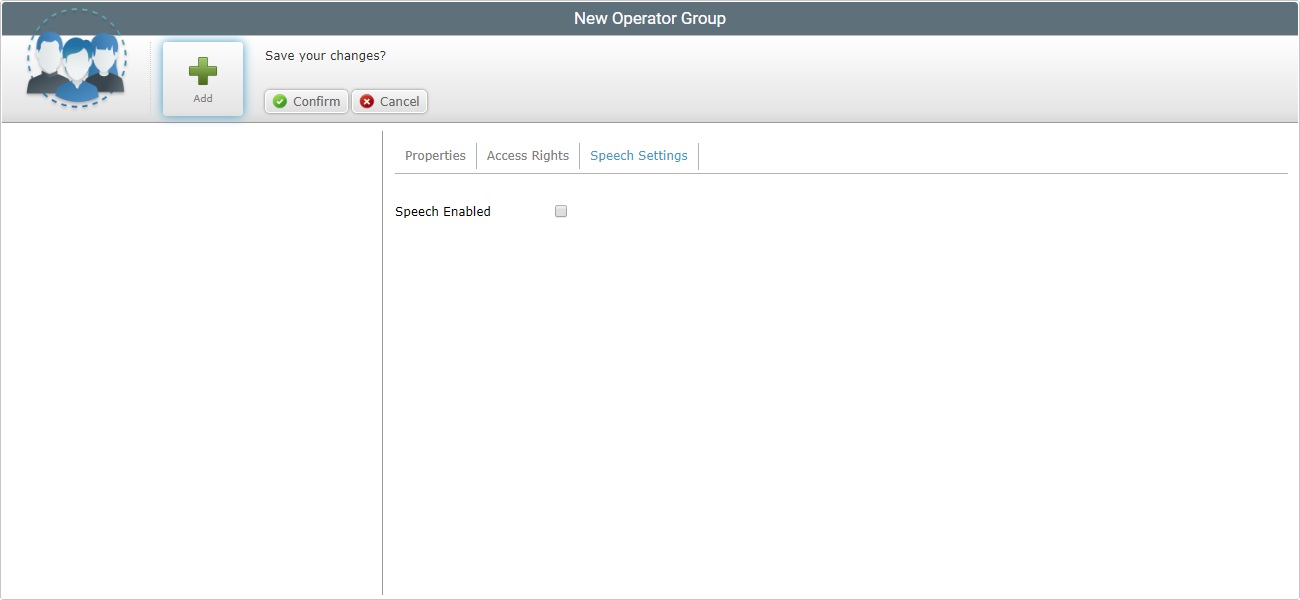
7. If you want this operator group to be a speech operator group, check the "Speech Enabled" option. This activates another speech related option - "Speech Profile".
If the new group is to be a non-speech operator group, continue to step 9.
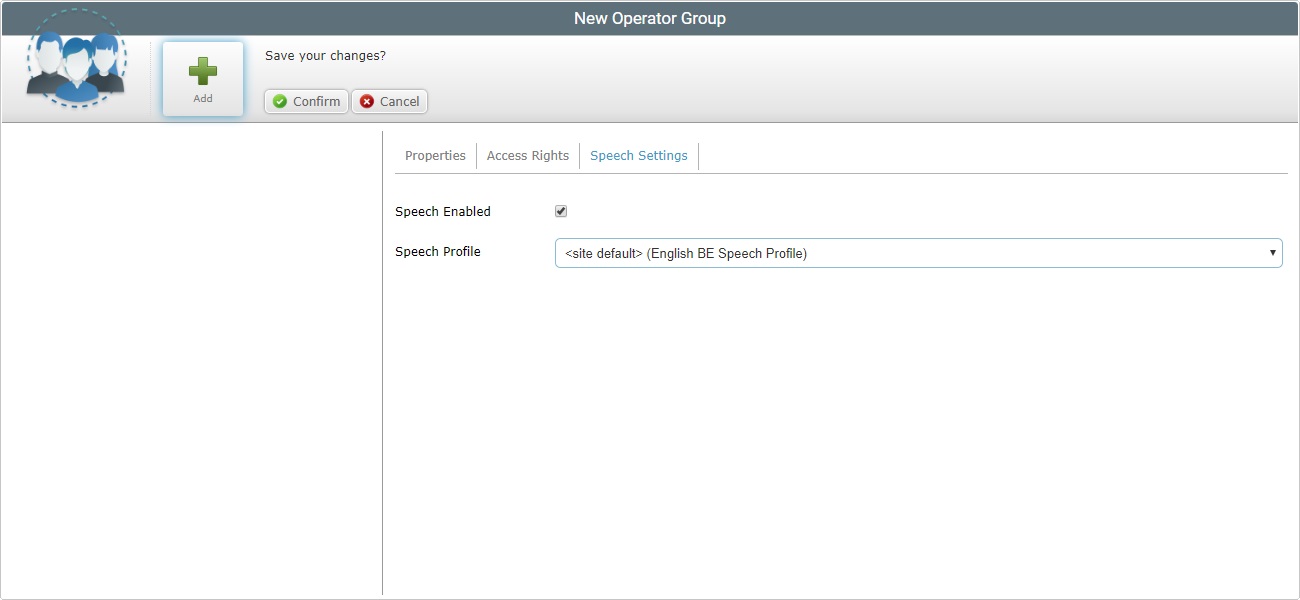
8. Select the appropriate speech profile.
![]()
The selected speech profile will be adopted by the operators that will be included in the current operator group.
9. Click ![]() to complete the creation of an operator group.
to complete the creation of an operator group.