Working with Library |
  
|
Working with Library |
|
Overview
In MCL-Designer V4, a Library refers to a folder with the specific purpose of storing data files, programs, routines, global procedures, screens and global events that have been or will be used in MCL-Designer V4 projects. In other words, the library is the "source folder" for the import of data files, programs, routines, global procedures, screens and global events as well as the "target folder" for their export.
Some of the exportable elements (programs, global procedures and/or global events) can be locked, meaning, they cannot be edited in the project they will be imported into. This is performed during the export into Library.
The library is included in two MCL-Designer's procedures:
•Exporting elements from a project into Library. See Export to Library.
•Importing elements from Library into a project. See Import from Library.
To Open the "Library Manager" window
Use one of the following to access the "Library Manager" window.
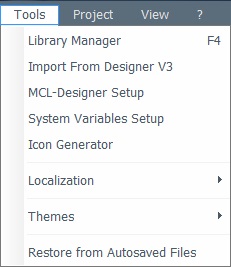
A. Go to the "Menu Bar", click "Tools" and, in the resulting menu, select "Library Manager".
B. Click <F4>.
C. Use the "Import ..." option whenever available in a right-click menu.
"Library Manager" window View
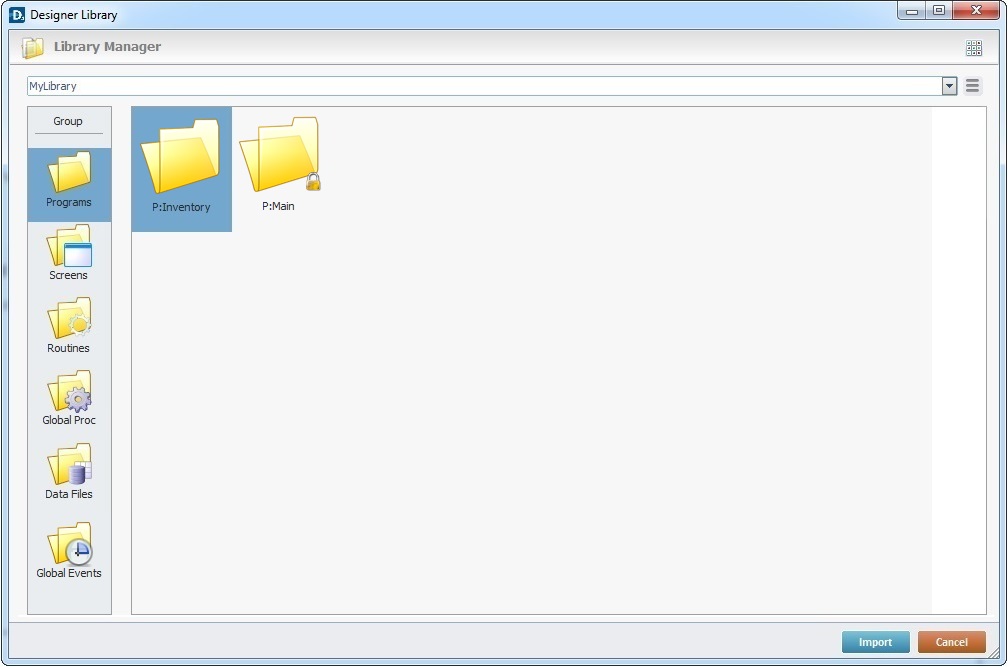
If required, click ![]() to have a "Large Icon" view.
to have a "Large Icon" view.
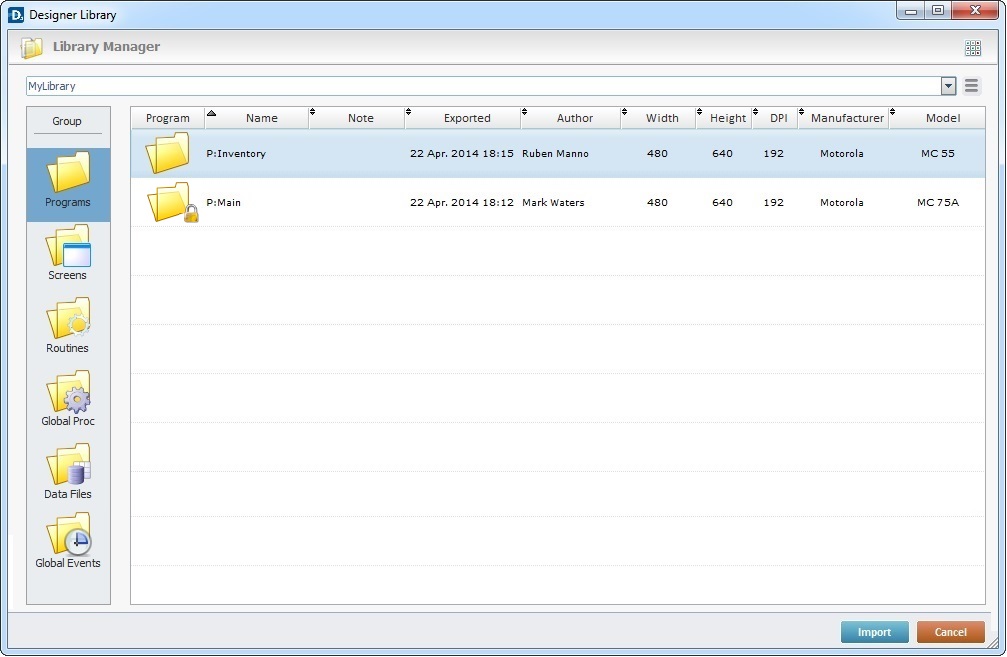
Default Library Manager view |
Library Manager view when clicking |
|
|
To select the appropriate element to be imported (a program, screen, routine, global procedure or data file) into a project, it is important to have information regarding each element contained in the Library. The default "Library Manager" view displays the following information:
1st column |
The column title takes the name of the selected element type and displays the corresponding icon. |
Name column |
Displays the element's name. |
Note column |
Displays any notes associated to the element. |
Exported column |
Displays the date of the element's addition to the library. |
Author column |
Displays the element's author. |
Width column |
Displays the screen width of the element's target device. |
Height column |
Displays the screen height of the element's target device. |
DPI column |
Displays the screen resolution of the element's target device. |
Manufacturer column |
Displays the element's target device manufacturer. |
Model column |
Displays the element's target device model. |
![]()
Unless there is a previous export (of elements such as programs, routines, global procedures, screens, data files and/or global events) into the defined "Library", the "Library Manager's " window will have nothing to display/provide for import.
![]()
The "Library Manager" window only displays the elements contained in the folder you have defined as "Library". If you have more than one library folder or directory and want to use them, click ![]() to define another library. See To define a Library.
to define another library. See To define a Library.
![]()
The "Library" elements that were "locked" during export and, therefore, can no longer be edited, are identified with a ![]() (ex: "P:Main"). This icon is displayed in the "Library Manager" window and in the tree view of the destination
(ex: "P:Main"). This icon is displayed in the "Library Manager" window and in the tree view of the destination
To Order the Library Manager Elements
In the default view, clicking ![]() (located on the upper left corner of each column) allows you to organize the information by ascending (
(located on the upper left corner of each column) allows you to organize the information by ascending (![]() ) or descending (
) or descending (![]() ) order, according to the content of each column.
) order, according to the content of each column.
To Change the Display of Library Manager Columns
Step-by-step
1. Right-click the column's name area (in the default view).
![]()
2. Mouse hover the ![]() button to access a list with all the columns contained in the "Library Manager".
button to access a list with all the columns contained in the "Library Manager".
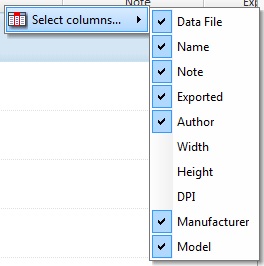
3. Check/uncheck the columns, depending on the columns you want displayed.
The view changes immediately, according to what you have checked/unchecked.
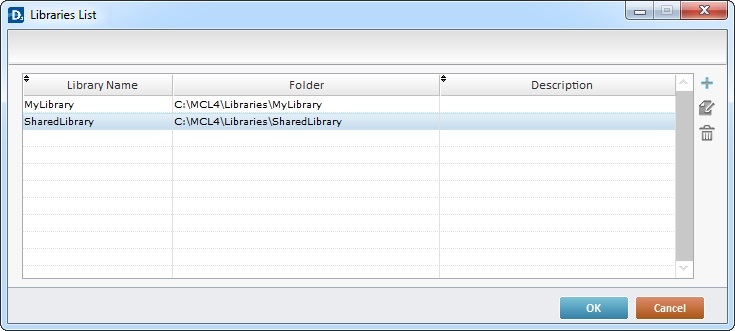
MCL-Designer V4 provides a default library folder named "MyLibrary" but you can rename it or define another folder, in another directory, to operate in the same way. See To Change Library.
Step-by-step
1. Click ![]() (button located on the "Library Manager" and "Export to Library" windows) to open the following window:
(button located on the "Library Manager" and "Export to Library" windows) to open the following window:
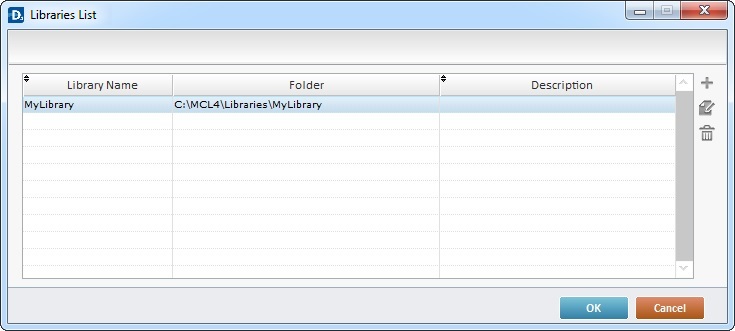
2. Either maintain the default option (continue to step 9) OR click ![]() to create a new library (proceed to step 3).
to create a new library (proceed to step 3).
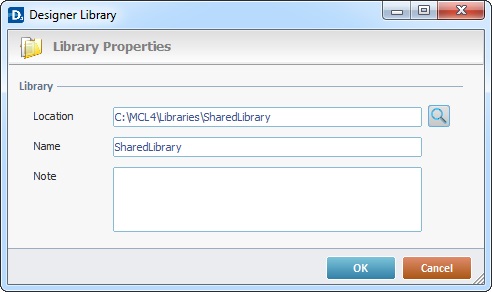
3. Click ![]() to open a "Library Properties" window:
to open a "Library Properties" window:
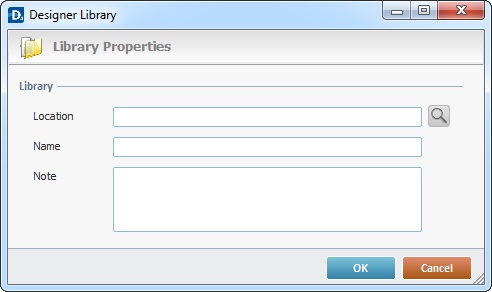
4. Click ![]() to browse for one.
to browse for one.
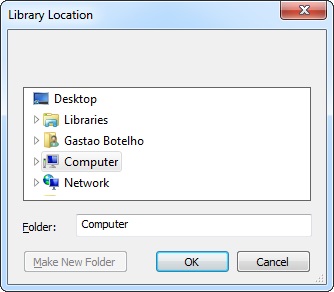
5. If required, create a new folder by clicking "Make New Folder".
6. Click ![]() to conclude the new library location and return to the "Library Properties" window.
to conclude the new library location and return to the "Library Properties" window.
7. In the "Name" option, maintain the suggestion (the location's folder name)or enter a new name for the new library.
8. If required, enter information in the "Note" box.
9. Click ![]() in the "Library Properties" window to conclude OR
in the "Library Properties" window to conclude OR ![]() to abort the operation.
to abort the operation.
Step-by-step
1. Click ![]() (located on the "Library Manager" and "Export to Library" windows) to open the following window:
(located on the "Library Manager" and "Export to Library" windows) to open the following window:
2. Select the library you want to edit from the displayed list.
3. Click ![]() (to the right of the table).
(to the right of the table).
4. Make the necessary changes.
5. Click ![]() to apply the changes and conclude the operation.
to apply the changes and conclude the operation.
To Delete a Library
Step-by-step
1. Click ![]() (located on the "Library Manager" and "Export to Library" windows) to open a list of existing libraries.
(located on the "Library Manager" and "Export to Library" windows) to open a list of existing libraries.
2. Select the library you want to delete.
3. Click ![]() .
.
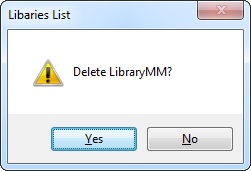
4. Click ![]() to confirm the delete operation.
to confirm the delete operation.