|
Global Procedures |
  
|
Global Procedures
|
Global Procedures |
|
Overview
A Global Procedure is usually created to perform a recurring action. Basically, it is considered a standard program that can be reused in other projects.
This procedure does not use global variables to prevent conflicts with global variables being used in a program.
To exchange data between the program that called this procedure and the global procedure, it is mandatory to define "input" and "output" parameters.
It is possible to reuse global procedures via an export/import. The global procedure is exported into the Library (a shared folder that stores exportable elements such as data files, programs, global procedures, screens, etc.) - see To Export a Global Procedure to Library. Afterward, it becomes available for future import into another MCL-Designer V4 project that requires its use (see To Import a Global Procedure from Library).
|
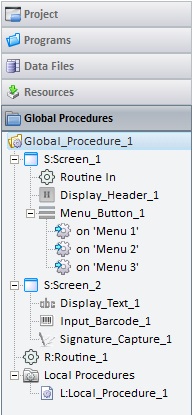
This illustration displays the structure of a Global Procedure as is displayed in the tree view. It contains screens, routines, objects and a local procedure. |
To Add a Global Procedure to a Project
Step-by-step
1. To add a global procedure to a project, open the “Global Procedures” module, right-click and select the “Add Global Procedure” option.
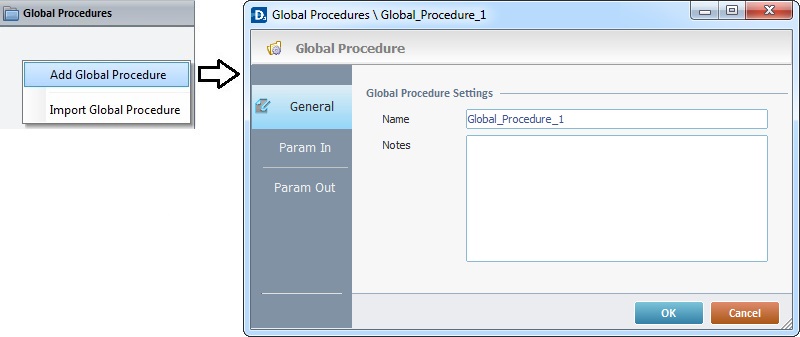
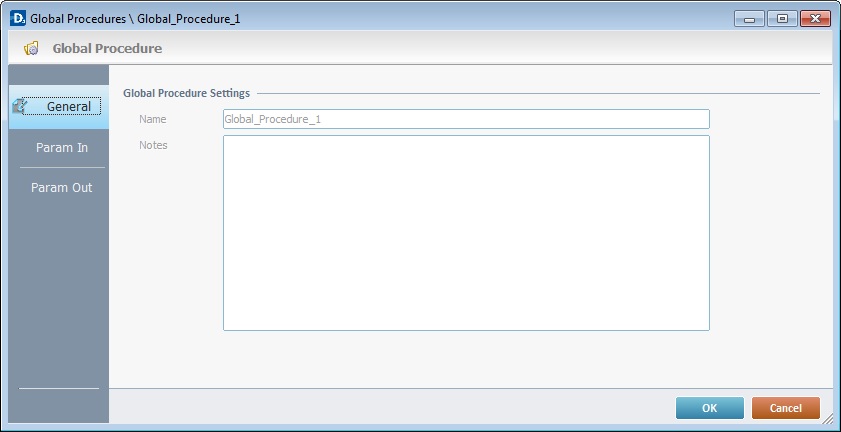
2. This opens a "properties window".
In the "General" tab, enter a name for the global procedure. This name is displayed in the tree view.
Optionally, notes can be added to the global procedure.
3. Go to the "Param In" tab.
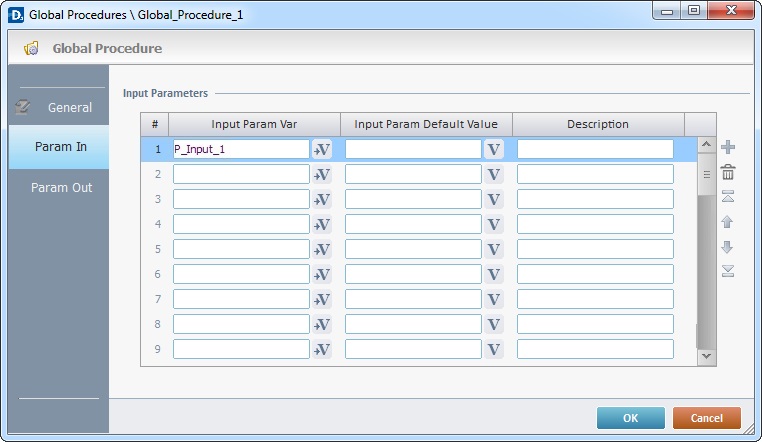
4. Define the input parameters for the global procedure, with the use of variables. See Working with the Variables Processes Group.
"Input Param Var"
In this column, define the program variable(s) (used in the global procedure) that will receive data from the outside.
"Input Param Default Value"
In the second column, as an option, define the value(s)/variable(s) that will be assigned to the "Input Param Var", in case the calling process does not map them.
"Description"
As an option, use the third column to add any relevant notes.
5. Go to the "Param Out" tab.
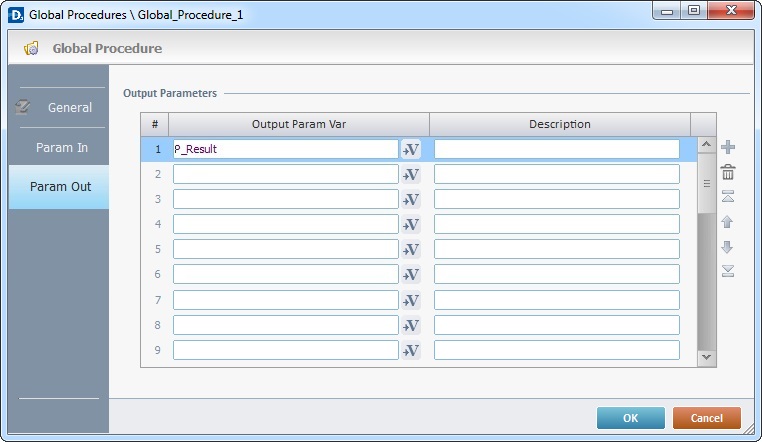
6. Define the output parameters for the global procedure, with the use of variables. See Working with the Variables Processes Group.
"Output Param Var"
In this column, define the program variable(s) (used in the global procedure) that will return data to the outside.
"Description"
As an option, use the second column to add any relevant notes.
Use the editing icons to the right of the table to move the rows up and down and to delete or add more rows.
7. Click ![]() to apply these choices.
to apply these choices.
Step-by-step
1. In the tree view, right-click the screen that will include the global procedure.
2. Right-click the open screen and select the "Screen properties" option OR double-click it to open the screen properties.
3. Go to the "Actions" tab.
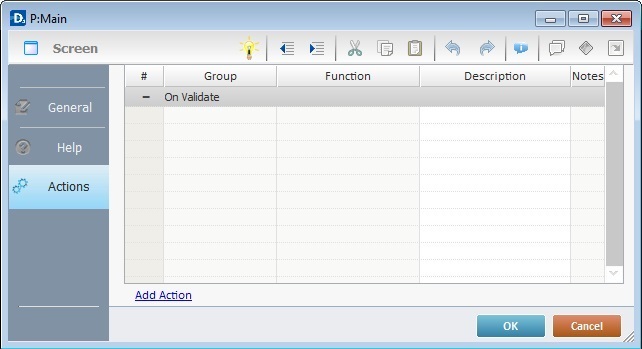
4. Add the "Call Global Proc" process to the screen (see Working with Call Global Proc Process). The process properties window opens:

5. In the "Procedure" box, select the global procedure to be called.
6. The "Param In" automatically displays the parameters established in the "Properties" window ("Param In" tab) of the called global procedure.
Define the value(s)/variable(s) to be sent to the global procedure (mapping of the global procedure's input parameters) in the second column of the upper table.
7. The "Param Out" also displays the parameters established in the "Properties" window ("Param Out" tab) of the called global procedure.
Define the value(s) that return(s) data from the global procedure (mapping of the global procedure's output parameters), in the second column of the lower table.
![]() Clicking
Clicking ![]() (located on the window's upper right corner), enables the creation of a global procedure.
(located on the window's upper right corner), enables the creation of a global procedure.
8. Click ![]() to apply these choices and return to the "Actions" tab that initiated this operation.
to apply these choices and return to the "Actions" tab that initiated this operation.
9. In the "Actions" tab, add a "Go to <Exit>" Branch Process. This will return the execution flow to the line, immediately below, that, initially, called for the global procedure.
10. Click ![]() in the "Actions" tab to finish this operation.
in the "Actions" tab to finish this operation.
To Add Components to a Global Procedure
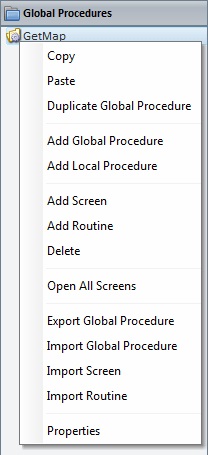
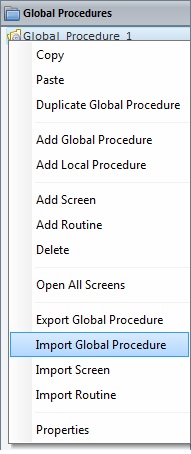
In the "Global Procedures" module, right-click the global procedure (represented in the tree view) and select the component to add.
|
Copy |
Copies the selected global procedure. Use "Paste" to complete the operation. This option is only available after the "Copy" option is used. |
Paste |
Pastes the previously copied global procedure. This option is only visible after a "copy" operation takes place. |
|
Duplicate Global Procedure |
Duplicates the selected global procedure with all its features, objects and processes. If the selected global procedure is a "locked" global procedure (not editable), this option is NOT applicable. |
|
Add Global Procedure |
Adds another global procedure to the "Global Procedure" module. |
|
Add Local Procedure |
Adds a local procedure to the selected global procedure. See Local Procedures. If the selected global procedure is a "locked" global procedure (not editable), this option is NOT applicable. |
|
Add Screen |
Adds a new screen to the selected global procedure. See Creating and Editing a Screen. If the selected global procedure is a "locked" global procedure (not editable), this option is NOT applicable. |
|
Add Routine |
Adds a routine to the selected global procedure. See Working with Routines. If the selected global procedure is a "locked" global procedure (not editable), this option is NOT applicable. |
|
Delete |
Deletes the selected global procedure. |
|
Open All Screens |
Opens the screens included in the selected global procedure. If the selected global procedure is a "locked" global procedure (not editable), this option is NOT applicable. |
|
Export Global Procedure |
Exports the selected global procedure to "Library". See To Export a Global Procedure to Library. If the selected global procedure is a "locked" global procedure (not editable), this option is NOT applicable. "Locked" elements are not exportable. |
|
Import Global Procedure |
Imports a global procedure from "Library". See To Import a Global Procedure from Library. |
|
Import Screen |
Imports a screen from "Library". See To Import a Screen from Library. If the target global procedure is "locked" (not editable), this option is NOT applicable. |
|
Import Routine |
Imports of a routine from "Library". See To Import a Routine from Library. If the target global procedure is "locked" (not editable), this option is NOT applicable. |
|
Properties |
Opens the global procedure's "properties" window.
|
![]()
Some of the right-click menu options are not applicable if the global procedure in question is a previously imported global procedure that is "locked" (an Export option - see To Export a Global Procedure to Library below). A "locked" global procedure is not editable so, certain operations (related to a global procedure's duplication, the adding or importing of screens/local procedures/routines or opening all the included screens) are NOT executable.
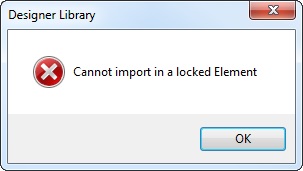
If you right-click a "locked" global procedure (identified with a ![]() ) and select options that relate to its edition, you get one of the following messages:
) and select options that relate to its edition, you get one of the following messages:
|
|
To Export a Global Procedure to Library
Step-by-step
1. Open the "Global Procedures" module.
2. Right-click the global procedure you want to export.
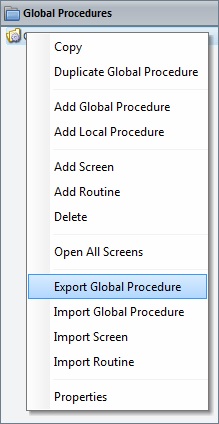
3. In the resulting menu, select "Export Global Procedure" to open the "Export to Library" window.
![]()
If required, select a different source library or rename it by clicking ![]() . See To define a Library.
. See To define a Library.
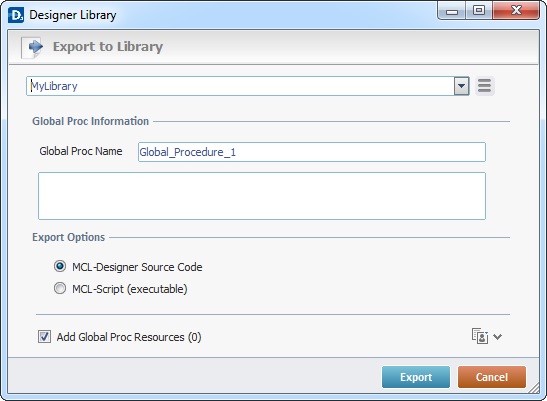
4. Fill in the following options:
Global Proc Information |
|
Global Proc Name |
Maintain or enter a new name. |
Text Box |
If required, add notes regarding the global procedure being exported. |
Export Options |
|
MCL-Designer Source Code |
Check this option if you want the settings/content of the global procedure being exported to be available for editing once it is imported into another MCL-Designer V4 project. |
MCL-Script (executable) |
Check this option if you want to lock the settings/content of the global procedure being exported (ex: name, input parameters, output parameters). This means that when the global procedure is imported into another project, it will not be editable. This affects its display in the destination project - only the name will be visible, the original components (routines, screens, local procedures) will not be available in the tree view and the corresponding properties window will not be editable. |
Add Global Proc Resources(x) |
If the global procedure contains resources, check this option to ensure they are included in the export. These resources can refer to image files, sound files, text files, language files containing the exportable element's localization tags, etc. |
![]()
It is possible to append project resources to the global procedure's export, even though they are not included in the global procedure.
a. To view all project resources, click ![]() .
.
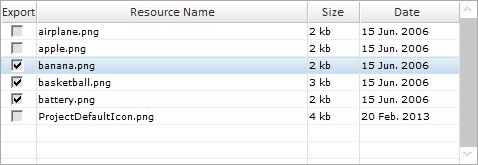
b. Check the project resources you want to include in the export. (If you have checked the "Add Global Proc Resources" option, the corresponding resources will be selected when you expand the project's resource list.)
c. If you want, click ![]() to hide the resource list.
to hide the resource list.
5. Click ![]() to conclude the export.
to conclude the export.
The exported global procedure is available in the Library ("Global Proc" section) and ready to be imported into another project.
![]()
You can use a drag-and-drop to initiate an export:
a. Open Library Manager (shortcut key - F4).
b. Drag the global procedure you want to export and drop it on the Library Manager window. This opens the corresponding "Export to Library" window.
c. Proceed as described in steps 4 and 5 ("To Export a Global Procedure to Library").
Example of Export Errors
•If the library already contains a global procedure with the same name, the following message box appears:
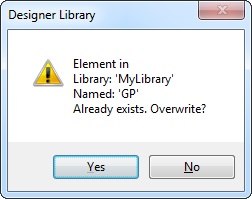
a. Click ![]() to overwrite.
to overwrite.
OR
b. Click ![]() to return to the " Export to Library" window, change the global procedure's name in the corresponding box and click
to return to the " Export to Library" window, change the global procedure's name in the corresponding box and click ![]() to conclude.
to conclude.
•If you intend to export a previously imported global procedure that is locked, the following message box appears:
a. Click ![]() to cancel the action and close the window. It is NOT possible to export a locked element that was included into the project through a previous import.
to cancel the action and close the window. It is NOT possible to export a locked element that was included into the project through a previous import.
To Import a Global Procedure from Library
Step-by-step
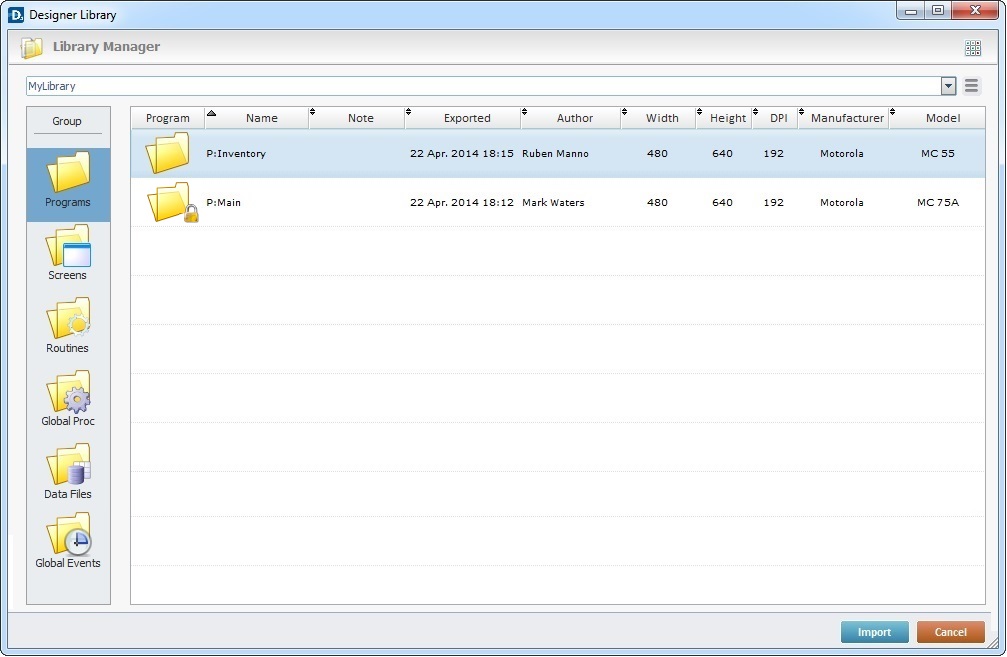
1. Use one of the following to access the "Library Manager" window:
A. Go to the "Menu Bar", click "Tools" and, in the resulting menu, select "Library Manager".
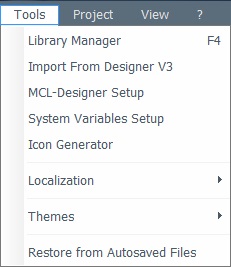
B. Click <F4>.
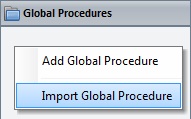
C. Right-click a global procedure or the empty space of the "Global Procedure" module and select "Import Global Procedure" from the drop-down list".
Right click a global procedure |
Right click the "Global Procedures" module |
|
|
Whichever the option chosen (A, B or C), it opens the "Library Manager" window.
![]()
If required, select a different source library or rename it by clicking ![]() . See To define a Library.
. See To define a Library.
If you used the A or B option, continue to step 2.
If you used option C, proceed to step 3.
2. Select the element type ("Global Procedures") you want to import in the "Group" section, to the left.
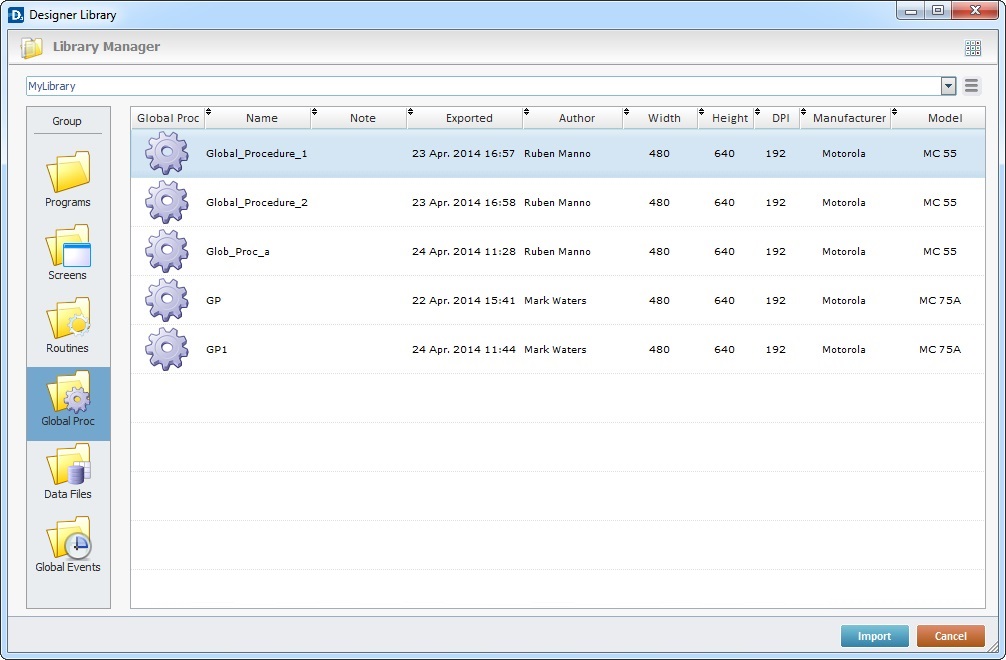
A list of available routines for import is displayed.
3. Use one of the following to access the "Import into Project" window and continue the import operation:
a. Double-click the global procedure you want to import.
b. Drag and drop the intended global procedure into the destination project's "Global Procedures" module.

c. Select the intended global procedure and click ![]() .
.
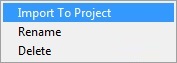
d. Right-click the selected global procedure and click the "Import to Project" option.
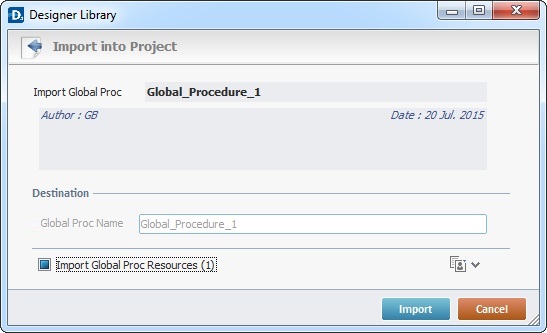
The corresponding "Import into Project" window opens.
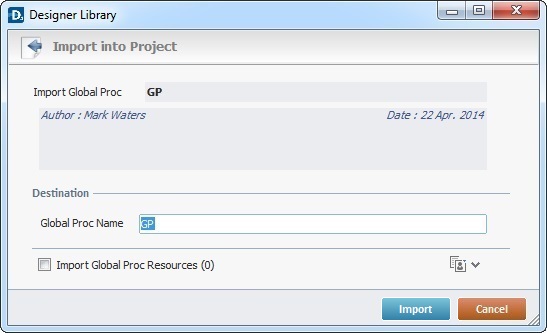
This window displays information that cannot be edited (regarding the global procedure being imported) and information you can edit (the "Destination" section).
![]() If the destination project contains a global procedure with the same name as the global procedure being imported, the name of the imported global procedure will automatically change to "..._X" ("X "refers to an incremental number).
If the destination project contains a global procedure with the same name as the global procedure being imported, the name of the imported global procedure will automatically change to "..._X" ("X "refers to an incremental number).
![]() If the global procedure being imported is "locked" (Export option that turned the selected element into a non-editable element - see To Export a Global Procedure to Library), you will not be able to edit its name. The option "Global Proc Name" will be inactive (displayed in gray).
If the global procedure being imported is "locked" (Export option that turned the selected element into a non-editable element - see To Export a Global Procedure to Library), you will not be able to edit its name. The option "Global Proc Name" will be inactive (displayed in gray).
You can either opt to change the name of the global procedure that already exists in the destination project (if it is not locked) and keep both global procedures OR proceed with the import, in which case, the newly imported global procedure will overwrite the one that already exists in the destination project.
4. Maintain or enter new information, as required by the project.
Import Global Proc |
Displays the global procedure's name. NOT editable. |
Displays the global procedure's author and when the global procedure was added to the library. It can also include notes entered during the export into Library operation. NOT editable. |
|
Destination |
|
Global Proc Name |
Maintain the suggestion or enter a new name for the imported global procedure. Make sure the target project does not have a global procedure with the same name or the imported global procedure will overwrite the one that already exists in the destination project. |
Import Global Proc Resources (x) |
If the global procedure contains resources, check this option to ensure they are included in the import. Their destination is the target project's "Resources" module. |
![]()
It is possible to attach project resources (appended during the global procedure's export into the "Library" - see To Export a Global Procedure to Library) to the global procedure's import, even though they are not included in the global procedure.
a. To view all project resources, click ![]() .
.
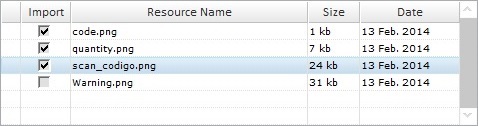
b. Check the project resources you want to include in the import. (If you have checked the "Import Global Proc Resources" option, the corresponding resources will be selected when you expand the project's resource list.)
c. If you want, click ![]() to hide the resource list.
to hide the resource list.
5. Click ![]() to conclude the global procedure import.
to conclude the global procedure import.
The newly imported global procedure is displayed in the "Global Procedures" module and ready to be used in the project.
![]() When the import includes language files (containing the imported element's localization tags), check the enabled languages of the destination project. If the imported language files relate to a language that is NOT enabled in the destination project, you have to define it as a project language in the project's Localization (a project properties tab). See Localization.
When the import includes language files (containing the imported element's localization tags), check the enabled languages of the destination project. If the imported language files relate to a language that is NOT enabled in the destination project, you have to define it as a project language in the project's Localization (a project properties tab). See Localization.
Ex: The import of a global procedure that includes a language file in "Dutch" into a project that only has "French" as an enabled language, will require that you add "Dutch" to the list of project enabled languages (in the Localization tab). If you skip this step, the imported "Dutch" language file will NOT be available for use.
Example of an Import Alert
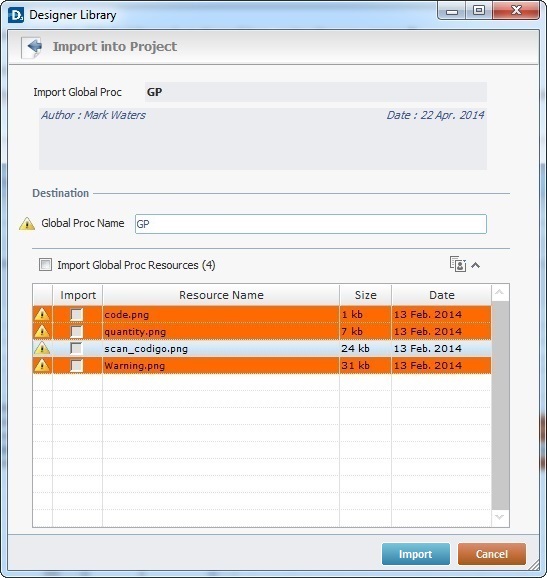
The ![]() marks an occurrence. This example includes two issues:
marks an occurrence. This example includes two issues:
•The current project contains a global procedure with the same name as the one to be imported.
•The destination project contains resources with the same name as the ones being imported.
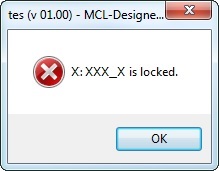
Example of an Import Error
If the name of the global procedure to import already exists in the current project, the following message box opens:
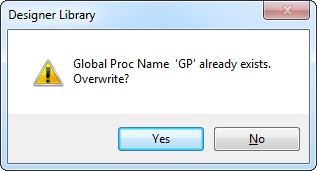
a. Click ![]() and replace the existing global procedure for the newly imported one.
and replace the existing global procedure for the newly imported one.
OR
b. Click ![]() to return to the " Import into Project" window, change the global procedure's name in the corresponding box and click
to return to the " Import into Project" window, change the global procedure's name in the corresponding box and click ![]() to conclude.
to conclude.