|
Adding a Counter |
  
|
Adding a Counter
|
Adding a Counter |
|
Overview
Counters can ONLY be added (and edited) at account level. However, they can be viewed and used by the account's sites.
When adding a counter to the account, consider the counter aliases (and the names of the included metrics) created in the MCL application(s) - they MUST match in terms of counter and metric name to ensure that the messages with metric values are fed to the MCL-Mobility Platform and available to the account's intended counter.
For instance, if the MCL application includes the counter alias "ItemsPicked" with the metrics "Requested", "Picked" and "Short", you must create a counter named "ItemsPicked" to have access to its metrics. You can choose to retrieve all the associated metrics (ex: "Requested", "Picked" and "Short") or just the ones you need, as long as you use the same metric name in the account's counter. Furthermore, you can also filter the selected metrics by time period or key (primary and/or secondary key).
Add a Counter
Step-by-step
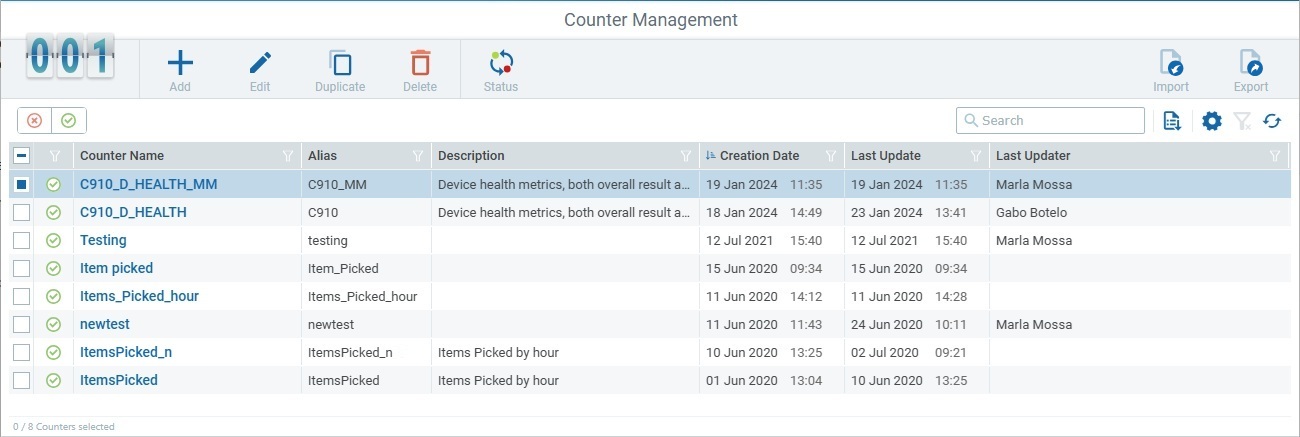
1. Access the "Counter Management page" (Admin Dashboard > Control Panel > Business Analytics module > Counters sub-module > Counter Management page).
2. Click ![]() and fill in the editable fields in the resulting page which opens in edit mode.
and fill in the editable fields in the resulting page which opens in edit mode.
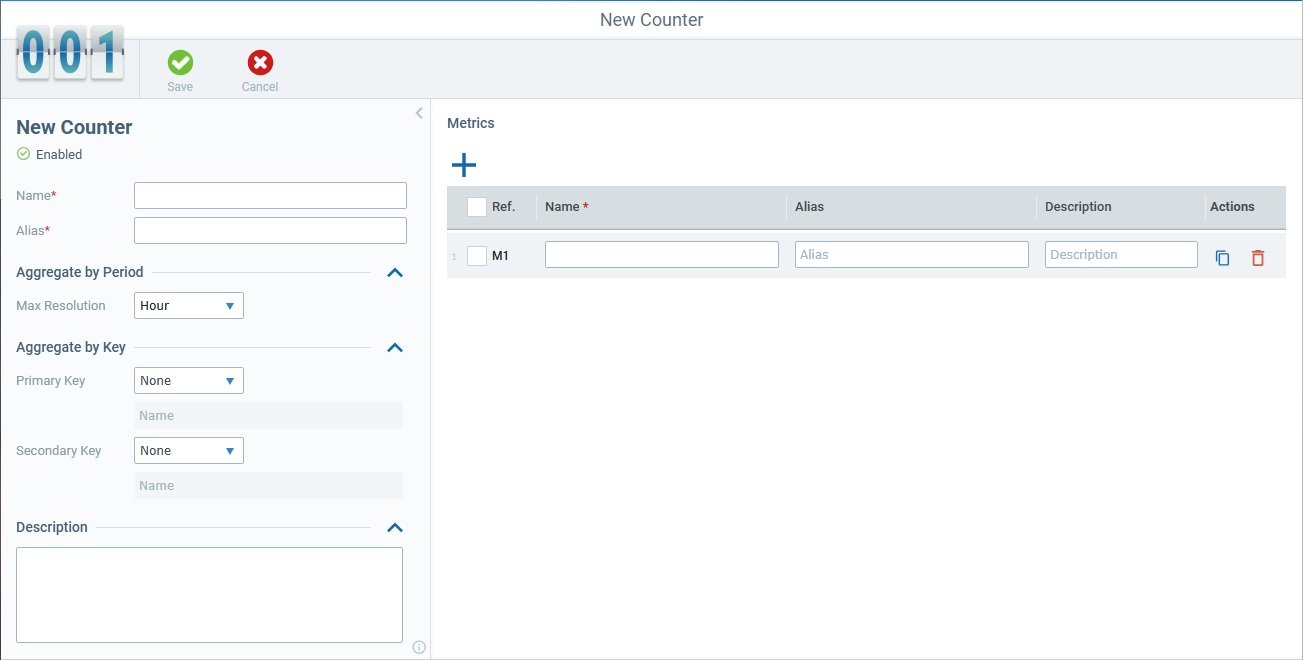
Add the necessary entries (each entry represents one metric) to feed the counter using the Fill in the associated metric options. |
|
Name* column |
Define the name of the metric to be added. |
Alias column |
Define the alias for the new metric.
|
Description column |
Enter relevant information about the corresponding metric. |
Follow Naming Best Practices when defining the name/alias of a metric to prevent future issues:
•Use alphanumeric characters (a-z; A-Z; 0-9); •Avoid special characters - the underscore and dash characters are allowed; •Avoid spaces; •Start a name/alias with an alphabetic character.
To perform a bulk Copy or Deletion, select the intended metrics and use the corresponding buttons that are activated above the table's header.
|
|
Name |
Define the new counter's name. |
Alias |
Define the new counter's alias.
The counter's alias MUST match the alias of the corresponding counter profile defined for the MCL application during development (in MCL-Designer). Refer to the MCL-Designer User Guide for more detailed information. |
Follow Naming Best Practices when defining the name/alias of a counter to avoid future issues:
•Use alphanumeric characters (a-z; A-Z; 0-9); •Avoid special characters - the underscore and dash characters are allowed; •Avoid spaces; •Start a name/alias with an alphabetic character. |
|
Aggregate by Period |
|
Max. Resolution |
Define a specific time frame to work as the maximum time period filter for the metrics you want the counter to aggregate. |
Aggregate by Key |
|
Metric data that is collected/sent by the MCL application can be further aggregated according to a counter’s primary and/or secondary key. These keys can be used by a dashboard’s widgets to filter the displayed counter data. For instance, in a Data Table widget that uses a counter as a data source, if that counter has a defined primary and/or a secondary key, you can assign a specific value to the key so that the information displayed by that Data Table is filtered accordingly. |
|
Primary Key |
If required, define a primary key for data aggregation/filtering. |
Secondary Key |
If required, define a secondary key for data aggregation/filtering. |
You are not required to have a primary key to use a secondary key UNLESS the MCL application sending the metric data includes a primary key. |
|
Description |
|
<description> |
If required, add relevant information about the counter. |