|
Duplicating a Counter |
  
|
Duplicating a Counter
|
Duplicating a Counter |
|
Overview
A Counter can be copied. Operationally speaking, it is another method to create a new counter with all the settings filled in.
This action can be performed in the "Counter Management" page and in the "Counter Details" page.
When duplicating a counter, the aggregated data is not copied.
Duplicate a Counter ("Counter Management" Page)
Step-by-step
1. Access the "Counter Management page" (Admin Dashboard > Control Panel > Business Analytics module > Counters sub-module > Counter Management page).
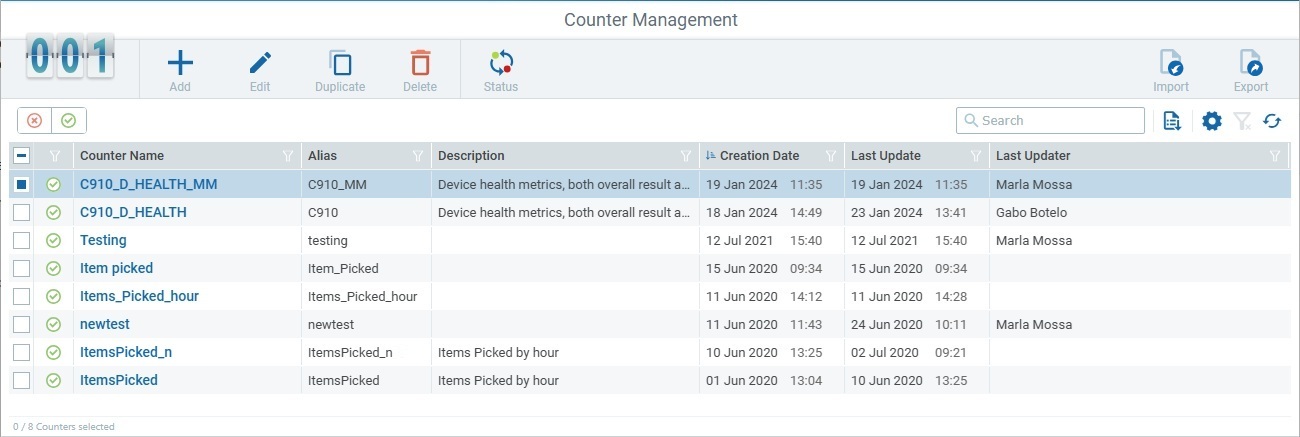
2. Select the counter to duplicate and click ![]() .
.
The page is already set to edit mode.
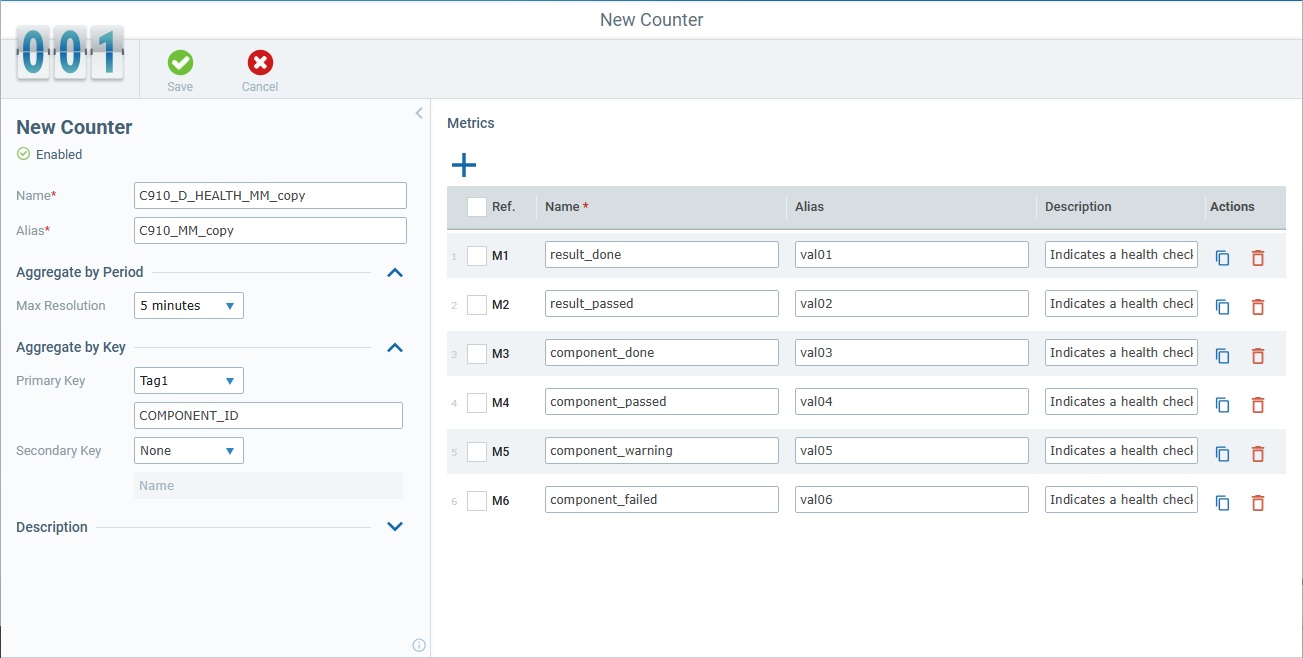
3. Edit the duplicate counter, as needed.
Duplicate a Counter ("Counter Details" Page)
Step-by-step
1. Access the intended counter's details page (Admin Dashboard > Control Panel > Business Analytics module > Counters sub-module > Counter Management page > < click counter > >Counter Details page).
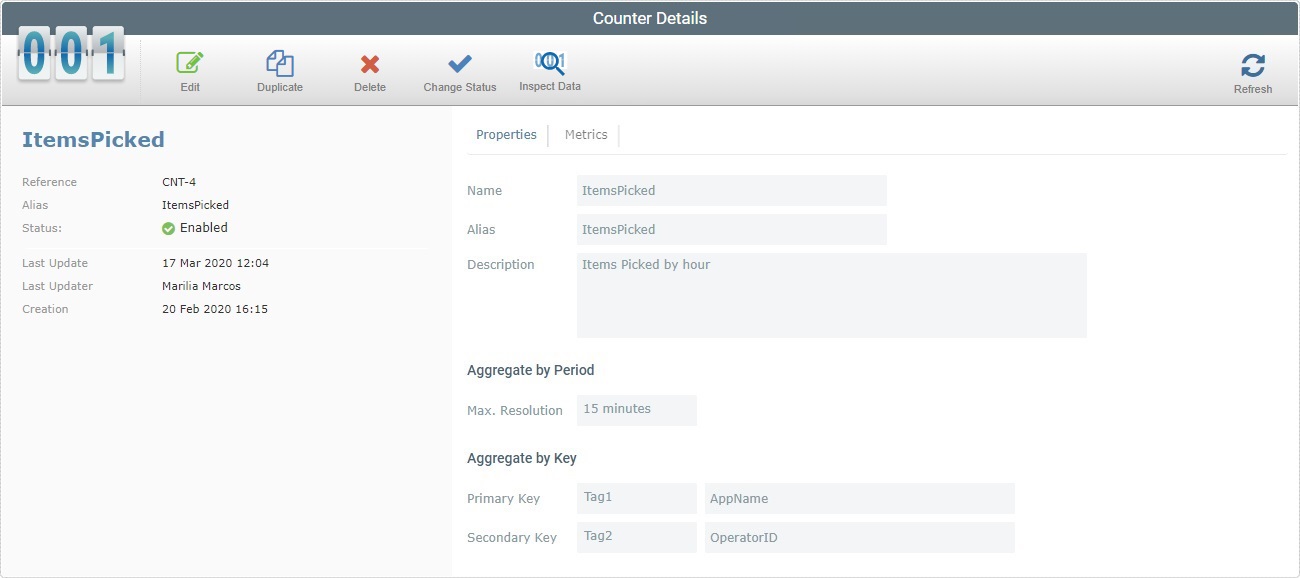
2. Click ![]() and fill in the editable options in the resulting page (already set to edit mode).
and fill in the editable options in the resulting page (already set to edit mode).
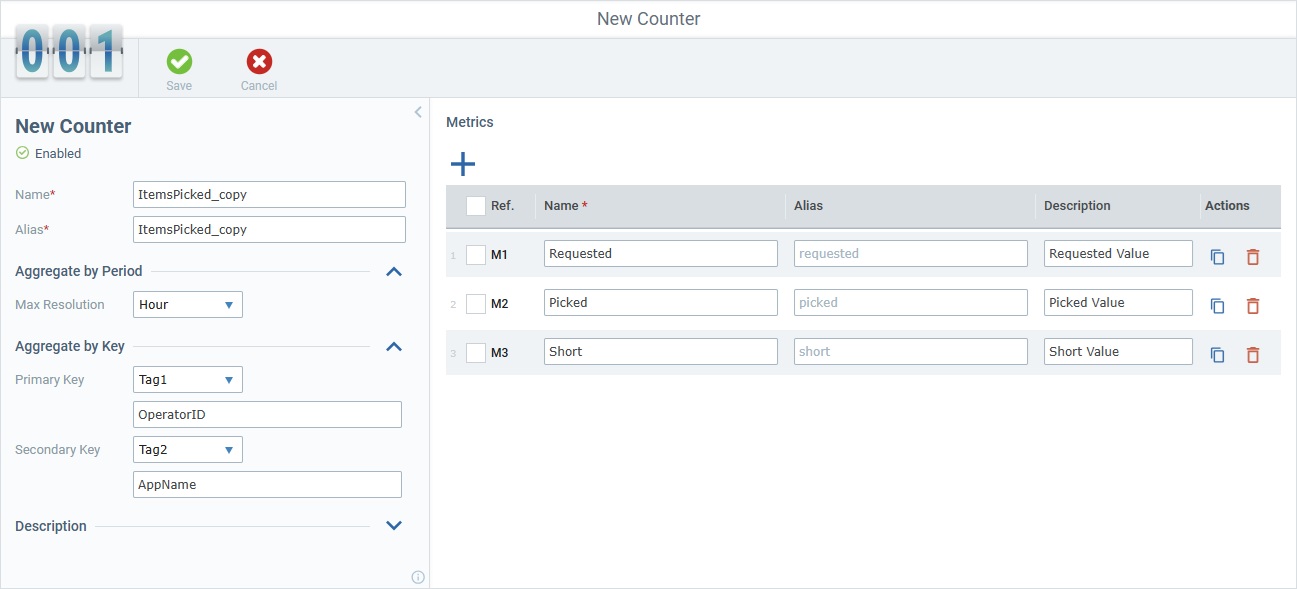
3. Edit the duplicate counter, as needed.
![]() When editing a counter, consider the following:
When editing a counter, consider the following:
•The alias of the counter MUST match the alias of the corresponding counter profile defined for the MCL application during development (in MCL-Designer).
•The alias of the counter's metrics MUST match the alias of the corresponding metrics included in the counter profile defined for the MCL application during development (in MCL-Designer).
•When editing the name/alias of a counter or metric, apply the Naming Best Practices:
▪Use alphanumeric characters;
▪Avoid special characters (except the underscore and dash characters);
▪Avoid including spaces;
▪Start the name/alias with an alphabetic character.
•Match the primary/secondary keys defined here with the keys defined in the counter profile for the MCL application.
•It is NOT necessary to have a primary key to define a secondary key UNLESS a primary key was defined in the counter profile (in MCL-Designer).
•Use the![]() and
and ![]() buttons associated to the selected metric to respectively copy and delete that metric. You can copy or delete metrics in bulk, if you select multiple metrics and use the corresponding button above the table header.
buttons associated to the selected metric to respectively copy and delete that metric. You can copy or delete metrics in bulk, if you select multiple metrics and use the corresponding button above the table header.