|
Adding a Report |
  
|
Adding a Report
|
Adding a Report |
|
Overview
Reports provide device-specific information (= software, hardware and system data) as well as details on MCL-Mobility Platform entities such as Sites, Device Groups, Operator Groups. The returned data is listed and displayed for viewing and analysis.
Reports are ONLY created at account level. Site users can view and export the provided data for analysis but NOT create their own reports.
Reports are always based on a report template - MCL-Mobility Platform provides a list of report templates that return specific information. The available report templates are categorized into "Masterdata" (= reports return static data related to the account's entities), "DeviceStatus" (reports return dynamic data that are constantly updated due to the generated business data/account activity) and "Operational" (reports provide dynamic operational data from "enabled" devices).
For more details on each report template, check our MCL Knowledge Base for the corresponding article - "Reporting Service's Report Templates". (You must register/log in to access this article.)
Choose the template that best suits your needs as a basis for your reports.
Each report template includes specific parameters which you can attribute values to so that the returned data can be filtered. For instance, if you choose the "Device List - System" report template as the basis for your report, you can set values for the parameters so that the report only returns device related info for the devices of a specific site or specific device group instead of returning data on all the account's devices.
Step-by-step
1. Access the "Report Management" page (Admin Dashboard > Control Panel > Business Analytics module > Reporting sub-module > Report Management page).
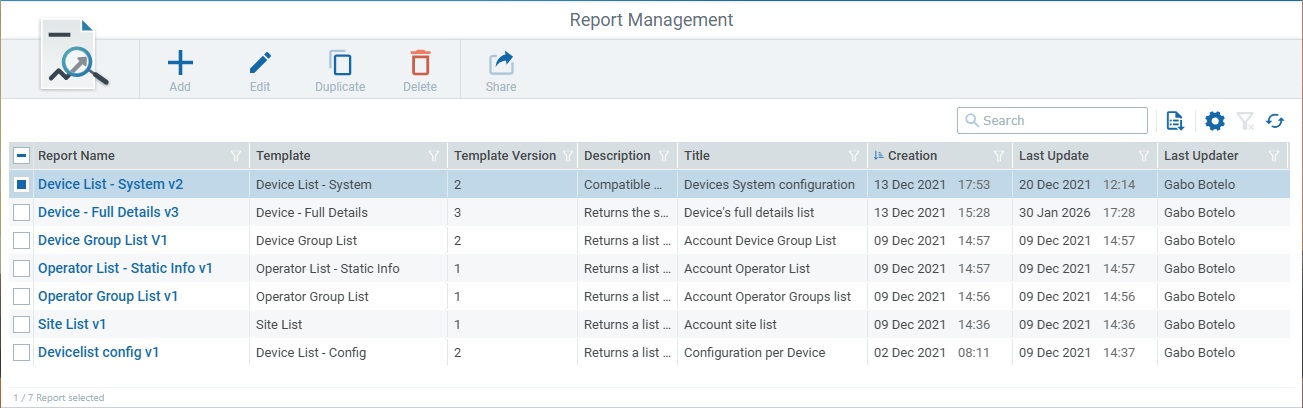
2. Click ![]() and, in the resulting page (which opens in edit mode) fill in the editable fields in the tabs.
and, in the resulting page (which opens in edit mode) fill in the editable fields in the tabs.

Template * |
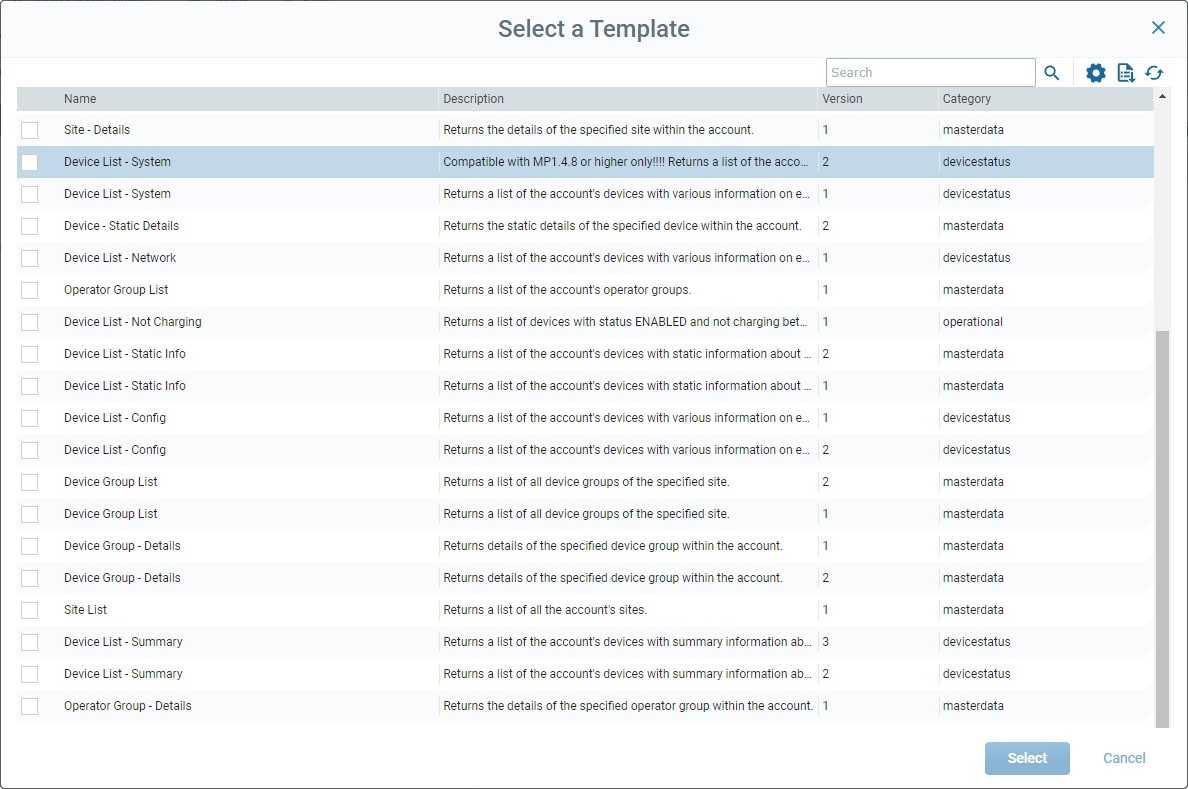
Select the template that will be the basis for your report from the drop-down OR click See Details on the "Select <entity>" window.
If the selected template has more than one version, you can choose the preferred version in the related drop-down.
We recommend you verify the template version's available fields/parameters to make sure the version you select will return the data you need. |
Name * |
There is a suggestion based on the name of the selected template but we recommend you define a report name that provides some context to the displayed information. |
Description |
The box already includes the selected templates default description but you can edit and/or add relevant information on the report. |
Title |
Define a title for the new report to be displayed in the "Data" section along with the returned data (section to the right). We recommend you define a title that relates to the purpose/values you want to display. |
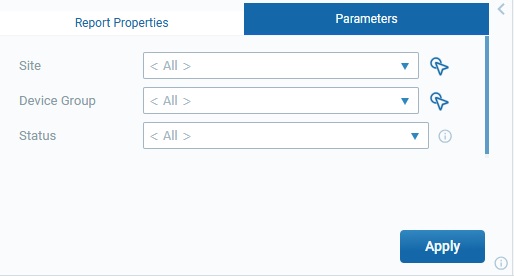
The available parameters depend on the selected report template's version.
If the selected report template does not require the setup of parameters (ex: the "Site List" template), the "Parameters" tab will not be active.
Example of a "Parameters" tab associated to the "Device List - Config" report template:
Use the
To definitively save the parameter values you set up and make them a part of the report, you must click
|
3. Click ![]() to conclude the new report.
to conclude the new report.
The content of this window is context-based. It opens when pressing the For instance, if this button is attached to the "Template" option ("Report Properties" tab), it will be named "Select a Template" and provide a list of the available report templates. If
Example:
Potential Operations/Options:
The availability of these options depends on the context associated to this window.
•Use the search box to look for specific list items.
• Click
•
•
|