Overview
Deployment/Network/Time Period profiles are sets of specific configurations that:
•concern the necessary criteria to trigger a deployment (Deployment profiles);
•define the communication settings between the devices and the MCL-Mobility Platform account (Cellular and Wifi Network profiles);
•define specific time periods that serve as data aggregators (Time Period profiles).
These profiles can be created at Account and Site level - there is a "Profiles" sub-module in the Admin Dashboard and in the Site Dashboard.
The following step-by-step describes how to create a Deployment/Network/Time Period profile at account level.
Depending on the type of profile you intend to create (Deployment profile, Wifi Network profile, Cellular Network profile or Time Period profile), the available options will be different. Proceed accordingly:
Step-by-step
1. In the Admin Dashboard's "Control Panel", click  and, then,
  to open the "Profile Management" page.
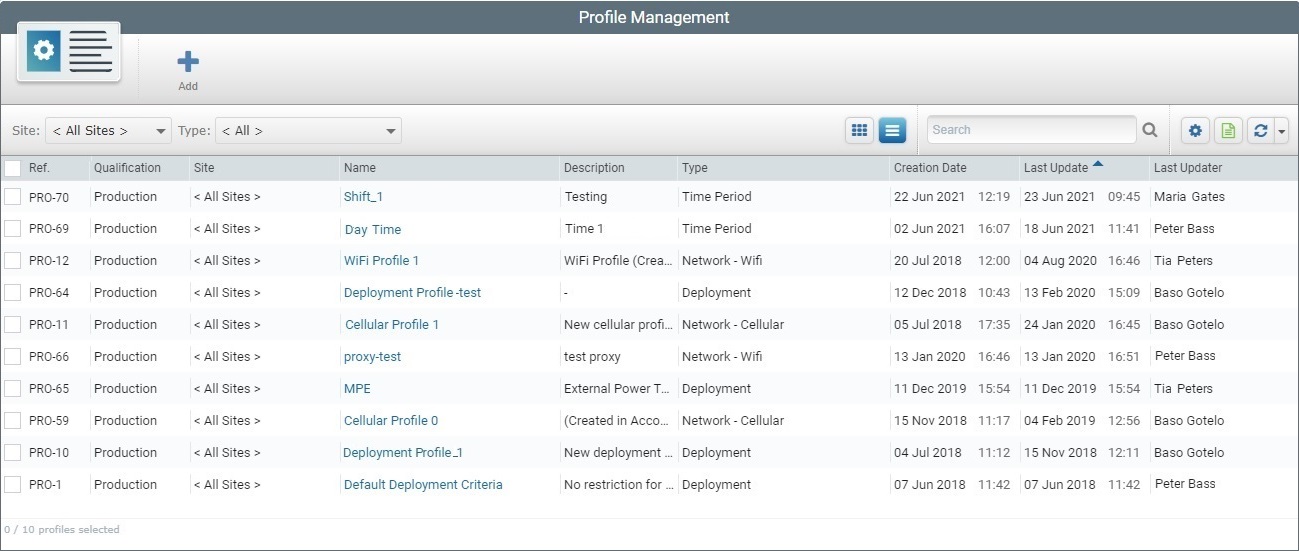
2. Click  .
.
 This button is ONLY available if no profile is selected in the "Profile Management" page.
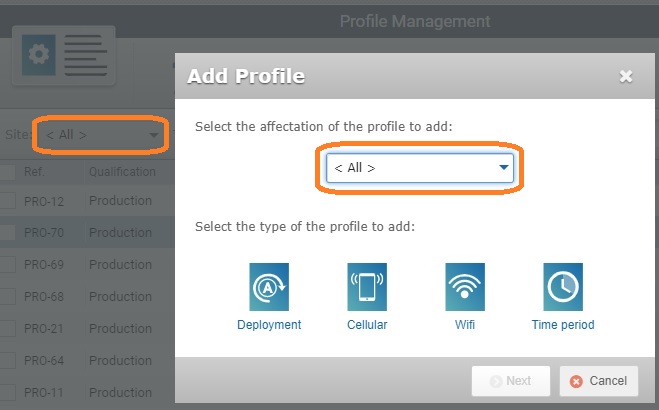
The options available in this window are affected by the use of filters in the "Profile Management" page:
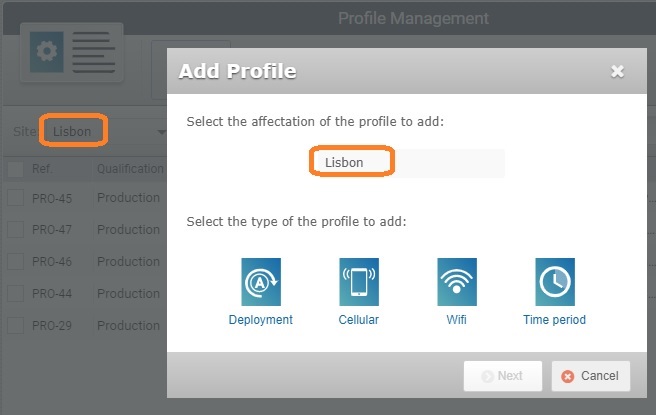
•If the page is filtered by site when you click , the profile is automatically restricted to that site:
Ex: The "Profile Management" page is ONLY displaying the profiles of the "Lisbon" site, so when is clicked, the resulting window shows the prospective profile as being associated to the "Lisbon" site without the possibility to edit the field.
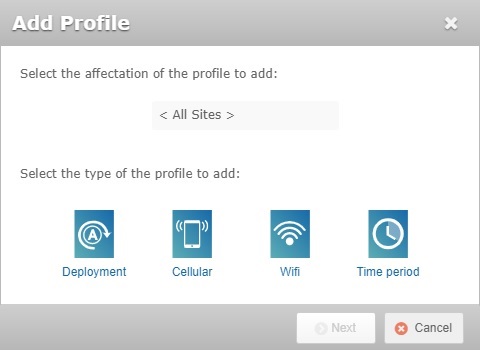
•If the "Site" filter is set to "< All >" when you click , the resulting window allows you to associate the profile to all the sites or to a specific site. You simply select the intended option from the drop-down.
Ex: The "Profile Management" page displays all the profiles within the account (= "Site: <All>"), so when you click , the resulting window includes a drop-down listing the "<All>" option along with all the sites in the account to choose from.
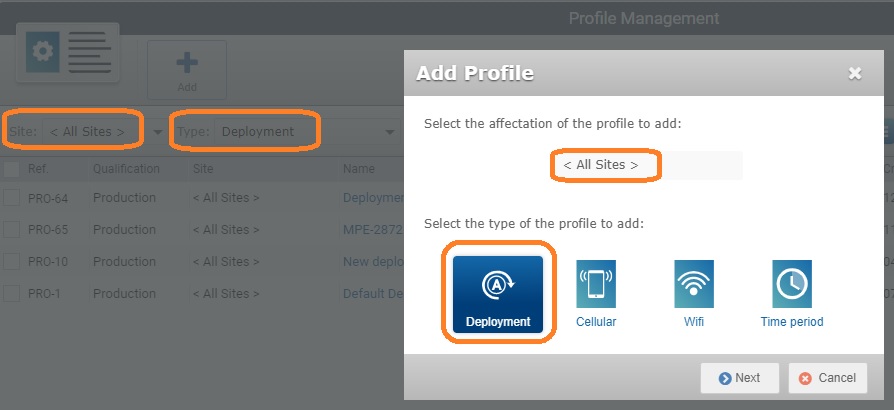
•If the page is filtered by profile type when you click (meaning, the display is limited to a "Deployment", a "Cellular Network", a "Wifi Network" or a "Time Period" profile), the window automatically selects the same type for the new profile.
Ex: The "Profile Management" page is filtered to ONLY display "Deployment" type profiles that are available to all the sites. If you click , the resulting profile will already have a set affectation (profile available to all the sites) and the "Deployment" option will already be selected. It will NOT be possible to change the profile's affectation or type.
3. If available/necessary, select the entity the profile will be associated to from the drop-down and the intended profile type:
4. Click  .
.
The next options available depend on the type of profile you have chosen.
Follow the step-by-step that concerns the type of profile you want to create:
Selecting  and clicking leads to the "New Deployment Profile" page: and clicking leads to the "New Deployment Profile" page:
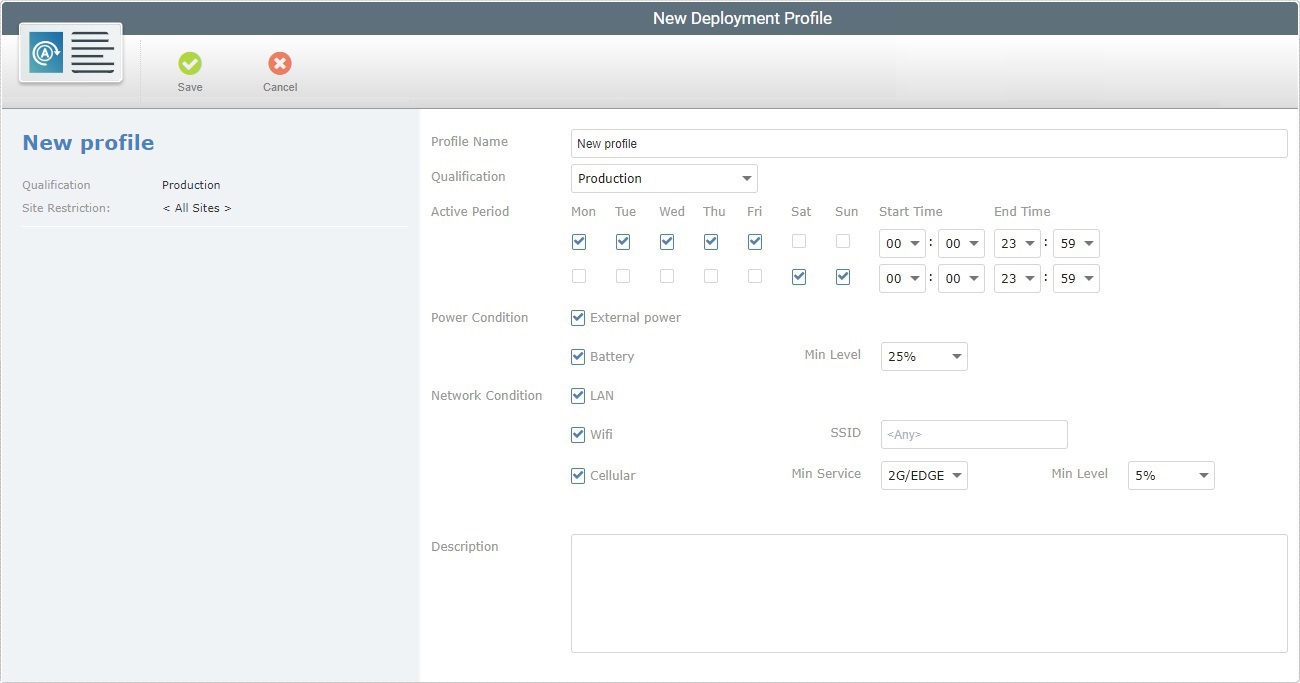
5. Fill in the required fields.
Profile Name
|
Enter the name for the new deployment profile.
 We recommend you consider the related best practices when you define a profile's name: We recommend you consider the related best practices when you define a profile's name:
•Use alphabetic/numeric characters (a-z; A-Z; 0-9) •Avoid special characters - underscore and/or dash characters are allowed •Always start the entity's name with an alphabetic character |
Qualification
|
Select one of the available qualifications from the drop-down:
•"Production" - for deployment profiles that are used in the customer's working environment, to assist in day-to-day tasks. •"Acceptance" - for deployment profiles that are used for specific testing in an environment that mimics the customer's working environment. •"Test" - for deployment profiles that are used in more general tests. •"Development" - for deployment profiles that are used in a development environment. This field is ONLY visible because this profile will be associated to the account. A profile intended for a site, meaning, a site restricted profile, will inherit the site's qualification so it is NOT possible to award the profile with a qualification when creating it.
|
Active Period
|
This concerns the available time period for the planned deployment to execute.
Check the desired days for the deployment to take place as well as the starting and ending times.
It is possible to define up to two (2) different active periods for a deployment - use the top and lower rows to do it.
|
Power Condition
|
Check "External power" if the deployment is to be performed when the device is charging.
|
Check "Battery" and define the battery's acceptable minimum power level, if the deployment is to be performed when the device is on battery power.
|
Network Condition
|
Check "LAN" if the deployment is to be performed when the device uses LAN communication.
|
Check "Wifi" if the deployment is to be performed when the device uses Wifi communication. If required, define the SSID.
|
If the deployment is to be performed when the device uses cellular communication, check "Cellular", select a minimum service ("2G/EDGE", "3G/UMTS" or "4G/LTE") and a minimum acceptable power level for the deployment from the corresponding drop-down.
|
Description
|
If required, enter any relevant information about the profile.
|
6. Click  to conclude the Deployment profile creation. to conclude the Deployment profile creation.
|
The "New Cellular Network Profile" page opens when you click  and, then, : and, then, :
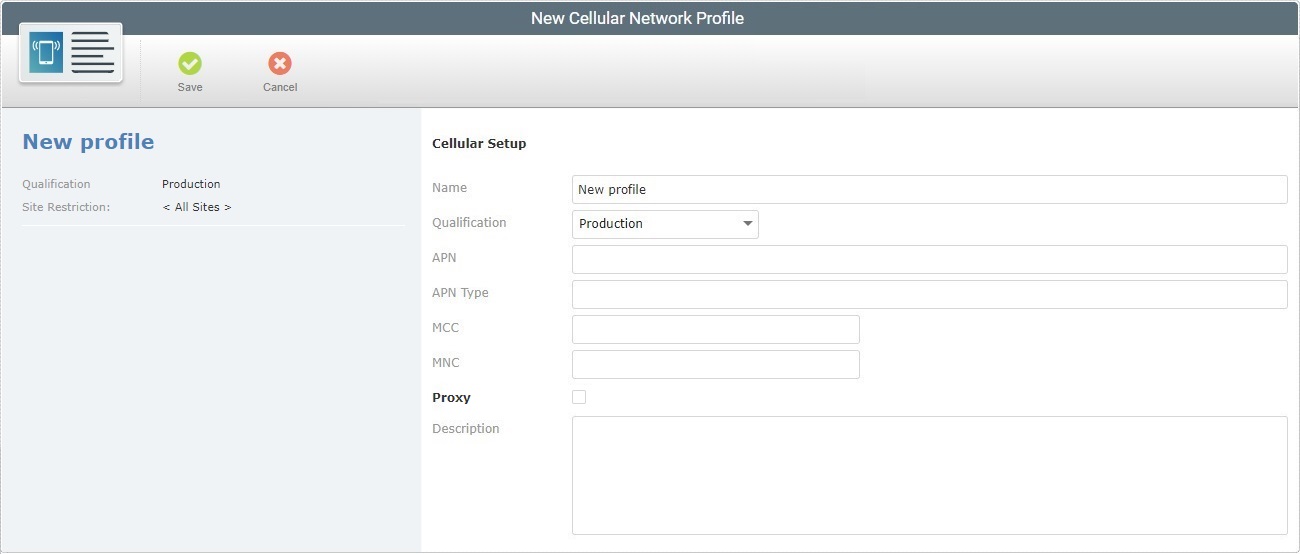
5. Fill in the fields as necessary. Any fields marked with an asterisk are mandatory.
Cellular Setup
|
Name
|
Enter the name for the new profile.
We recommend you avoid special characters and consider the related best practices when you define a profile's name:
•Use alphabetic/numeric characters (a-z; A-Z; 0-9) •Underscore and/or dash characters are allowed •Always start the entity's name with an alphabetic character |
Qualification
|
Select one of the available qualifications from the drop-down list (see Qualification):
•"Production" - for cellular network profiles that are used in the customer's working environment, to assist in day-to-day tasks. •"Acceptance" - for cellular network profiles that are used for specific testing in an environment that mimics the customer's working environment. •"Test" - for cellular network profiles that are used in more general tests. •"Development" - for cellular network profiles that are used in a development environment. This field is ONLY visible because this profile will be associated to the account. A profile intended for a site, meaning, a site restricted profile, will inherit the site's qualification so it is NOT possible to award the profile with a qualification when creating it.
|
APN
|
Enter the APN name.
|
APN type
|
Enter the APN type.
|
MCC
|
Enter the MCC.
|
MNC
|
Enter the MNC.
|
Proxy
|
If you want the cellular connection to use a proxy, check the option.
|
Host *
|
This option is ONLY available if the "Proxy" option is checked.
Enter the proxy's host address.
|
Port *
|
This option is ONLY available if the "Proxy" option is checked.
Enter the proxy's host port.
|
Description
|
If required, enter information about the profile.
|
6. Save your changes by clicking .
|
To create a Wifi Network profile, click  and, then, . This opens the "New Wifi Network Profile" page. and, then, . This opens the "New Wifi Network Profile" page.
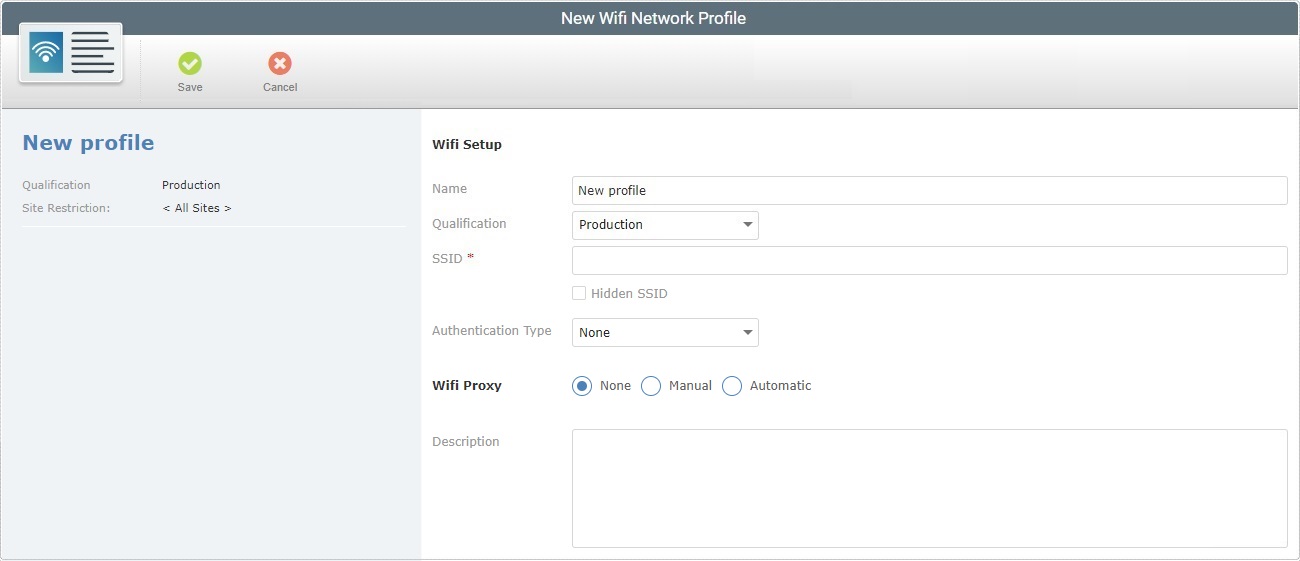
5. Fill in the available fields. Fields marked with an asterisk are mandatory.
Wifi Setup
|
Name
|
Enter the name for the new profile.
We recommend you avoid special characters and consider the related best practices when you define a profile's name:
•Use alphabetic/numeric characters (a-z; A-Z; 0-9) •Underscore and/or dash characters are allowed •Always start the entity's name with an alphabetic character |
Qualification
|
Select one of the available qualifications from the drop-down list:
•"Production" - for wifi network profiles that are used in the customer's working environment, to assist in day-to-day tasks. •"Acceptance" - for wifi network profiles that are used for specific testing in an environment that mimics the customer's working environment. •"Test" - for wifi network profiles that are used in more general tests. •"Development" - for wifi network profiles that are used in a development environment. This field is ONLY visible because this profile will be associated to the account. A profile intended for a site, meaning, a site restricted profile, will inherit the site's qualification so it is NOT possible to award the profile with a qualification when creating it.
|
SSID *
|
Enter the wifi 's SSID.
|
Hidden SSID
|
Check it, if the network is meant to be a hidden network.
|
Authentication Type
|
Select the required authentication type:
None - If no authentication needed.
WEP - If WEP authentication needed. This enables the "Authentication Key" field.
WPA - If WPA authentication needed. This enables the "Authentication Key" field.
|
Authentication Key *
|
This option is ONLY available if an authentication type (WEP or WPA) is selected.
Enter the authentication key for the selected authentication type.
|
Wifi Proxy
|
Check the required proxy setup:
None - If no proxy is to be used.
Manual - If a proxy is to be used. Define the proxy's Host address, Port and, if required, a Bypass List.
Automatic - If a proxy is to be used and automatically detected. Define the URL for the proxy's auto configuration file (Pac-File URL), if required.
|
Description
|
If required, enter relevant information concerning the current profile.
|
6. Conclude by clicking .
|
Once you click  and, then, , the "New Time Period Profile" page opens. and, then, , the "New Time Period Profile" page opens.
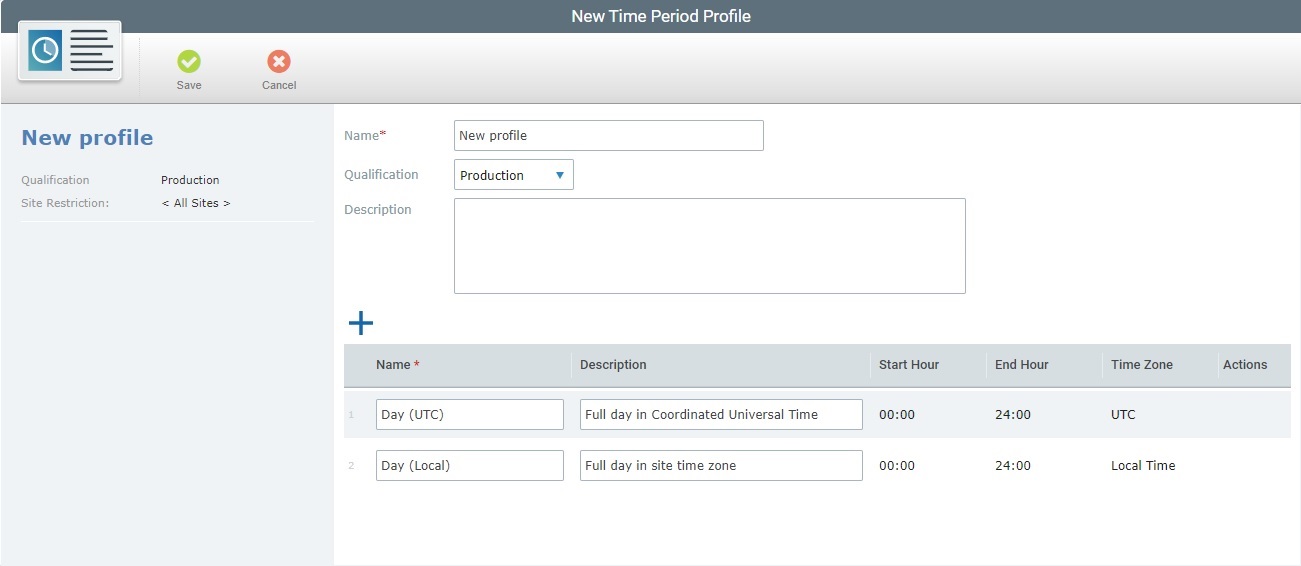
5. Fill in the mandatory fields (marked with an asterisk) and, if required, the remaining fields.
Name *
|
Enter the name for the new profile.
We recommend you avoid special characters and consider the related best practices when you define a profile's name:
•Use alphabetic/numeric characters (a-z; A-Z; 0-9) •Underscore and/or dash characters are allowed •Always start the entity's name with an alphabetic character |
Qualification
|
This drop-down is ONLY visible because this profile will be associated to the account [= available to all the sites). A profile intended for a site, meaning, a site restricted profile, will inherit the site's qualification so it is NOT possible to award the profile with a qualification when creating it.
Select one of the available qualifications from the drop-down:
•"Production" - for profiles that are used in the customer's working environment, to assist in day-to-day tasks. •"Acceptance" - for profiles that are used for specific testing in an environment that mimics the customer's working environment. •"Test" - for profiles that are used in more general tests. •"Development" - for profiles that are used in a development environment. |
Description
|
If required, enter relevant information concerning the current profile.
|
Every Time Period profile has 2 default time periods that can aggregate the data sent by the devices:
•Day (UTC) - represents a 24 hour day in UTC time. •Day (Local) - represents a 24 hour day in the site'/account's local time.
The name and description of these 2 time periods is editable but you cannot change the start/end hours or the time zone.
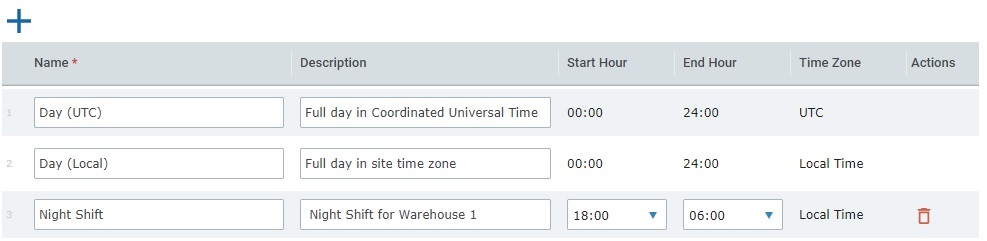
If necessary, you can define more time periods to retrieve specific data. For instance, if you want to analyze the data coming from a night shift that starts at 18:00 one day and finishes at 06:00, the next day, the default time periods are not adequate and you will have to create a specific time period.
6. If required, click  to add another time period entry. to add another time period entry.
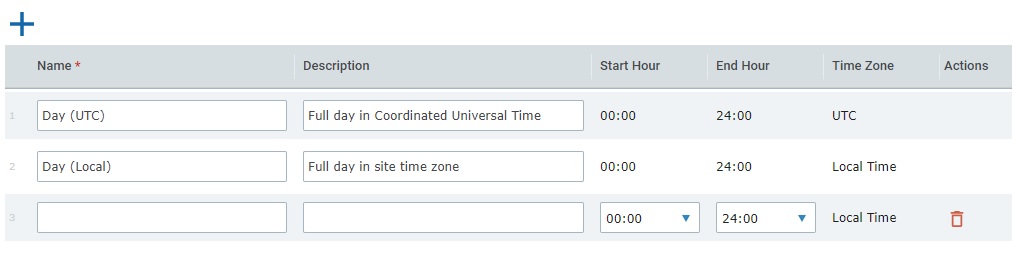
7. Fill in the available fields:
Name *
|
Define a name for the corresponding time period.
|
Description
|
If necessary, enter relevant information about the new time period.
|
Start Hour
|
Use the drop-down to define when the time period should start.
|
End Hour
|
Select an hour from the drop-down to define when the time period ends.
|
Time Zone
|
The time zone is automatically defined as being Local Time. This local time will depend on the time zone of the site the profile will be associated to (or of the account, if there is no restricted use of the Time Period profile).
|
Actions
|
If necessary, you can click  to delete the new entry. to delete the new entry.
This option is NOT available for the 2 default time periods.
|
Example:
8. Conclude by clicking .
|