|
Adding a Topic |
  
|
Adding a Topic
|
Adding a Topic |
|
Overview
Create the necessary topics to be used by the Messagebox Service so that the intended device(s) and back-ends can exchange messages.
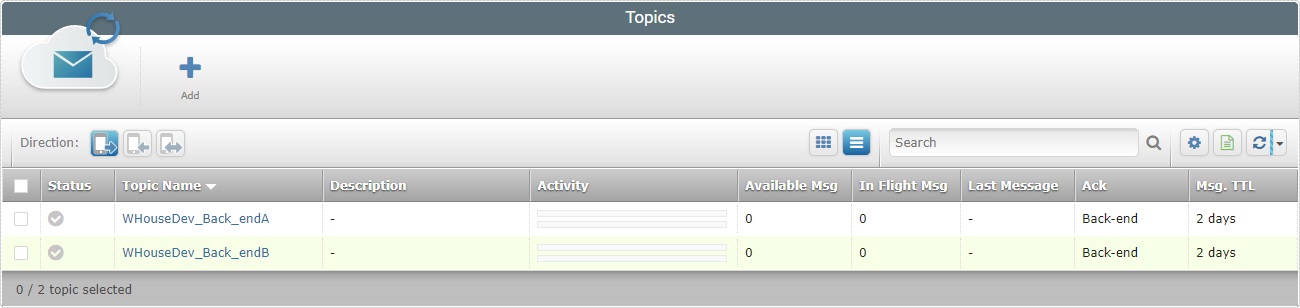
There are 2 ways to add a topic to a site's topics list - create a topic or copy an existing topic.
In the "Topics" page, the option to add a topic is always available but the ![]() button is only visible if a topic is selected. The option to copy a topic is always available in its "...Topic Details" page.
button is only visible if a topic is selected. The option to copy a topic is always available in its "...Topic Details" page.
![]() If a topic that was not added or copied appears in a site's list, it means the topic was created, at account level, and assigned to that site (it is also possible to manage topics in the "Messagebox" sub-module of the Admin Dashboard).
If a topic that was not added or copied appears in a site's list, it means the topic was created, at account level, and assigned to that site (it is also possible to manage topics in the "Messagebox" sub-module of the Admin Dashboard).
Check the following links to access the intended step-by-step:
See To Copy a Topic
Step-by-step
1. Click  , in the Site Dashboard's "Control Panel", to access the corresponding sub-module. Click
  to open the "Topics" page.
2. Click ![]() and open the"New Topic" page which is set to edit mode.
and open the"New Topic" page which is set to edit mode.

3. Fill in the available fields. The fields marked with an asterisk are mandatory.
Topic Name * |
Enter a name for the topic you want to add. It must be more than 4 and less than 30 characters in length, without spaces.
•Use alphabetic/numeric characters (a-z; A-Z; 0-9); •Underscore and/or dash characters are allowed; •Always start the entity's name with an alphabetic character.
|
Direction |
Select the appropriate direction related type for the new topic. •"Mobile to Back-end" (default option) - if the topic is meant to receive messages from devices to be delivered to a back-end. •"Back-end to Mobile" - if the topic is supposed to handle messages sent by a back-end to the device(s). •"Request" - if the topic is meant to manage synchronized request/response messages between devices and a back-end.
|
Message Time-To-Live * |
Define the time period for the sent message(s) to be available for retrieval from the receiver. Use the buttons/drop-down to define a number/time unit (minutes, hours or days). |
Message Acknowledgment |
Define how the "message read" Ack is managed: "Automatic ..." - the sender automatically receives a "message read" Ack once the message is read from the current topic (default option). "Device" - The "message read" Ack is managed by the device. "Back-end" - the sending (or not) of an Ack message is handled by the back-end. |
Expiration Date |
If necessary, use the calendar button to define an expiration date for the topic. The topic will be deleted at that date. |
Description |
Enter any information you find relevant regarding the new topic. |
4. Proceed to the "Message Template" tab.

5. If required, define a message template to be applied to any message that is created within this topic and sent to this topic (ex: for testing purposes).
Fill in the table as follows:
Index column |
Refers the number of the corresponding header. NOT editable. |
Name column |
Enter a name for each necessary header. Each message can have up to 10 headers. |
Description column |
If required, add information about the corresponding header. |
Required column |
Check the header(s) you want to turn into a message requirement. |
6. Click ![]() to conclude the operation.
to conclude the operation.
The newly added topic is available in the "Topics" page.
The ![]() button can be accessed in 2 pages - the "Topics" page and a topic's "...Topic Details" page (it must be on view mode).
button can be accessed in 2 pages - the "Topics" page and a topic's "...Topic Details" page (it must be on view mode).
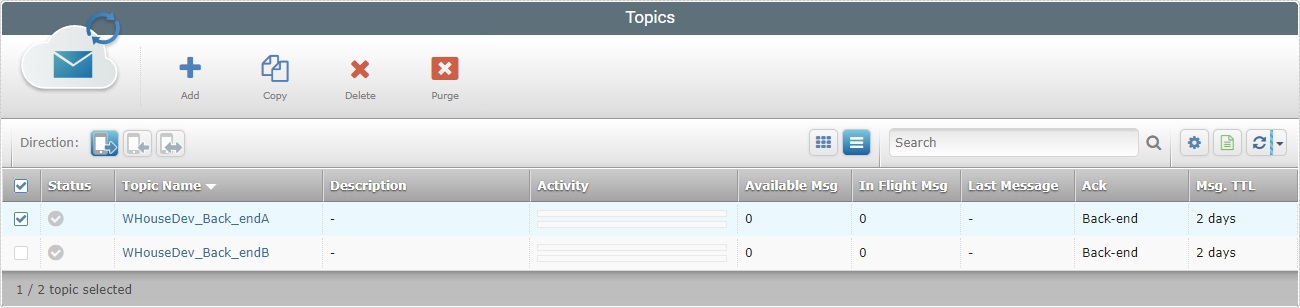
This option is not always visible in the "Topics" page - it is only available if you select one (1) topic.
Step-by-step
1. Click on the Site Dashboard's "Control Panel" and, then, click which opens a "Topics" page (this page opens in a new tab).
2. Check the topic you want to copy to access the "Copy" button.
As an alternative, you can click the name of the topic (displayed in light blue) to open its "...Topic Details" page.
3. Clicking ![]() opens a "New Topic" page on edit mode.
opens a "New Topic" page on edit mode.
If in the previous step (2) you chose to open the topic's "...Topic Details" page instead, click the ![]() button that is available in that page so it opens a "New Topic" page on edit mode.
button that is available in that page so it opens a "New Topic" page on edit mode.
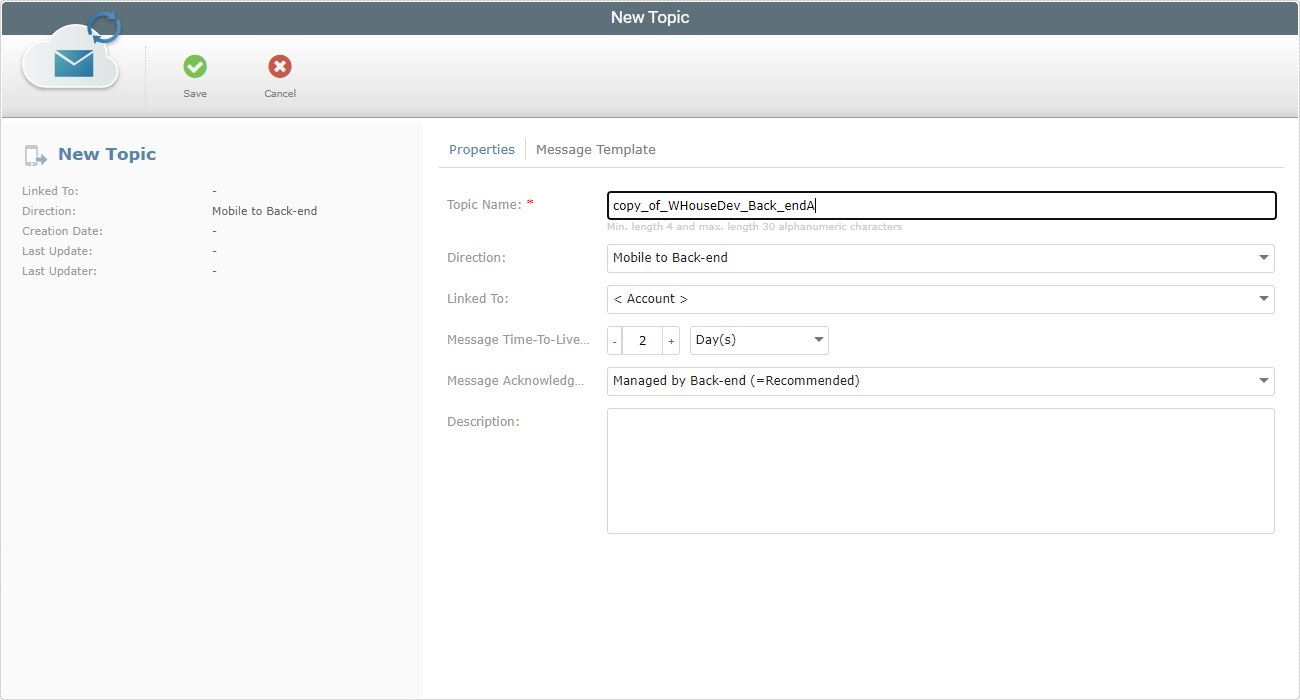
4. This is the same page that opens when you create a new topic. The only difference is there is a suggestion for the topic name ("copy_of_<name of the original topic>).
We recommend you rename the topic copy. Once you save this copy, it will NOT be possible to rename it.
![]()
Consider the following rules/best practices when defining a topic name:
•Use alphabetic/numeric characters (a-z; A-Z; 0-9);
•Spaces are not allowed;
•Underscore and/or dash characters are allowed;
•Start the entity's name with an alphabetic character;
•Avoid special characters
5. The topic copy displays the same properties and message template as the original topic. Edit the available options as necessary.
See To Create a Topic (the step-by-step above), if you require more details to edit the available options.
6. Click ![]() to save your changes. The copy becomes available in the "Topics" page.
to save your changes. The copy becomes available in the "Topics" page.