|
Adding an Operator |
  
|
Adding an Operator
|
Adding an Operator |
|
Overview
Operators can be added manually, one by one (standard Add Operator operation), or by importing files containing operator lists (see Importing Operators). The operators you want to add require operator groups to include them in so, make sure to create them beforehand. For more information, see Creating an Operator Group.
Depending on the type of operator, he must be included in a compatible group - speech operators have to be included in speech operator groups and non-speech operators added to non-speech operator groups.
The type of the new operator is determined by the choice of operator group. If the selected operator group has speech attributes, the new operator will be a speech operator (the "New Operator" page will only display speech related options/tabs after you have selected a speech operator group in its "Properties" tab).
By default, any added operator is attributed an "Enabled" status. However, when the operator quota for the current MCL-Mobility Platform account reaches its limit, the status of the next operator(s) to be added will be"Disabled".
Once operators are added to a site, you can enable/disable their current status in the corresponding "Operator Details" page but these status changes will always consider the operator quota for the account. Ex: If your quota is 30 operators and you have 30 Enabled operators and 5 Disabled operators, it will not be possible to enable the 5 Disabled operators before disabling 5 of the Enabled operators - the quota of 30 Enabled operators cannot be exceeded.
You can check the number of currently enabled operators/operator quota for the account in the Admin Dashboard:

For more details on operator quota per subscription, go to the "Subscriptions" sub-module.
Standard "Add Operator"
Step-by-step
1. Click  (in the Control Panel section) and, in the resulting row below, select
  to open the "Operators" page.
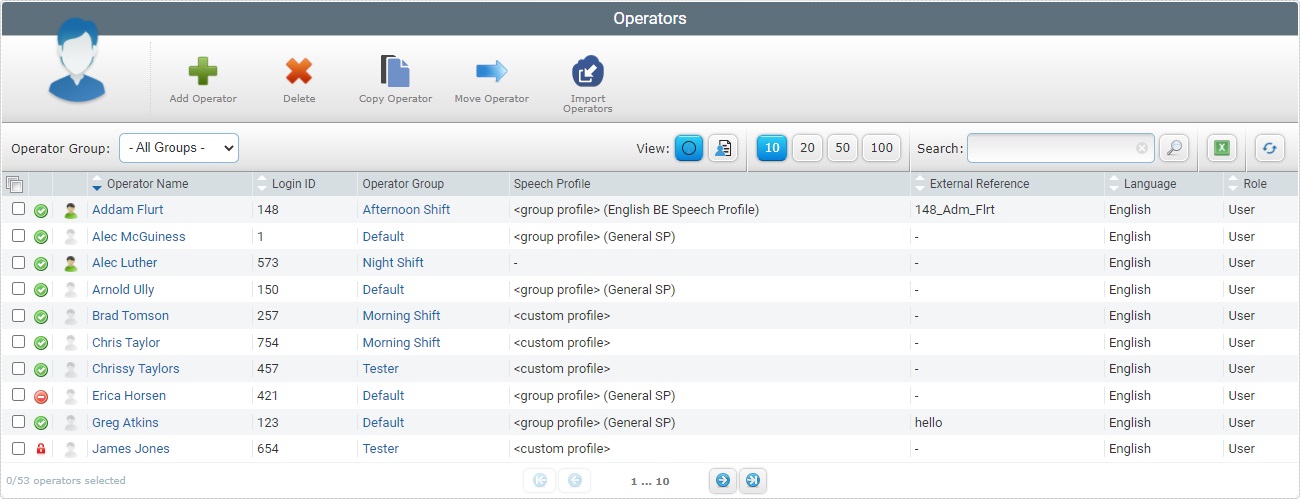
2. Click ![]() to open the "New Operator" page.
to open the "New Operator" page.
![]() If the default operator group is a speech operator group the "New Operator" page icon is
If the default operator group is a speech operator group the "New Operator" page icon is ![]() that represents a speech operator.
that represents a speech operator.
If the default operator group is not a speech operator group the "New Operator" page icon is ![]() that represents a non-speech operator.
that represents a non-speech operator.
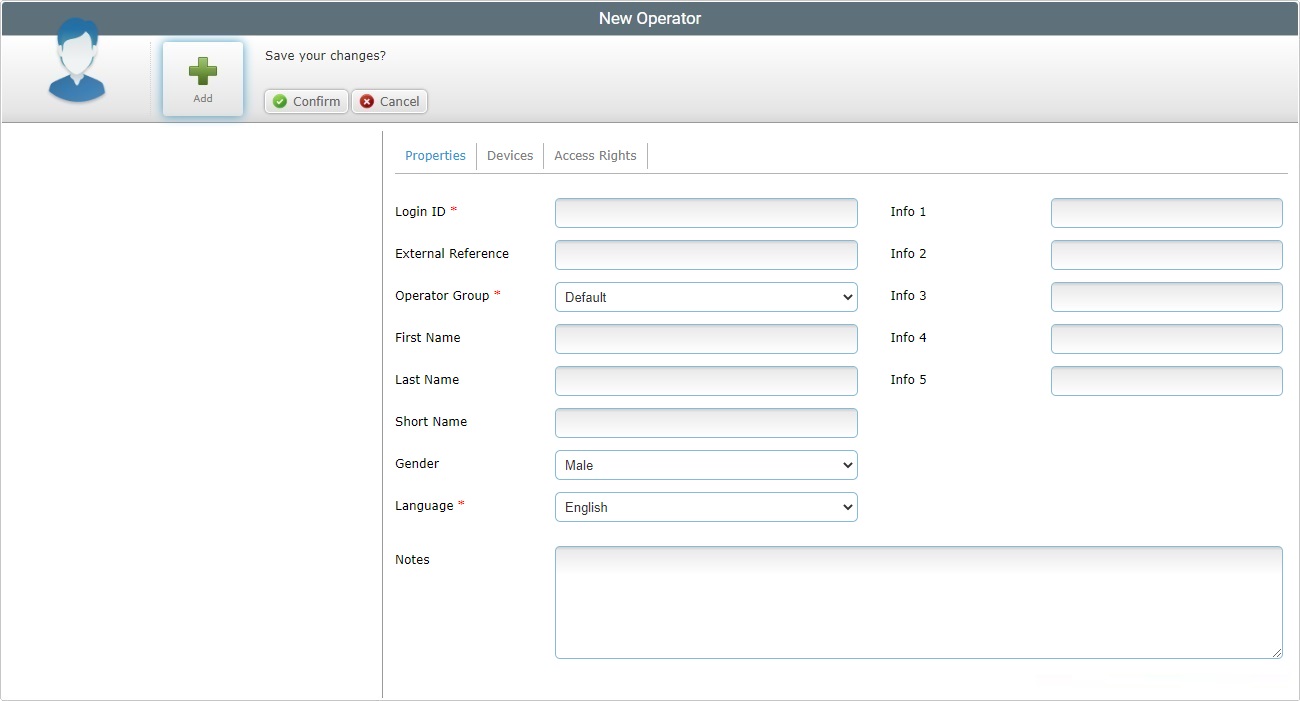
3. The "New Operator" page is on edit mode and opens, by default, in the "Properties" tab. Fill in the mandatory fields (marked with an asterisk) and, if required, the remaining fields.
Login ID * |
Enter the operator's identification number in the account. If the device being handled by the operator has the "MCL Operator Login" application installed, this information will be used to identify the logged-in operator. See MCL Operator Login Application. |
External Reference |
Enter the customer's internal operator identification reference. If the device being handled by the operator has the non-speech version of the "MCL Operator Login" application installed, this information can also be used to identify the logged-in operator. |
Operator Group * |
Select the operator group that will include the newly added operator. If you select a speech operator group (with enabled Speech settings), the new operator will become a speech operator. This means that speech related fields/tabs are activated and that some of the operator group's speech values are applied to the new operator. You can, however, replace them with other values more suitable to this operator. (Ex: If the selected operator group includes speech attributes, the "Speech Profile" option becomes visible and the "Speech Input (ASR)", "Speech Output (TTS)" and "Misc Speech Settings" tabs will also be activated and automatically filled in with the settings established for that operator group.) |
First Name |
Enter the operator's first name. |
Last Name |
Enter the operator's last name. |
Short Name |
Define an alternative name to identify the operator. If the device being handled by the operator has the "MCL Operator Login" application installed, the "short name" will be used to identify the logged-in operator in MCL App Desktop. |
Spoken Name |
This option is only visible if the previously selected operator group is a speech operator group (with enabled Speech settings). Define the name that is prompted to the operator in the speech dialog (ex: a welcome message). |
Gender |
Select the operator's gender. |
Language * |
Select the language to be used by the operator in the application. |
Speech Profile * |
This option is only visible if the previously selected operator group is a speech operator group (with enabled Speech settings). Select the appropriate speech profile. The speech profile you select will affect most of the speech related options available in the new operator's profile. The drop-down displays the available speech profiles (global or local according to the site's current speech profile management). If any of the available speech profiles has been set as an entity's default or custom profile, instead of its name, you will view one of the following designations: <group profile> - Refers to the speech profile set as default for the previously defined operator group. Used in both levels of speech profile management (Global or Local). <account default> - Refers to the speech profile set as default for the account. Only used within the Global Speech Profile Management. <site default> - Refers to the speech profile set as default for the current site. Only used within the Local Speech Profile Management. <custom profile> - Refers to a custom speech profile, to be created, specifically for the operator, in the speech related tabs ("Speech Input (ASR)", "Speech Output (TTS)" and "Misc Speech Settings"). |
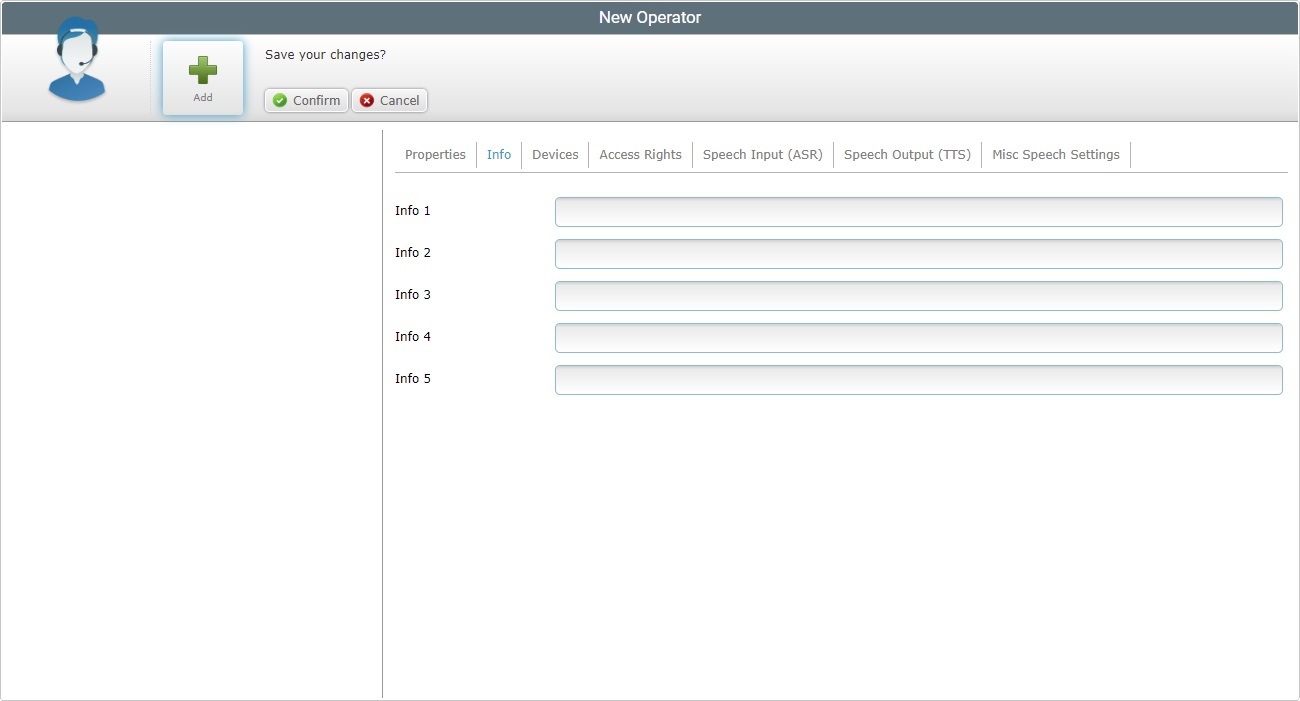
Info 1 > 5 |
These field labels can be customized (their designation can be modified according to the information they are supposed to retrieve). See "Editing Site Details" - Custom Labels tab. Enter the requested information.
Ex: If you use the X_USR_CUST3 system variable within an MCL Designer developed application, you can retrieve the information entered in this field. |
Notes |
If required, enter any relevant information regarding the operator. |
![]() If you have selected a speech operator group (therefore, creating a speech operator), you will, now, have access to additional speech related tabs - "Speech Input (ASR)", "Speech Output (TTS)" and "Misc Speech Settings".
If you have selected a speech operator group (therefore, creating a speech operator), you will, now, have access to additional speech related tabs - "Speech Input (ASR)", "Speech Output (TTS)" and "Misc Speech Settings".
Those tabs are explained in the corresponding steps, so proceed with this step-by-step.
4. Go to the "Devices" tab to define the operator's devices.
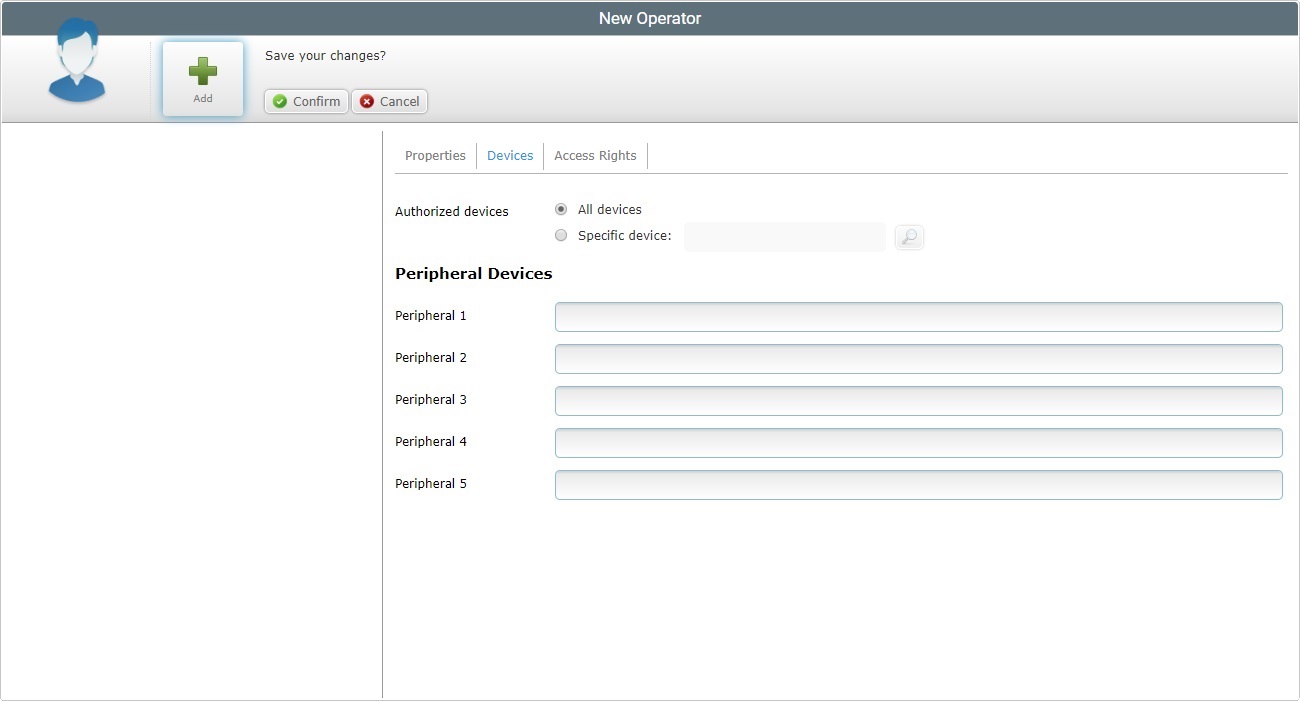
5. Define the devices the operator will have access to:
Authorized Devices |
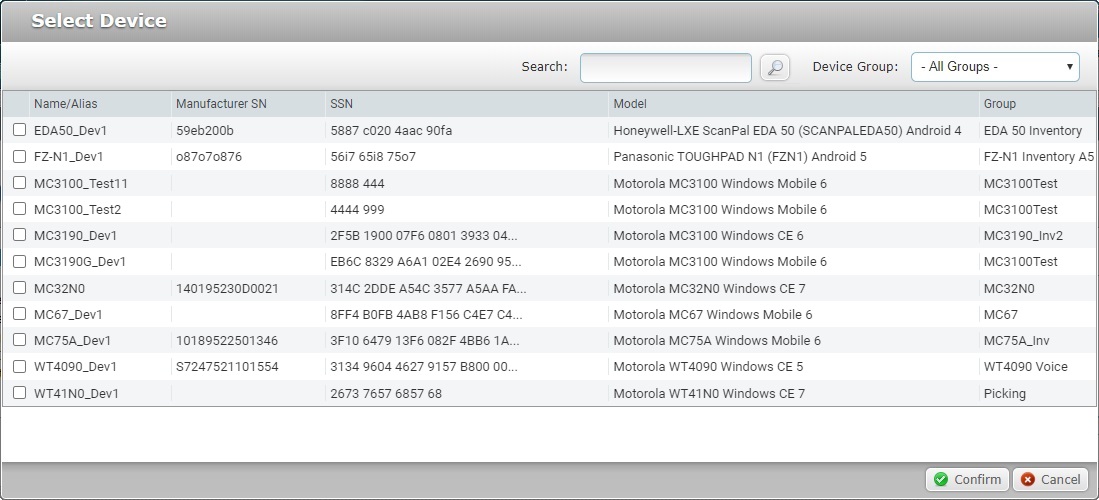
All Devices: If you check this option, the operator will be able to use all the site's devices. Specific Device: If this option is checked, the operator will only be able to use a specific device from the sites's device pool. See Details on the "Select Device" window below. |
Peripheral Devices |
|
Peripheral 1 > 5 |
If required, customize the labels concerning peripheral devices to display something other than "Peripheral...". See "Editing Site Details" - Custom Labels tab.
The Mac Address defined here is used by the MCL Voice Operator Login App to identify the intended headset when the operator logs in and to initiate the pairing procedure with the operator's device ( =Automatic Headset Pairing Mode. See Assigning A BT Headset to an Operator Profile.) |
To select a specific device for the operator, proceed as follows:
a. In the "New Operator" page, check the "Specific Device" option and click
b. Select the device by checking the corresponding
c. Click
Use the following options to control the display of listed items:
•Use
a. Enter what you want to search for. b. Click c. To conclude the search operation, click
•
|
6. Go to the "Access Rights" tab.
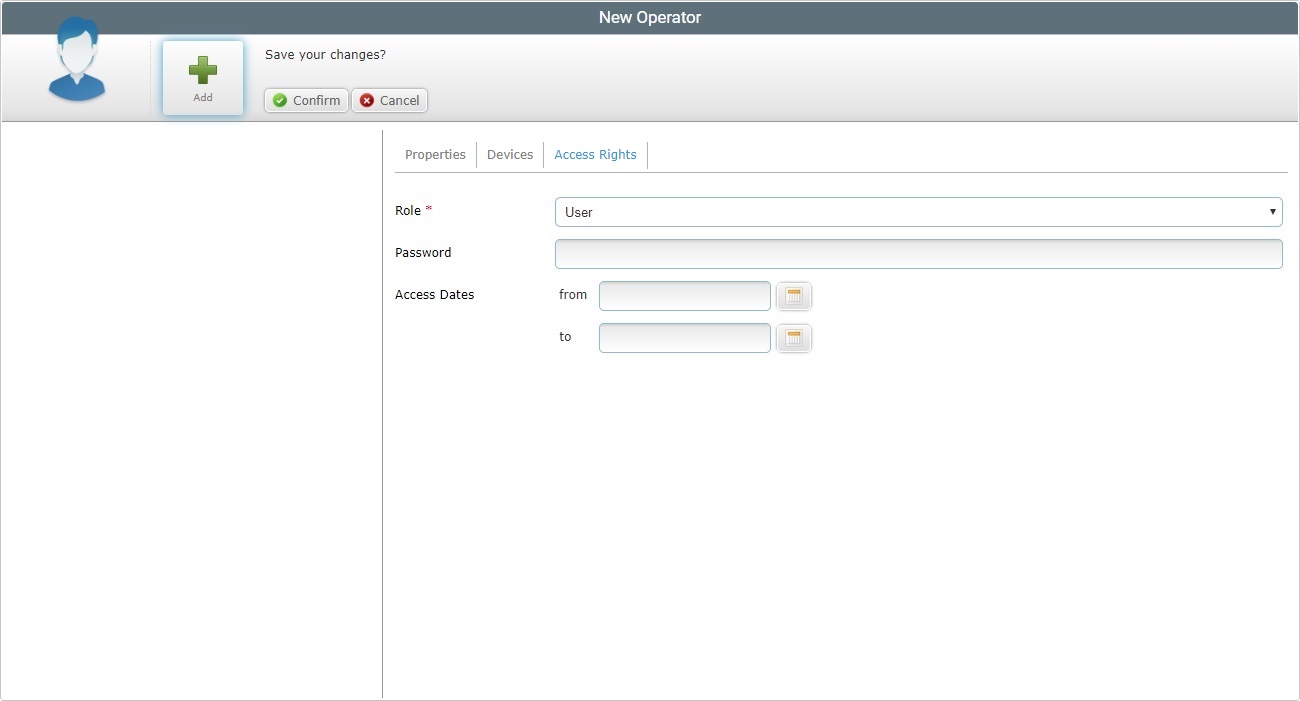
7. Fill in the mandatory fields (marked with an asterisk) and, if required, the remaining fields.
Role * |
Select the role of the new operator from the available options in the drop-down list. |
Password |
This field is to be used exclusively for non-speech operators. Enter a password for the new non-speech operator to access the system. This password will be used to log in to the MCL Operator Login App. See MCL Operator Login Application.
|
Access Dates |
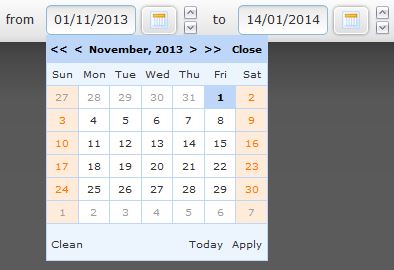
If required, define the period of time the operator will have access to the application(s). Enter a beginning and an ending date (DD/MM/YYYY) or use the a. Click the corresponding
b. Select the appropriate date. Use the <</</>/>> to navigate the months/years. If you want to clear any information, click If you want to select the current date, click If you want to exit the calendar, click c. Click |
8. If you are adding a non-speech operator, there are no more tabs to fill in. Continue to step 14.
If the new operator is a speech-operator, there will be speech related tabs to be filled in. Go to the "Speech In" tab.
The display of information in this tab is affected by your choice of speech profile (in the "Properties" tab):
•If the selected speech profile does not have the "speech input" setting enabled, this tab will not display any information.
•If the selected speech profile has the "speech input" setting enabled, the tab will display the following information:
•If you have selected a "custom" speech profile, there will be additional options:
•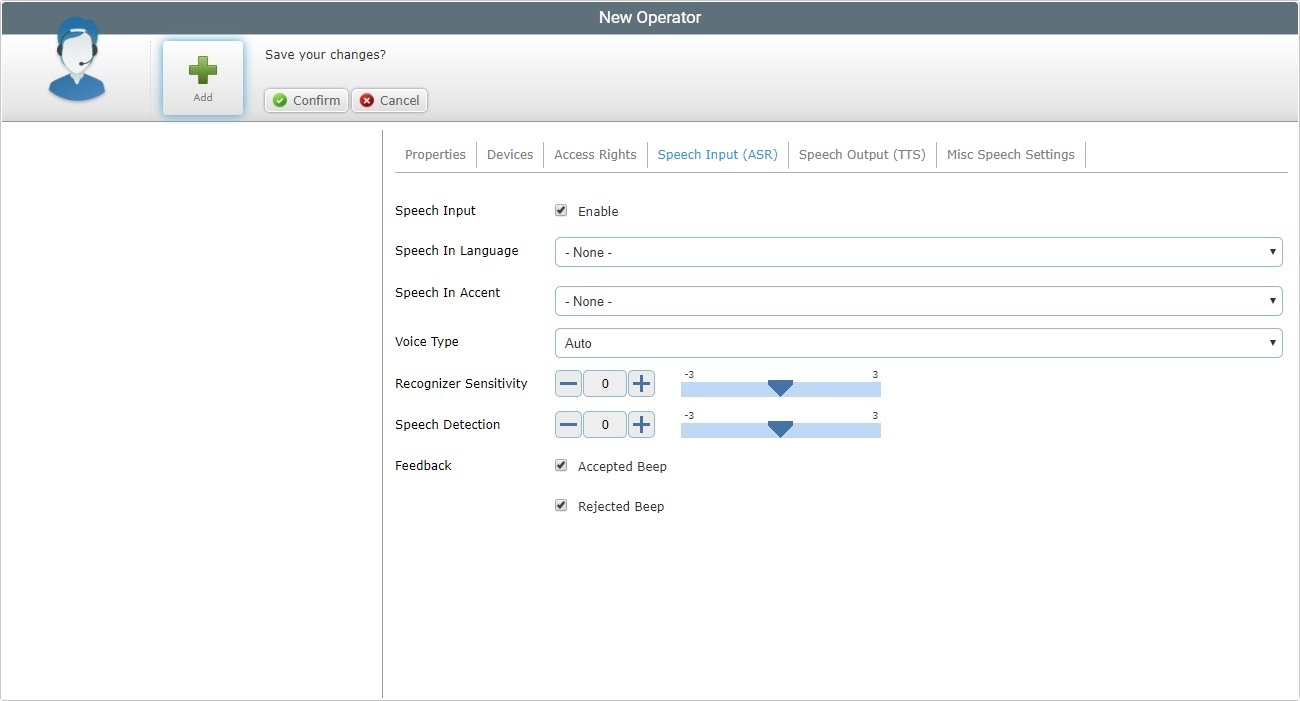
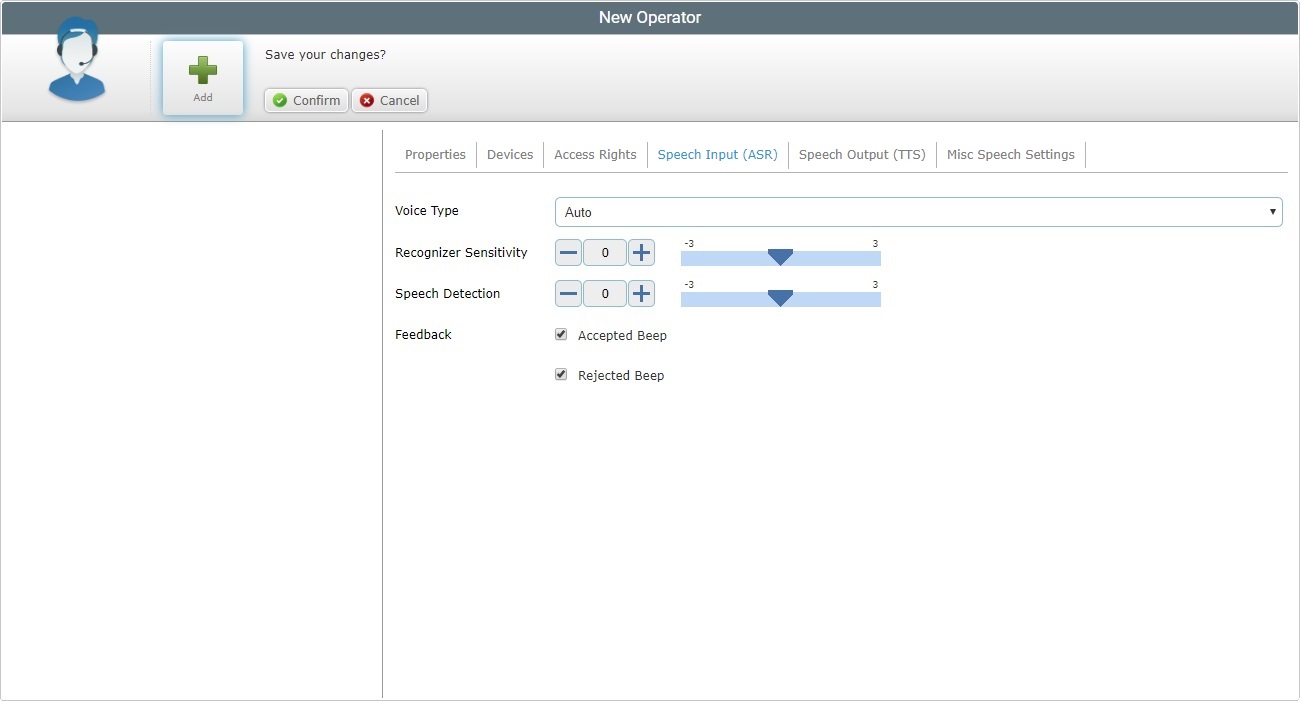
9. Depending on the tab's display, fill in the available options:
Speech Input |
Only available if you selected <custom profile>. Check/uncheck the option to enable/disable the Speech Input setting. |
||||||||||||||||||
Speech In Language |
Only available if you checked the "Speech Input" option. Select the language the new operator will use to interact with the speech application. |
||||||||||||||||||
Speech in Accent |
Only available if you checked the "Speech Input" option. Select the accent file that will store the fine tuning of speech recognition. The drop-down list displays the accent files added in the account's "Speech Profiles" module (Global Speech Profile Management) or the site's "Speech Profiles" sub-module (Local Speech Profile Management). |
||||||||||||||||||
Voice Type |
This parameter is responsible for the filtering of the speech signal spectrum and its purpose is to optimize user speech decoding. When the voice type is set to "Auto", the system executes an adaptation, over time, to match the speech input signal. If you select another voice type (Neutral, Male, Female or Child), this progressive auto adjustment is bypassed, providing better initial performance. Defining the wrong voice type will affect speech recognition quality. Select the voice type from the drop-down list (Auto, Neutral, Male, Female or Child). For most cases, the default value (Auto)is the preferred value. |
||||||||||||||||||
Recognizer Sensitivity |
This parameter's purpose is to match the operator's speech to the expected words. Define a recognizer sensitivity value. Enter a value, use the plus/minus buttons or drag the slider mark to the required position (available values from -3 to +3). Consider the following when defining the recognizer sensitivity value: •The operator's speech level (a good speech -high energy/loud and clear word pronunciation OR a poor speech -low energy and bad word pronunciation). •The operator's environment and possible interference from background noise. Ex: Too low recognizer sensitivity dismisses background noise but does NOT accept an operator's "poor" speech.
Possible settings based on general considerations:
Fine tuning suggestions:
|
||||||||||||||||||
Speech Detection |
This parameter (aka microphone sensitivity) defines the "Speech Detection" levels that will "isolate" background noise from actual speech based on the received energy level. Define a speech detection value. Enter a value, use the plus/minus buttons or drag the slider mark to the required position (available values from -3 to +3). Consider the following: •A high speech sensitivity helps detect a low energy speech (operator with a soft voice) but it increases the risk of noise processing. •A low speech sensitivity reduces the risk of noise processing but requires a high energy speech (operator must speak loud and clear) for a good detection.
Ex: For operators with a loud and clear voice, define a speech sensitivity value of -1 or -2.
Note that some words start with low energy (ex: words with an initial "sh" sound) which means they might not be detected if the speech sensitivity value is too low. |
||||||||||||||||||
Feedback |
Check/uncheck the corresponding option to enable/disable a success and/or a rejection beep. |
![]() The values of the new speech operator's comfort settings ("Recognizer Sensitivity" and "Speech Detection") are inherited from the previously defined speech profile. If required, you can edit those values right away to adapt them to the new operator or you can do it later. In any case, once the comfort settings are customized, they will NOT be affected by any new speech profile assignment. Whenever you need to change the values in "Recognizer Sensitivity" and "Speech Detection", edit the "Operator Details" page.
The values of the new speech operator's comfort settings ("Recognizer Sensitivity" and "Speech Detection") are inherited from the previously defined speech profile. If required, you can edit those values right away to adapt them to the new operator or you can do it later. In any case, once the comfort settings are customized, they will NOT be affected by any new speech profile assignment. Whenever you need to change the values in "Recognizer Sensitivity" and "Speech Detection", edit the "Operator Details" page.
10. Go to the "Speech Out" tab.
The display of information in this tab is affected by your speech profile choice (in the "Properties" tab):
•If the selected speech profile does not have the "speech output" setting enabled, this tab will not display any information.
•If the selected speech profile has the "speech output" setting enabled, the tab will display the following information:
•If you have selected a "custom" speech profile, there will be additional options:
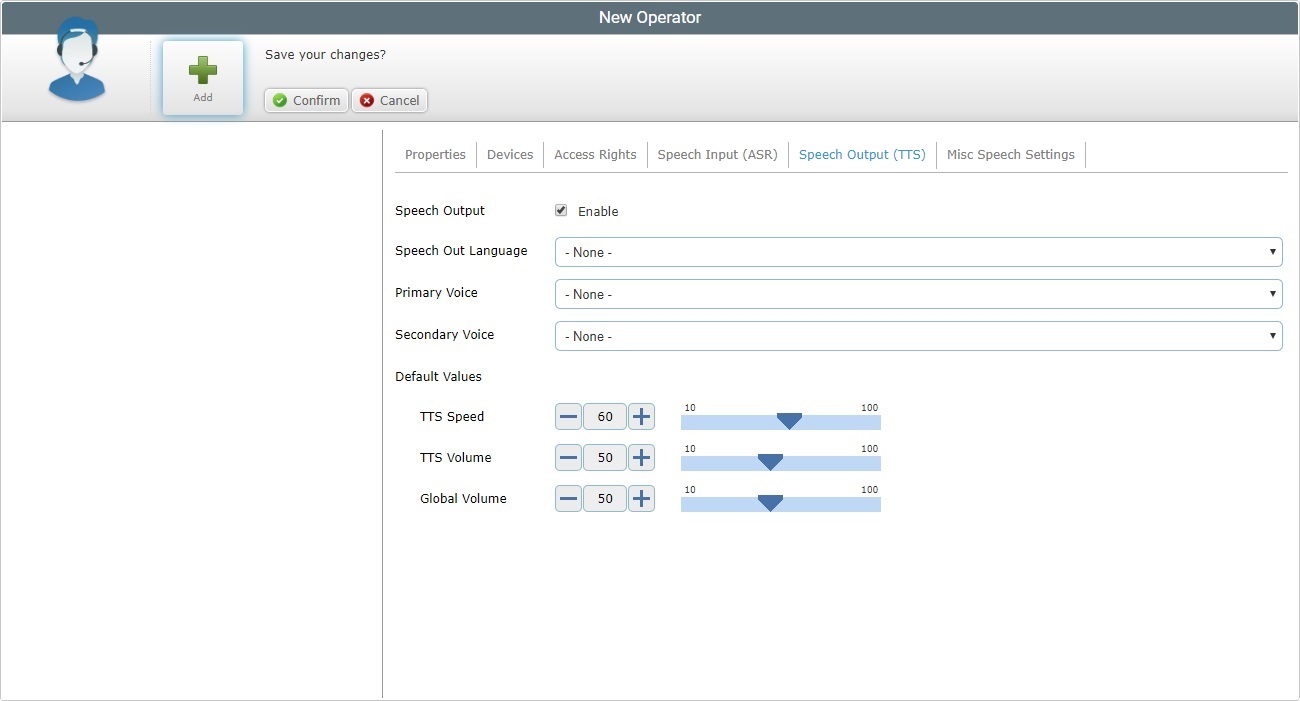
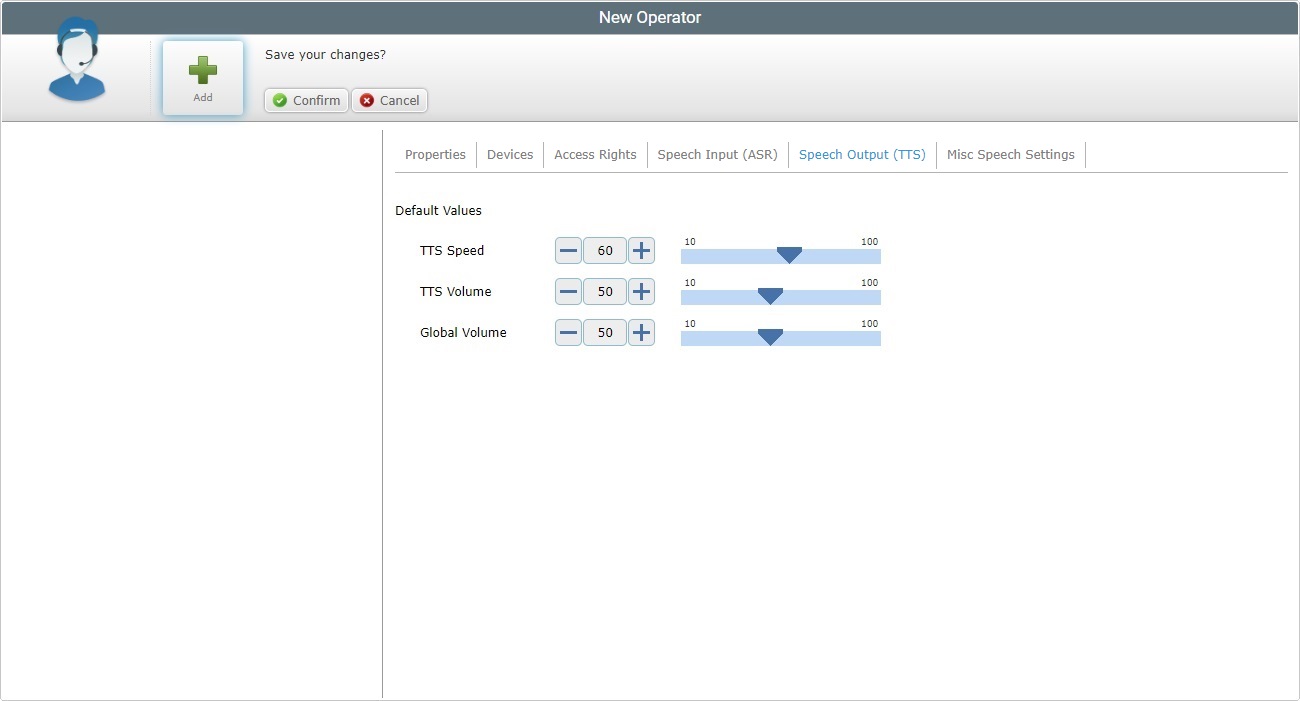
11. Depending on the tab's display, fill in the available options:
Speech Output |
Only available if you selected <custom profile>. Check/uncheck the option to enable/disable the Speech Output setting. |
Speech Out Language |
Only available if you checked the "Speech Output" option. Select the language the operator will hear from the device. |
Primary Voice |
Only available if you checked the "Speech Output" option. Select the primary language the operator will hear from the device. |
Secondary Voice |
Only available if you checked the "Speech Output" option. Select the secondary language that the operator will hear from the device. This is optional and only active if you have previously defined more than one compatible TTS language. |
Default Values |
|
TTS Speed |
Define the speed to be used by the TTS (text to Speech) engine. Enter a value, use the plus/minus buttons or drag the slider mark to the required position. |
TTS Volume |
Define the speech volume to be used by the TTS engine (the TTS Volume parameter only affects the Synthesizer channel). Enter a value, use the plus/minus buttons or drag the slider mark to the required position. |
Global Volume |
The Global Volume parameter sets the volume of all channels (recognition/rejection beep, application beep, TTS, wave player…). Define the global audio volume for the device. Enter a value, use the plus/minus buttons or drag the slider mark to the required position. |
![]() The values of the new speech operator's comfort settings ("TTS Speed", "TTS Volume" and "Global Volume") are inherited from the previously defined speech profile. If required, you can edit those values right away to adapt them to the new operator or you can do it later. In any case, once the comfort settings are customized, they will NOT be affected by any new speech profile assignment. Whenever you need to change the values in "Recognizer Sensitivity" and "Speech Detection", edit the "Operator Details" page.
The values of the new speech operator's comfort settings ("TTS Speed", "TTS Volume" and "Global Volume") are inherited from the previously defined speech profile. If required, you can edit those values right away to adapt them to the new operator or you can do it later. In any case, once the comfort settings are customized, they will NOT be affected by any new speech profile assignment. Whenever you need to change the values in "Recognizer Sensitivity" and "Speech Detection", edit the "Operator Details" page.
12. Go to the "Misc Speech Settings" tab.
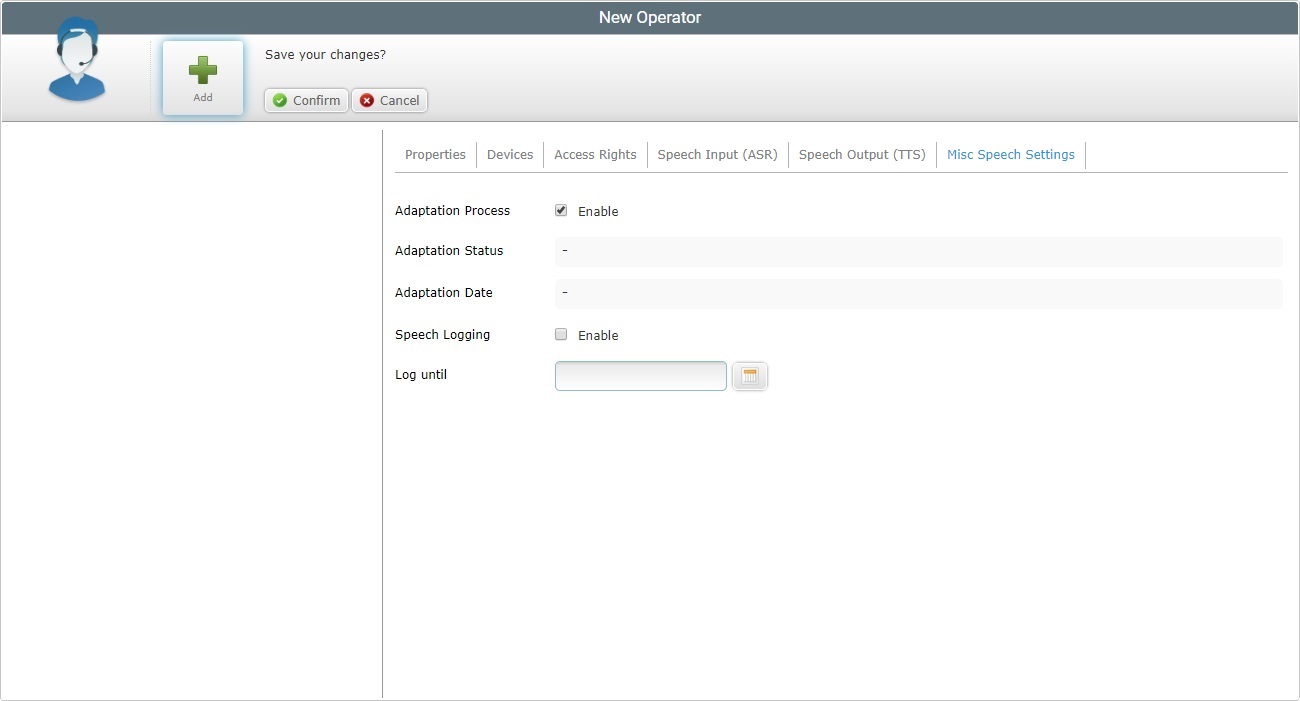
13. Fill in the available options:
Adaptation Process |
This option does NOT apply to operators running MCL-Voice V4 applications. For operators handling MCL-Voice V3 applications, consider the following: Check/uncheck the option to enable/disable the Adaptation process. Although adaptation is not considered a comfort setting, it has the same purpose - to take the operator's unique speech traits into consideration so that the speech recognition performance improves. See Adaptation. New operators inherit the corresponding setting from the already applied speech profile but you can customize this option, meaning, you can choose whether you want the new operator to use adaptation or not. |
Adaptation Status |
Only applicable for operators running MCL-Voice V3 applications. This field is NOT editable. Its content depends on the optional speech adaptation performed by the operator. |
Adaptation Date |
Only applicable for operators running MCL-Voice V3 applications. This field is NOT editable. Its content depends on the optional speech adaptation performed by the operator. |
Speech Logging |
When the operator uses MCL Voice Operator Login App (v.4.10.52 or higher) to log in, the device always generates a voice log with basic speech data that is communicated to the MCL-Mobility Platform account when the operator logs out.
If a more complete voice log is required, check this option. This voice log is mostly used for troubleshooting purposes since it includes additional speech input data. If left unchecked, basic voice logs will still be generated (via MCL Voice Operator Login App v4.10.52 or higher) and sent to MCL-Mobility Platform.
All generated voice logs are sent to the associated site's "File Repository" and available for analysis: <site's Site Dashboard> > "Control Panel" > "Set Up" > "Files" > "File Repository" > "logs" folder> <date> folder > "voice" folder > "analyzer" folder
These logs with more speech data will ONLY be generated if there is an associated end date to their creation (end date is defined in the "Log until" option below). The "Speech Logging" and "Log until" options MUST be enabled/applied in tandem.
|
Log until |
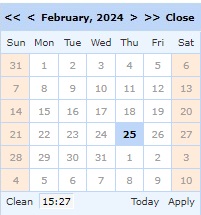
If the "Speech Logging" option was checked to enable the creation of voice logs with more speech information, you MUST also define an end date for those voice logs. The "Log until" and "Speech Logging" options MUST be enabled/applied in tandem.
Define an end date by manually entering a date/time (DD/MM/YYYY HH:MM format) or use the
a. Click
b. Select the appropriate date/time.
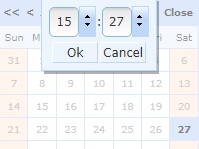
Use the <</</>/>> to navigate the months/years. If you want to clear any information, click If you want to select the current date, click Click the box with the time and define the intended hours/minutes in the resulting input box:
If you want to exit the calendar, click
c. Click |
![]()
If you selected a "custom" speech profile for the operator, there is another speech related option visible:
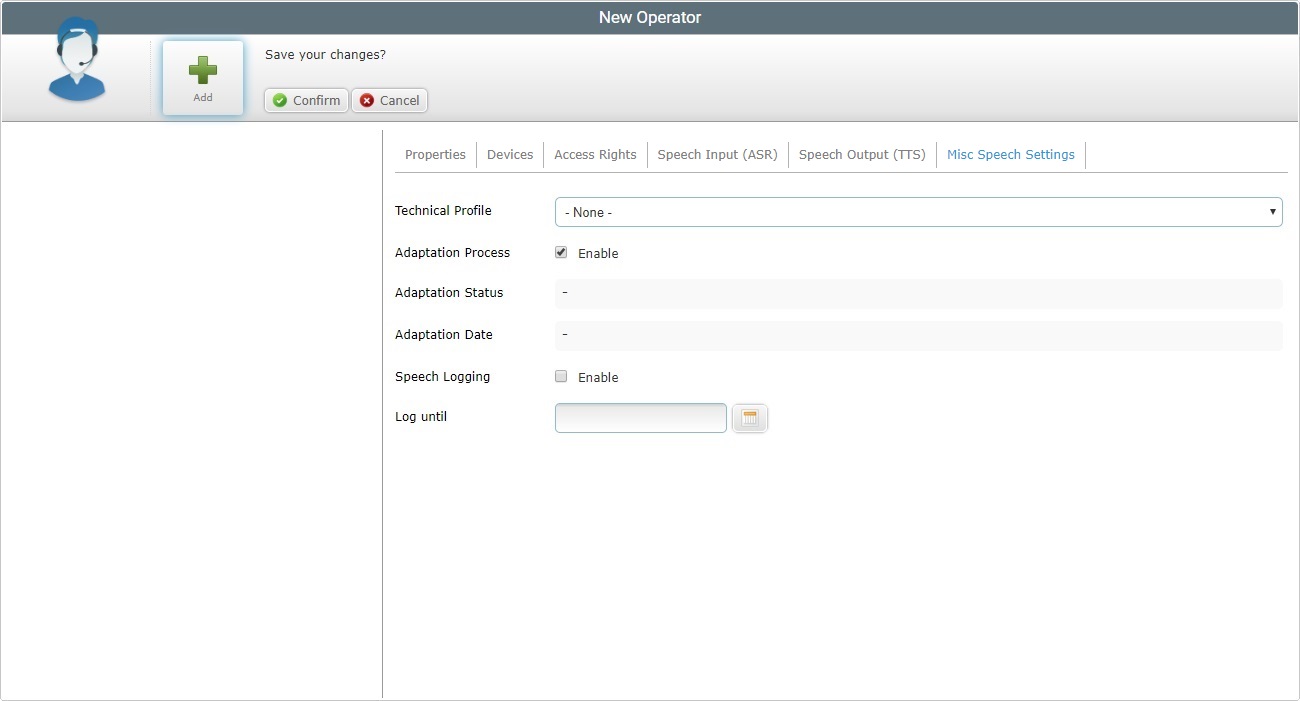
This is the additional option. Check the table above for information on the other options (adaptation and log related options).
Technical Profile |
Select the appropriate Technical Profile ( a configuration file, provided by MCL, that allows for the fine tuning of the MCL-Client behavior). The drop-down list displays the technical profiles added in the account's "Speech Profiles" module (Global Speech Profile Management) or the site's "Speech Profiles" sub-module (Local Speech Profile Management). |
14. Click ![]() to complete the adding of a new operator.
to complete the adding of a new operator.
If you have just created a speech operator, the default non-speech operator icon (on the left upper corner) will be replaced with the speech operator icon - ![]() .
.