|
Counters |
  
|
Counters
|
Counters |
|
Overview
Metrics are values/data that always refer to the operator's interaction with the MCL application/device. A metric example is the number of sales executed by a vendor (in a Sales environment) or the number of shipped orders (in a Logistics environment).
They are fed to MCL-Mobility Platform through messages posted by the MCL application(s)/device(s).
The received metrics are processed and statistics such as Sum, Average, Min, etc, are calculated for each metric.
Counters are used to aggregate specific metrics, meaning, the results of the statistic operations of the defined metrics. These are updated/calculated, in real time, whenever the MCL application/device feeds those metrics
Counters can ONLY be added at account level. The account's sites can view and use the existing counters (ex: as a basis for a dashboard) but they CANNOT edit them.
You can check a counter's settings in its details page so you know the metric information it receives and use it in a dashboard (in its widgets) as a data source.
To access a counter's details page, click the intended counter's name.
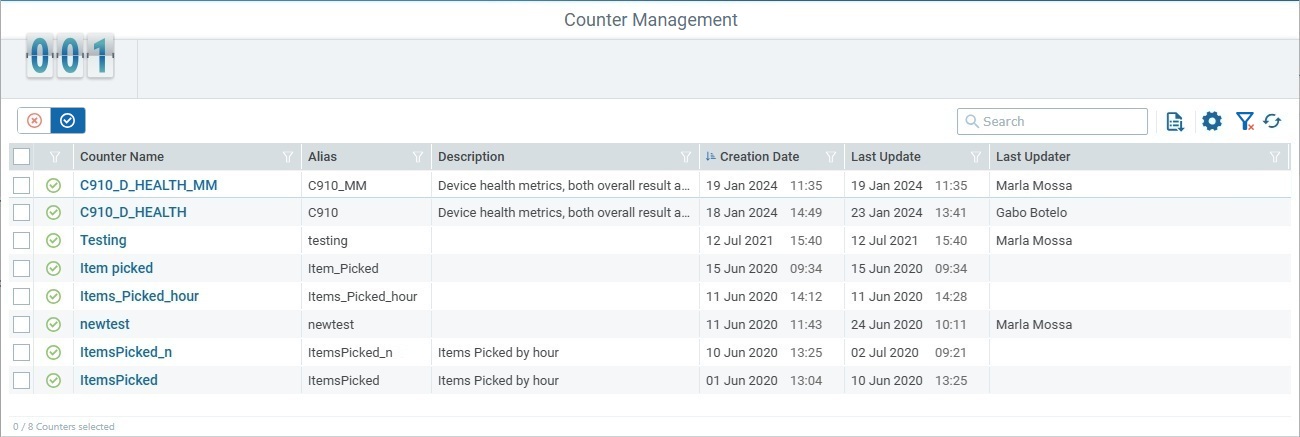
Main Page
Access: Site Dashboard > Control Panel > Business Analytics module > Counters sub-module > Counter Management page
Example of a main page of the "Counters" sub-module listing all counters available to the current site:
Available Options/Buttons
Display Filters
Buttons that filter the counter display according to their "enabled" and/or "disabled" status.
Status Icon List
There is a column (to the left of the "Counter Name" column) which provide status information on the corresponding counter via specific icons.
Icon |
Description |
|---|---|
|
= status “Enabled” - the counter is active. |
|
= status “Disabled” - the counter is inactive but will still check for status changes. It simply will not perform any tasks. |
Options/Buttons
•Use the search box to look for a specific item.
•![]() Downloads a list with the counters in view.
Downloads a list with the counters in view.
The counter list is downloaded in an Excel file format.
![]() Since the list only includes the information on display, make sure the page is listing the intended counters before the download.
Since the list only includes the information on display, make sure the page is listing the intended counters before the download.
You can use the available filters to display the listing you need (ex: filter display based on status, hide/show specific columns).
•![]() Opens a pop-up window where you can check/uncheck the columns you want shown/hidden.
Opens a pop-up window where you can check/uncheck the columns you want shown/hidden.
•![]() Clears any filters you may have set up for this page.
Clears any filters you may have set up for this page.
•![]() Refreshes the information on the current page.
Refreshes the information on the current page.
Header Buttons
In this case, at site level, you cannot manage any aspects of the counters. Counters are exclusively handled at account level.
This chapter includes the following topic:
Topic |
|---|