Overview
You can view the details of a Deployment/Network/Time Period profile and edit some of its criteria/settings.
The editable options available depend on the profile type being edited.
Step-by-step
1. In the Site Dashboard's "Control Panel", click  and, then,
  in the resulting row below.
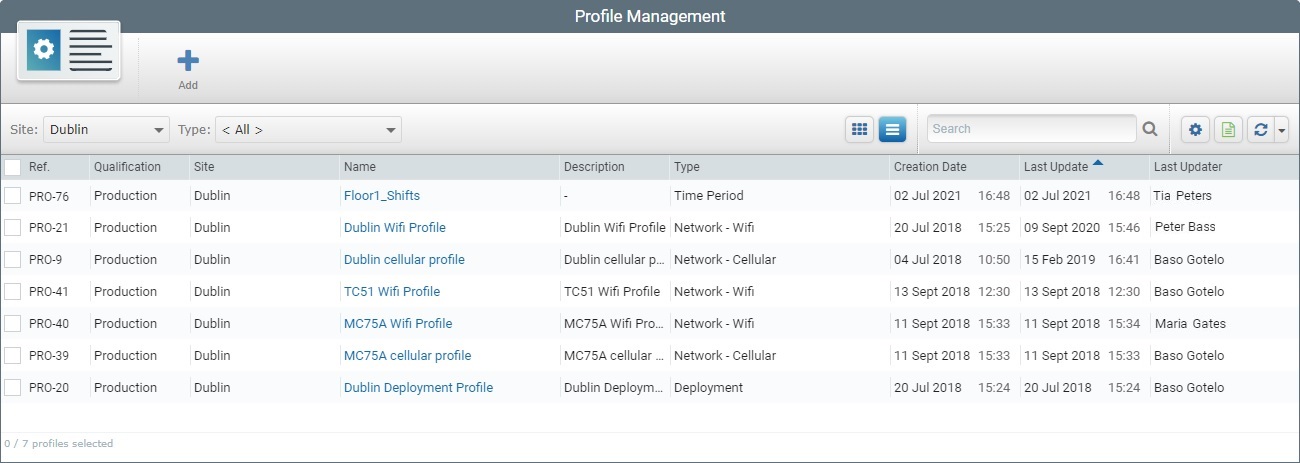
2. Select the profile you want to edit by clicking its name (displayed in light blue).
3. The next options available depend on the type of profile to be edited.
Follow the step-by-step that concerns the type of profile you want to edit:
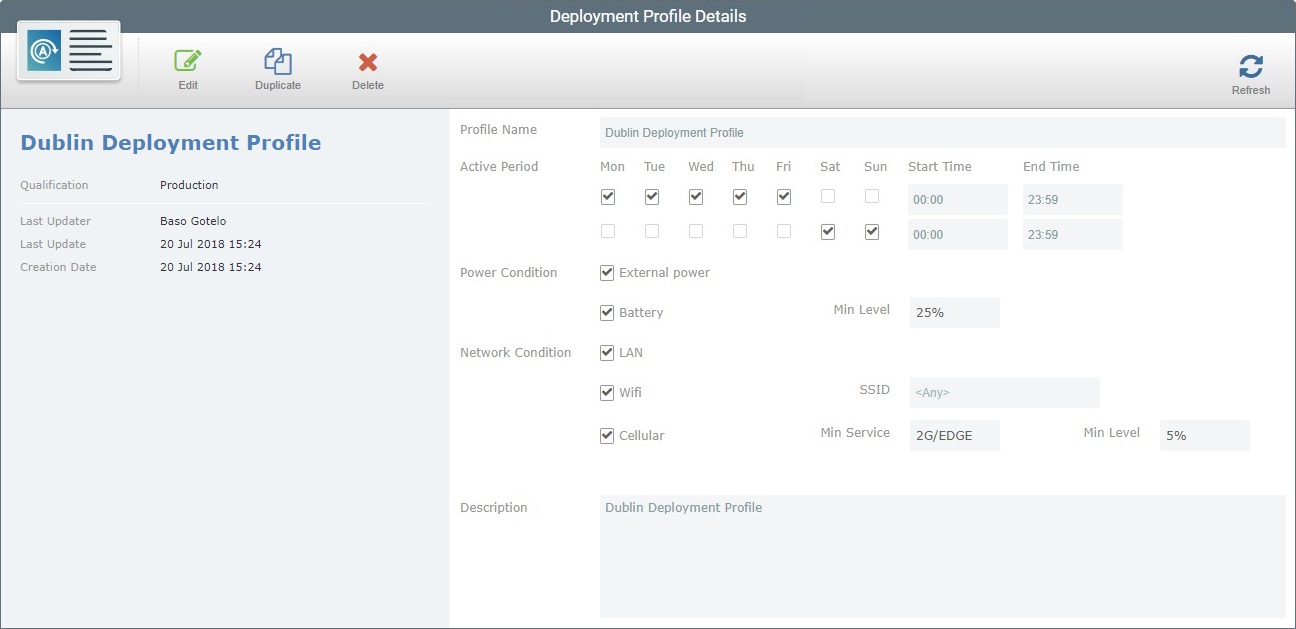
This is the typical details page of a Deployment profile. It is set to view mode.
4. Click  to set the page to edit mode. to set the page to edit mode.
5. Edit the information as necessary:
Name
|
Maintain or edit the name of the deployment profile.
 When editing, we recommend you consider the following: When editing, we recommend you consider the following:
•Avoid special characters - underscores and/or dashes are allowed, •Use alphabetic/numeric characters (a-z; A-Z; 0-9), •Always start the entity's name with an alphabetic character. |
Active Period
|
Maintain or change the time period available for the planned deployment to be executed.
Check the intended days and/or add/change the corresponding start/end times.
|
Power Condition
|
Check the "External Power" option, if the deployment is to be performed when the device is charging. Uncheck it to disregard this criterion.
|
Check "Battery" and/or change the battery's acceptable minimum power level to execute the deployment. Otherwise, uncheck the option.
|
Network Condition
|
Check "LAN" to ensure the device uses LAN communication for the deployment or not. If this criterion is not necessary, uncheck the option.
|
Check "Wifi" to accept this communication type for the deployment or not. Maintain,change or remove the SSID. If Wifi is unnecessary, uncheck it.
|
Check "Cellular" to accept this communication type for the deployment. Maintain or edit the minimum service and the acceptable power level for the deployment. If this criterion is not required, uncheck the option.
|
Description
|
Maintain/edit/add information about the profile.
|
6. Once you have edited the required fields, click  to apply the modifications and return the page to view mode. to apply the modifications and return the page to view mode.
|
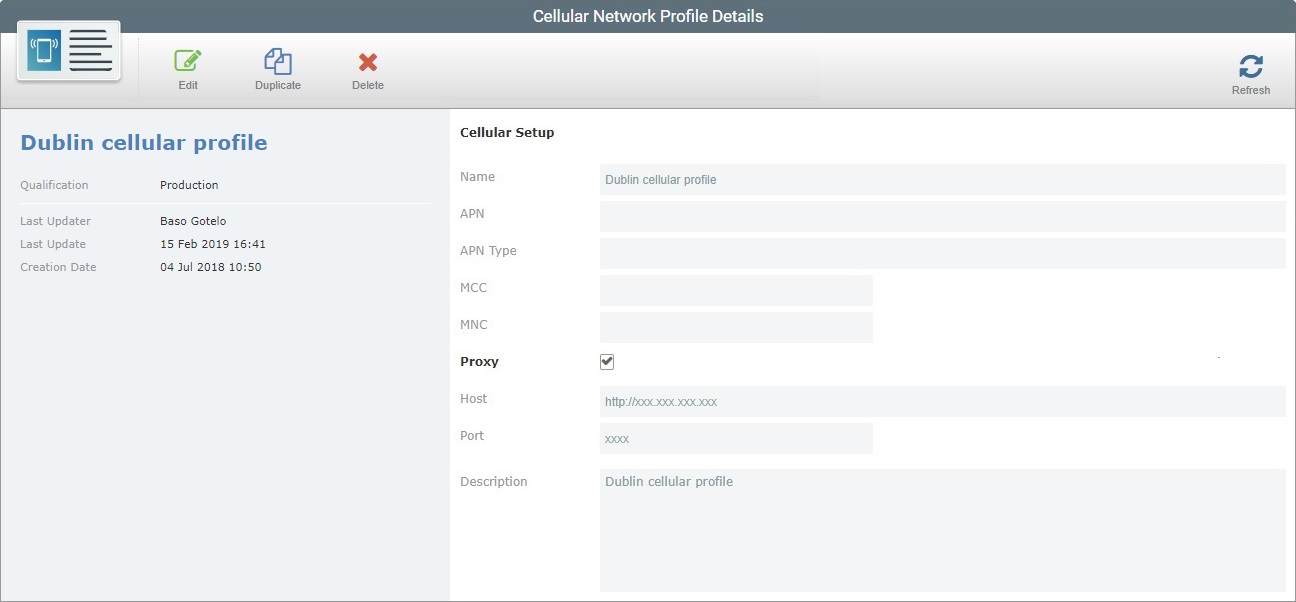
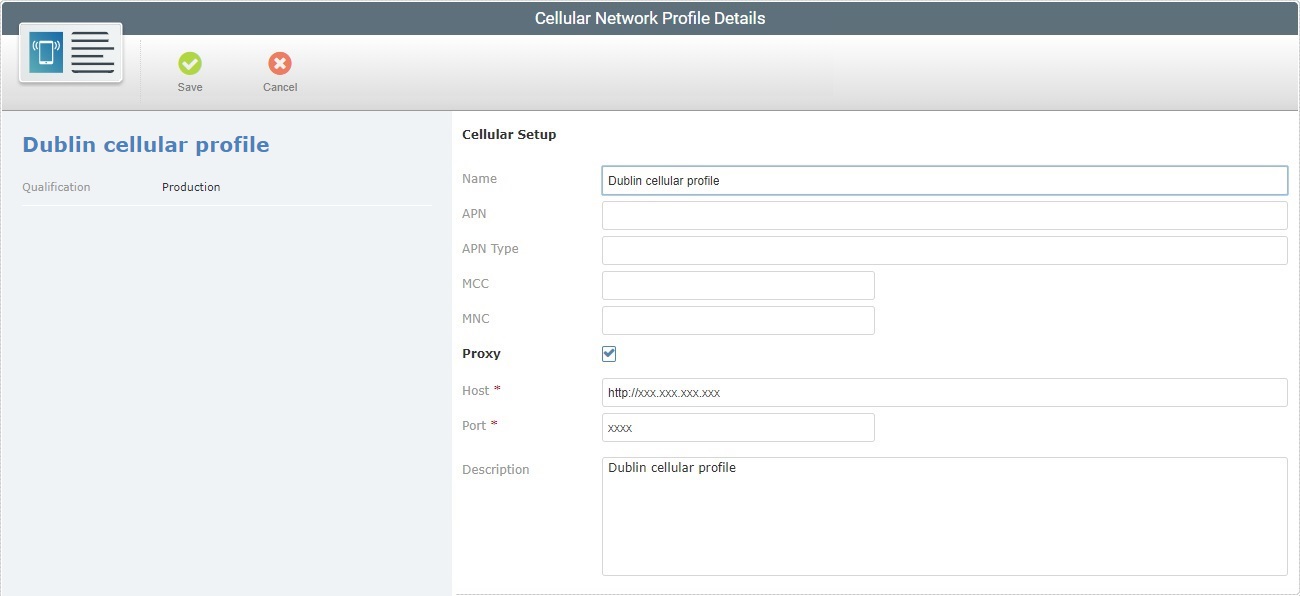
This is the details page of a "Cellular Network Profile". It is set to view mode.
4. Set the page edit mode by clicking .
5. Edit the displayed information, as needed:
Cellular Setup
|
Name
|
Maintain or edit the name for this profile.
When editing, we recommend you consider the following:
•Avoid special characters - underscore and/or dash characters are allowed, •Use alphabetic/numeric characters (a-z; A-Z; 0-9), •Always start the entity's name with an alphabetic character. |
APN
|
Maintain or edit the APN name.
|
APN type
|
Maintain or edit the APN type.
|
MCC
|
Maintain or edit the MCC.
|
MNC
|
Maintain or edit the MNC.
|
Proxy
|
Check this option if you want the cellular connection to use a proxy. If not, uncheck it.
|
Host *
|
This option is ONLY available if the "Proxy" option is checked. Maintain or edit the proxy's host address.
|
Port *
|
This option is ONLY available if the "Proxy" option is checked. Maintain or edit the proxy's host port.
|
Description
|
Maintain/edit/add information about the profile.
|
6. Once you have edited the required fields, click to apply the modifications and return the page to view mode.
|
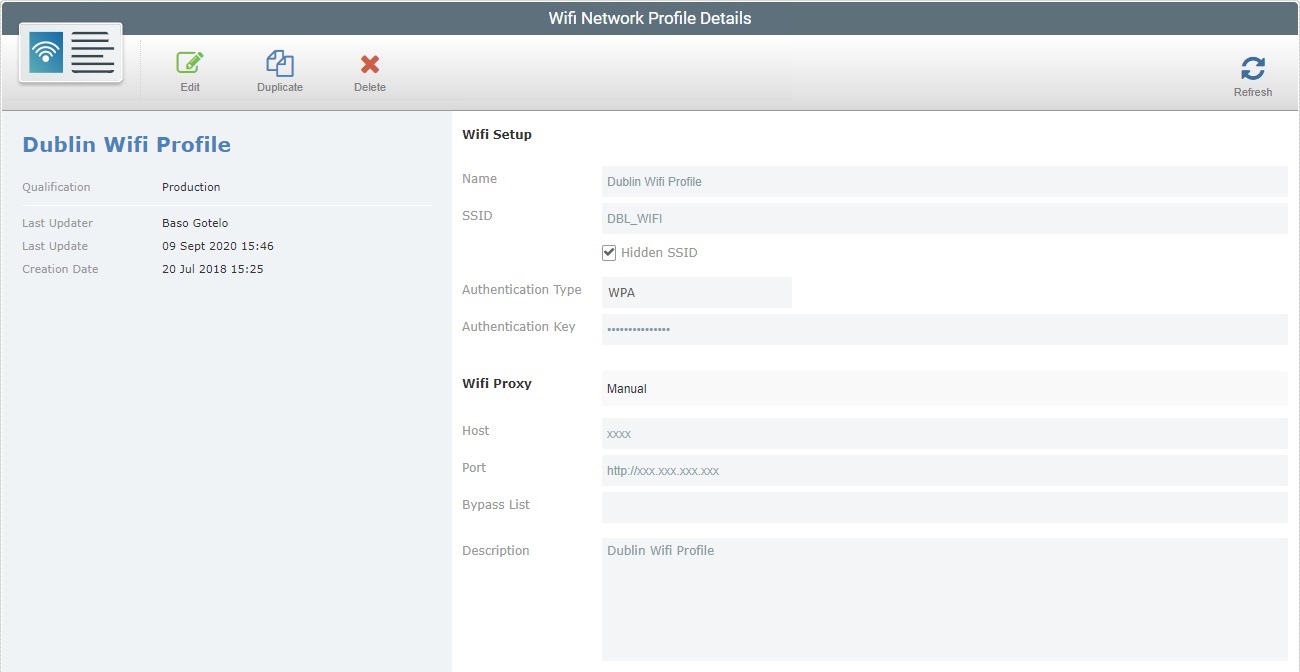
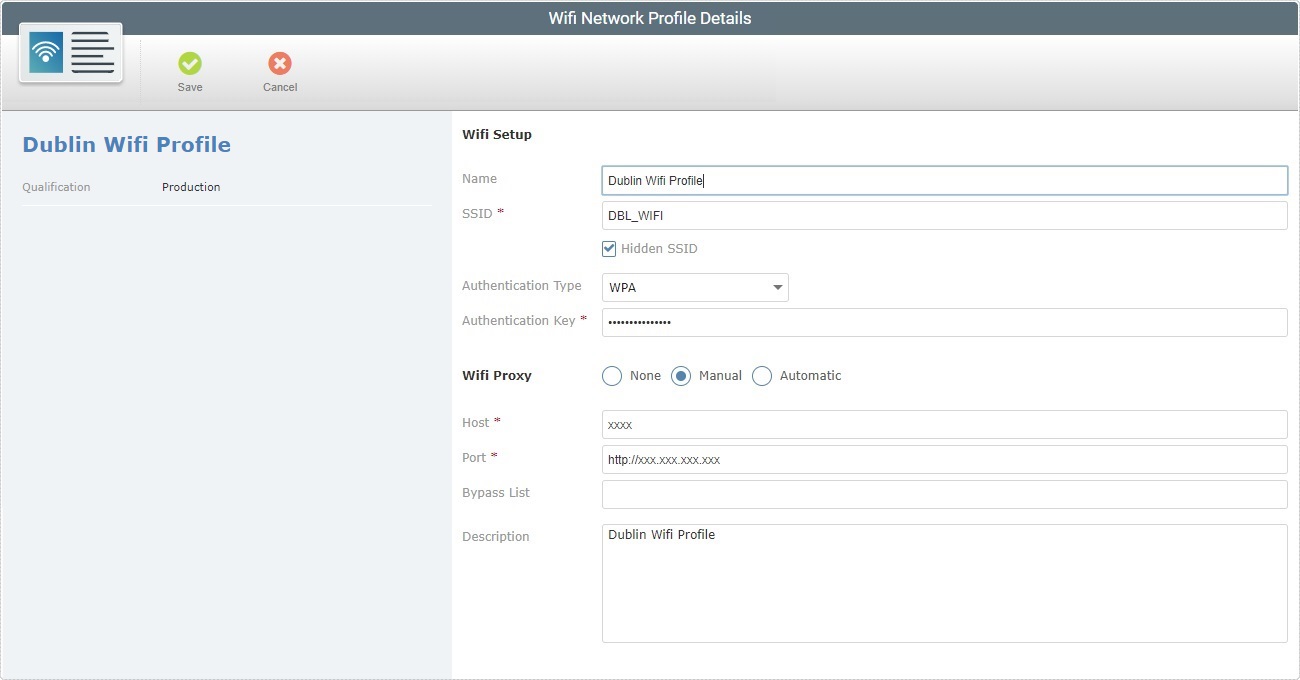
This is the details page of a "Wifi Network Profile". It is set to view mode.
4. Set the page edit mode by clicking .
5. Edit the information as necessary:
Wifi Setup
|
Name
|
Maintain or edit the name of the Wifi profile.
When editing the profile, remember to:
•Avoid special characters (underscores and/or dashes are allowed), •Use alphabetic/numeric characters (a-z; A-Z; 0-9), •Always start the entity's name with an alphabetic character. |
SSID *
|
Maintain or edit the Wifi network's SSID.
|
Hidden SSID
|
Check the option, if this wifi network is meant to be hidden. Otherwise, uncheck it.
|
Authentication Type
|
Maintain the authentication type or check another one.
Check "None" if no authentication is needed or check "WEP" or "WPA" as needed.
Checking "WEP" or "WPA" activates the "Authentication Key" option.
|
Authentication Key *
|
Option ONLY available if an authentication is defined for the network. Edit or enter the corresponding authentication key.
|
Wifi Proxy
|
Maintain or select another proxy use option.
None - To stop proxy use.
Manual - If a proxy is to be used. Define the proxy's Host address, Port (mandatory fields) and, if required, a Bypass List.
Automatic - If a proxy is to be used and automatically detected. You must define the URL for the proxy's auto configuration file (Pac-File URL).
|
Description
|
Maintain, edit or add information concerning the current profile.
|
6. Once you have edited the required fields, click to apply the modifications and return the page to view mode.
|
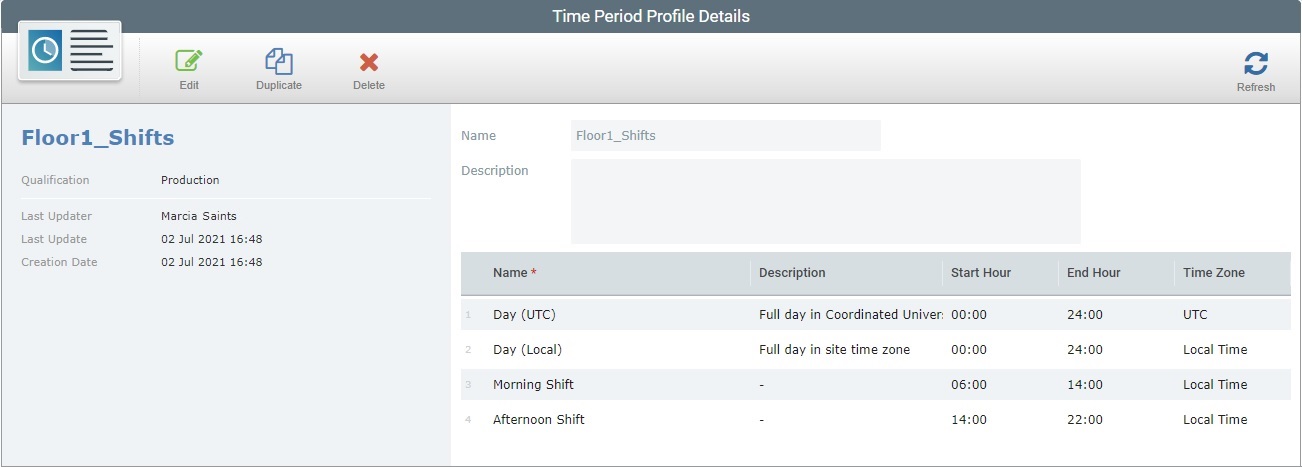
This is the details page of a Time Period profile set to view mode.
4. Set the page to edit mode by clicking .

5. If necessary, edit the fields related to the profile:
Name *
|
Maintain or edit the name of the Time Period profile.
When editing the profile, consider the following:
•Avoid special characters - underscore and/or dash characters are allowed, •Use alphabetic/numeric characters (a-z; A-Z; 0-9), •Always start the entity's name with an alphabetic character. |
Description
|
Add or edit the existing information about the profile.
|
6. If required, edit the time periods of the current profile.
 The 2 default time periods ("Day (UTC)" and "Day (Local)"), can ONLY have their name and description edited. The 2 default time periods ("Day (UTC)" and "Day (Local)"), can ONLY have their name and description edited.
They CANNOT be deleted.
Name *
|
Maintain or edit a name for the corresponding time period.
|
Description
|
Add or edit the entered information about the time period.
|
Start Hour
|
Maintain or define a different start hour.
|
End Hour
|
Maintain or define a different end hour.
|
Time Zone
|
NOT editable.
|
Actions
|
If necessary, click the  of the time period you want to delete. of the time period you want to delete.
|
7. It is possible to add more period times to the current profile. Click  and fill in the available fields. and fill in the available fields.
8. Conclude by clicking .
|


