|
Profiles |
  
|
Profiles
|
Profiles |
|
Overview
It is possible to use several profile types within a site.
•Deployment profile - This type of profile specifies the necessary conditions to trigger a deployment (ex: when it should start and the necessary power and network conditions).
•Network profile - This profile type is a set of communication parameters that regulates specific interactions between the devices and the MCL-Mobility Platform, namely, the pairing of the devices into the account. There are 2 sub-types of Network profiles:
▪Wifi Network profiles - These network profiles define wifi communication settings such as SSID ("Service Set Identifier"), authentication and proxy.
▪Cellular Network profiles - These network profiles define cellular communication settings such as APN ("Access Point Name") and APN type, MCC ("Mobile Country Code"), MNC ("Mobile Network Code") and proxy.
•Time Period profile - This type of profile is used to specify time periods (ex: a day, a warehouse shift) which will be used to aggregate data. This information can, then, be displayed in a Dashboard according to those time periods.
For instance, you may want to analyze the data coming from a night shift that starts at 20:00 one day and finishes at 08:00, the next day. The default time periods are not adequate for this situation so being able to create specific time periods can be very useful. The time frames you define within this profile will become available in the dashboards and compatible widgets (in the Period Resolution related drop-downs) as long as the intended Time Period profile is associated to this site. See Site Details - Time Period Tab.
Profiles are managed in the "Profiles" sub-module (included in a site's "Set Up" module). This module can be accessed by the site manager or any site user with the necessary access rights to manage the profiles that concern their own site. This includes profiles that were created within the site and the ones that were created at account level and are compatible (see Qualification Compatibility) or restricted to that site.
The "Profile Management" Page
Click ![]() , in the Site Dashboard's "Control Panel" and, then,
, in the Site Dashboard's "Control Panel" and, then, ![]() to access the "Profile Management" page and view all the Deployment/Network/Time Period profiles.
to access the "Profile Management" page and view all the Deployment/Network/Time Period profiles.
This page includes profile related information, allows for several profile related operations and provides access to the details page of each available profile.
•The information can be displayed in a Grid or a List view. Use ![]() or
or ![]() to define the most appropriate view.
to define the most appropriate view.
▪![]() (default view) organizes the page into a List view:
(default view) organizes the page into a List view:
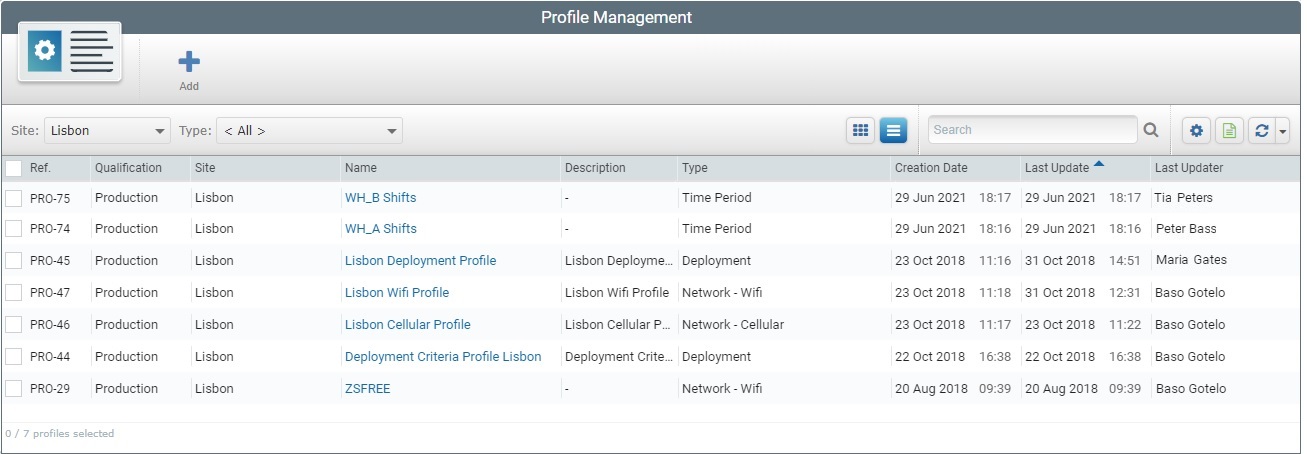
This view displays the following information:
Ref. |
Internal reference that identifies the profile. It is automatically generated when the profile is created and it cannot be changed. |
Qualification |
The profiles's qualification ("Production", "Acceptance", "Test" or "Development"). See Qualification.
•"Production" - for profiles that are used in the customer's working environment, to assist in day-to-day tasks. •"Acceptance" - for profiles that are used for specific testing in an environment that mimics the customer's working environment. •"Test" - for profiles that are used in more general tests. •"Development" - for profiles that are used in a development environment. |
Site |
The entity the profile is associated to. For profiles associated to the current site, it displays the site's name. If the field displays "<All Sites>", it means the corresponding profile is associated to the account and available to all the sites included in the account. |
Name |
The profiles's name (which is displayed in light blue). Click the name to access the corresponding profile's details page. See Profile Details. |
Description |
Information about the profile that was added in the "Description" field of the profile's details page. |
Type |
The profiles's type - "Deployment", "Network - Cellular", "Network - Wifi" or "Time Period". |
Creation Date |
The date and time the profile was created. |
Last Update |
The date and time of the profiles's last update. |
Last Updater |
The name of the user that updated the profile last. |
OR
▪Use ![]() to organize the page into a Grid view:
to organize the page into a Grid view:
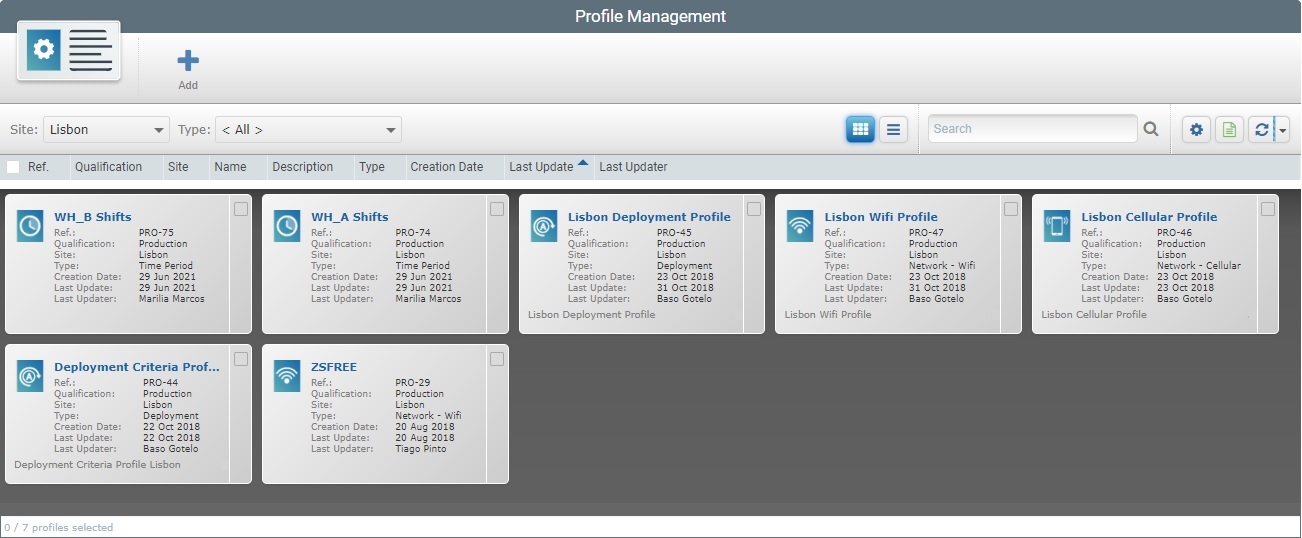
This view displays the following information:
Name (displayed in light blue) |
The profiles's name. Click the name to access the corresponding profile's details page. See Profile Details. |
Ref. |
Internal reference that identifies the profile. It is automatically generated when the profile is created and it cannot be changed. |
Qualification |
The profiles's qualification ("Production", "Acceptance", "Test" or "Development"). See Qualification. |
Site |
The entity the profile is associated to. If the profile is associated to the current site, the site's name is displayed. If the profile is available to all the sites within the account (= associated to the account) , the field displays "<All Sites>". |
Type |
The profiles's type - "Deployment", "Network - Cellular", "Network - Wifi" or "Time Period". |
Creation Date |
The date and time the profile was created. |
Last Update |
The date and time of the profiles's last update. |
Last Updater |
The name of the user that updated the profile last. |
Description |
Information about the profile that was added in the "Description" field of the profile's own details page. |
![]() If some of these fields/columns are NOT available, use the
If some of these fields/columns are NOT available, use the ![]() button (upper right corner) to open a list with the available fields/columns and check the ones you want to display.
button (upper right corner) to open a list with the available fields/columns and check the ones you want to display.
•If necessary, you can restrict the available profile list with the use of the "Site" and/or "Type" filters:

![]() Use this drop-down to filter the displayed information:
Use this drop-down to filter the displayed information:
▪Selecting the current site (default option) means viewing the profiles that were created/associated to the site.
▪Selecting "<All Sites>" lists the profiles that are available to all the account's sites (= profiles created at account level).
▪Choosing "<All>" provides a view of the profiles associated to the current site and the ones that are available for all the sites.
![]() Use this drop-down to limit the profile display by type:
Use this drop-down to limit the profile display by type:
▪Select the intended profile type - "Deployment", "Network - Cellular", "Network - Wifi" or "Time Period".
▪For a full view, select/maintain the "<All>" option.
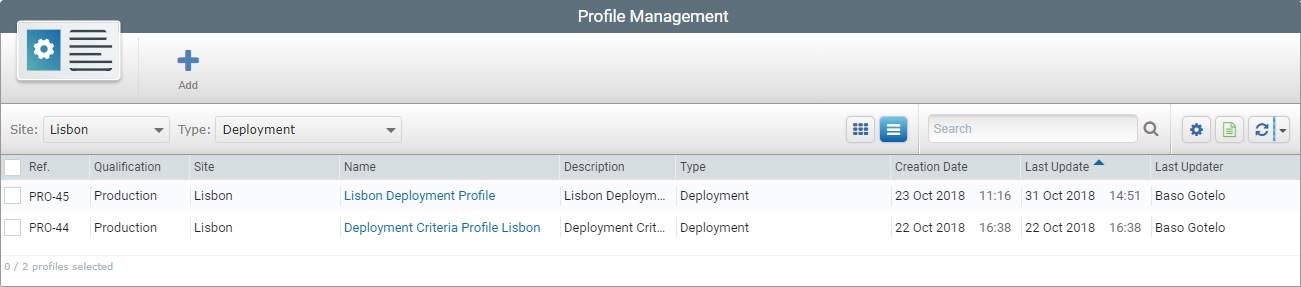
Example 1. Site: <Current Site> + Type: Deployment The list includes all the Deployment profiles created within the site.
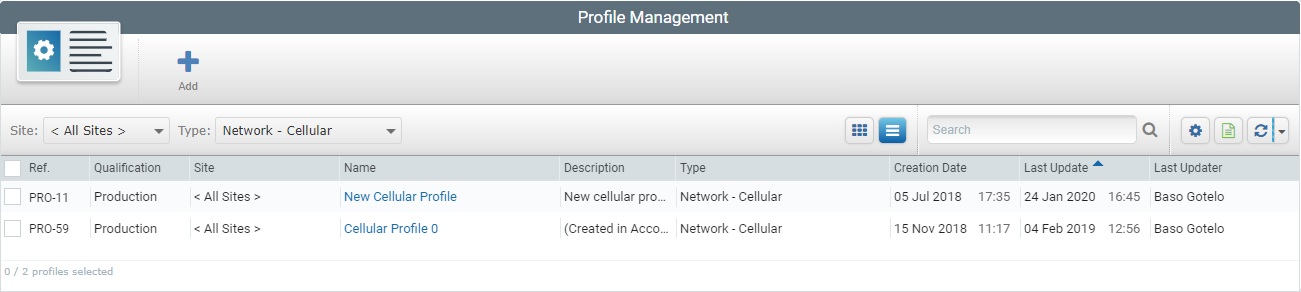
Example 2. Site: <All Sites> + Type: Network - Cellular ONLY the Network-Cellular profiles that are available to all the sites and compatible to the current site are listed.
|
•There is a search tool to look for specific profiles:
![]()
a. Enter the name of the profile you are searching for or a word from its description.
b. Click ![]() or press <ENTER> in your PC keyboard to initiate the search.
or press <ENTER> in your PC keyboard to initiate the search.
c. Use one of the following to clean the searched data to start a new search or return to a full view:
▪empty the search box and click ![]() ;
;
▪empty the search box and press <ENTER> in your PC keyboard;
▪click the ![]() icon.
icon.
•Use ![]() to define which columns/fields should be hidden or shown:
to define which columns/fields should be hidden or shown:
a. Click ![]() , which is located on the upper right corner, to open the list of available columns/fields.
, which is located on the upper right corner, to open the list of available columns/fields.
b. Check/uncheck the intended columns/fields.
c. Click ![]() again to hide the list and apply.
again to hide the list and apply.
•If necessary, click ![]() to export a "*.csv" file with a list of the displayed profiles. The export only concerns the currently viewed/filtered profiles and corresponding displayed columns/fields.
to export a "*.csv" file with a list of the displayed profiles. The export only concerns the currently viewed/filtered profiles and corresponding displayed columns/fields.
![]() If necessary, use the "Site" and/ or "Type" filters to define what you want/need to export.
If necessary, use the "Site" and/ or "Type" filters to define what you want/need to export.
If you only need certain columns, use ![]() to show/hide the intended columns (click this button to expand the list of columns and check/uncheck the columns, as needed).
to show/hide the intended columns (click this button to expand the list of columns and check/uncheck the columns, as needed).
•Use ![]() to refresh the page and define a Page Refresh cycle:
to refresh the page and define a Page Refresh cycle:
▪Click ![]() for an automatic Page Refresh.
for an automatic Page Refresh.
▪Use ![]() to define the page's Refresh cycle:
to define the page's Refresh cycle:
a. Click ![]() to access the drop-down with the available time periods ("Disabled"; "Auto" (default option); "1 minute"; "# minutes").
to access the drop-down with the available time periods ("Disabled"; "Auto" (default option); "1 minute"; "# minutes").
b. Select the preferred Page Refresh cycle.
c. Click the arrow again to hide the list.
If you select "Disabled", the page's content is ONLY refreshed when you click ![]() .
.
A blue vertical gauge in the middle of the button displays the Refresh cycle's progress.
•If necessary, you can reorder the information in the columns.
![]()
Mouse over the desired column header to access the sort arrow and organize the corresponding column's listed items:
▪![]() by ascending order.
by ascending order.
▪![]() by descending order.
by descending order.
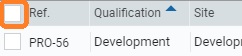
•If you want to select all the listed items (in this case, all the profiles) at once, click the column header's checkbox.
To create a profile, use the ![]() button. This option is ONLY available in the page's header if NO profile is selected. For more detailed information, see Creating a Profile.
button. This option is ONLY available in the page's header if NO profile is selected. For more detailed information, see Creating a Profile.
To duplicate a profile, use the ![]() button. This option is only visible if you select one(1) profile from the list. For more detailed information, see Duplicating a Profile.
button. This option is only visible if you select one(1) profile from the list. For more detailed information, see Duplicating a Profile.
To delete a profile, use the ![]() button. This option is visible if you select one(1) or more profiles from the list. For more detailed information, see Deleting a Profile.
button. This option is visible if you select one(1) or more profiles from the list. For more detailed information, see Deleting a Profile.
This chapter includes all the aspects associated to profiles.
Topic/Operations |
Description |
|---|---|
View the details of a profile. |
|
Create a profile. |
|
Edit a profile. |
|
Duplicate a profile. |
|
Delete a profile. |