|
Reading/Sending a Message |
  
|
Reading/Sending a Message
|
Reading/Sending a Message |
|
Overview
It is possible to read a message that has been sent to a Mobile to Back-end and/or a Back-end to Mobile topic as well as send a message to the topic itself. Both features are mainly used for testing/maintenance (the "Messagebox Service's" purpose is to facilitate message exchange between the devices and a back-end).
If you intend to send a message onto the selected topic, make use of its "Message Template" tab (in the topic's "...Topic Details" page) to create a message model with the necessary headers - the template is automatically applied to any message you send onto that topic.
Any necessary editing of a header's name is done in the "Message Template" tab. Editing a Topic - Message Template tab.
Check the following links to access the intended step-by-step:
See To Read a Topic's Message below.
See To Send a Message to a Topic.
To Read a Topic's Message
This "Read Message" operation reads the queued messages that were sent to the current topic.
This is mainly used for testing purposes.
![]()
This option is ONLY available for "Mobile to Back-end" and "Back-end to Mobile" topic types.
The topic's "...Topic Details" page MUST be in view mode so you can access the corresponding button.
Step-by-step
1. Click  in the Site Dashboard's "Control Panel" and, then,
  .
.
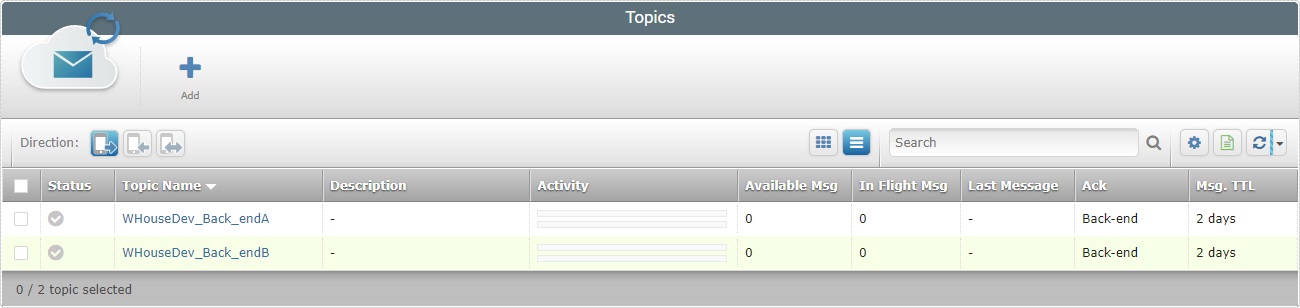
2. In the resulting "Topics" page, click the name of the topic (displayed in light blue) to access the corresponding details page.
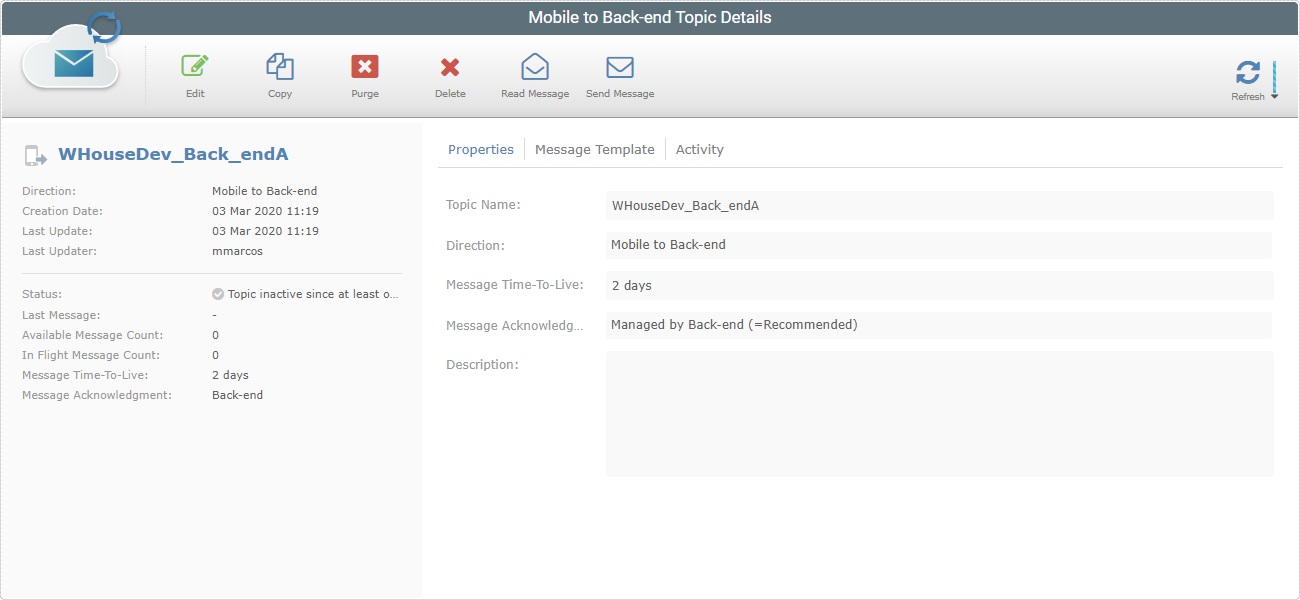
3. With the "...Topic Details" page in view mode, click ![]() to open a "Message Receiver Tool" window.
to open a "Message Receiver Tool" window.

4. Click ![]() to access the first message on queue and read it.
to access the first message on queue and read it.
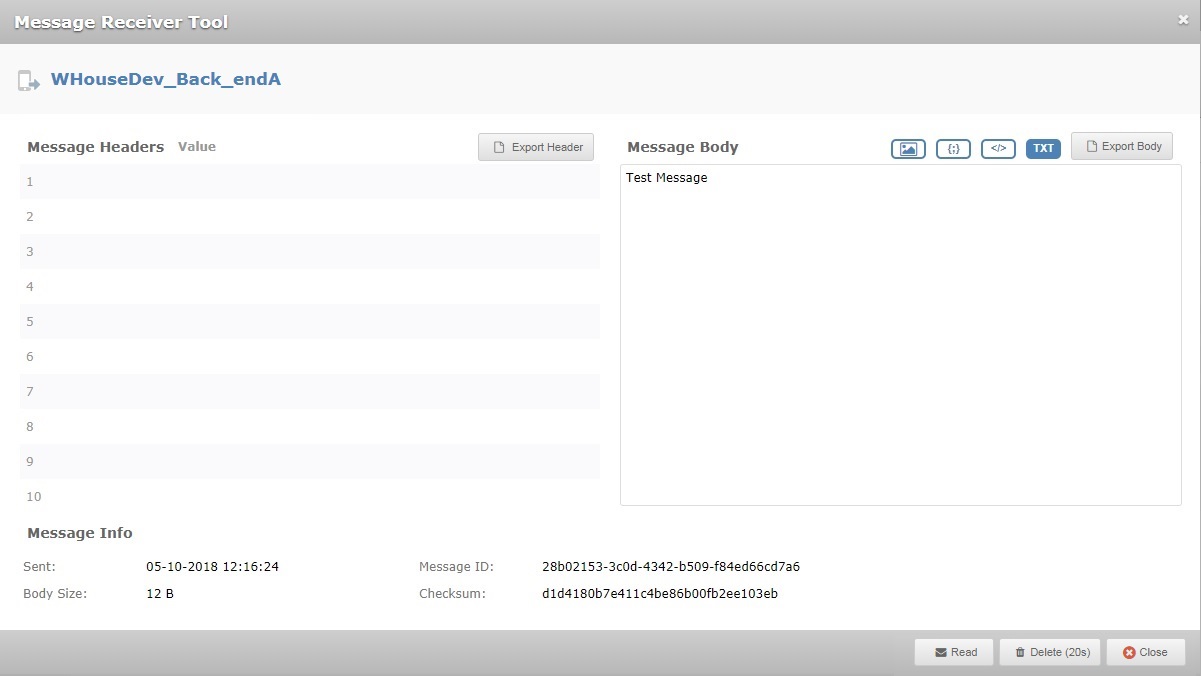
The window displays the message's content (Headers and Body) and the following info:
Message Info |
|
Sent |
When the message was sent to the current topic (date/time). |
Body Size |
The size of the message's content. |
Message ID |
The message's ID. |
Checksum |
The checksum for message validation. |
There are also other operations available:
•![]() Use this button to download a "*.csv" file with the message's header (index number, name, value information).
Use this button to download a "*.csv" file with the message's header (index number, name, value information).
•![]() Click this button to download a "*.txt" file with the message's body.
Click this button to download a "*.txt" file with the message's body.
•![]() Click this button to view the message's content in image format.
Click this button to view the message's content in image format.
•![]() Use this button to view the message's body in JSON format.
Use this button to view the message's body in JSON format.
•![]() Click this button to view the message's body in XML format.
Click this button to view the message's body in XML format.
•![]() Use this button to view the body's content to a TXT format.
Use this button to view the body's content to a TXT format.
5. Click ![]() to read the next message.
to read the next message.
6. If required, use the enabled ![]() button to delete the message you are currently reading from the topic.
button to delete the message you are currently reading from the topic.
The button includes a 20 second timeout during which the "delete" operation is available.
7. If you are done, click ![]() to close the window and return to the topic's details page.
to close the window and return to the topic's details page.
Use this "Send Message" operation to create/send a message to the currently open topic.
This is mainly used for testing purposes.
![]()
This option is ONLY available for "Mobile to Back-end" and "Back-end to Mobile" topic types.
The topic's "...Topic Details" page MUST be in view mode so you can access the corresponding button.
![]() The message size limit is 1 MB.
The message size limit is 1 MB.
Step-by-step
1. In the Site Dashboard's "Control Panel", click . Then, click the sub-module to open the "Topics" page.
2. Click the name of the topic you want to send a message to (displayed in light blue).
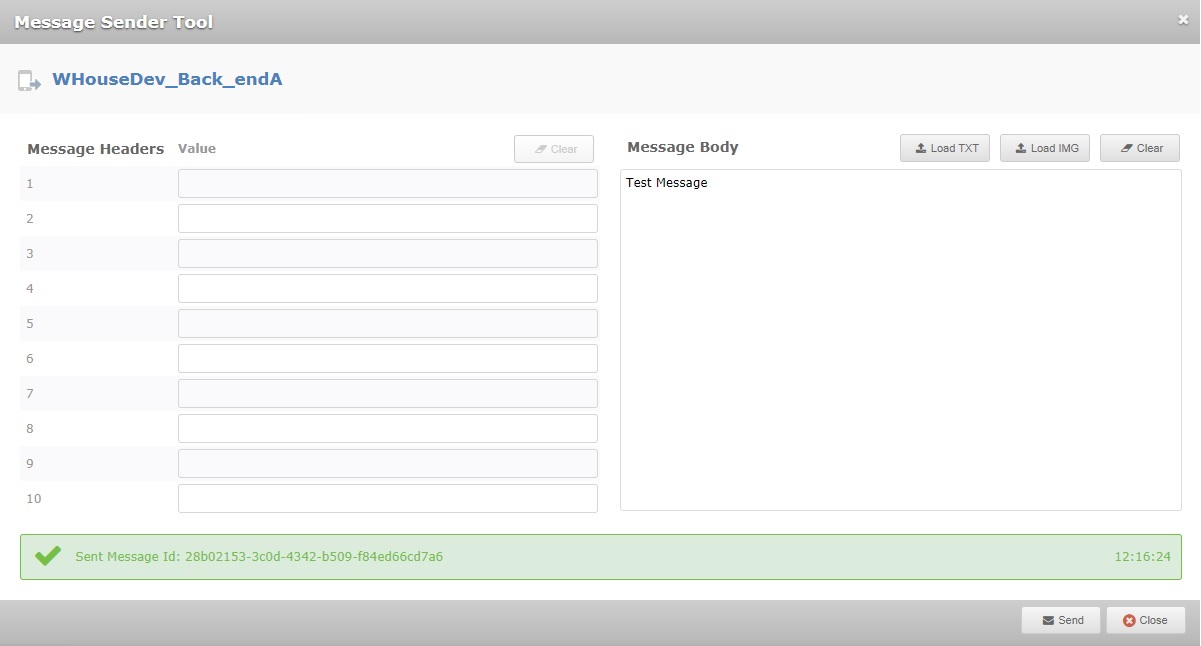
3. In the resulting "...Topic Details" page, click ![]() . This opens a "Message Sender Tool" window.
. This opens a "Message Sender Tool" window.
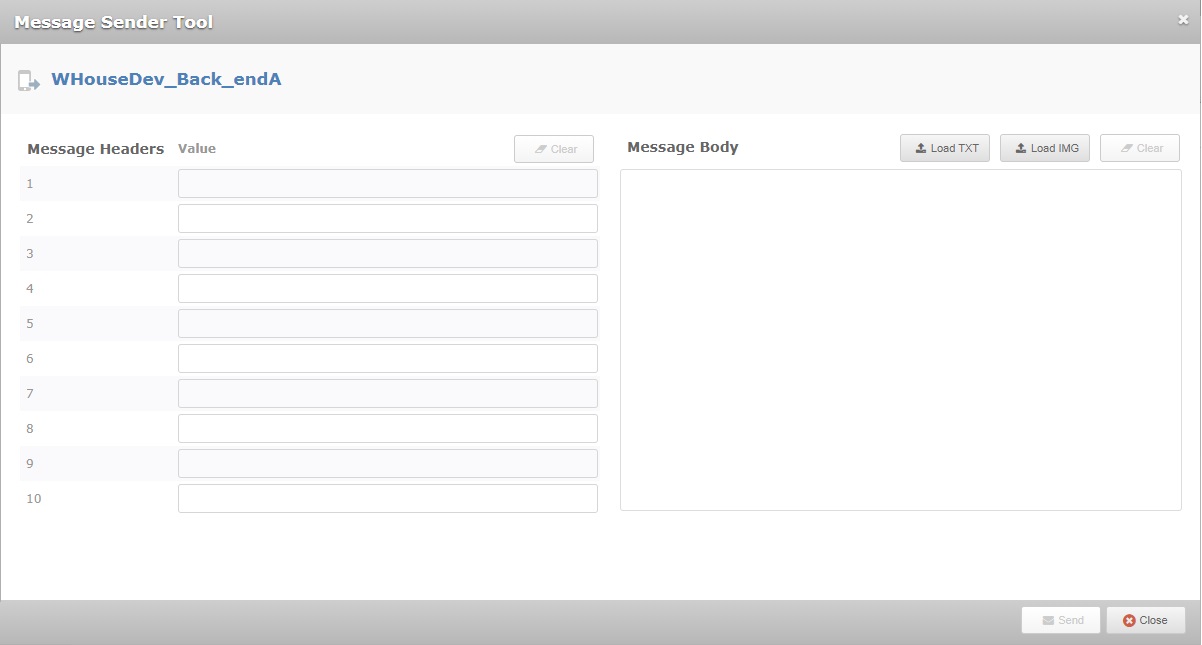
![]()
If you have previously created a message template, in the "Message Template" tab, it is applied to this message - the intended "Message Headers" are already filled in.
4. Fill in the defined "Message Headers" with the required values.
5. In the "Message Body" box, enter the intended information manually.
As an alternative, use the ![]() button to load an image file or
button to load an image file or ![]() to load a ".txt" file onto the message's body.
to load a ".txt" file onto the message's body.
Both buttons open an OS browse window so you can browse for the intended file.
6. If necessary, use the ![]() button of each section ("Message Headers" and/or "Message Body") to clear the fields/box and restart.
button of each section ("Message Headers" and/or "Message Body") to clear the fields/box and restart.
7. Once you've added the necessary information (in the message's Header and/or the Body), click ![]() and wait for the success message that includes the message's ID.
and wait for the success message that includes the message's ID.
8. If you want to send more messages to this topic, repeat the previous steps (steps 4 to 7).
If you are done, click ![]() .
.