|
Working with the HTTP/Web Services Processes Group |
  
|
Working with the HTTP/Web Services Processes Group
|
Working with the HTTP/Web Services Processes Group |
|
Process Purpose
Web services allow access to software components through the HTTP standard protocol. The HTTP/Web Services group of processes enables the device to directly call REST compliant web services, SOAP compliant web services or any http URL.
Most used methods are possible (GET, POST, etc). With this group of processes, it is possible to receive data in JSON and XML formats and to parse them into data files and/or variables.
![]() There is one recurring icon in these processes:
There is one recurring icon in these processes:
![]() Click this icon (located on the upper right corner of the properties window) to setup a time out. See To Define a Time Out below.
Click this icon (located on the upper right corner of the properties window) to setup a time out. See To Define a Time Out below.
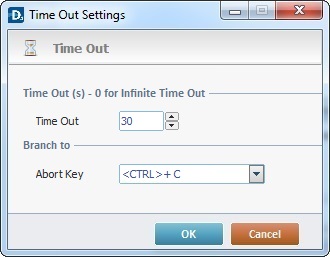
To Define a Time Out
The setting of a time out value allows you to define how long the device will wait to receive the confirmation that the operation is executed with success.
To setup a “Time Out” value:
a. Click ![]() on the upper right corner of the process's properties window to open a "Time Out" window.
on the upper right corner of the process's properties window to open a "Time Out" window.
b. Proceed as follows:
Time out (s) – 0 for infinite time out |
|
Time Out |
Define the time out value in seconds. |
Branch to |
|
Abort Key |
Select a keyboard key from the drop-down list, in case you need to abort the current operation before the defined time out is executed. |
c. After filling in the required options, click ![]() to conclude or
to conclude or ![]() to abort the operation.
to abort the operation.
The web service related processes include a few options/windows designed to help you with web service transactions and response data management:
•The URL Assistant window defines/constructs the call to a web service. See The URL Assistant below.
•The Test the Web Service window tests, retrieves and exposes the response so it can be used by other options. See The Test the Web Service window.
•The Body to Use for Parsing window allows for the manipulation of displayed data for a parsing. See The Body to Use for Parsing window.
The purpose for this assistant is to help you define the required parameters in the web service request URL.
Step-by-step
1. Click ![]() (available to the right of the "URL" text box).
(available to the right of the "URL" text box).

2. Fill in the following options:
Host and Resource Path |
|
Host Name |
Define the host. Enter the host name or select a host profile from the drop-down list. If necessary, click |
Resource Path/ |
Enter the resource path or click |
Query String |
|
Parameter Name column |
Enter the necessary query parameter(s) or click the corresponding |
Value column |
Enter the query value(s) or click the corresponding |
![]()
Depending on the process you call the URL Assistant from, you may or may not have the Test the Web Service option available (![]() icon). See The Test the Web Service window.
icon). See The Test the Web Service window.
Ex: This option is NOT available when you open the URL Assistant within the "Call & Parse" and "Parse Response" processes because the ![]() is already available in the upper right corner of the corresponding properties window.
is already available in the upper right corner of the corresponding properties window.
3. Click ![]() to apply your options in the URL Assistant window.
to apply your options in the URL Assistant window.
The Test the Web Service window
This window has multiple purposes. It tests the request to the web service and it retrieves/displays the result of the request, meaning, the response which, in turn, will be fed into another useful window - the "Body to Use for Parsing" window. It does NOT expose the full raw response, it displays arrays and the first 5 elements of each array.
The information displayed by this window is affected by its context. Below are the two types of "Test the Web Service" window:
|
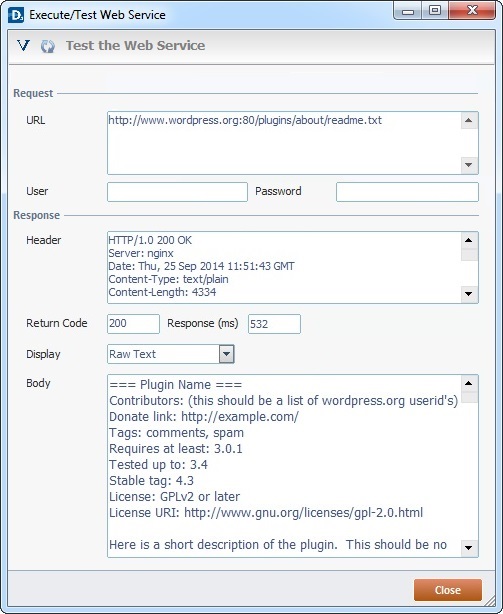
This window opens when it is called from the following HTTP/Web Services processes:
"REST/JSON" "REST/XML" "Get File from URL" "HTTP Request"
It displays the defined URL, corresponding authentication parameters, if required, and resulting web service response.
Most of the fields are automatically filled in once you get the web service's response but you can perform some operations:
I. In the "Display" drop-down list (Response section), select the appropriate format for the display of information ("HTML", "Raw Text", "XML", "JSON", "Image" or "Hexadecimal").
II. Use the icons on the upper left corner of the window when necessary:
Click |
|
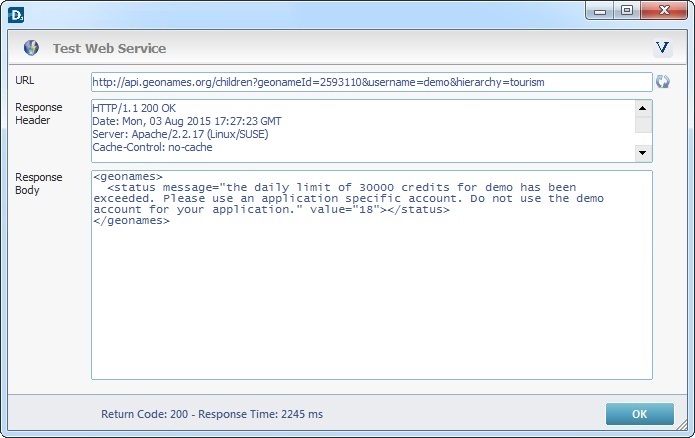
This window opens when it is called from the following HTTP/Web Services processes:
"Call & Parse" "Parse Response"
It displays the web service's response (header and body).
If the URL includes variables, you can define their values. Use the
If you want to refresh the Web Service request, click
Click |
Detail of a Set Variable Values window
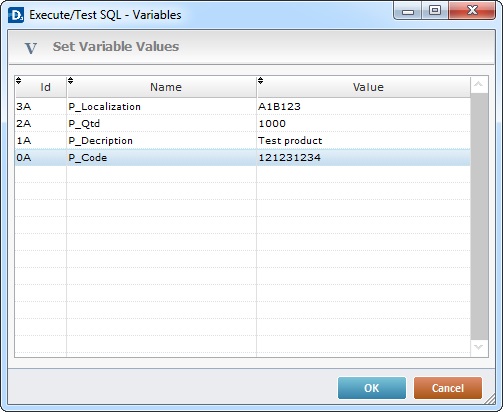
This window displays all the variables contained in the URL you have defined.
I. Click the field you want to edit so it is set to "edit" mode.
II. Enter the value you want to add to the variable in the "value" column.
III. Click ![]() to apply and return to the "Test Web Service" window.
to apply and return to the "Test Web Service" window.
The Body to Use for Parsing window
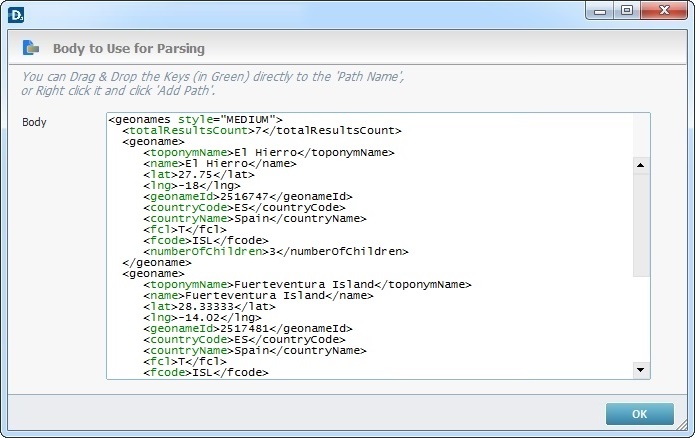
This window displays the body of a web service response and is accessed via the ![]() button which is available in the properties window of the "Call & Parse" and "Parse Response" processes (specifically, in the "Parse Simple" and "Parse to File" tabs).
button which is available in the properties window of the "Call & Parse" and "Parse Response" processes (specifically, in the "Parse Simple" and "Parse to File" tabs).
The displayed information is a result of a web service test (the "Test the Web Service" window feeds the "Body to Use for Parsing" window). In fact, if you perform a web service test (by clicking ![]() in the "Call" tab) and, then, proceed to the "Parse Simple" or "Parse to File" tabs, the corresponding "Test the Web Service" window, that was left open, is replaced with the "Body to Use for Parsing" window.
in the "Call" tab) and, then, proceed to the "Parse Simple" or "Parse to File" tabs, the corresponding "Test the Web Service" window, that was left open, is replaced with the "Body to Use for Parsing" window.
The purpose for this window is to use the highlighted keys (elements in green/arrays in blue) to define the elements to be parsed via a Drag-and-Drop or a right-click option.
Check the example/explanations below to understand the window's usage in each available context.
Examples of "Body to Use for Parsing" window Usage
Examples A and B illustrate the use of a "Body to Use for Parsing" window in a simple parse of a web service call. Both options are performed within the "Parse Simple" tab of the "Call & Response" process.
Example A
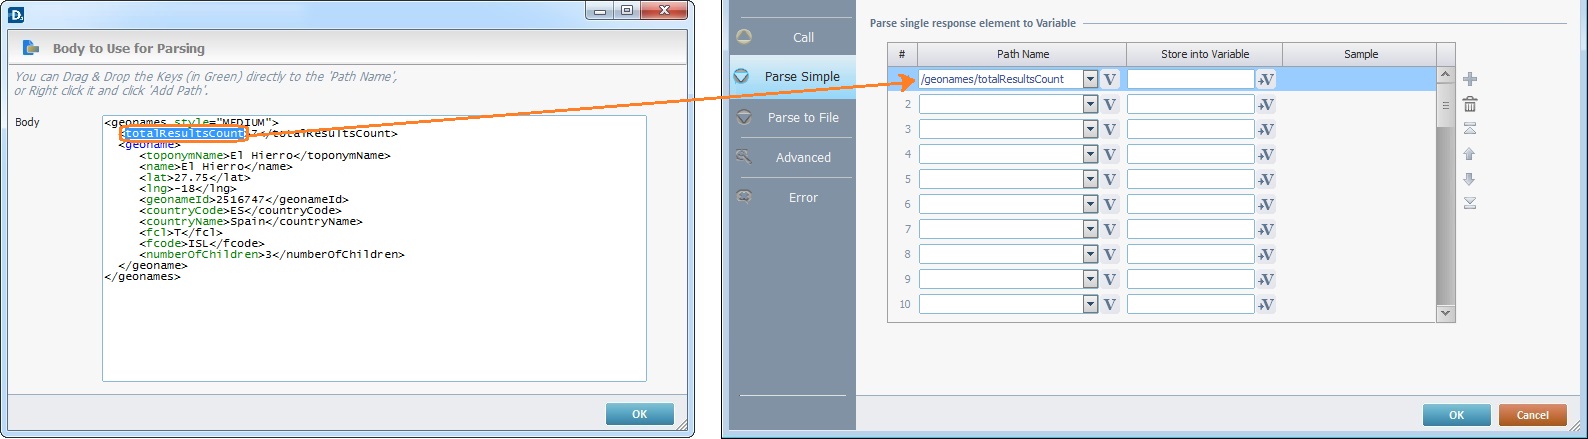
Both the "Parse Simple" tab and the "Body to Use for Parsing" window are open. Only the elements displayed in green (keys) are available for a drag-and-drop.
The "totalResultsCount" key is dragged into the " Path Name" column. The writable variable of the "Store into Variable" column must be entered by hand or via a drop-down selection in the corresponding row.
Example B
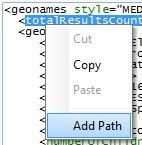
Both the "Parse Simple" tab and the "Body to Use for Parsing" window are open. Instead of a "Drag-and-Drop", right-click the key (displayed in green) to be defined as a path and select the "Add Path" option. This adds the selected key onto the "Path Name" column of the "Parse Simple" tab. The writable variables of the "Store into Variable" column are entered one by one in the corresponding rows.
Examples C and D illustrate the use of a "Body to Use for Parsing" window in the "parse to file" procedure of a web service response. Both options are performed within the "Parse to File" tab of the "Call & Response" process.
Example C
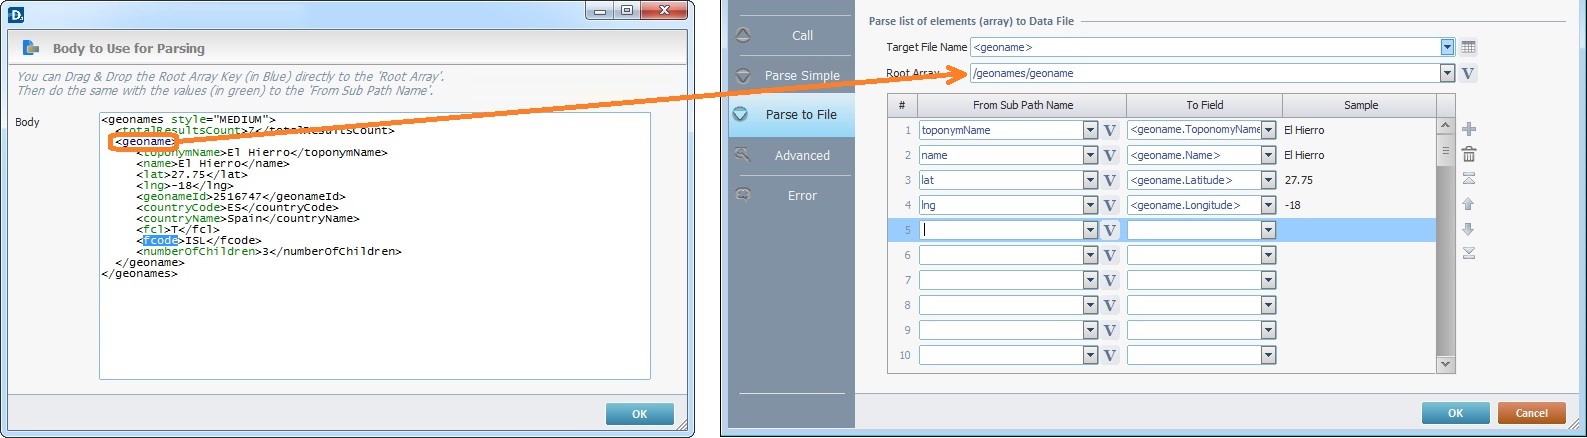
Both the "Parse to File" tab and the "Body to Use for Parsing" window are open. In this case, it is the array "geoname" that is dragged into the "Root Array" box.
Once the drag-and-drop is performed, you get the following window:
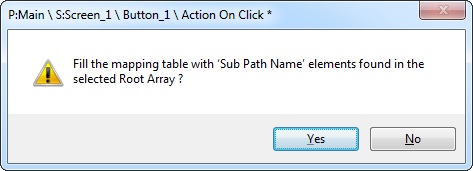
Either click![]() and all the array's elements are retrieved and automatically placed in the "From Sub Path Name" column OR click
and all the array's elements are retrieved and automatically placed in the "From Sub Path Name" column OR click ![]() and fill in the related "From Sub Path Name" column of the "Parse to File" tab, one by one. If you choose not to fill the "From Sub Path Name" column automatically, you can use the:
and fill in the related "From Sub Path Name" column of the "Parse to File" tab, one by one. If you choose not to fill the "From Sub Path Name" column automatically, you can use the:
Drop-Down List - (performed in the "Parse to File" tab) In the "From Sub Path Name" column, select the necessary elements from each field's drop down list.
Drag-and-Drop - Drag the intended elements (in green) from the "Body to Use for Parsing" window onto the "From Sub Path Name" column.
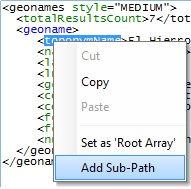
Right-click menu option - In the "Body to Use for Parsing" window, right click the element you want (in green) and select "Add Sub Path". The selected element will be added to the "From Sub Path Name" column. (This option is only available after you have defined the "root array".)
Example D
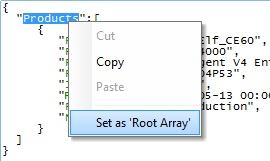
Both the "Parse to File" tab and the "Body to Use for Parsing" window are open. Instead of a "Drag-and-Drop", right-click the intended array and select the "Set as 'Root Array' " option. Decide how to fill in the related "Sub Path Name" column, in the resulting window.
Either click![]() and all the array's elements are retrieved and automatically placed in the "From Sub Path Name" column OR click
and all the array's elements are retrieved and automatically placed in the "From Sub Path Name" column OR click ![]() and fill in the related "From Sub Path Name" column of the "Parse to File" tab, one by one. If you choose not to fill the "From Sub Path Name" column automatically, you can use the:
and fill in the related "From Sub Path Name" column of the "Parse to File" tab, one by one. If you choose not to fill the "From Sub Path Name" column automatically, you can use the:
Drop-Down List - (performed in the "Parse to File" tab) In the "From Sub Path Name" column, select the necessary elements from each field's drop down list.
Drag-and-Drop - Drag the intended elements (in green) from the "Body to Use for Parsing" window onto the "From Sub Path Name" column.
Right-click menu option - In the "Body to Use for Parsing" window, right click the element you want (in green) and select "Add Sub Path". The selected element will be added to the "From Sub Path Name" column. (This option is only available after you have defined the "root array".)
The HTTP/Web Services group includes the following processes:
----- Web Services |
----- HTTP |
----- Legacy |