|
Adding an Add-on to a Subscription |
  
|
Adding an Add-on to a Subscription
|
Adding an Add-on to a Subscription |
|
Overview
A Subscription enables the use of a number of services and products during a specific period of time. It is possible to add services and products to a subscription in the form of an Add-on. These add-ons can consist of more devices/operators, products, servers, etc., but do NOT contemplate a time period extension.
After the purchase of an MCL-Mobility Platform add-on, you receive an email with the following information:
•Order ID
•Add-on code
•Add-on password
•Product name
•A direct link to the MCL Subscription Manager
The add-on addition is performed in a subscription's "Subscription Details" page. There are two paths to access this page:
1. Use the link included in the email. See To Add an Add-on to a Subscription via Email Link.
2. Login to your MCL-Mobility Platform account to open the corresponding Admin Dashboard. See To Add an Add-On to a Subscription via Admin Dashboard below.
To Add an Add-on to a Subscription via Admin Dashboard
Step-by-step
1. Login to your MCL-Mobility Platform account and open its Admin Dashboard.
2. Access the "Subscriptions" page by clicking ![]() (in the Admin Dashboard's "Control Panel").
(in the Admin Dashboard's "Control Panel").
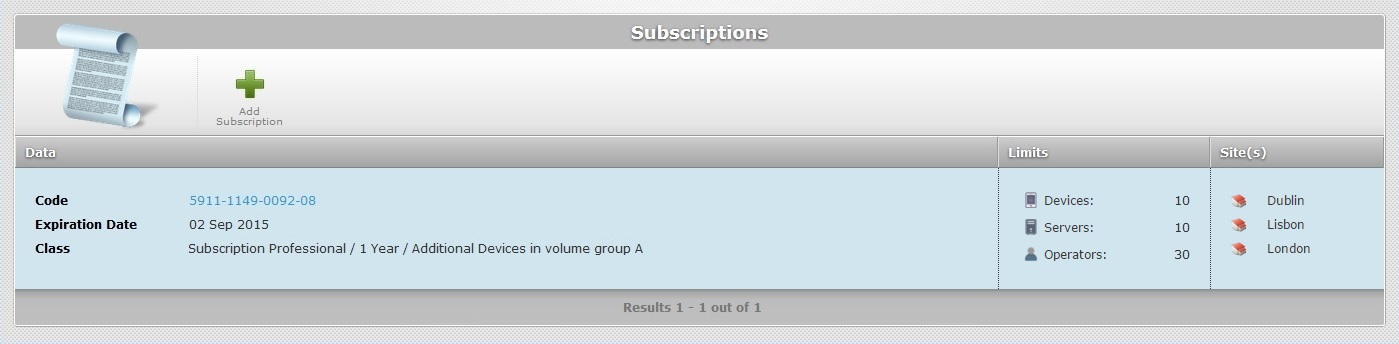
3. Click the subscription you want to add the add-on to (displayed in light blue). This opens the corresponding "Subscription Details" page.
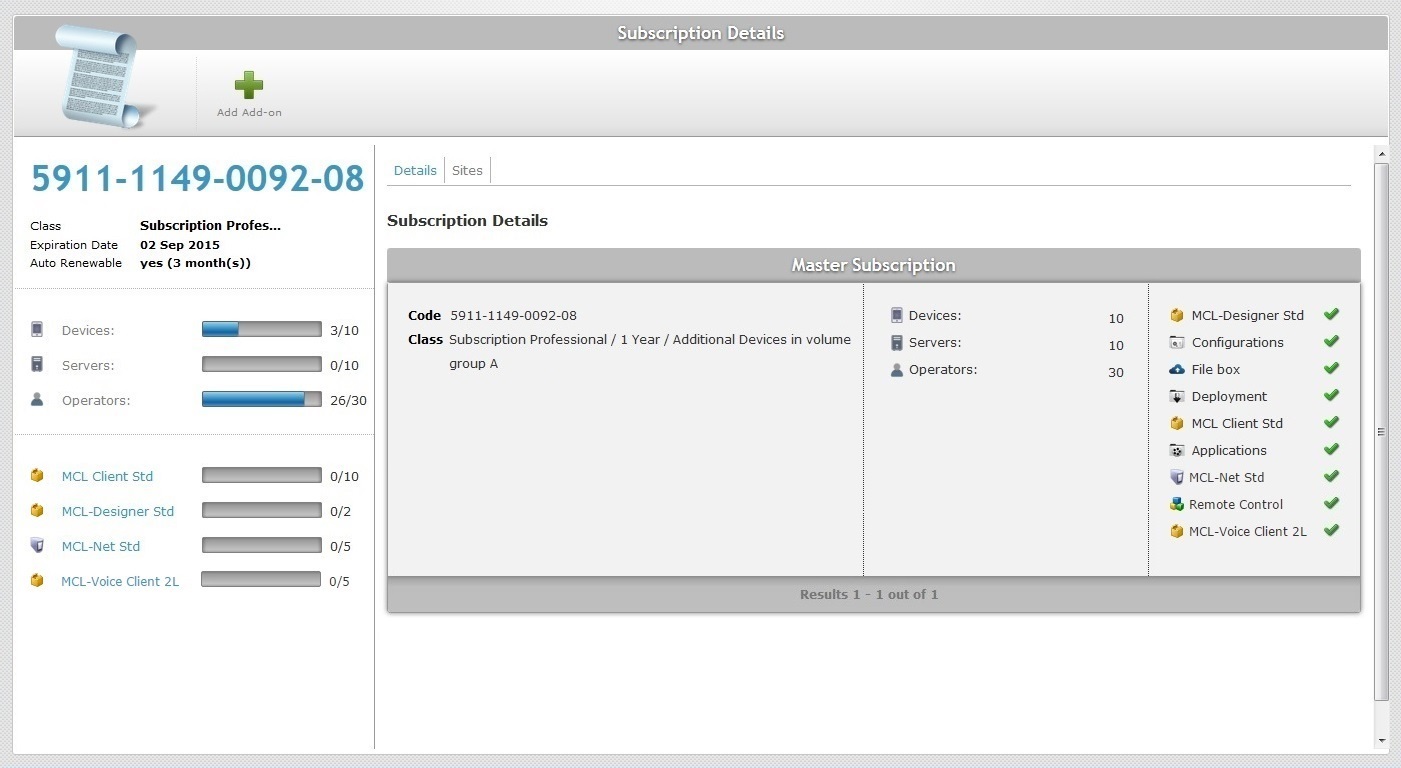
4. Click ![]() .
.
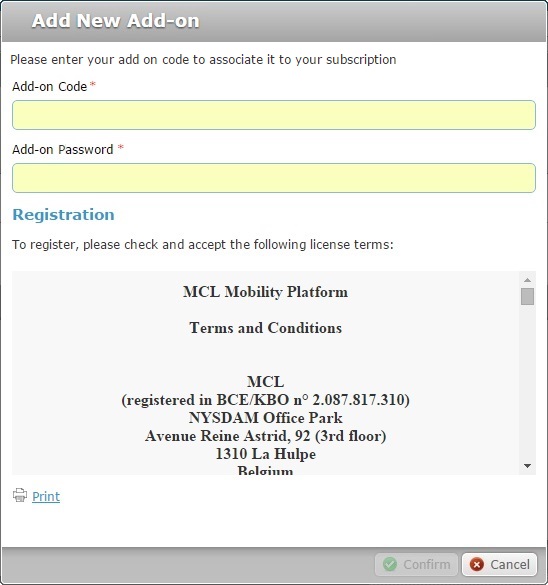
5. Fill in the "Add-on Code *" box. The information is contained in the email you were sent after the add-on purchase.
6. Fill in the "Add-on Password *" box. The information is contained in the email you were sent after the add-on purchase.
7. Read the terms and conditions associated to the add-on. (The scroll-down of the "Terms and Conditions" document enables the ![]() button.)
button.)
8. If required, click ![]() to print the "Terms and Conditions" document regarding the new add-on.
to print the "Terms and Conditions" document regarding the new add-on.
9. Click ![]() to conclude the operation. (The
to conclude the operation. (The ![]() button only activates after you have scrolled down the "Terms and Conditions" document).
button only activates after you have scrolled down the "Terms and Conditions" document).
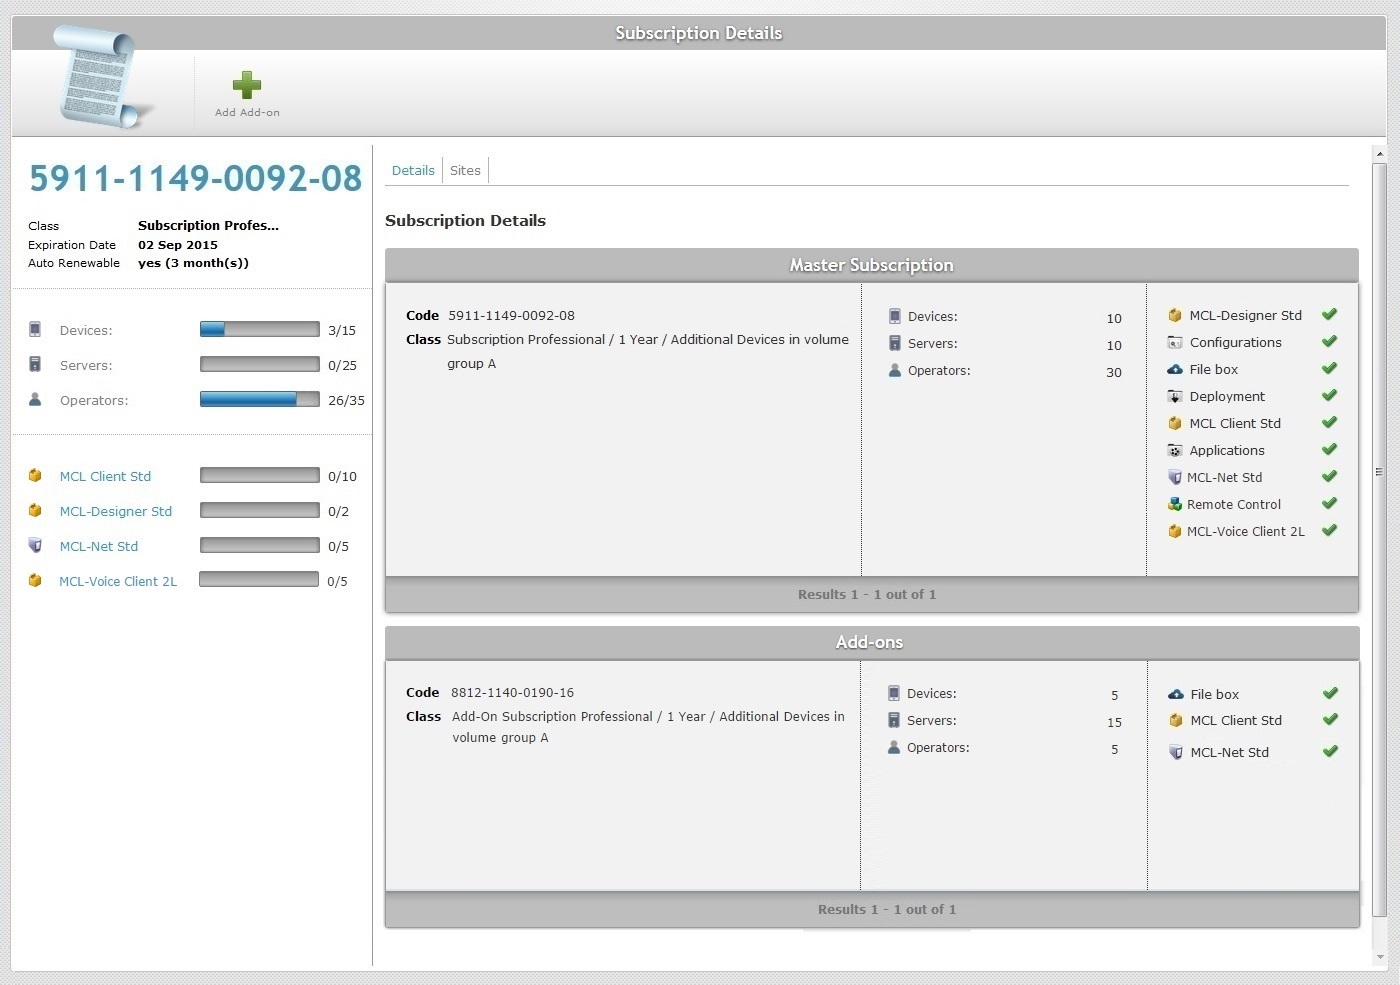
The add-on is displayed in the "Subscription Details" page of the subscription you included the Add-on in ("Add-ons" table).
To Add an Add-on to a Subscription via Email Link
Step-by-step
1. Click the link included in the email you receive after the Add-on purchase.
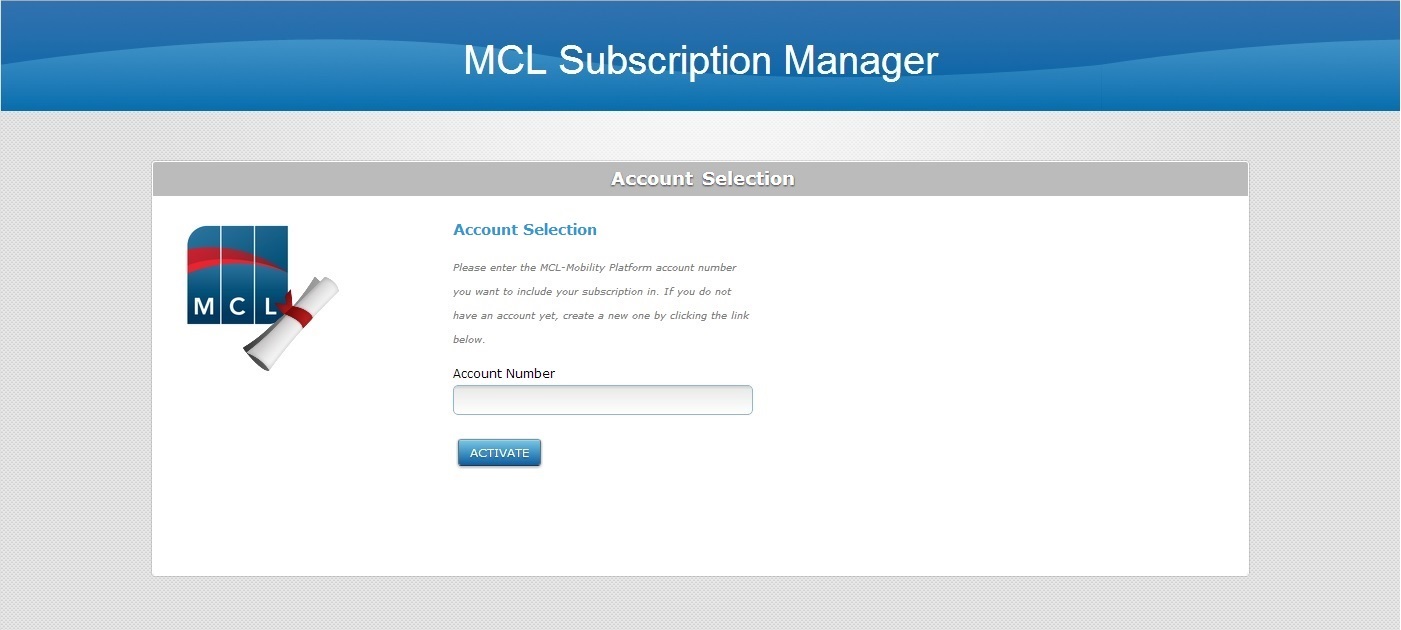
2. Enter your account number.
3. Click ![]() to open the "Subscriptions" page.
to open the "Subscriptions" page.
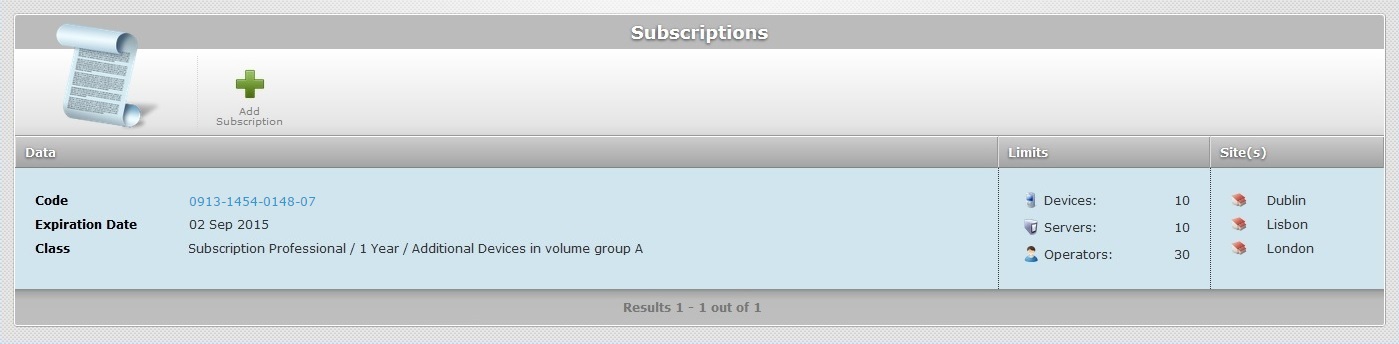
4. Click the subscription that you want to associate the add-on to (displayed in light blue). This opens the corresponding "Subscription Details" page.
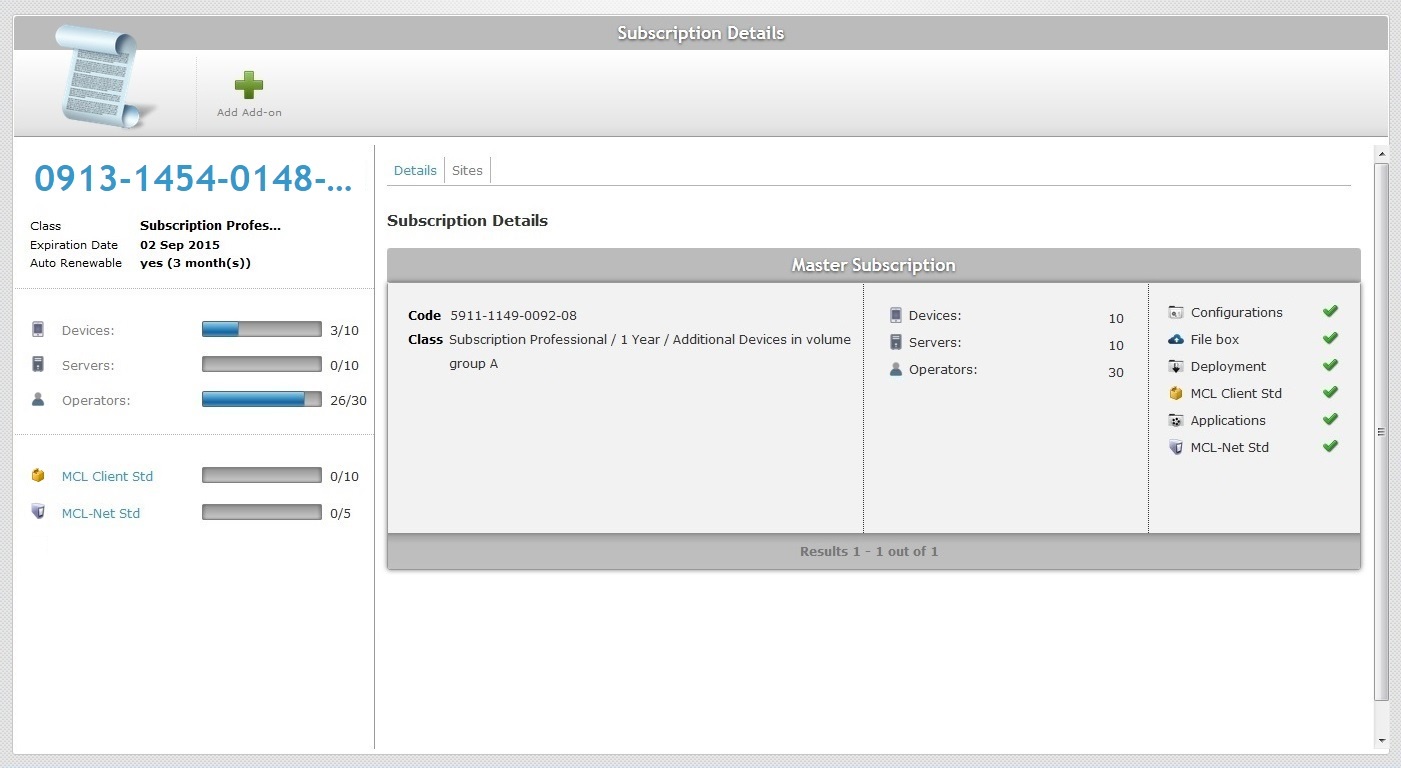
5. Click ![]() .
.
6. Fill in the "Add-on Code *" box. The information is contained in the email you were sent after the add-on purchase.
7. Fill in the "Add-on Password *" box. The information is contained in the email you were sent after the add-on purchase.
8. Read the terms and conditions associated to the add-on. (The scroll-down of the "Terms and Conditions" document enables the ![]() button.)
button.)
9. If required, click ![]() to print the "Terms and Conditions" document regarding the new add-on.
to print the "Terms and Conditions" document regarding the new add-on.
10. Click ![]() to conclude the operation. (The
to conclude the operation. (The ![]() button only activates after you have scrolled down the "Terms and Conditions" document).
button only activates after you have scrolled down the "Terms and Conditions" document).
The add-on is displayed in the "Subscription Details" page of the subscription you included the Add-on in ("Add-ons" table).