|
Sharing a Dashboard |
  
|
Sharing a Dashboard
|
Sharing a Dashboard |
|
Overview
It is possible to share a dashboard with others (people without access to your MCL-Mobility Platform site). The shared dashboard can ONLY be viewed by the people that use a specific link.
The intended dashboard is shared via an autonomous URL that provides direct access to the selected dashboard in Live mode (= display ONLY includes the dashboard's name, the actual widgets and a few filters/options). The shared link does not require a user/password authorization. Furthermore, this link can have an expiration date.
To share a dashboard, you must, first, generate the URL and, then, send that link to the intended receiver(s). This is done in the "Share Link" pop-up window which is accessed by clicking  - this option is available in the "Dashboard Management" page when ONLY ONE dashboard is selected.
Share a Dashboard Link
Step-by-step
1. Open the "Dashboard Management" page.
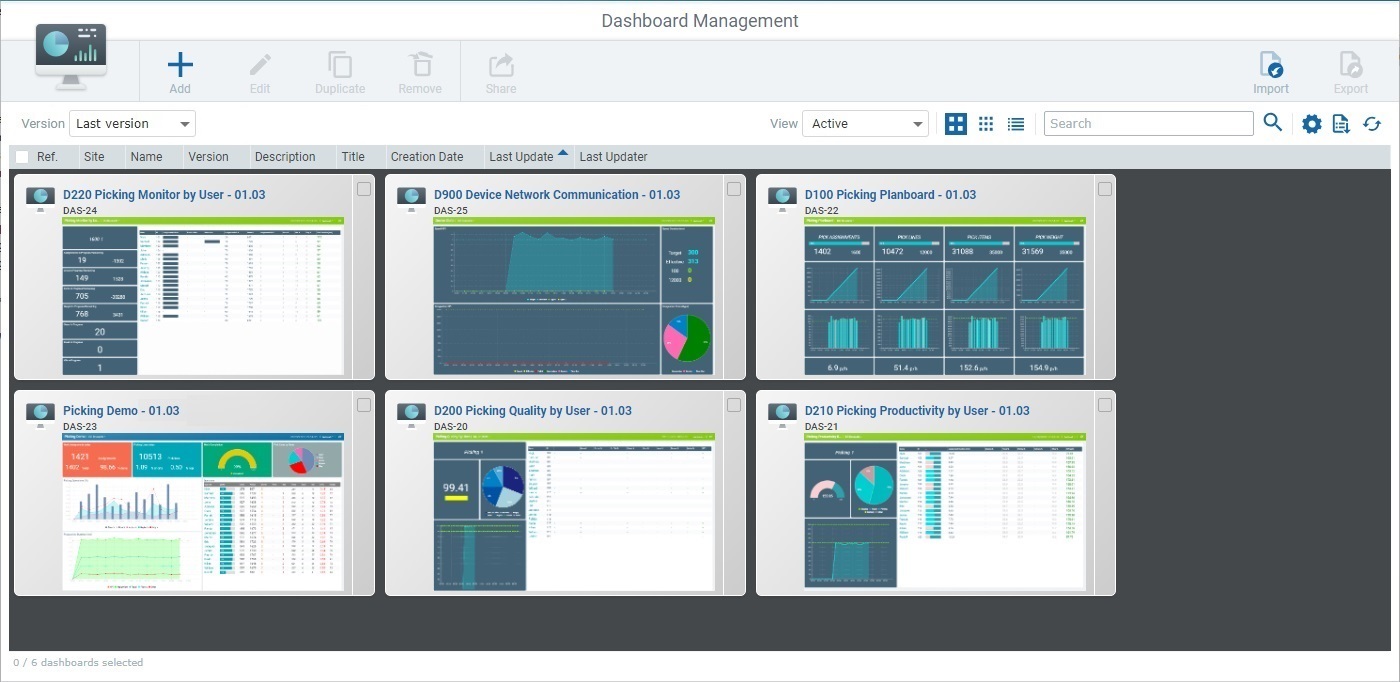
2. Select the dashboard you want to share and click ![]() .
.
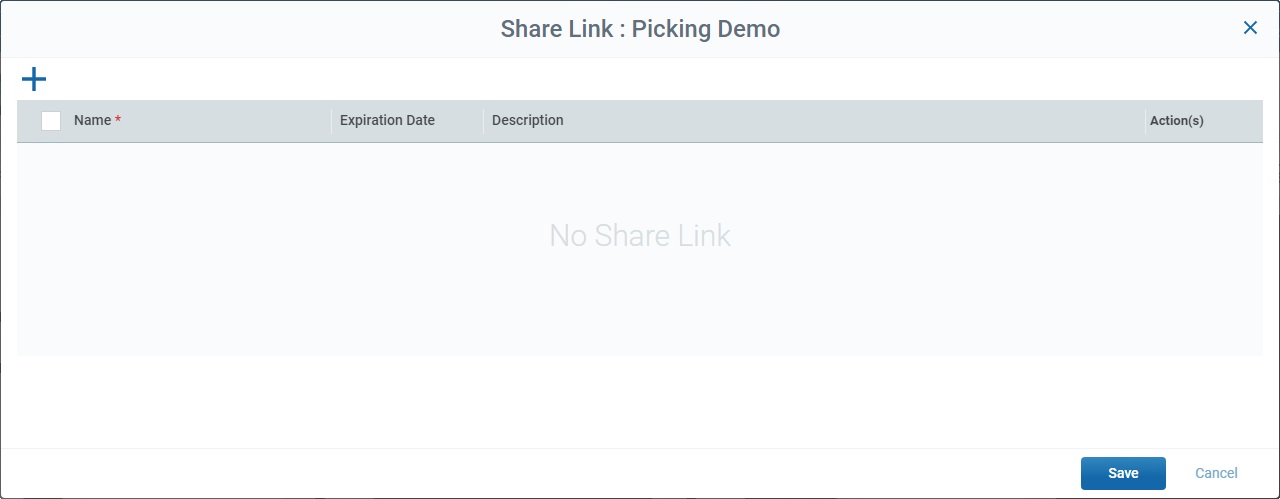
3. Click ![]() to add an entry and generate the required link to the intended dashboard.
to add an entry and generate the required link to the intended dashboard.
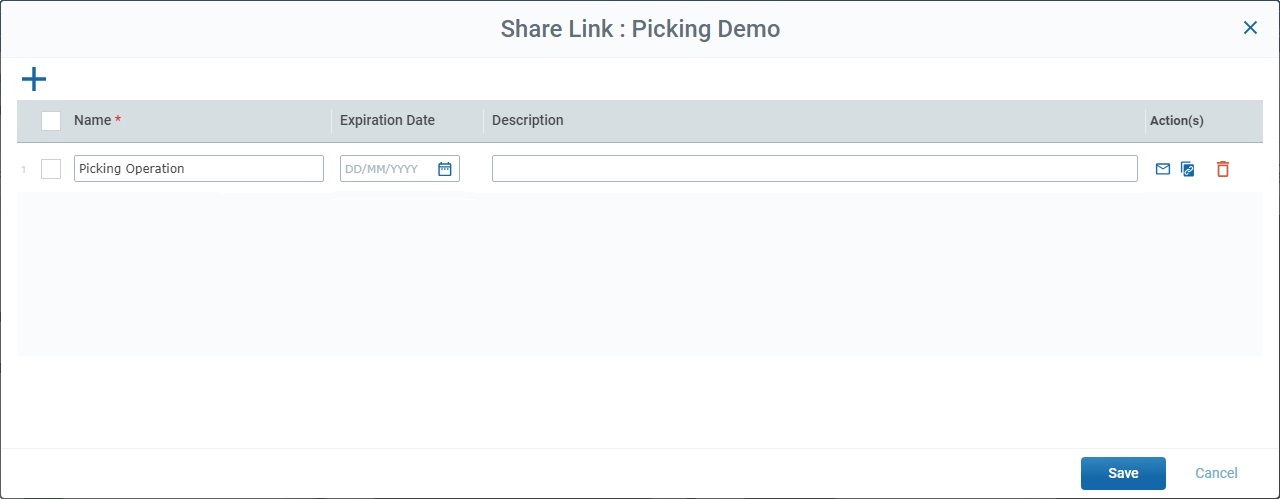
4. Define the name of the link to share the dashboard.
This field is, automatically, filled in - it is the name of the dashboard you selected in the "Dashboard Management" page.
5. If necessary, define an expiration date for the URL:
Enter a date, directly - you MUST use a "DD/MM/YYYY" format.
![]() As an alternative, click the calendar button and select the expiration date in the resulting calendar window.
As an alternative, click the calendar button and select the expiration date in the resulting calendar window.
6. If required, enter relevant information in the "Description" field. For instance, the context for this share or the people the dashboard will be shared with. This information will not be sent along with the URL.
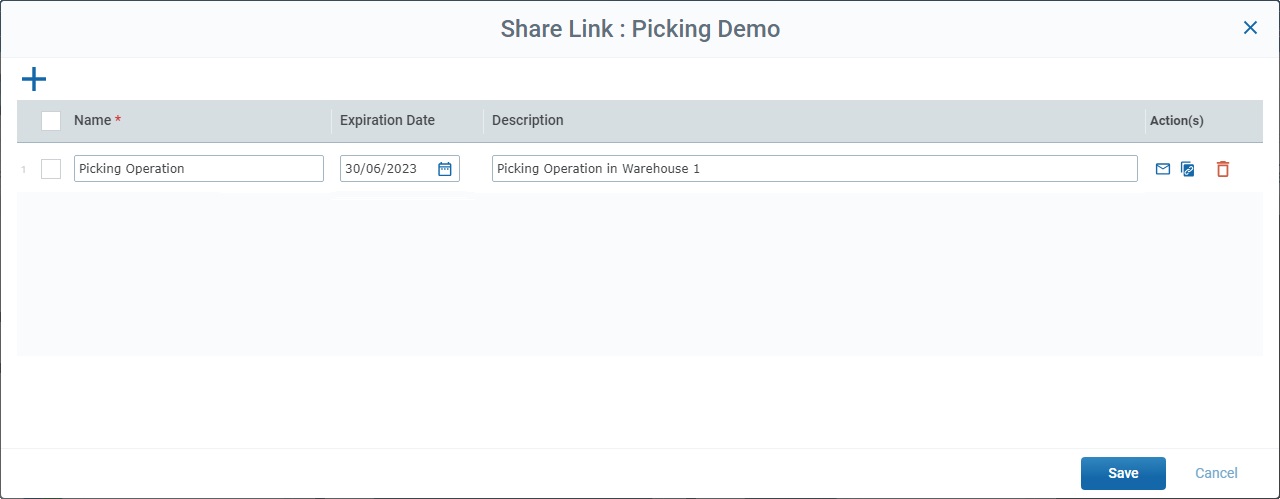
7. The URL can be provided to the intended collaborators via direct email or you can copy the link itself:
•![]() Option - This option is used to send an email with the dashboard link to the people that are supposed to access it.
Option - This option is used to send an email with the dashboard link to the people that are supposed to access it.
a. Click the entry's corresponding ![]() to open an Outlook email with a small text that includes its purpose, the name of the dashboard to share and the link to access it.
to open an Outlook email with a small text that includes its purpose, the name of the dashboard to share and the link to access it.
b. Enter the email addresses of the people that are supposed to access the dashboard.
c. If required, edit the email's default text. Do NOT edit the link itself.
•![]() Option - This option provides the link itself.
Option - This option provides the link itself.
a. Click the entry's corresponding ![]() to copy the dashboard link.
to copy the dashboard link.
b. Paste the link (ex: use the CTRL+V key shortcut) onto the intended destination such as an Internet browser.
8. If you want to keep the shared link, click ![]() . The corresponding entry will be listed in this pop-up window, when you select the same report again and click
. The corresponding entry will be listed in this pop-up window, when you select the same report again and click ![]() .
.
Other Operations Available
•Use the ![]() button to delete the corresponding entry. Click it and confirm the operation by clicking the resulting
button to delete the corresponding entry. Click it and confirm the operation by clicking the resulting ![]() .
.
![]() You can execute a bulk Deletion - select the links you want to delete and click
You can execute a bulk Deletion - select the links you want to delete and click ![]() (on the table's header).
(on the table's header).
