Adding a "Gauge" Object to a Screen |
  
|
Adding a "Gauge" Object to a Screen |
|
Object Purpose
This object is used to display the values' progress inside a variable. It is a display object that does not receive input.
Add a gauge to a screen by dragging a "Gauge" object ![]() from the top section of the "Control" tab OR the "Style Preview Section" onto the screen.
from the top section of the "Control" tab OR the "Style Preview Section" onto the screen.
Step-by-step
1. Drag the object onto the screen:
•If dragged from the "Control" tab, the object will assume the default style. (See Set Default.)
•If dragged from the "Style Preview Section", it will assume that particular style.
2. Now, double-click the selected object on the screen OR the representation in the tree view to open the "Properties" window.
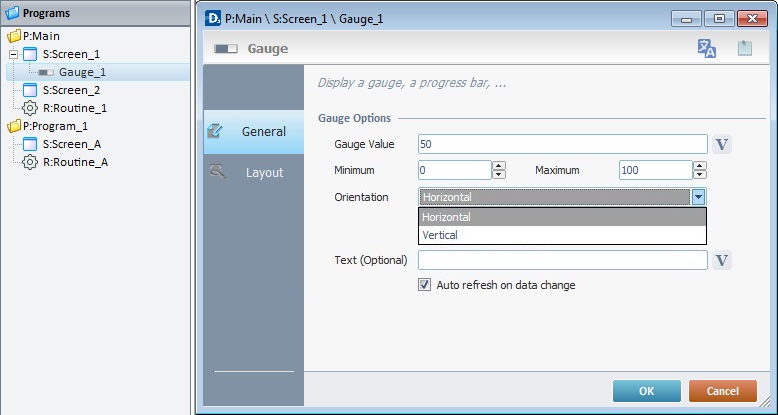
The "General" tab is open by default.
3. In the "Gauge Value" option, enter the gauge value or click ![]() and select a variable with that value. See Variable Definition.
and select a variable with that value. See Variable Definition.
4. Define the minimum and maximum values that the gauge will display.
5. Define the orientation of the gauge, either vertical or horizontal.
6. Text can be added to a gauge. Either enter it or click ![]() and select a variable with that value.
and select a variable with that value.
7. Check the "Auto refresh on data change" to ensure that the variable data updates are taken into account.
8. Go to the "Layout" tab.
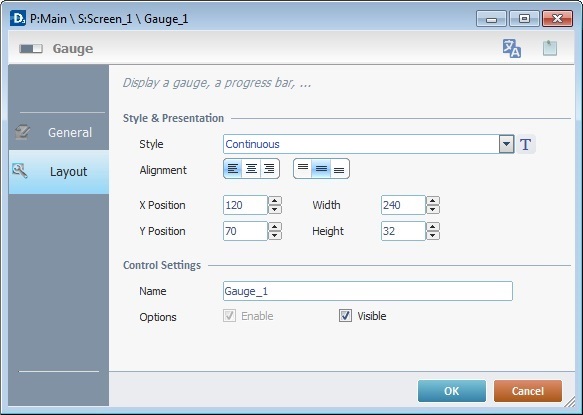
9. Define the object's style by selecting an option from the drop-down list or by clicking ![]() . See Editing and Creating Styles and Editing and Creating the "Gauge" Style.
. See Editing and Creating Styles and Editing and Creating the "Gauge" Style.
10. If a text/value has been added (step 6), position the text/value, within the object, with the alignment buttons.
11. Maintain the given values or specify the object's position/size, within the screen, by providing the "X" and "Y" coordinates as well as "Width" and "Height".
![]()
Detail of Position/Size values

12. In the "Control Settings" section, attribute a name to the object. This name is displayed in the tree view.
13. Check the "Visible" option so that the object is visible on the device's screen.
Before concluding the addition operation, check the following:
![]() Remember that the "Enable" option (located in the "Layout" tab) must be checked so that the added actions/processes run.
Remember that the "Enable" option (located in the "Layout" tab) must be checked so that the added actions/processes run.
![]()
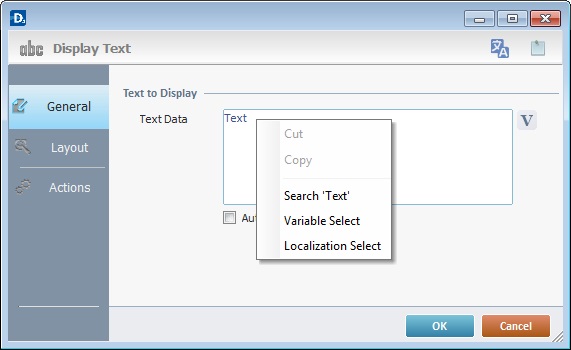
Use the right click in MCL-Designer's input boxes to access certain features regarding the input box's option as well as general actions such as "Copy"; "Paste"; "Search".
Ex: If you right-click the "Text Data" input box (included in a "Display Text" properties window), you are provided with the "Paste", "Search..." and "Variable Select" options.
If you right-click any other input box, it will provide other possibilities.
If required, use the icons located on the upper right corner of the "properties" window:
![]()
Click this icon to open a "Localization" window where you can edit the text element within that object or add translations to it. See Localization.
![]()
Click this icon to attach any relevant notes to this object. Enter your text in the resulting window. This information is displayed in the "Developer report". See Report.
14. Click ![]() to apply the editing choices.
to apply the editing choices.
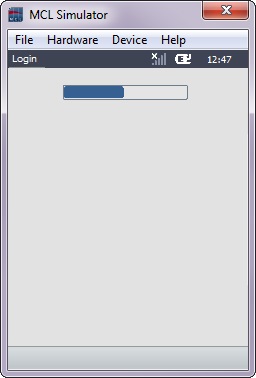
The "Gauge" object has been successfully added to the screen.
![]()
If any subsequent edition of the object's properties is required, double-click the "Gauge" OR select " Gauge Properties" (in its right-click menu) to open the properties window.