|
Mass Pairing Devices |
  
|
Mass Pairing Devices
|
Mass Pairing Devices |
|
Overview
The Pairing method (an immediate link between device and platform) can be done one by one (see Pairing a Device) or several devices at a time. This is called Mass Pairing.
Mass Pairing is a procedure that requires the use of an .ini file provided by the destination site (in its "Device Groups" page or in a specific "Device Group Details" page).
Once the .ini file is downloaded and copied into the devices you want to pair, the pairing is executed automatically, without your intervention.
If the .ini file is downloaded from the "Device Groups" page, the paired devices are included into the "Unassigned Devices". This means that, after the mass pairing is executed, you must move the devices into the intended compatible device group(s) and, then, change their status to "Enabled" to be able to work with them.
If the .ini file is downloaded from a specific device group's "...Details" page, then, the devices are automatically paired into that device group with an "Enabled" status.
Depending on the OS of the target devices, follow the appropriate link:
Mass Pairing of Windows Mobile Devices
Mass Pairing of Android Devices
![]()
Mass Pairing requires MCL-Agent to be installed into the devices being paired.
To install MCL-Agent in a Windows Mobile device, see Installing MCL-Agent into a Windows Mobile device.
To install MCL-Agent in an Android device, see Installing MCL-Agent into an Android Device.
![]() Connect your device to the Internet by Wifi or USB (for devices with a Windows Mobile / Windows CE OS use Windows Mobile Device Center).
Connect your device to the Internet by Wifi or USB (for devices with a Windows Mobile / Windows CE OS use Windows Mobile Device Center).
![]() Before initiating the mass pairing operation, make sure the device’s system date is up-to-date and that its timezone is the same as the one defined in the destination site.
Before initiating the mass pairing operation, make sure the device’s system date is up-to-date and that its timezone is the same as the one defined in the destination site.
Mass Pairing of Windows Mobile ![]() Devices
Devices
Step-by-step
1. Click ![]() (in the Control Panel section) to access the Device Groups sub-module and, in the resulting row below, select
(in the Control Panel section) to access the Device Groups sub-module and, in the resulting row below, select ![]() . This opens the "Device Groups" page.
. This opens the "Device Groups" page.
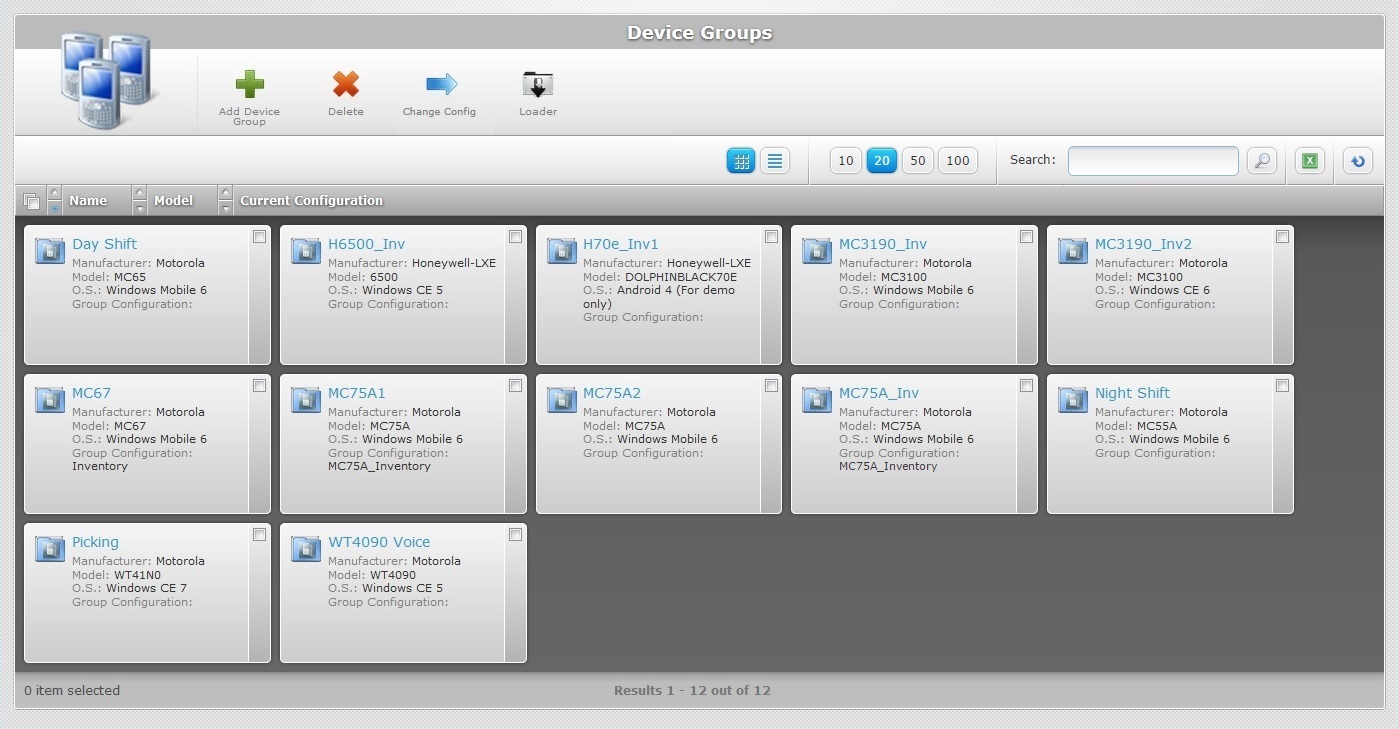
2. Depending on your target entity (a site or a specific device group), choose one of the following options:
a. To mass pair the devices to the current site (they will be added to the default "Unassigned Devices" device group:
I. Click ![]() .
.
II. Click ![]() to download the corresponding .ini file ("loader.ini") into your PC.
to download the corresponding .ini file ("loader.ini") into your PC.
III. Proceed to step 3.
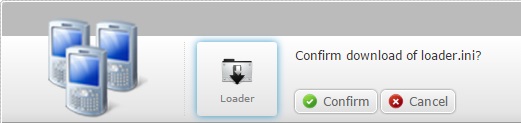
b. To mass pair the devices to the a specific Device Group:
I. Select the device group you want by clicking its name (displayed in light blue). This opens the corresponding "Device Group Details" page.
II. Click ![]() .
.
III. Click ![]() to download the corresponding .ini file ("loader.ini") into your PC.
to download the corresponding .ini file ("loader.ini") into your PC.
IV. Proceed to step 3.
3. Connect your Windows Mobile device to your PC, via USB and wait for it to be detected by Windows Mobile Device Center.

4. Select the "Connect without setting up your device" option.
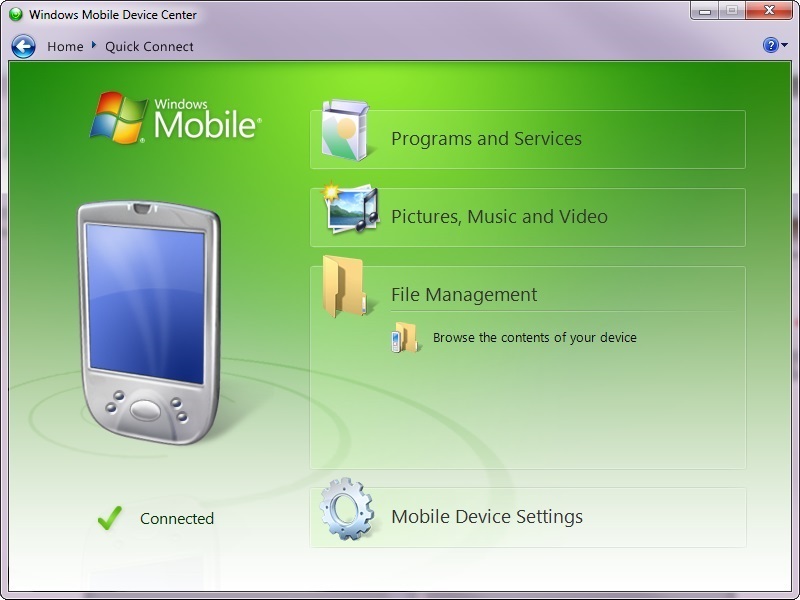
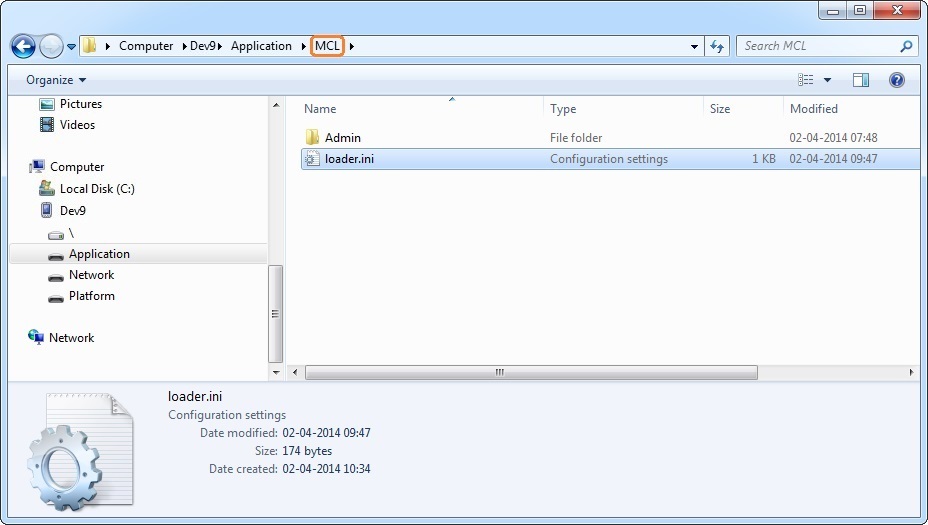
5. Click "File Management" and, then, "Browse the contents of your device" to browse, via your PC, for folders within the connected device.
6. Open the "MCL" folder to copy the downloaded .ini file into.
7. Reboot the device.
8. Connect another device and repeat the copy/paste/reboot steps described above (steps 3 to 7).
9. Execute the same steps for the remaining devices.
After the reboot, App Desktop is launched and the pairing procedure is performed automatically.
![]()
If the used "loader.ini" file was downloaded from the "Device Groups" page (2a), the paired devices will be included in the default "Unassigned Devices" device group.
To be able to work with them, do NOT forget to:
1. Move the devices into compatible device groups (see Moving a Device).
2. Change each device's status to "Enabled" (see Changing a Device's Status).
Mass Pairing of Android ![]() Devices
Devices
Step-by-step
1. Click ![]() (in the Control Panel section) to access the Device Groups sub-module and, in the resulting row below, select
(in the Control Panel section) to access the Device Groups sub-module and, in the resulting row below, select ![]() . This opens the "Device Groups" page.
. This opens the "Device Groups" page.
2. Depending on your target entity (a site or a specific device group), choose one of the following options:
a. To mass pair the devices to the current site (they will be added to the default "Unassigned Devices" device group:
I. Click ![]() .
.
II. Click ![]() to download the corresponding .ini file ("loader.ini") into your PC.
to download the corresponding .ini file ("loader.ini") into your PC.
III. Proceed to step 3.
b. To mass pair the devices to the a specific Device Group:
I. Select the device group you want by clicking its name (displayed in light blue). This opens the corresponding "Device Group Details" page.
II. Click ![]() .
.
III. Click ![]() to download the corresponding .ini file ("loader.ini") into your PC.
to download the corresponding .ini file ("loader.ini") into your PC.
IV. Proceed to step 3.
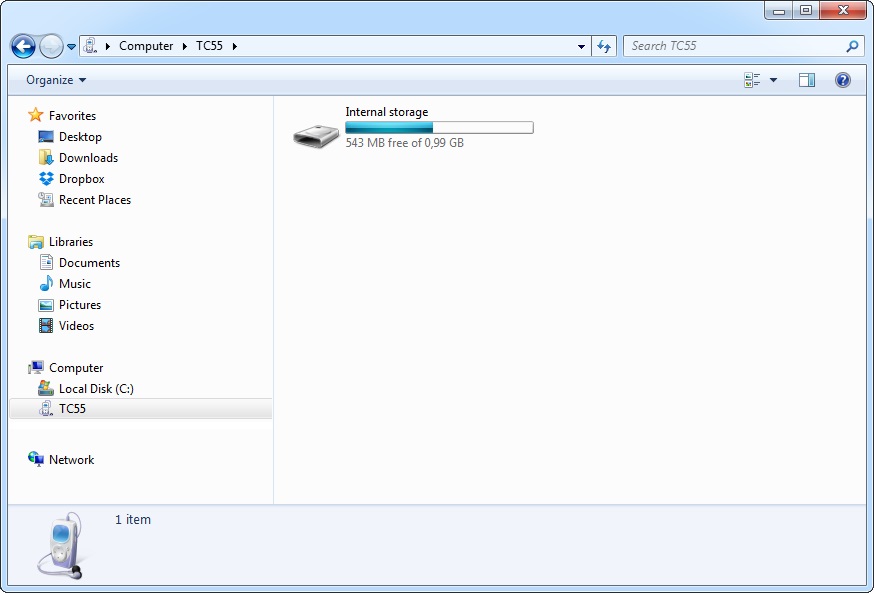
3. Connect your Android device to your PC, via USB, and wait for it to be detected.
4. Use the following path to open the folder where you will add the "loader.ini" file (the "files" folder):
Android\data\com.mcltechnologies.android.agent.mot\files

5. Copy/paste the "loader.ini" file into the "files" folder.

6. Reboot the device.
7. Connect another device and repeat the open folder/copy/paste/reboot steps described above (steps 3 to 6).
8. Execute the same steps for the remaining devices.
After the reboot, App Desktop is launched and the pairing procedure is performed automatically.
![]()
If the used "loader.ini" file was downloaded from the "Device Groups" page (2a), the paired devices will be included in the "Unassigned Devices" device group.
To be able to work with them, do NOT forget to:
1. Move the devices into compatible device groups (see Moving a Device).
2. Change each device's status to "Enabled" (see Changing a Device's Status).