|
Adding a Back-end Profile |
  
|
Adding a Back-end Profile
|
Adding a Back-end Profile |
|
Overview
Create the back-end profile that represents the external back-end that will be authorized to exchange data with your MCL-Mobility Platform account (or a specific site) via one or more back-end services.
Step-by-step
1. To access the "Back-end Management" page, click  and select the
  sub-module in the resulting row.
2. Click ![]() to open the"New Back-end" page.
to open the"New Back-end" page.
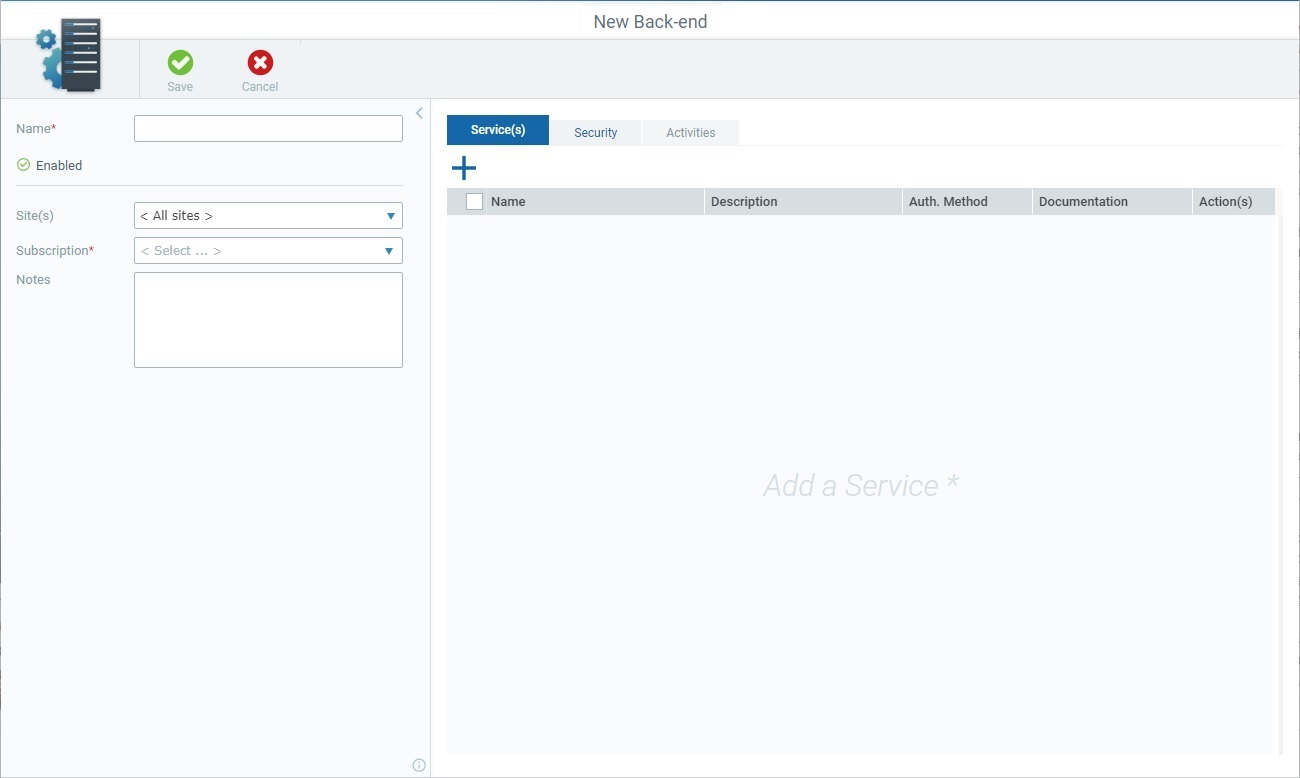
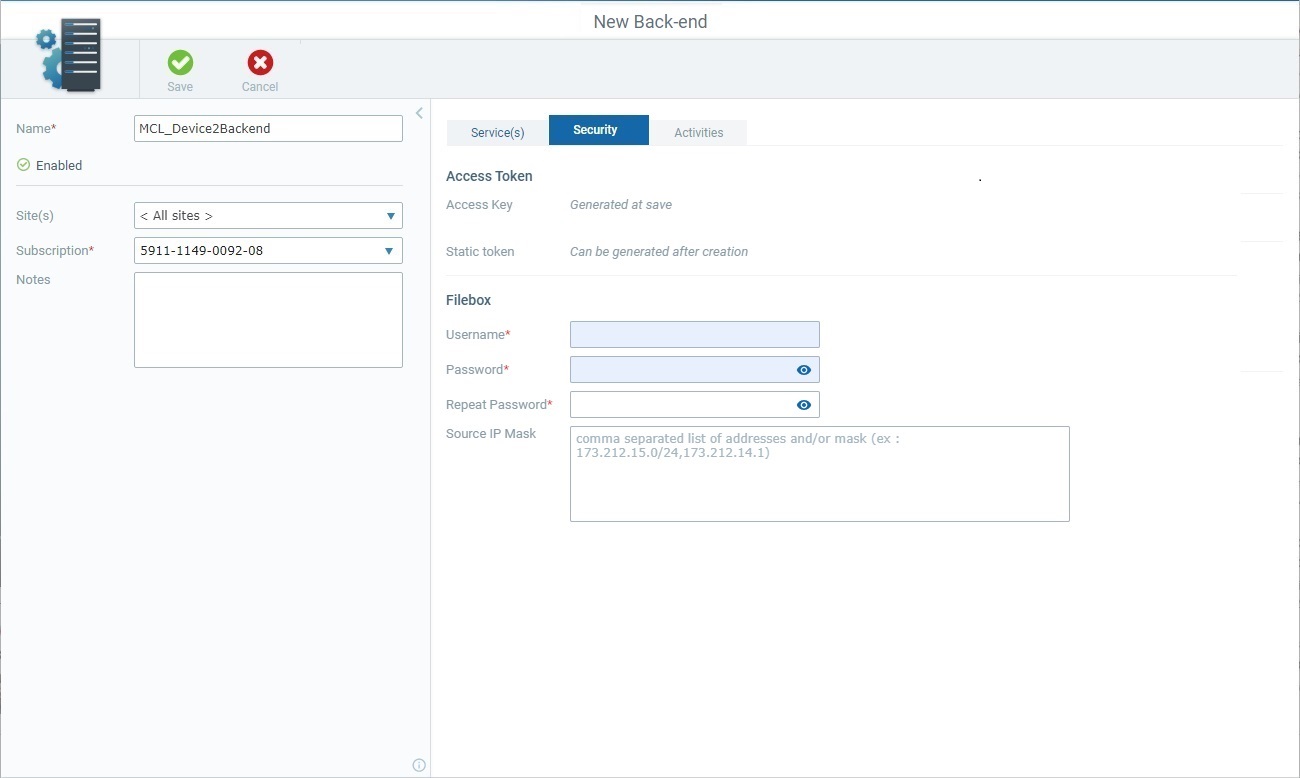
3. Fill in the available fields in the left panel. The fields marked with an asterisk are mandatory.
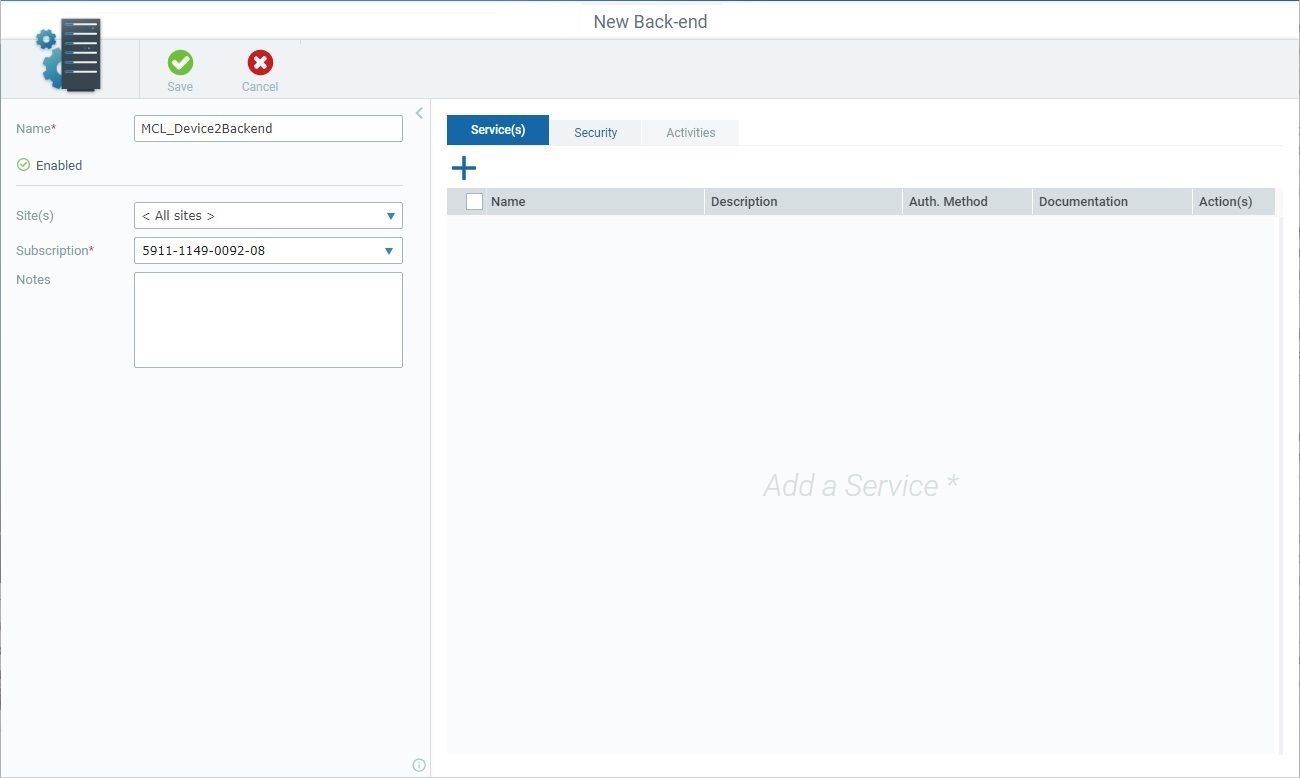
Name * |
Enter a name for the back-end profile you want to add.
•Use alphabetic/numeric characters (a-z; A-Z; 0-9) •Underscore and/or dash characters are allowed •Always start the entity's name with an alphabetic character
|
Site |
Maintain the default option "<All sites>" so all the account's sites can communicate with the external back-end OR select a site from the drop-down.
•Selecting "<All sites>" means the external back-end will be communicating with the shared Filebox. (virtual space for incoming/outgoing files that is available to all sites). If a specific site is selected, the external back-end will communicate with that site's private Filebox (virtual space for incoming/outgoing that only concerns that site).
•If the referred site does NOT have a private Filebox, the external back-end using this back-end profile will, in fact, be communicating with the shared Filebox. You can check if a site has a private Filebox in its details page and edit it, if necessary. See Site Details - Properties Tab.
|
Subscription * |
Select an available subscription from the drop-down. |
Notes |
Enter any notes you find relevant related to the new back-end profile. |
4. Proceed to the "Service(s)" tab where you will add the necessary back-end service(s).
5. Click ![]() to open the window with a list of the available back-end services.
to open the window with a list of the available back-end services.
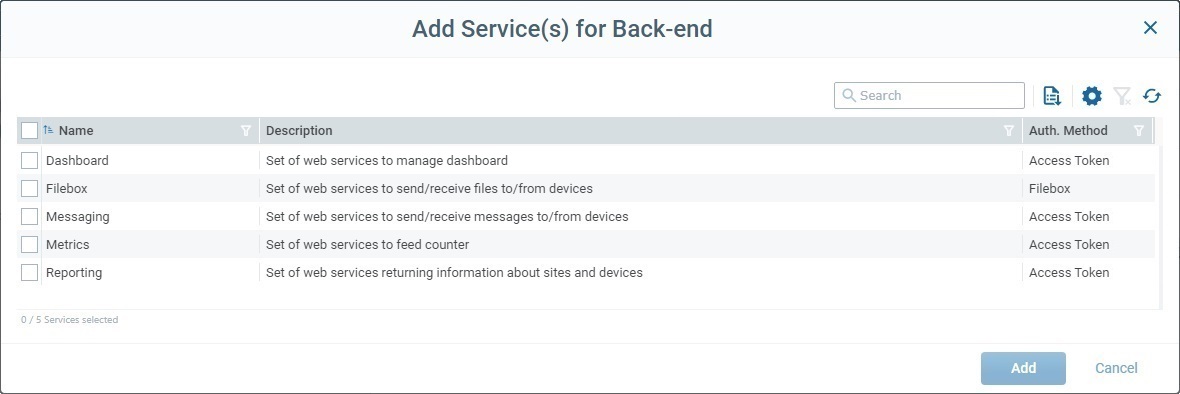
6. Check the intended service(s). For more details on this window, see Details on the Back-end Service Selection window.
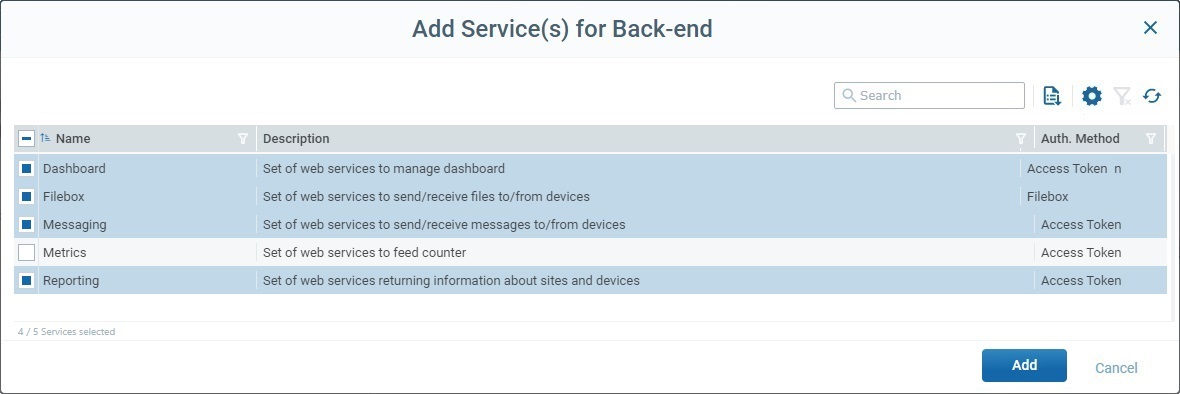
7. Click ![]() to apply (this button is activated as soon as you check a service).
to apply (this button is activated as soon as you check a service).
The selected services are added to the "Service(s)" tab and displayed in a table. If you want to add more services, click ![]() and repeat steps
and repeat steps
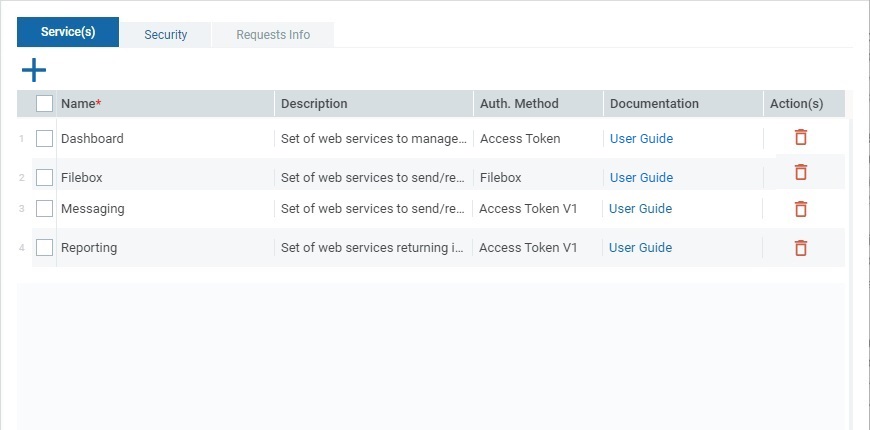
The table includes the following information/options:
|
The check box is used to select the corresponding service. |
Name |
The name of the added back-end service. |
Description |
A description of the corresponding back-end service. NOT Editable. |
Auth. Method |
The authentication method used by the corresponding back-end service. NOT Editable. |
Documentation |
You can click the link to have direct access to the MCL-Mobility Platform user guide topic that describes the corresponding back-end service. |
Actions |
You can click |
8. If you need to add more services, click ![]() and repeat steps 6 and 7. If not, proceed to the "Security" tab.
and repeat steps 6 and 7. If not, proceed to the "Security" tab.
9. Fill in the available fields. Fields marked with an asterisk must have information.
Access Key |
At the moment, the field is empty but, once you save the new back-end profile, MCL-Mobility Platform will generate an access key to be used for token requests.
This field is NOT available if only the "Filebox" service was added to the "Services" tab - the "Filebox" service does not require the Token Authentication method. |
Static Token |
The Static token can only be generated by a user after the back-end profile is created so, for now, the field is empty. See To Generate a Static Token.
This field is NOT available if only the "Filebox" service was added to the "Services" tab - the "Filebox" service does not require the Token Authentication method. |
Username * |
This field is ONLY displayed if the "Filebox" service was added to the "Service(s)" tab. Enter a username for the virtual user that can access the "Filebox" service.
This username should be unique, meaning, define a username per MCL-Mobility Platform account. Avoid the use of spaces.
|
Password * |
This field is ONLY displayed if the "Filebox" service was added to the "Service(s)" tab. Enter a password for the virtual user that can access the "Filebox" service.
Do NOT use spaces.
|
Repeat Password * |
This field is ONLY displayed if the "Filebox" service was added to the "Service(s)" tab. Repeat the password you defined. |
Source IP Mask |
Enter the external back-end's IP address(es) that will be authorized to exchange data with MCL-Mobility Platform. If you intend to define multiple IP addresses, consider the option's hint - use commas and/or CIDR notations to separate the IPs/masks (ex: 173.212.15.0/24,173.212.14.1). |
At this point, the "Activities" tab is empty (it is meant to display information concerning web service requests). Since there are no options to fill in, you do not have to open it.
10. Click ![]() to create the new back-end profile.
to create the new back-end profile.
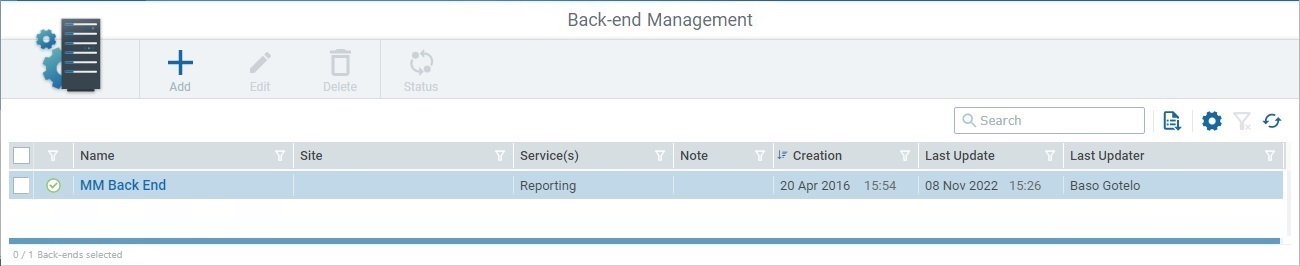
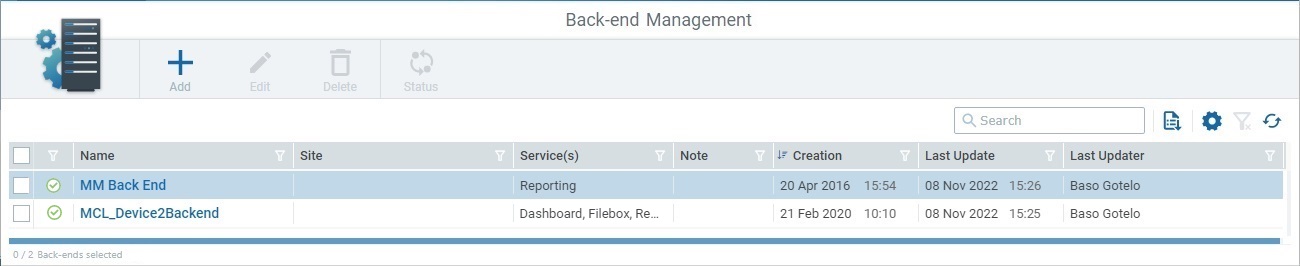
The newly added back-end profile will be displayed in the "Back-end Management" page.
Details of the Back-end Service Selection window
This pop-up window provides a list of back-end services you can add to the back-end profile.
Available options in this pop-up window:
•Enter an access right related value in ![]() to be searched in the displayed list.
to be searched in the displayed list.
The list will automatically change according to the search. To end the search, empty the search box.
The search will ONLY apply to the currently displayed info.
•Use ![]() to export a list of the displayed info. If you want to export a full list of back-end services, make sure there are no applied filters.
to export a list of the displayed info. If you want to export a full list of back-end services, make sure there are no applied filters.
•Click ![]() to open a drop-down with the available columns and check/uncheck the columns you want to expose/hide.
to open a drop-down with the available columns and check/uncheck the columns you want to expose/hide.
•Click![]() to clear currently active filters in this pop-up window.
to clear currently active filters in this pop-up window.
•Use ![]() to refresh the window's information.
to refresh the window's information.
•Use the options included in the header of each column to organize/select/filter the listed items:
![]() Click this to order the items in ascending/descending order.
Click this to order the items in ascending/descending order.
![]() Use this button to filter the column info based on specific rules/conditions.
Use this button to filter the column info based on specific rules/conditions.
Example:
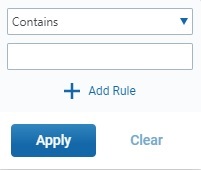
I. Click |
II. Enter the string to be searched (ex: "devices") and click |
III. If you want to add a second rule (= condition + search string) , instead of clicking |
|
|
|
Make sure the defined rules do NOT conflict with each other because it could lead to an empty view.
If required, click ![]() to clear the corresponding rule from the Rules window (this button is only active once you click
to clear the corresponding rule from the Rules window (this button is only active once you click ![]() ).
).
You can use the ![]() button to clear the defined rules.
button to clear the defined rules.
Available Operation(s)
To quit without creating a new back-end profile, click ![]() .
.