|
Editing a Back-end Profile |
  
|
Editing a Back-end Profile
|
Editing a Back-end Profile |
|
Overview
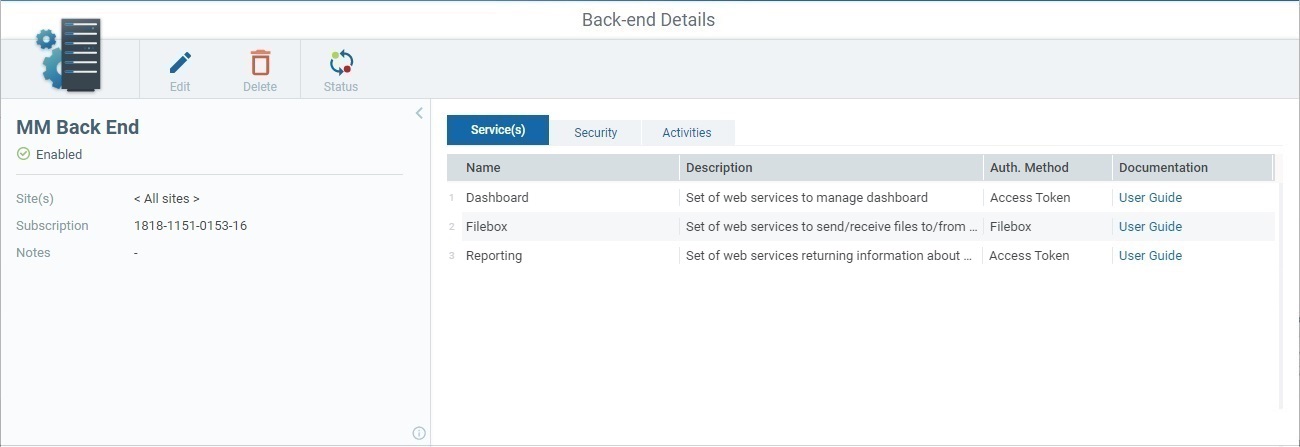
There are several details of a back-end profile that can be edited, at any time, within the left panel and the "Service(s)" and "Security" tabs.
The "Activities" tab only displays information on back-end service requests so there are NO editable fields in that tab.
If you do not want to use the access key that was automatically generated by MCL-Mobility Platform when you created the profile, you can generate a new access key (see To Generate a New Access Key).
If, instead of an access key (for token requests), you want to use a static token, you can generate one (see To Generate the Initial Static Token).
It is also possible to replace the current static token with a different one (see To Generate a New Static Token), to download it (see To Download a Static Token) and/or to deactivate it (see To Revoke a Static Token) for security reasons.
If required, you can change the current status of the back-end profile - you can enable ( = "Enabled" status) or disable it (= "Disabled"). See To Alter a Back-end Profile's Status.
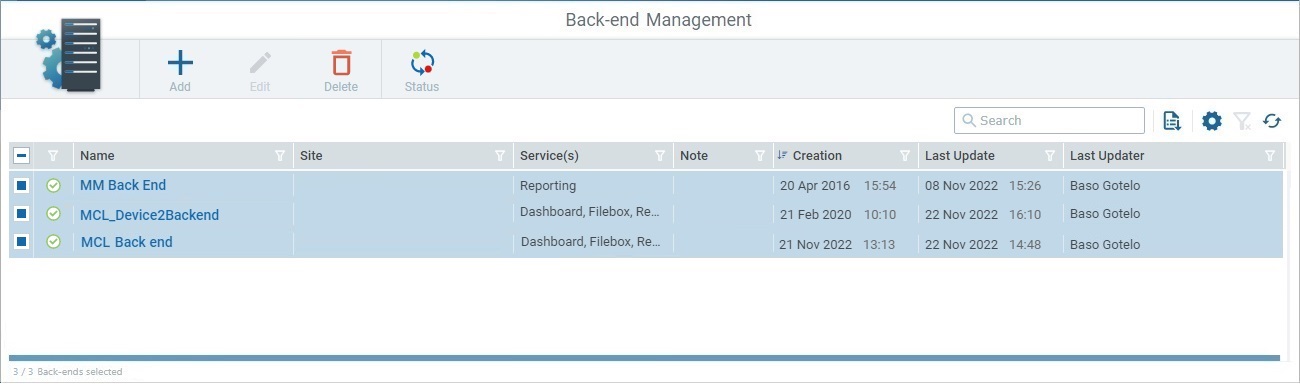
To Edit the Back-End Profile
Step-by-step
1. Click  and, then,
  to access the "Back-end Management" page.
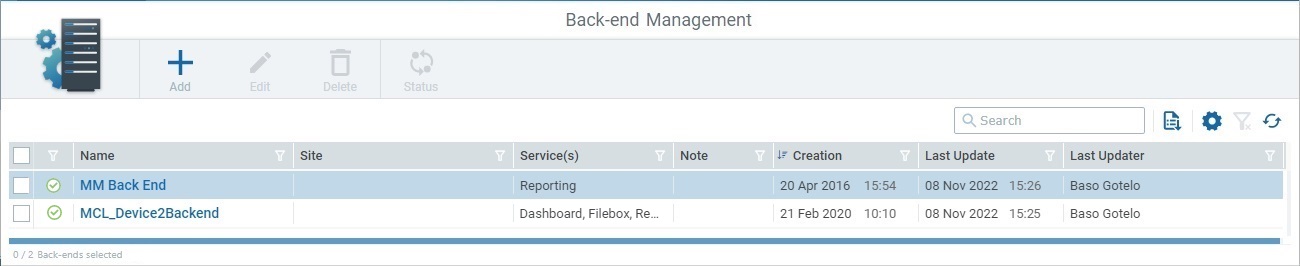
2. Use one of the following methods to access the details page of a particular back-end profile:
•Click the name of the intended back-end profile (it is displayed in light blue) to open the corresponding details page and, then, click ![]() to set the page to edit mode.
to set the page to edit mode.
|
|
|
•Select the intended back-end profile by checking the corresponding ![]() and, then, click
and, then, click ![]() . The resulting details page opens in edit mode.
. The resulting details page opens in edit mode.

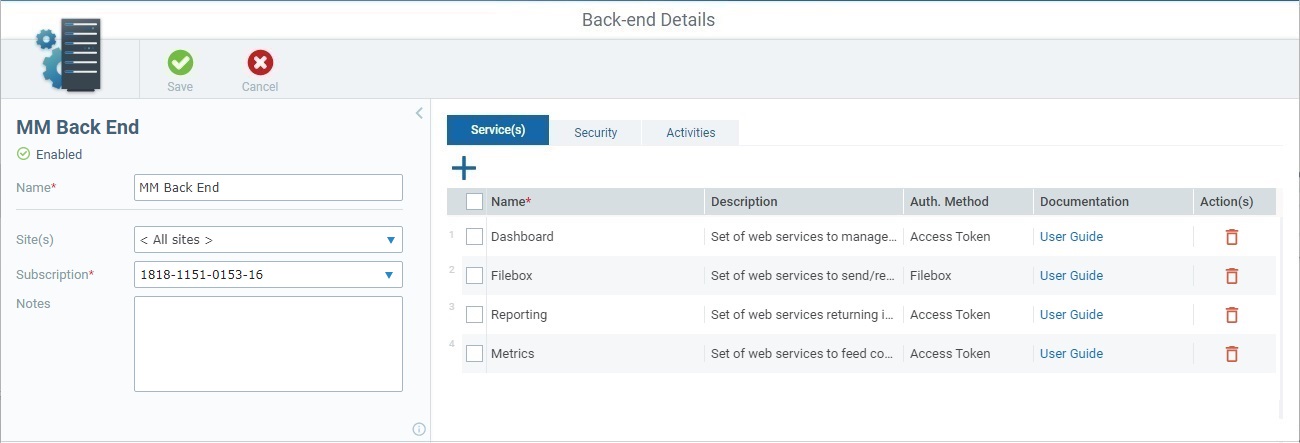
3. Edit the left panel and/or the "Service(s)"/"Security" tabs as required. The "Activities" tab is NOT editable, it simply displays information about back-end service requests.
Left Panel
If you want to change the back-end profile's current status, see To Alter a Back-end Profile's Status.
Edit the available fields as required (fields marked with an asterisk must always contain information):
Name * |
Maintain or edit the name of the back-end profile.
•Use alphabetic/numeric characters (a-z; A-Z; 0-9) •Underscore and/or dash characters are allowed •Always start the entity's name with an alphabetic character
|
Site(s) |
Maintain or select a different site to communicate with the external back-end. If you select "<All sites>", the external back-end will be able to communicate with all the account's sites.
•Selecting "<All sites>" means the external back-end will be communicating with the shared Filebox. (virtual space for incoming/outgoing files that is available to all sites). If a specific site is selected, the external back-end will communicate with that site's private Filebox (virtual space for incoming/outgoing that only concerns that site).
•If the selected site does NOT have a private Filebox, the external back-end using this back-end profile will, in fact, be communicating with the shared Filebox. You can check if a site has a private Filebox in its details page and edit it, if necessary. See Site Details - Properties Tab.
|
Subscription * |
Maintain or choose a different subscription to be associated to the current back-end profile. |
Notes |
Maintain or edit the notes regarding the back-end profile. |
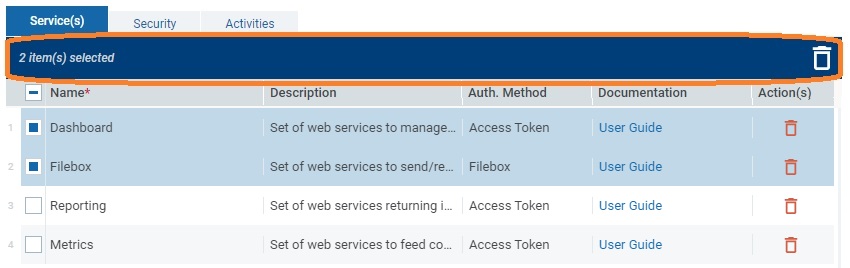
"Service(s)" tab
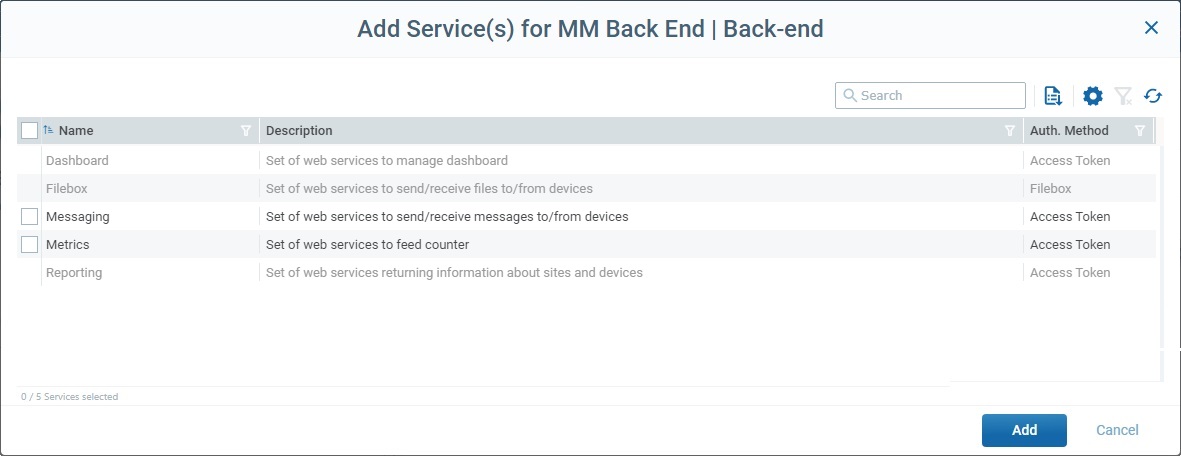
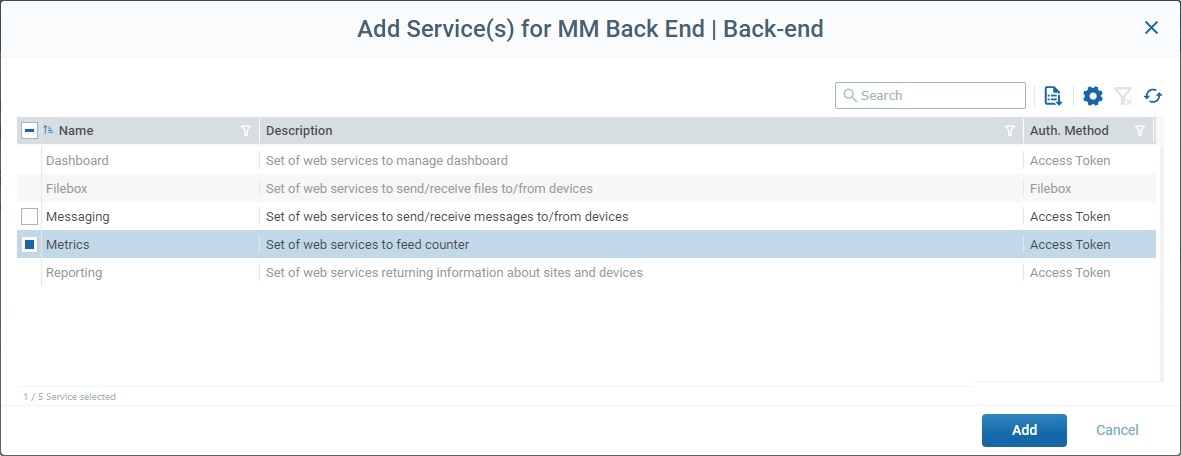
Add/remove the intended back-end services, making sure the back-end profile contains, at least, one selected service.
Follow the related link below to:
1. Click the The window will only allow you to select back-end services that have not been added to the profile already (those will be grayed out). For more info on this window, see Details of the Back-end Service Selection window.
2. Check the intended back-end service(s).
3. Click
|
Use one of the following methods to remove back-end services from the current back-end profile.
•Click the
•Check the
As a result, the "Service(s)" tab will refresh its display:
|
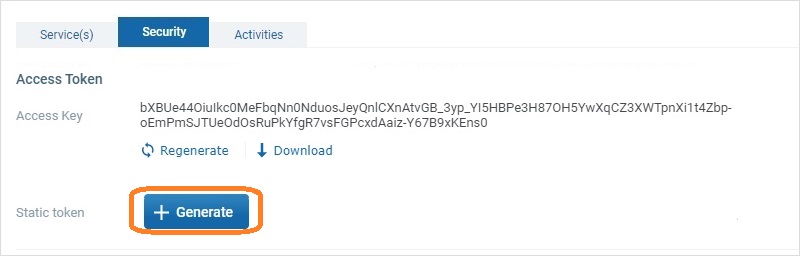
"Security" tab
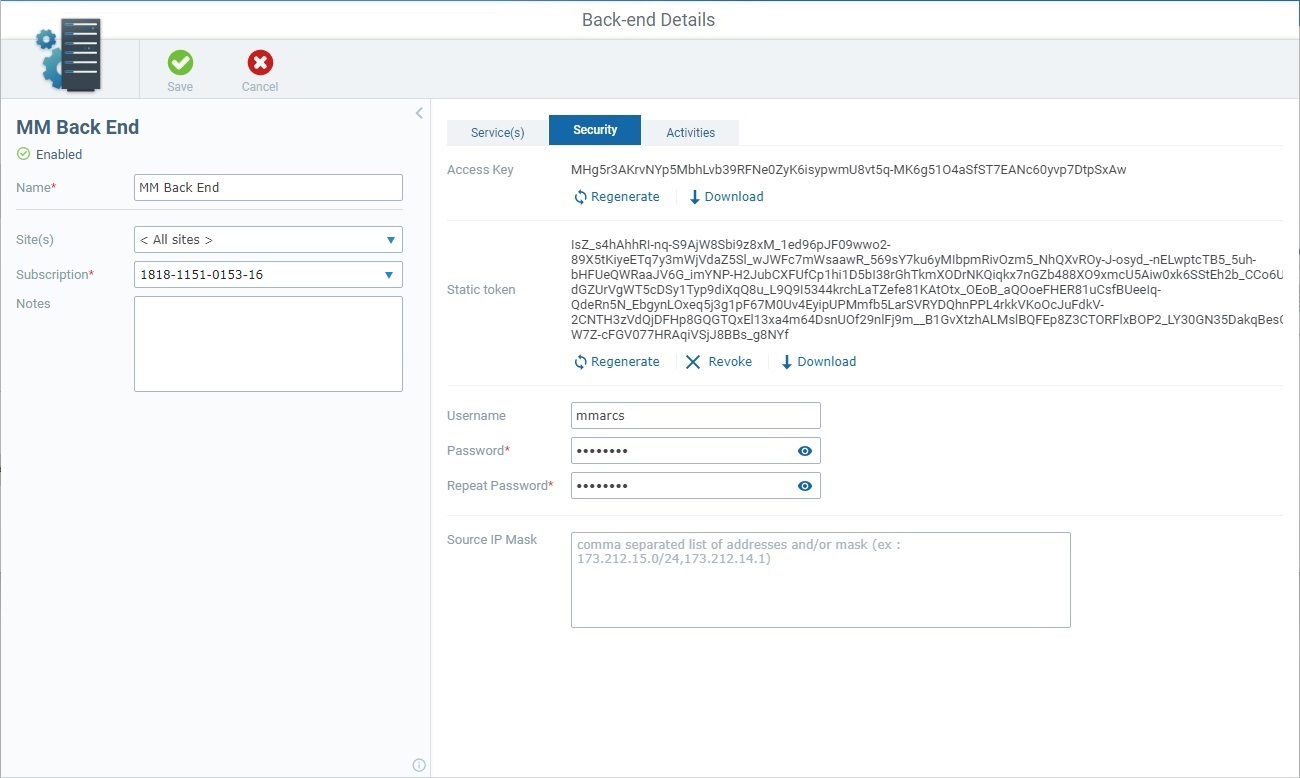
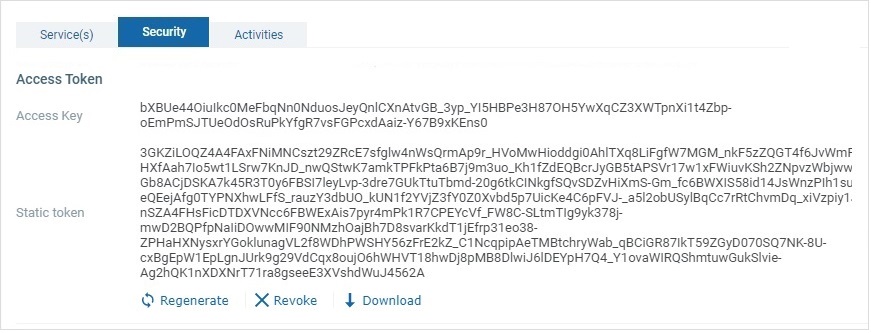
Some of the available options for edition depend on the added back-end services (ex: if the back-end profile includes the "Filebox" service, you will be able to edit the corresponding credentials) and on the use of a static token, meaning, if there is none, you can generate it. If a static token already exists, you can generate a new one, download it in a ".txt" format and/or revoke it.
Open the link that best suits your edition needs concerning the access key/static token and proceed as described:
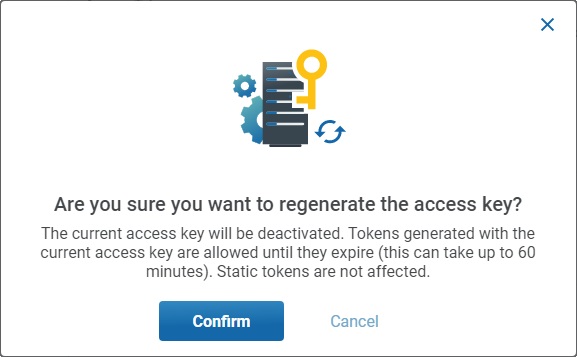
If required, you can generate a new access key to replace the current one. The old access key will be deactivated (the deactivation can take up to 60 minutes to be effective).
Step-by-step
1. Access the details page of the back-end profile with the access key you want to replace and open the "Security" tab.
2. Click
3. Please read the information available in the pop-up window and, then, click
The new key replaces the old one in the "Access Key" field.
|
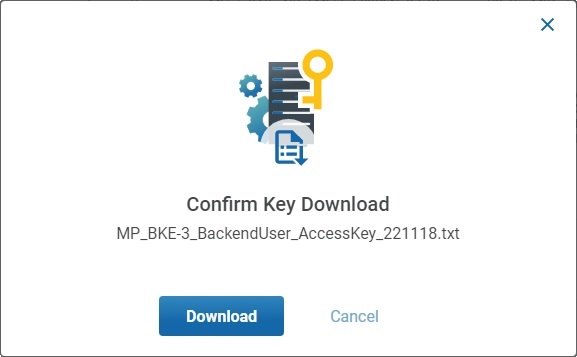
If required, you can download the data string that represents the access key in a "*.txt" format.
Step-by-step
1. Open the details page of the back-end profile with the access key you want to download and click the "Security" tab.
2. Click
3. Click
4. Browse for the desired folder to place the downloaded "*.txt" file and save it in your PC.
The folder browsing/file saving procedures depend on the used browser. You should be able to save the "*.txt" file in your PC or open it directly after the download.
|
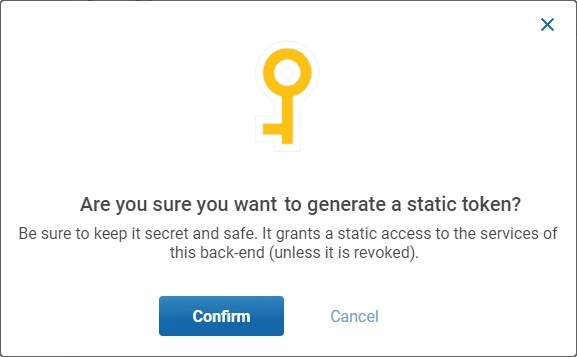
You can generate a static token within your MCL-Mobility Platform account to be used for back-end requests (static tokens are NOT generated automatically by MCL-Mobility Platform). This static token can be replaced, whenever necessary. See To Generate a New Static Token. Proceed as follows to generate the first static token:
Step-by-step
1. Access the details page of the back-end profile you want to associate a static token to and open its "Security" tab.
2. Click
3. Read the provided information and click
Now, the "Security" tab displays the generated static token and options related to it so you can replace the current static token (see To Generate a New Static Token), deactivate it (see To Revoke a Static Token) or download a "*.txt" file with the static token (see To Download a Static Token).
|
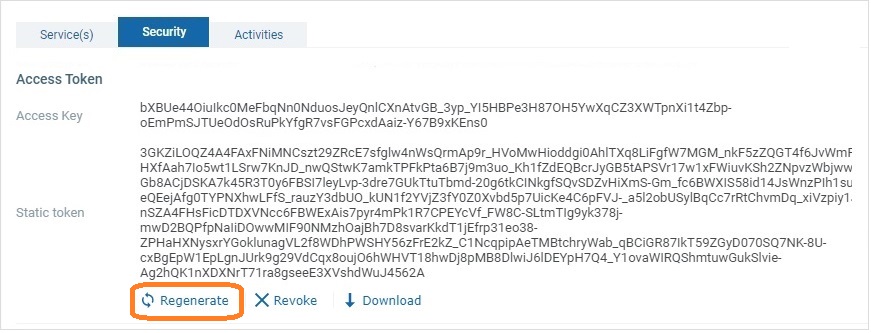
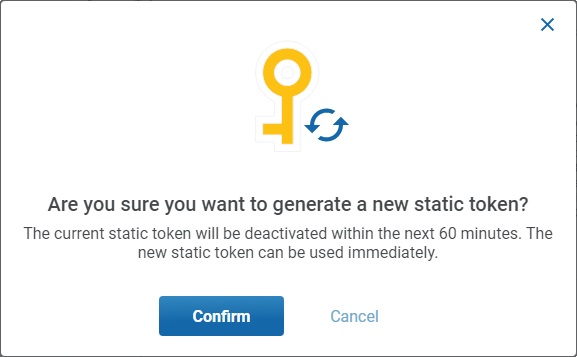
If required (ex: for security reasons), you can replace the current static token with another one. Be aware that it may take up to 60 minutes to deactivate the current static token. Proceed as follows to generate a new static token.
Step-by-step
1. Access the details page of the back-end profile with the static token to replace and open its "Security" tab.
2. Click
3. Read the provided information and click
The previous static token is replaced with the new one.
|
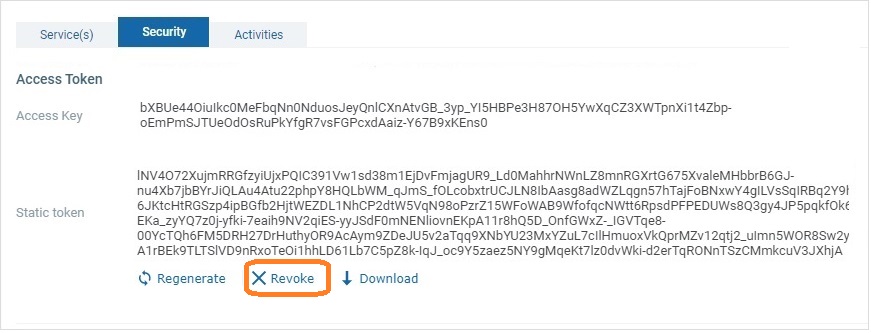
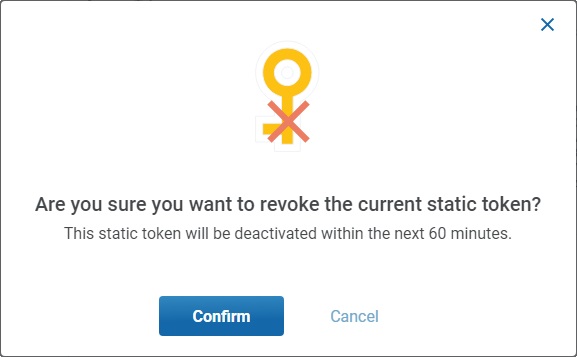
If necessary (ex: for security reasons), you can deactivate a static token. Keep in mind that the deactivation can take up to 60 minutes to be valid.
Step-by-step
1. Open the details page of the back-end profile with the static token you want to deactivate and open its "Security" tab.
2. Click
3. Click
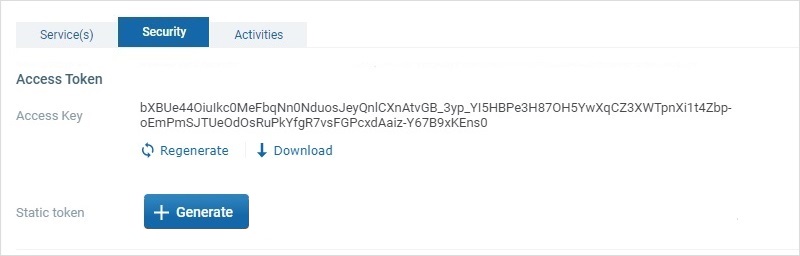
The static token disappears from the "Security" tab. If, in the future, you want to associate a static token to the current back-end profile again, click
|
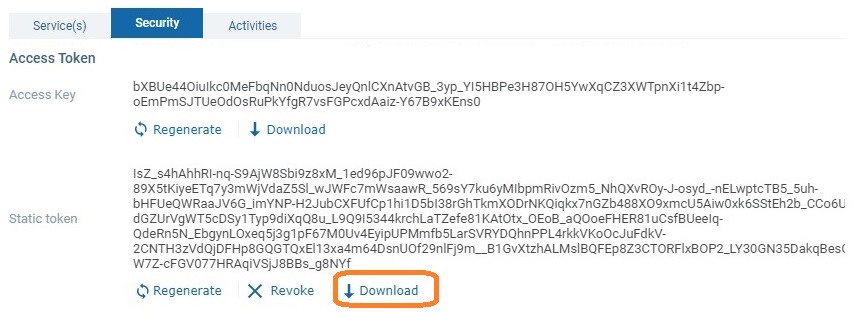
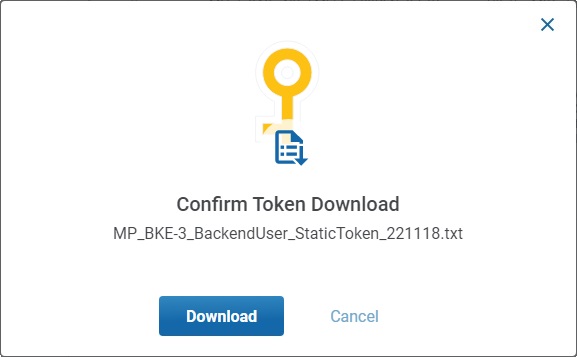
For security reasons, you may want to download the current static token and keep it somewhere safe. The data string that represents the static token is downloaded in a "*.txt" format.
Step-by-step
1. Open the details page of the back-end profile with the static token you want to download and proceed to the "Security" tab.
2. Click
3. Click
4. Browse for the desired folder to place the downloaded file and save it in your PC.
The folder browsing/file saving procedures depend on the used browser. You should be able to save the "*.txt" file in your PC or open it directly after the download.
|
4. Once you have edited the required fields in the left panel and/or the "Service(s)" and "Security" tabs, click ![]() to apply the modifications.
to apply the modifications.
To Alter a Back-end Profile's Status
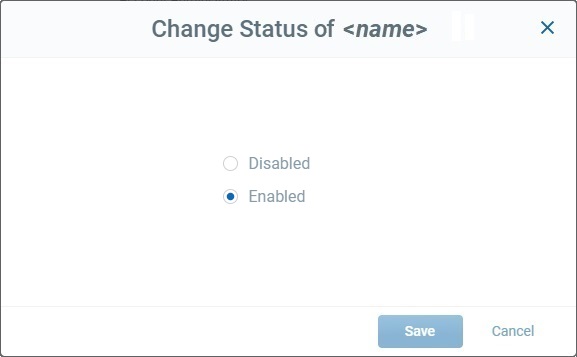
If required, you can change the current back-end profile's status, meaning, you can attribute an "Enabled" or a "Disabled" status to it.
Be aware that, if the back-end profile's status is changed to "Disabled", the profile CANNOT be used by an external back-end to communicate with MCL-Mobility Platform.
This change can be performed in the "Back-end Management" page and the details page of the intended back-end profile. Check the links below for each case.
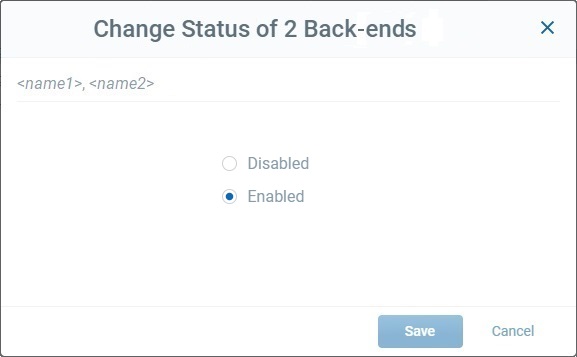
It is possible to alter the current status of one or more back-end profiles, at the same time, in the "Back-end Management" page. This method is ideal for the bulk status change of back-end profiles that have the same current status.
Step-by-step
1. Access the "Back-end Management" page.
2. Select the intended back-end profiles with the same status by checking the corresponding
3. Click
4. Check the intended status (= the opposite status to the current one).
5. Conclude the operation by clicking
The status change is immediate.
|
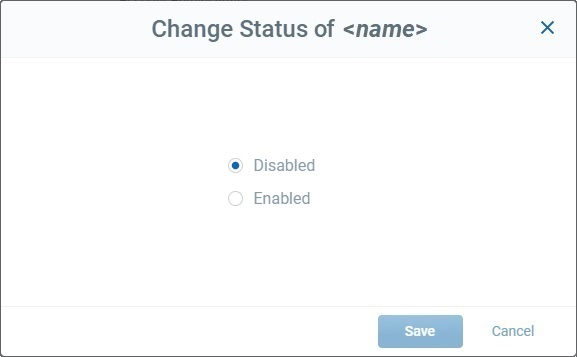
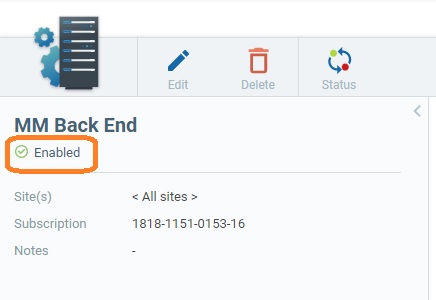
You can delete a specific back-end profile from within its details page.
Step-by-step
1. Access the "Back-end Details" page of the back-end profile whose status you want to alter. The page must be set to view mode.
2. You can check the back-end profile's current status in the left panel.
3. Click the
4. Check the intended status (= the opposite status to the current one).
5. Conclude the operation by clicking
The status change is immediate.
|
Available Operation(s)
To discard any changes made while the page was in edit mode, click ![]() . This option is ONLY available if the page is in edit mode.
. This option is ONLY available if the page is in edit mode.