|
Adding a User Profile |
  
|
Adding a User Profile
|
Adding a User Profile |
|
Overview
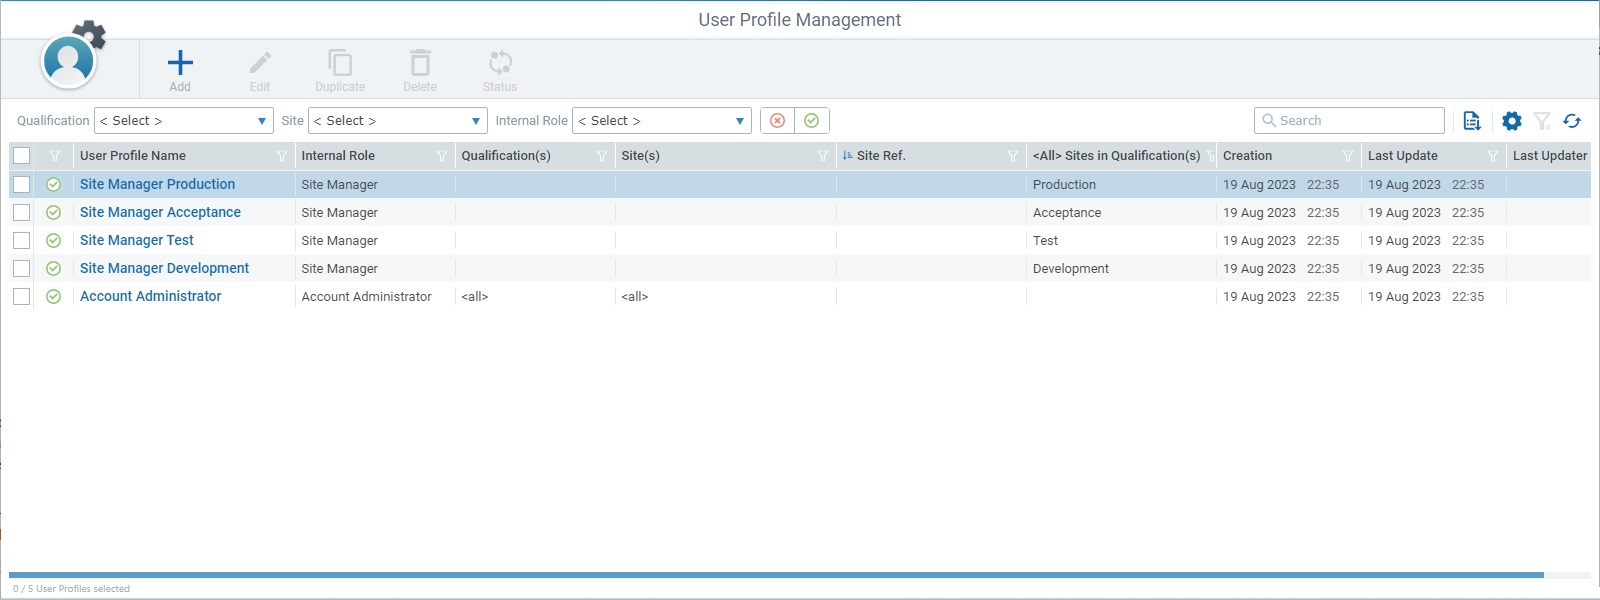
User profiles can only be created, at account level, in the "User Profiles" sub-module.
This" sub-module is only available in MCL-Mobility Platform accounts with an active/in use OpenID Authentication method ("External System (OpenID Connect)" MUST be the default method - it is defined in the "Account Details" sub-module - "Authentication" tab. See Editing Account Details - Authentication Tab).
MCL-Mobility Platform provides default user profiles ("Site Manager Production", "Site Manager Acceptance", "Site Manager Test", "Site Manager Development", "Account Administrator") but, if necessary, you can create user profiles with different roles (= specific access rights and/or assigned sites) so they can be linked to the external users created within the external authentication provider and access MCL-Mobility Platform.
![]() When creating user profiles:
When creating user profiles:
1. Make sure the external authentication provider includes the necessary user role attribute(s) and corresponding alias (see External System User Authentication Method).
2. Open the "OpenID Connect Settings" page in your MCL-Mobility Platform account and map the newly created user profile to the intended external user role alias to establish a link between the external authentication provider and MCL-Mobility Platform and allow the associated external users to access your account. See Editing Account Details - To Edit the OpenID Connect Settings.
Step-by-step
1. To create a new user profile, go to the Admin Dashboard's "Control Panel", click![]() and, then, select
and, then, select  to access the "User Profile Management" page.
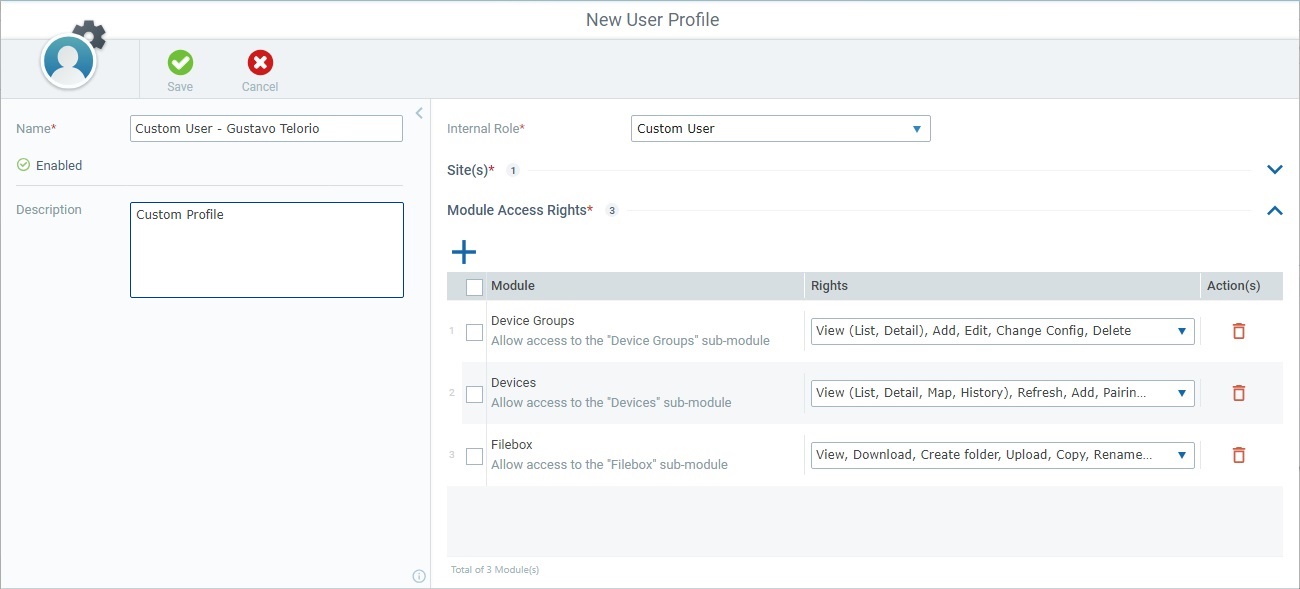
2. Click ![]() to access the "New User Profile" page.
to access the "New User Profile" page.
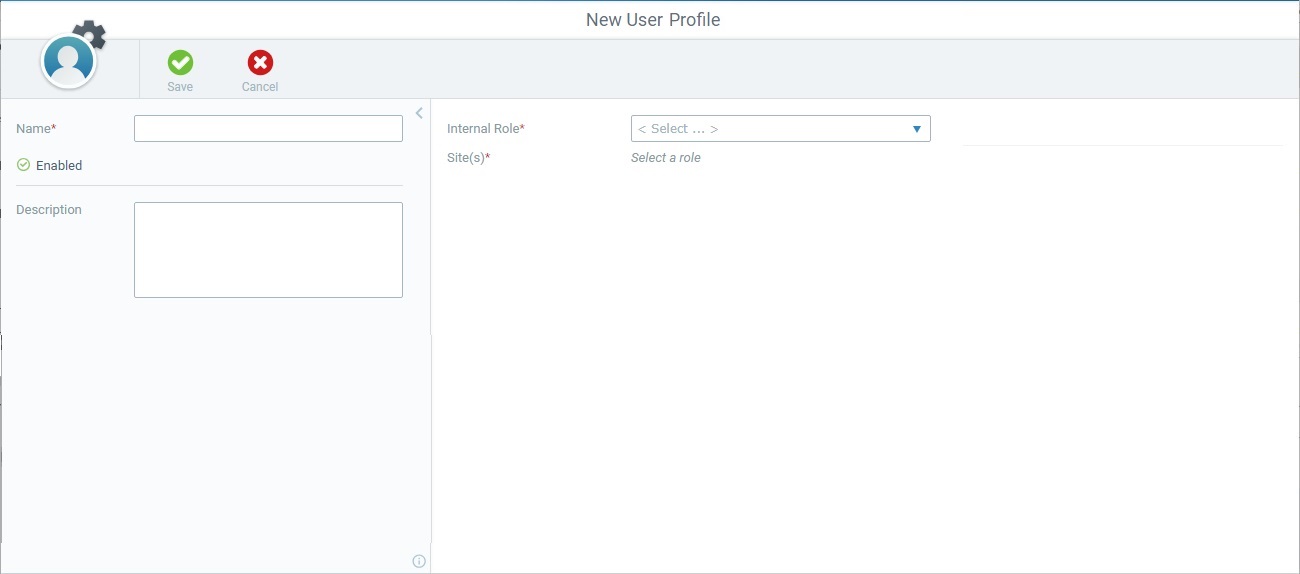
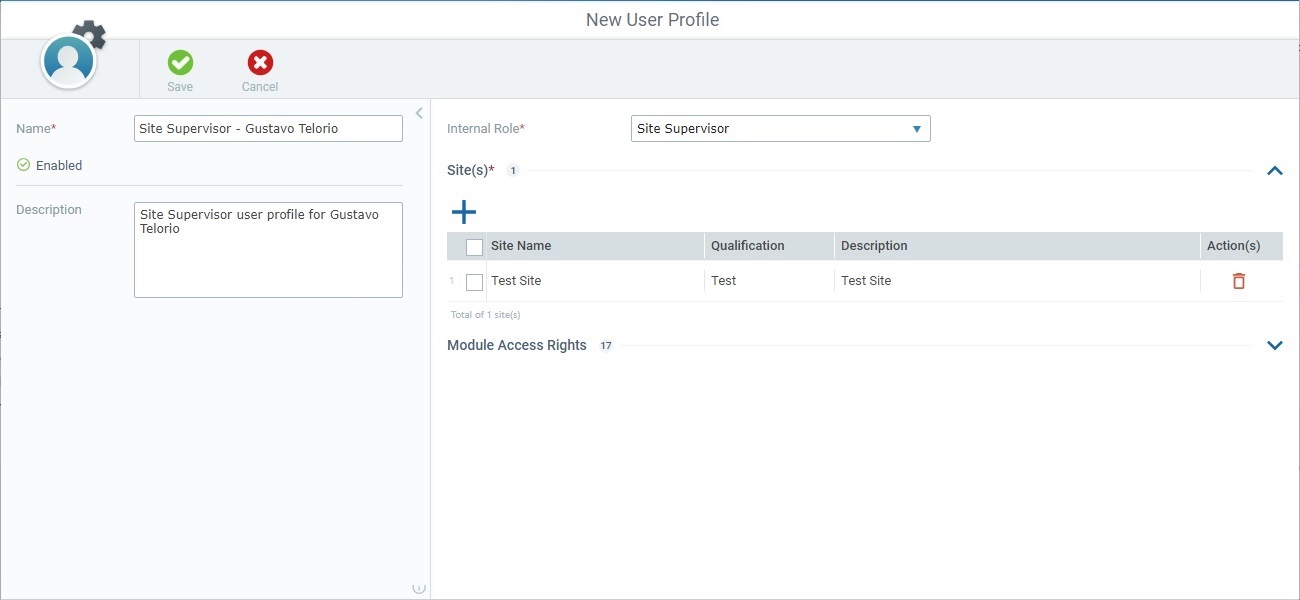
3. The page is already in edit mode. Start by filling in the options available in the left panel. Fields marked with an asterisk are mandatory.
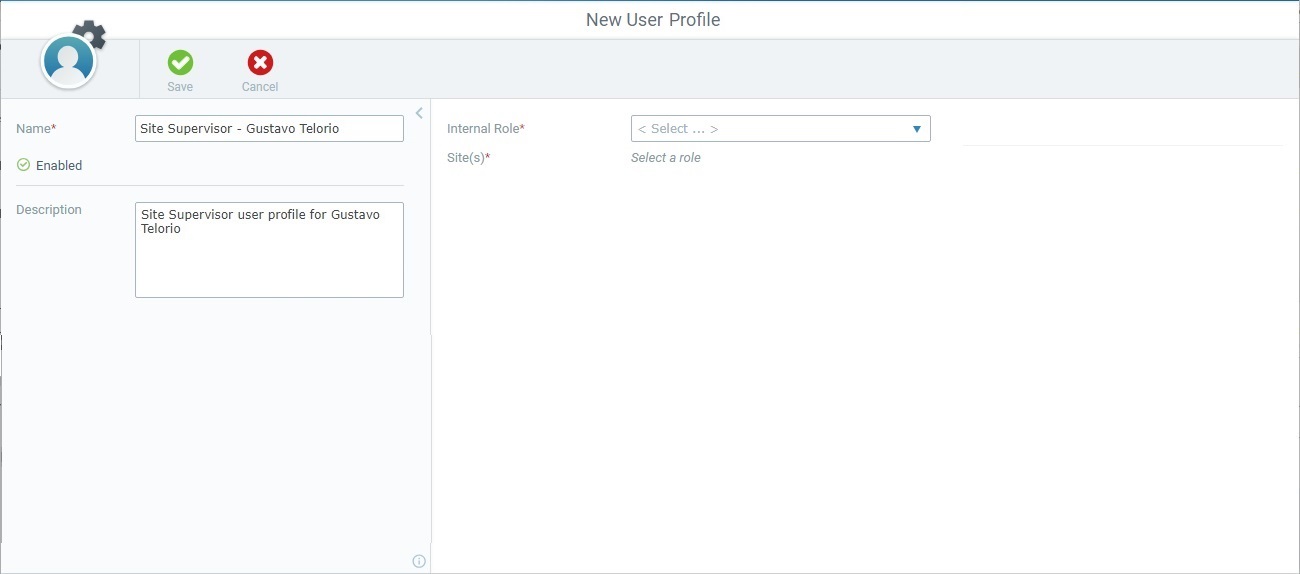
Name * |
Define a name for the user profile.
The profile name MUST comply with the following rules: •Maximum of 40 characters. •Alphanumeric lowercase/uppercase characters. •Allows for accentuated characters. •Special characters allowed: "-" "_" "<space> " (But NO leading/trailing spaces).
|
Description |
If relevant, add notes regarding the new user profile. |
4. If required, click ![]() (panel's upper right corner) to hide the panel and have an expanded view of the right panel. To view the panel again, click
(panel's upper right corner) to hide the panel and have an expanded view of the right panel. To view the panel again, click ![]() (upper left corner).
(upper left corner).
5. Proceed to the right panel. Fields marked with an asterisk are mandatory, meaning, they must always contain information.
6. Select the new user profile's role from the corresponding drop-down. There are 9 different roles to choose from.
The options that follow will be adapted to the role you choose in this drop-down.
Role |
Access Rights |
Account Administrator |
Has full access to the account and its sites. |
Site Manager |
Has full access to the assigned site(s). |
Site Supervisor |
Can access all operational sub-modules within the assigned site(s). Does NOT have access to the site's setup. |
MDM Manager |
Can access all sub-modules related to the device and application management of the assigned site(s). |
Device Manager |
Has access to the sub-modules related to device management of the assigned site(s). |
Operator Manager |
Has access to the operator related sub-modules of the assigned site(s). |
Deployment Manager |
Has access to the sub-modules that handle device groups, configurations and deployments of the assigned site(s). |
Configuration Manager |
Can only access the applications/configurations related sub-modules of the assigned site(s). |
Custom User |
Can have access to the operational sub-modules you choose for this profile within the assigned site(s). |
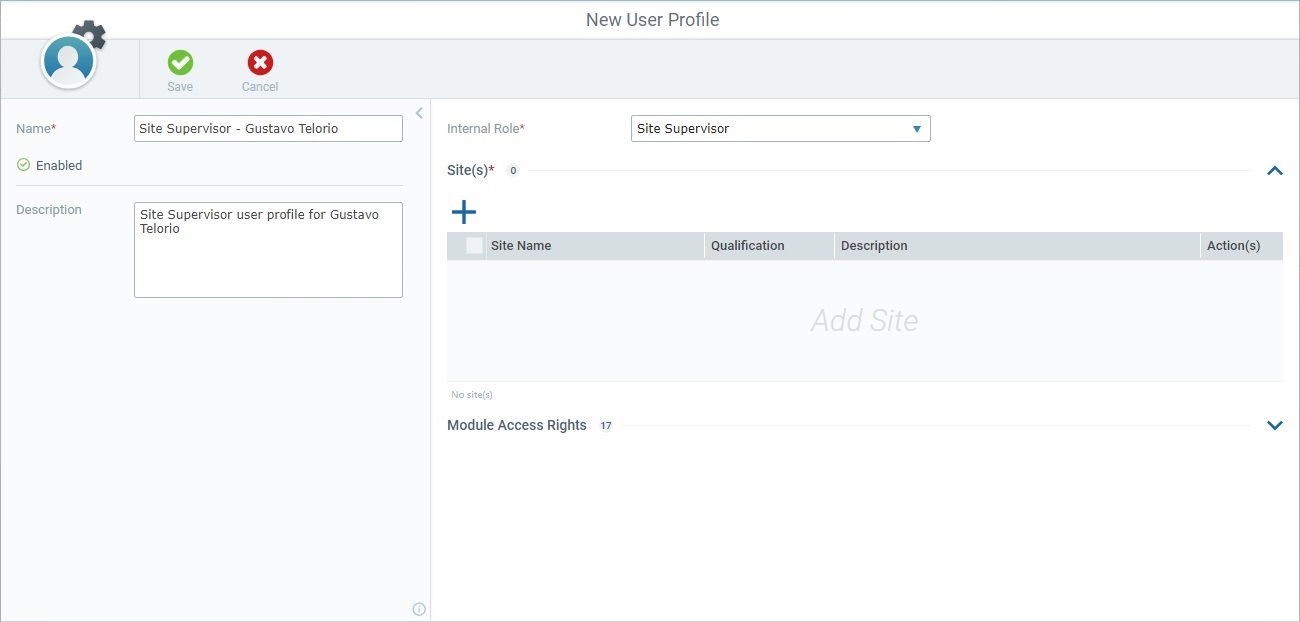
7. In the "Site(s)" section, select the site(s) to be associated to the new user profile. Check the "Site Selection" link below.
![]()
If the "Site(s)" section is hidden, click the arrow to the right to expand its content.
![]()
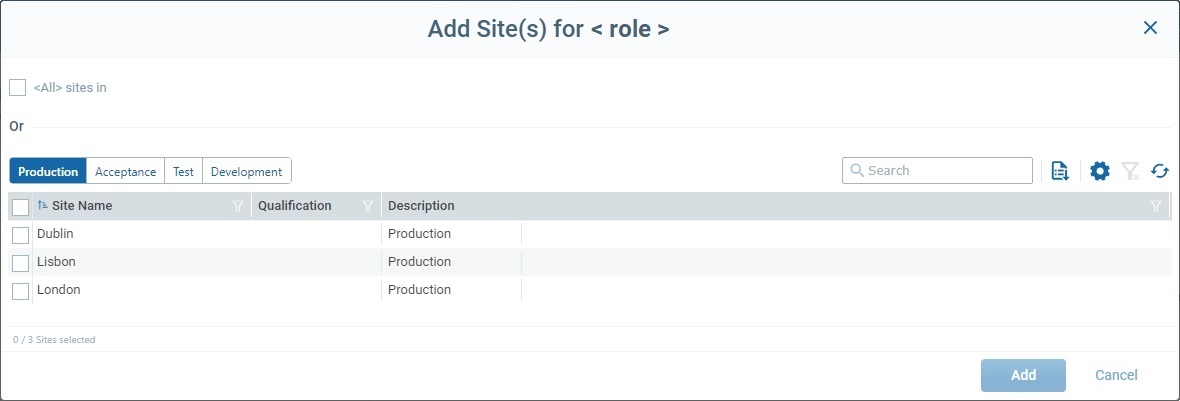
a. Click
b. If you want the new user profile to be associated to all the sites in the account with a specific qualification, check "<All> sites in Qualification" and, then, select the required qualification from the drop-down (the drop-down only activates after you check the "<All> sites in Qualification" option). If you want to select specific sites with different qualifications, ignore this option and proceed to step c.
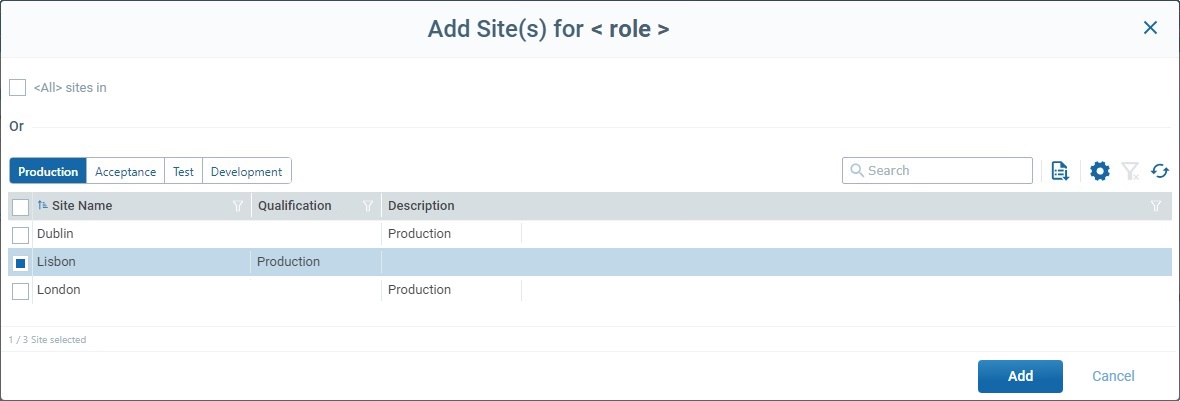
c. Select, at least, one site from the given list.
You can use the qualification buttons to filter the site list by qualification (ex: "Production", "Acceptance", "Test" and "Development" buttons).
For more details on this window, see Details of the Site Selection window.
d. Click
|
![]() This step does NOT apply to user profiles with an account administrator role because this role has full access to the account and its sites.
This step does NOT apply to user profiles with an account administrator role because this role has full access to the account and its sites.
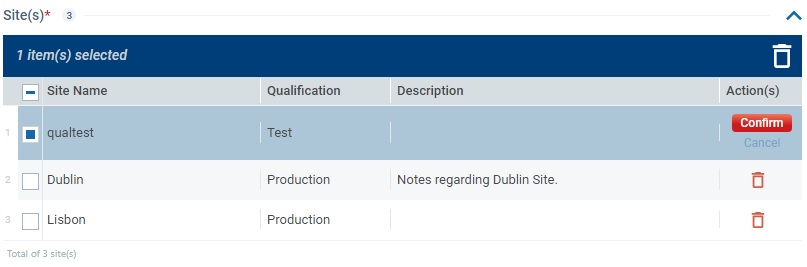
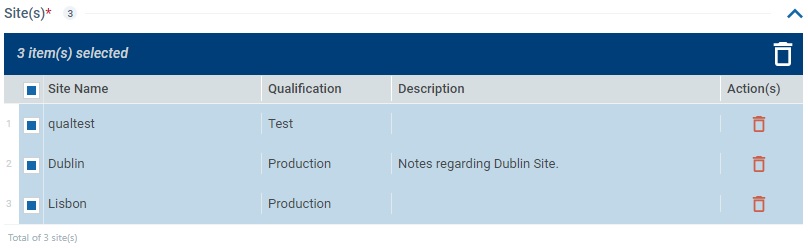
The right panel, now, displays the selected site(s). If you assigned all the sites with the same qualification to this profile, the site list will only display the entry "<All> Site(s) in <the selected qualification>".
If necessary, you can:
▪click ![]() to delete the corresponding site from the list.
to delete the corresponding site from the list.
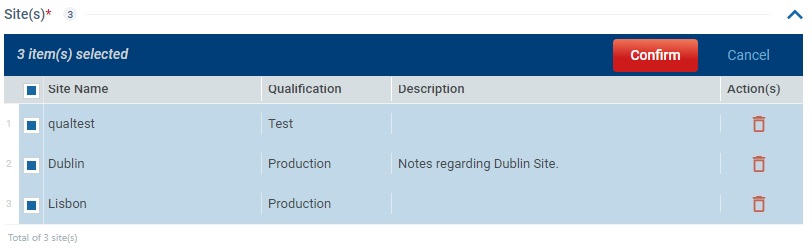
▪execute a bulk deletion by checking the box next to the "Site Name" column so all listed sites are selected (this activates the ![]() button) and click
button) and click ![]() .
.
Either action (single/bulk deletion) requires you to confirm the deletion by clicking the resulting ![]() button.
button.
via |
via |
|
|
8. If you have selected the custom user role for the new user profile, you must select which modules it can access, in the "Module Access Rights" section. This will apply to all the previously selected sites. Proceed as described in the "Access Rights Selection" link below.
If you have selected any other role, you can proceed to step 10 to save the new user profile.
![]()
If the "Module Access Rights" section is hidden, click the arrow to its right to expand its content.
![]()
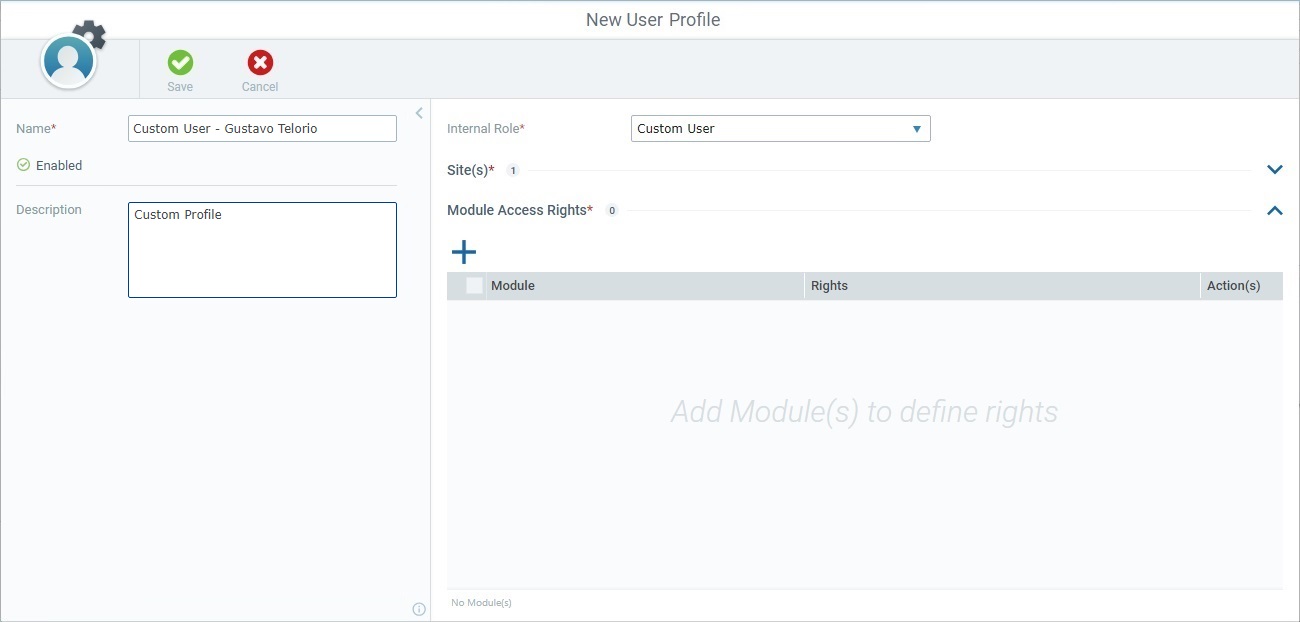
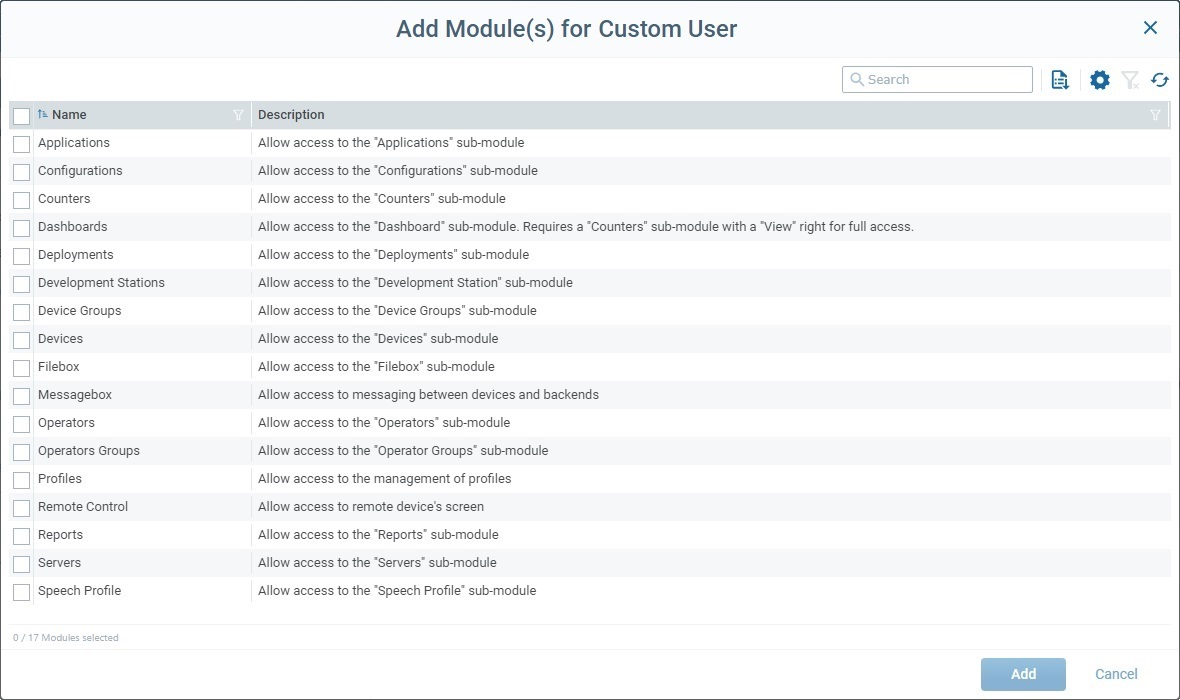
a.In the "Module Access Rights" section, click
b. Check the intended sub-modules. For more details on this window, see Details on the Sub-Module Selection window.
c. Click
|
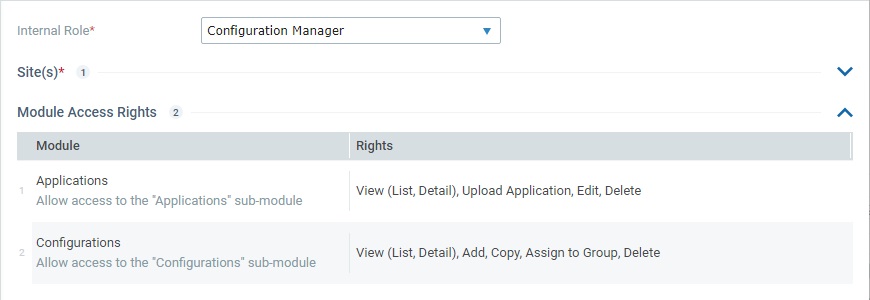
![]() This step does not apply to the other roles - the account administrator has full access and all the other roles have predefined rights which become available for consultation in this section once a role is selected in the corresponding drop-down. You can check the listed user rights but you cannot edit them.
This step does not apply to the other roles - the account administrator has full access and all the other roles have predefined rights which become available for consultation in this section once a role is selected in the corresponding drop-down. You can check the listed user rights but you cannot edit them.
Ex: The "Module Access Rights" section of a configuration manager role which does NOT have editable access rights.
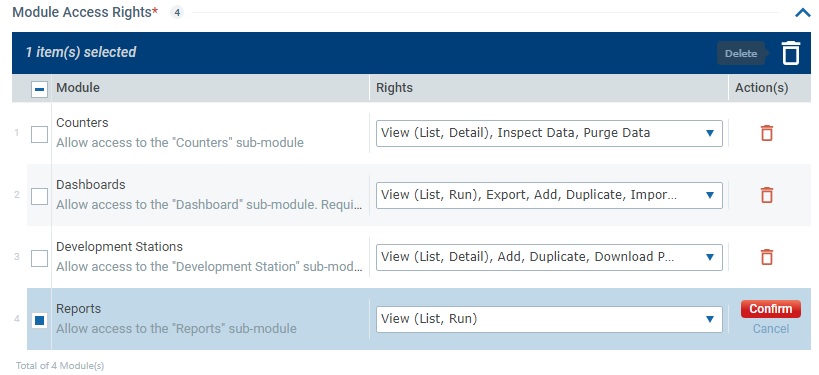
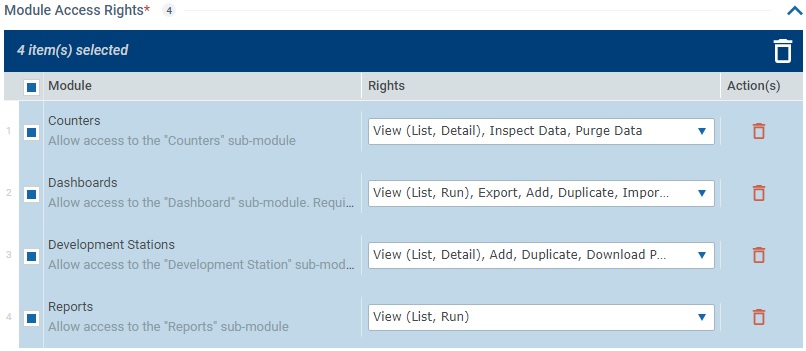
9. Once you have added the sub-modules you want this profile to access, you will be able to edit those sub-modules and corresponding operations.
a. If necessary, you can delete added access rights:
▪click ![]() to delete the corresponding right from the list.
to delete the corresponding right from the list.
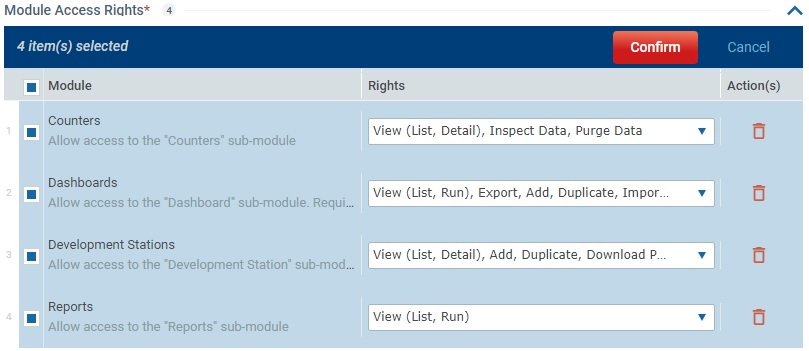
▪execute a bulk deletion by checking the box next to the "Module" column so all listed access rights are selected (this activates the ![]() button) and click
button) and click ![]() .
.
Either action (single/bulk deletion) requires you to confirm the deletion by clicking the resulting ![]() button.
button.
via |
via |
|
|
b. If you want to edit the default rights of a listed sub-module, open the corresponding drop-down in the "Rights" column and check/uncheck the intended rights.

You can use the search box to look for a specific right.
Click outside the drop-down or the X button to close the drop-down.
10. Once you have filled in/checked the required options in the left and right panels, click ![]() to apply.
to apply.
The page will be set to view mode with the information you added.