|
Editing a Configuration |
  
|
Editing a Configuration
|
Editing a Configuration |
|
Overview
The site manager/site users with the proper access rights can ONLY edit the configurations that were created within the site and have NOT been associated to a deployment. If the configuration is, already, part of a deployment plan, its editing will create an incremented version of that configuration.
Configurations created at account level CANNOT be edited at site level.
Step-by-step
1. In the Site Dashboard's "Control Panel" section, click  and, then, in the resulting row below, click
  to access the "Configurations" page.
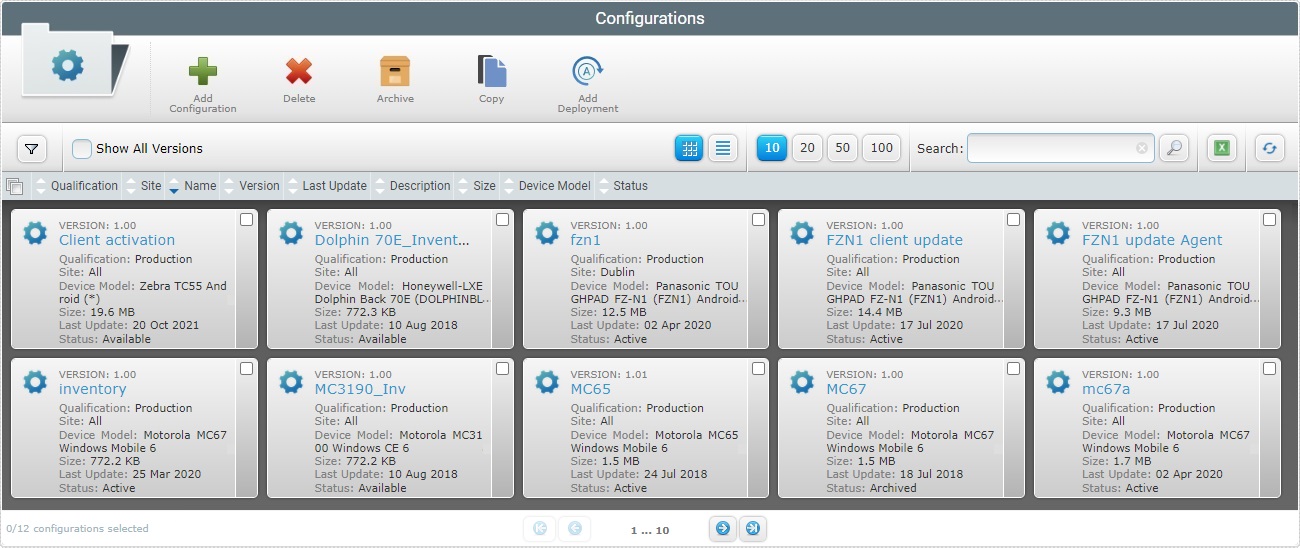
2. Click the name of the configuration you want to edit (displayed in light blue).
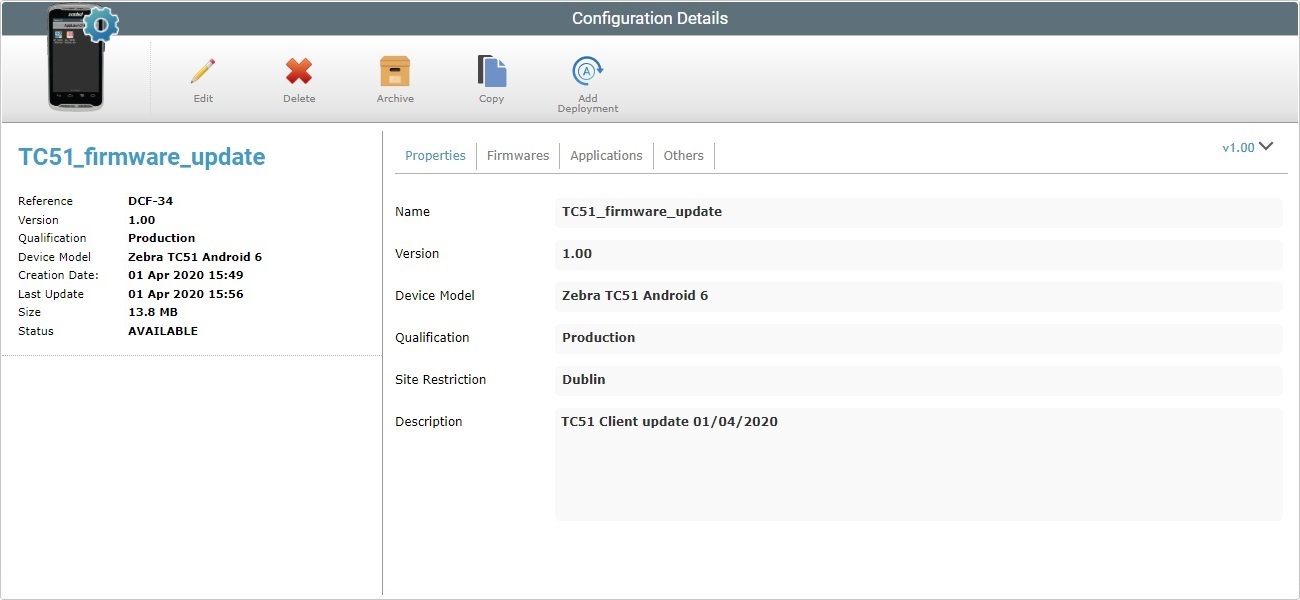
3. The resulting "Configuration Details" page is in view mode. Click ![]() to set the page to edit mode.
to set the page to edit mode.
The "Properties" tab is open, by default.
![]() If the configuration being edited is associated to a deployment and the deployment has started, the following message is displayed:
If the configuration being edited is associated to a deployment and the deployment has started, the following message is displayed:
![]()
The editing will result in an incremented version of that configuration.
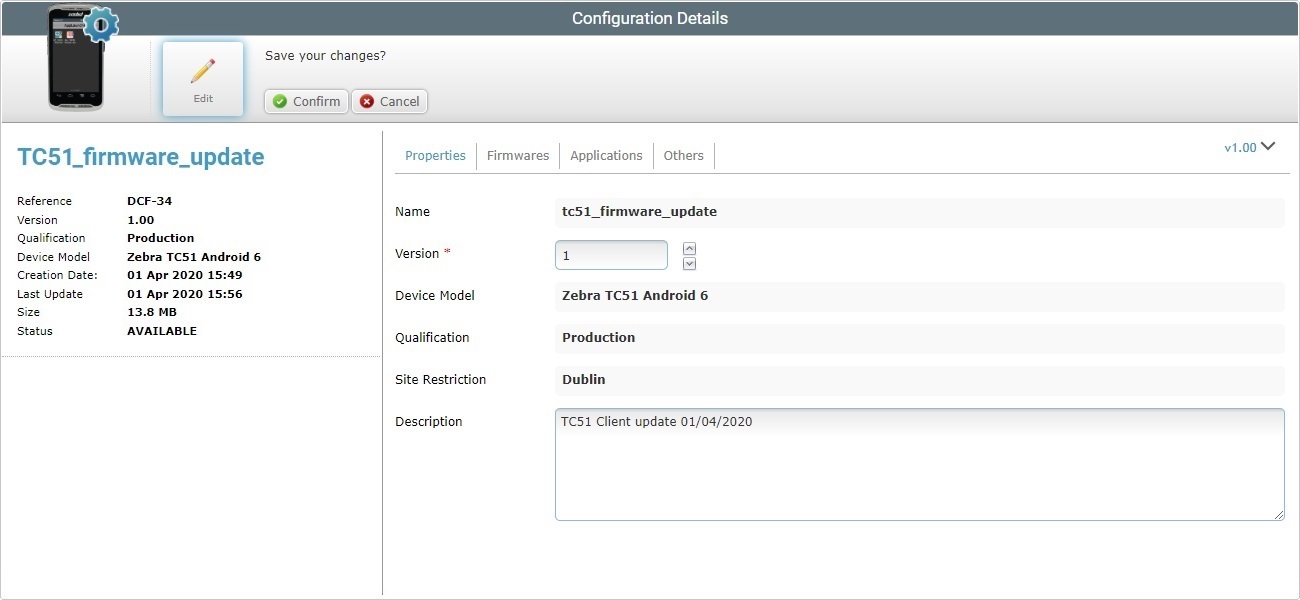
4. Edit the available options and make sure that the mandatory fields (marked with an asterisk) contain information:
Name |
The configuration's name. This field is NOT editable. |
Version * |
Define a new version number. If you edit a configuration, already involved in deployments, and do not change it, when you save your modifications, the version number will automatically be incremented. |
Device Model |
The configuration's target device (manufacturer, model and OS version). This field is NOT editable. |
Qualification |
Not Editable. See Qualification. |
Site Restriction |
Not Editable. |
Description |
Maintain or edit the displayed information. These notes are displayed in the "Description" field of a "Configurations" page. |
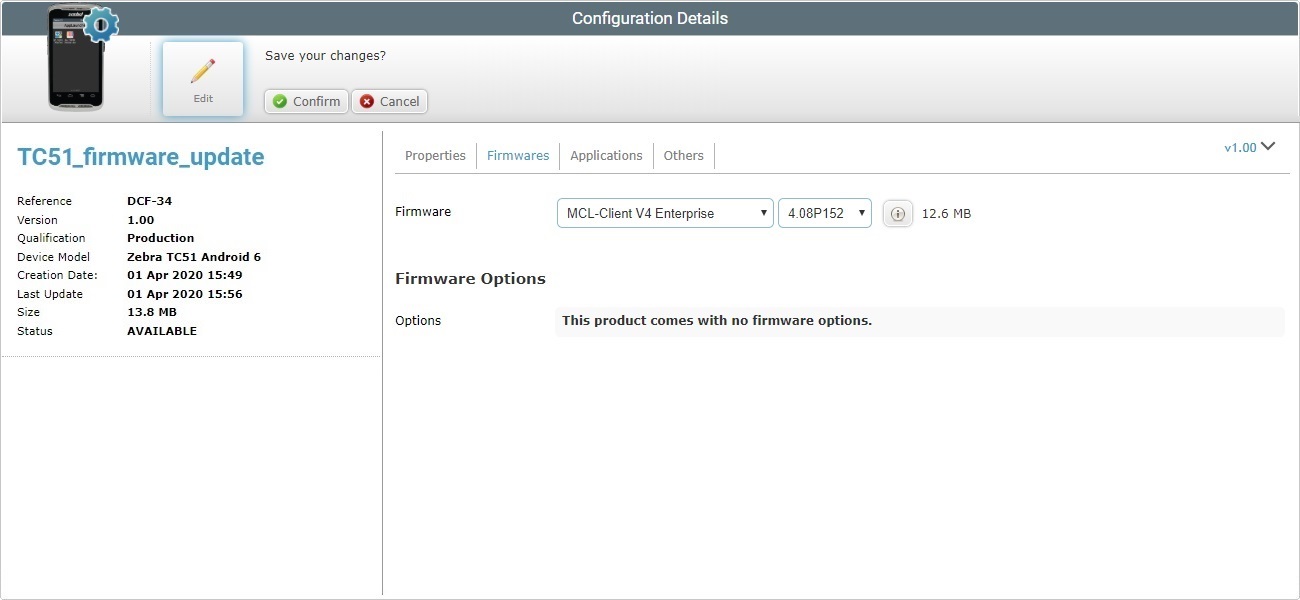
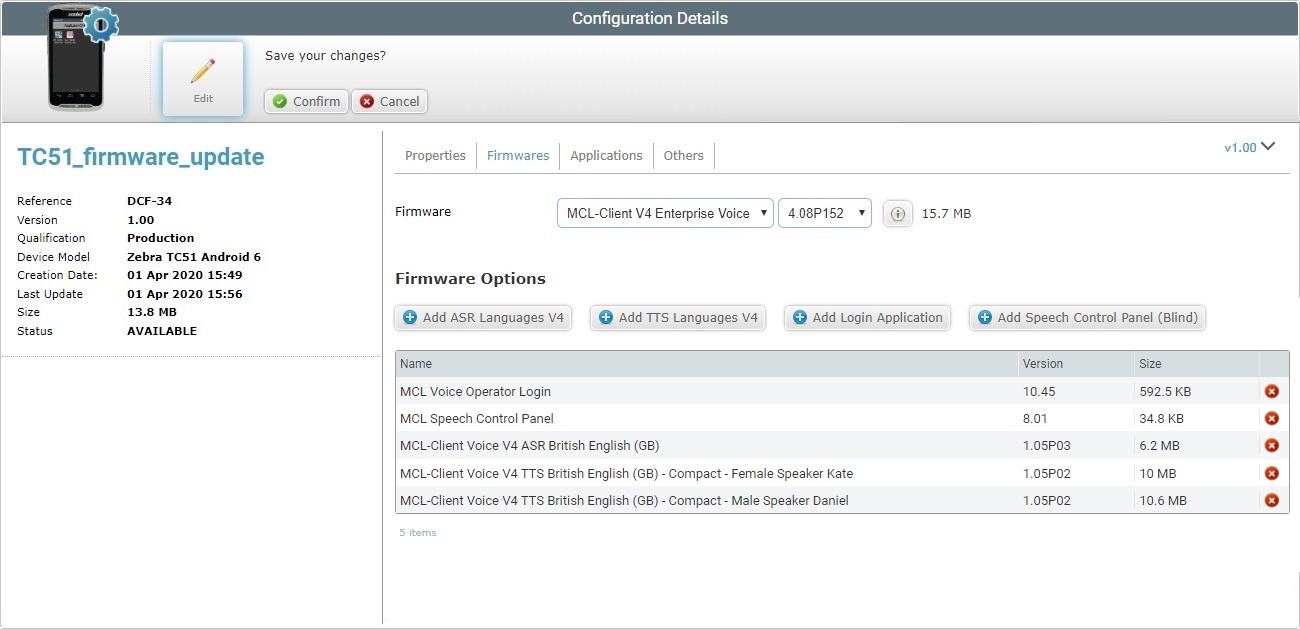
5. Go to the "Firmwares" tab.
6. The editable options available depend on the selected Firmware product.
Click the examples below:
If you intend to keep this firmware/firmware version, there is nothing to edit. If you intend to edit the configuration's firmware, proceed as follows:
|
||||||||
|
||||||||||||||
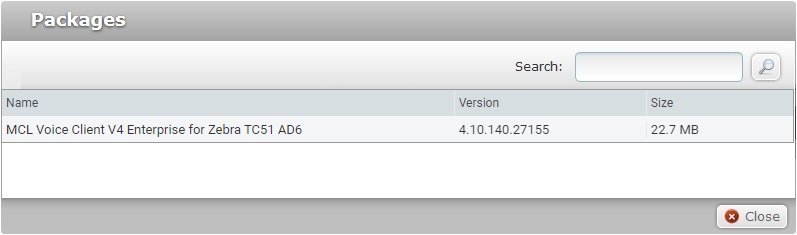
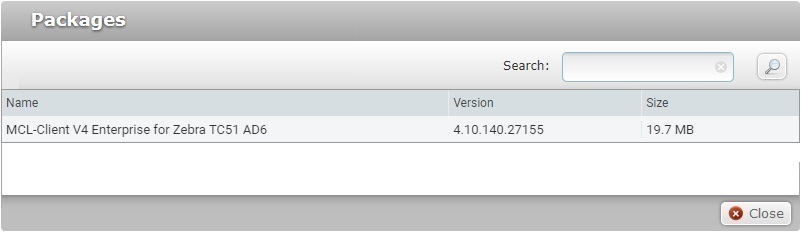
If you want to view the name of the available firmware package version, click ![]() to open a "Packages" window.
to open a "Packages" window.
If required, use the search box to filter the display of resources:
a. Enter what you want to search for.
b. Click ![]() or press <ENTER> in your PC keyboard to initiate the search.
or press <ENTER> in your PC keyboard to initiate the search.
c. To conclude the search operation, empty the search box and click ![]() or press <ENTER> in your PC keyboard.
or press <ENTER> in your PC keyboard.
Click ![]() to close the "Packages" window and return to the"Firmwares" tab.
to close the "Packages" window and return to the"Firmwares" tab.
![]()
When editing the TTS languages, do NOT select/add a standard and a compact TTS file for the same language/gender. The device will NOT run both files, it will ONLY use the more recently downloaded TTS language file.
7. Go to the "Applications "tab.
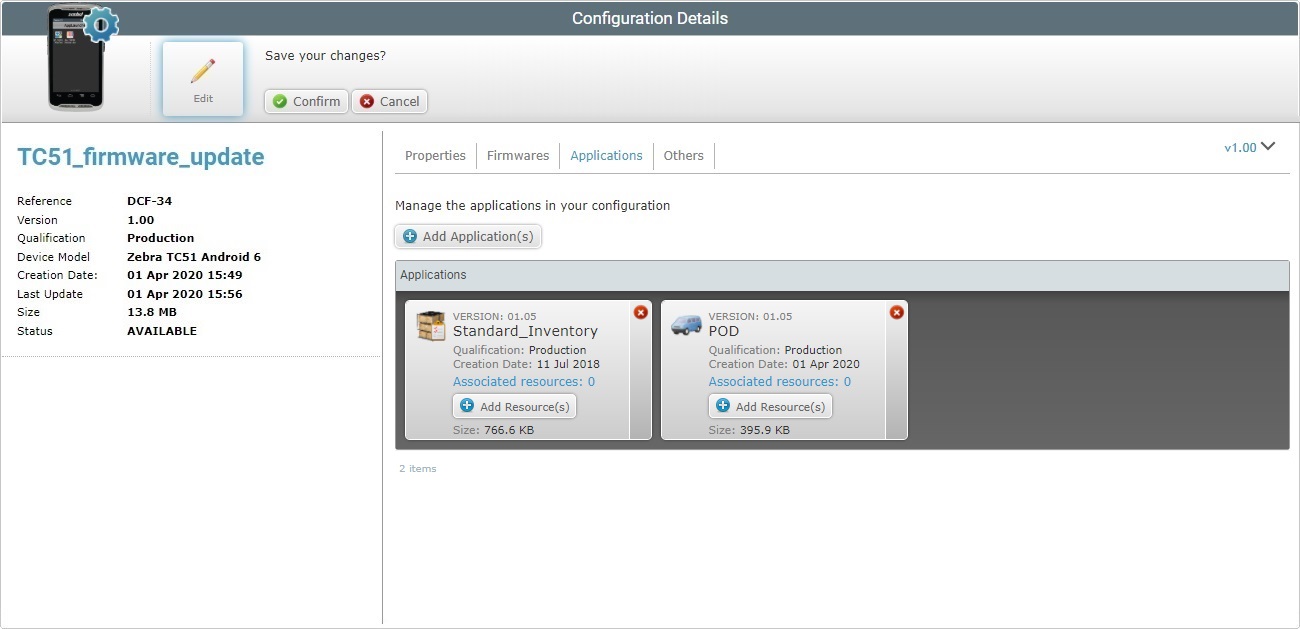
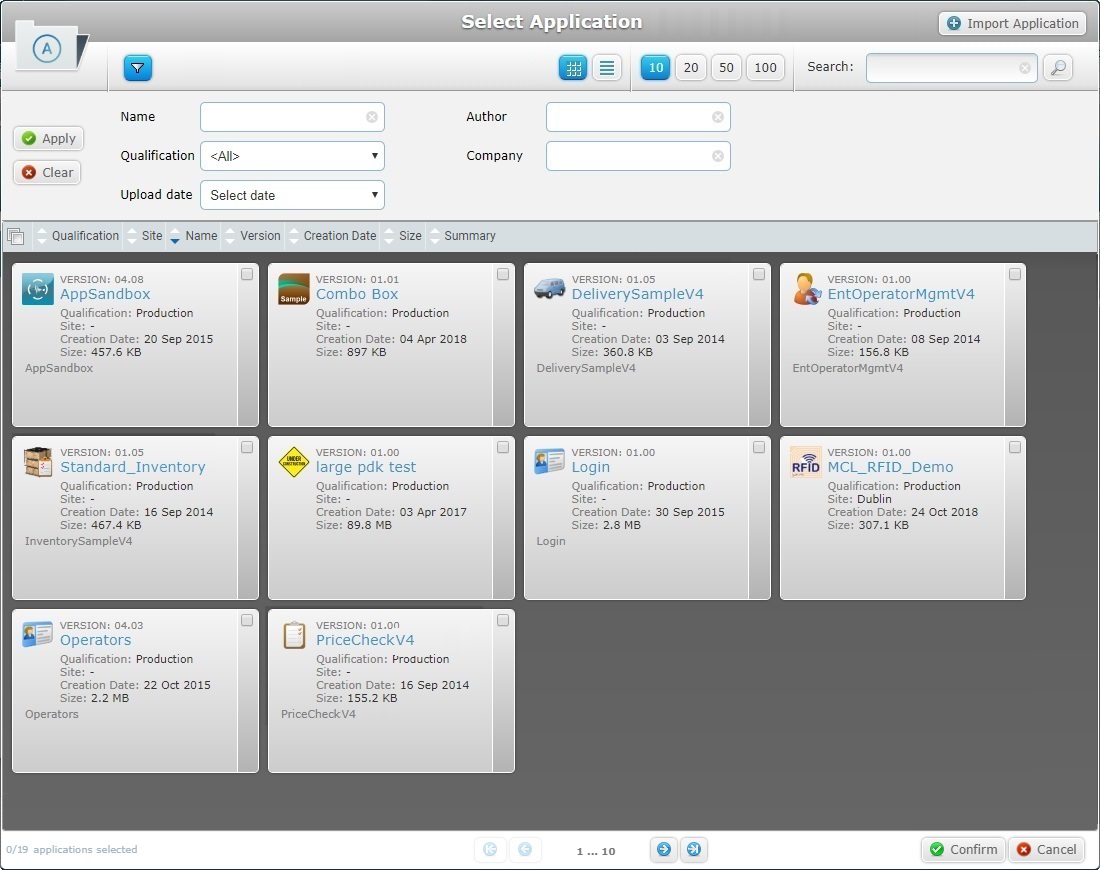
8. The "Applications" tab displays the applications included in the configuration.
Each application also displays its internal resources. You can click the corresponding "associated resources" option (which is displayed in light blue) to access those resources' details.
There are several operations available:
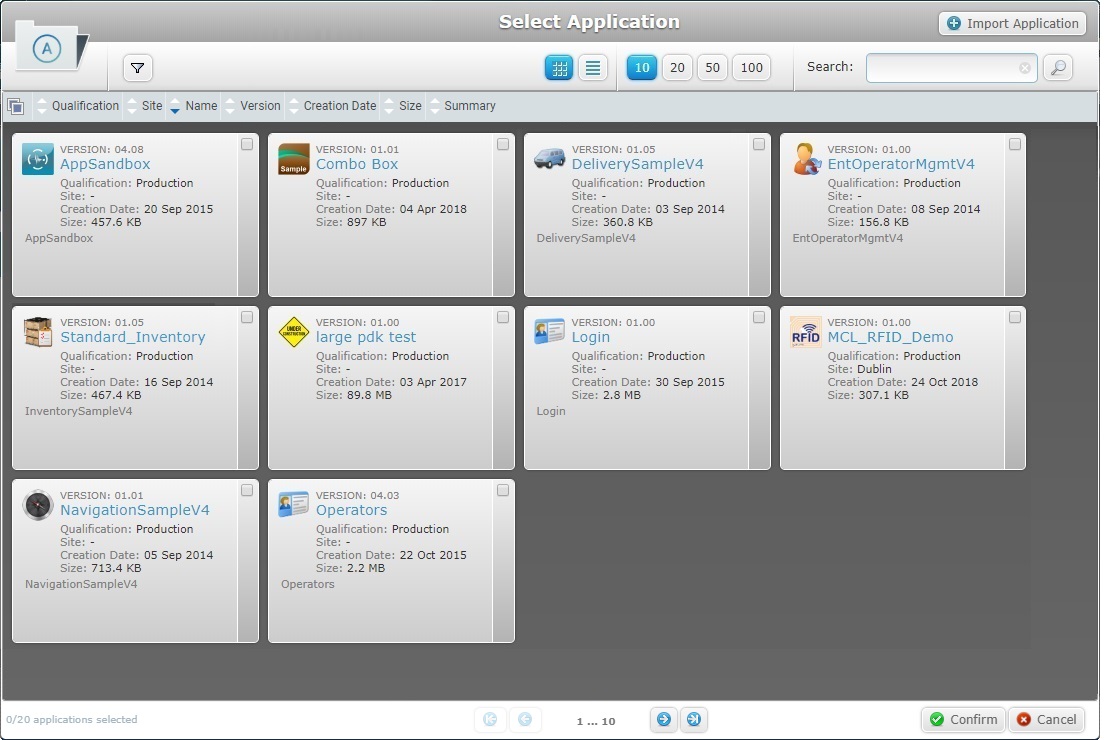
a. Click
b. Select the required application(s) by checking the corresponding
c. Click
|
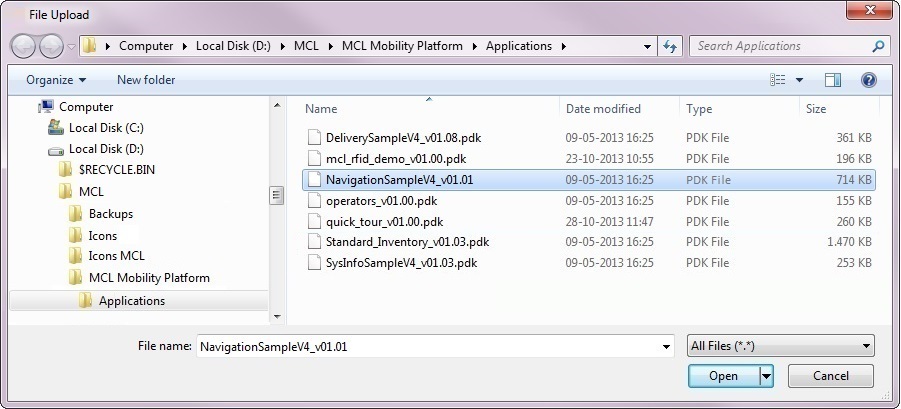
a. Click
b. Click
c. Select the required file and click
If necessary, you can delete added files. To delete one file, click the corresponding
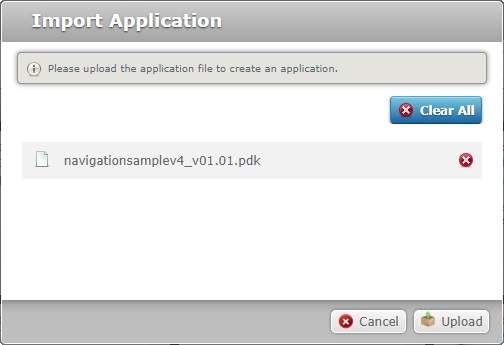
d. Click
The imported application is, now, displayed in the "Select Application" window and available to be added to the configuration.
e. If you need to import more applications, repeat steps a to d - applications can ONLY be added one at a time to the "Select Application" window.
f. Check the
|
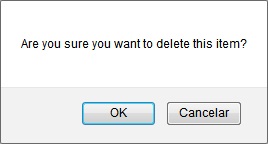
a. Click the
b. Confirm the operation, in the resulting window, by clicking
|
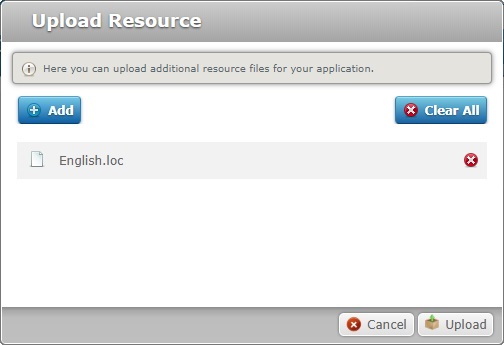
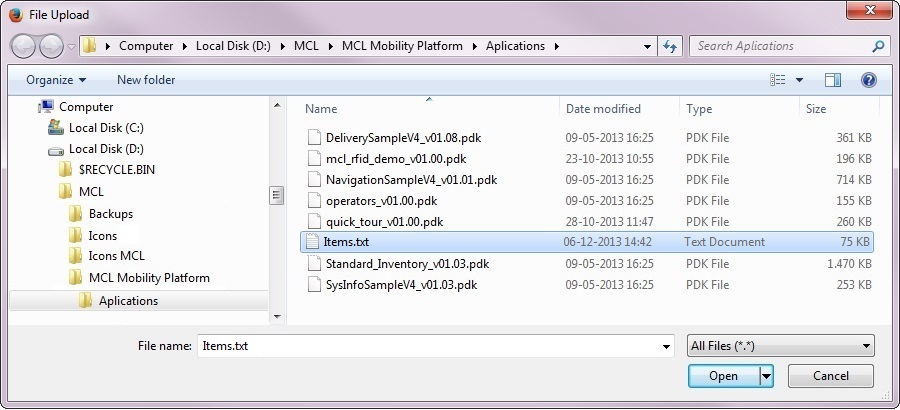
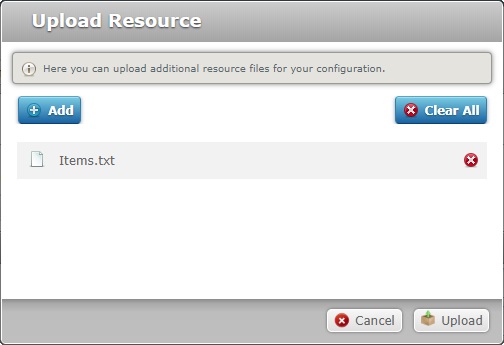
a. Click the
b. Select the appropriate file and click
c. The resource file is displayed in the "Upload Resource" window. If necessary, you can delete added files. To delete one file, click the corresponding If you are done adding resources, continue to step d. If you want to add more resources, click
d. Click
The resource is automatically uploaded. It can be viewed, if you click the "Associated resources" option (displayed in light blue) from the corresponding application.
|
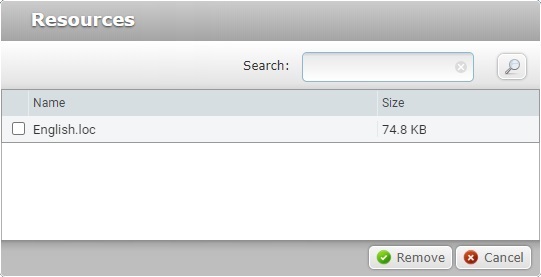
a. Click an application's "associated resources" option (displayed in light blue) to open the "Resources" window and view its resources.
b. Select the resource(s) you want to remove by checking the corresponding
c. Click
|
9. Once you have completed all the necessary changes in the "Applications" tab, proceed to the "Others" tab.
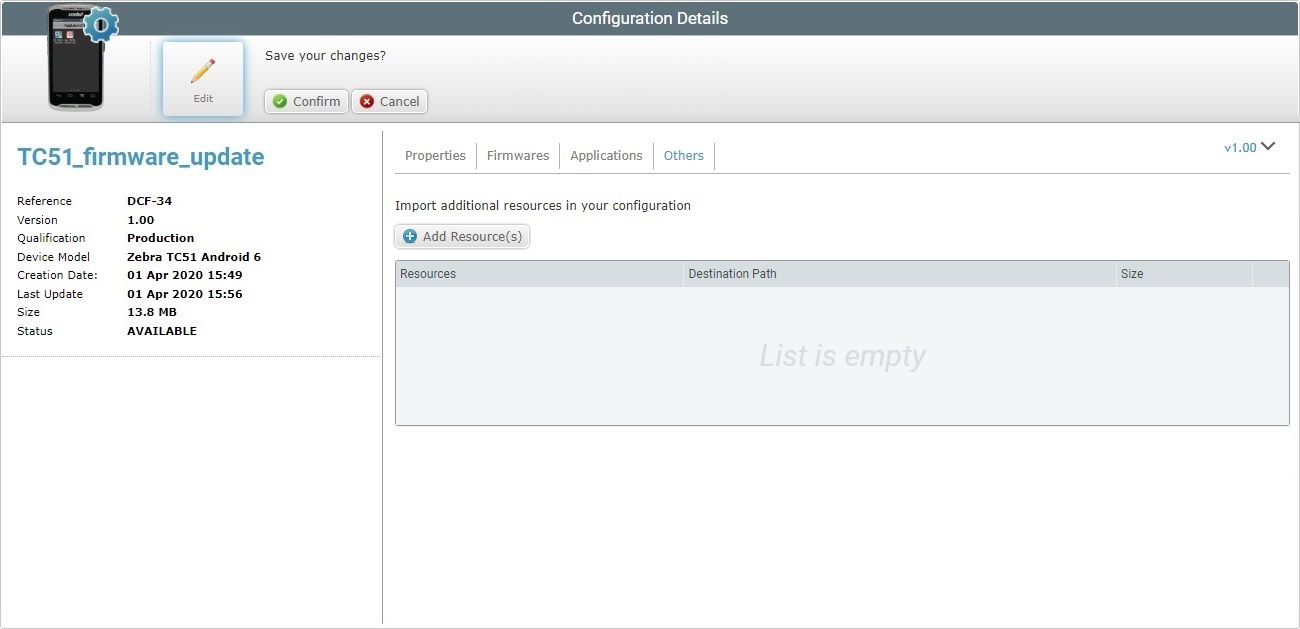
10. The "Others" tab allows you to:
a. Click
b. Select the appropriate resource file and click
If you want to deploy files (with extensions other than ".pdk", an ".apk" or ".cab") to a known location, you can use the corresponding alias in the path. "<APPS>", "<SHARED>", "<MCL>", "<INSTALL>" and/or "<SYSTEM>" are the available aliases you can enter. Ex: <APPS>\User_Guide\; <INSTALL>\Zebra manifest file ("*.mprf"); <INSTALL>\parameter services files ("*.dpf", "*.upf", "*apf", "*.cpf"). For more information about aliases, see Details on Aliases below.
The size limit for file uploads into the "Others" tab of a configuration is 1GB.
The resource file is displayed in the "Upload Resource" window. If necessary, you can delete added files. To delete one file, click the corresponding
c. If you have more resource files to add, click
d. Once you are done, click
|
a. Click the
|
a. Click the b. In the opened browser's page (if the file is a PDF file) or in the "Save as" OS window (for other file types), use the available Download/Save option to download and save the file.
|
The configuration's resources are delivered in the order they are presented in the table, from top to bottom.
a. Move the resources up and/or down by clicking the corresponding
|
11. Once you have entered the required modifications, click ![]() to apply them. The page returns to view mode and displays the modifications.
to apply them. The page returns to view mode and displays the modifications.
![]() To have a configuration deployed into devices, you must create a deployment plan. For more detailed information, see Creating a Deployment.
To have a configuration deployed into devices, you must create a deployment plan. For more detailed information, see Creating a Deployment.
![]()
Occurrence: When trying to upload an imported application.
Cause: The imported file does not have a .pdk extension.
Action: Repeat the import operation and select a file with the correct extension.
![]()
Occurrence: When clicking ![]() .
.
Cause: The added resource does not have a .pdk, an .apk or .cab extension and no path was provided. Without the path, the file cannot be located.
Action: Enter a path to locate the file.