|
Planning a Deployment for a Device Group |
  
|
Planning a Deployment for a Device Group
|
Planning a Deployment for a Device Group |
|
Overview
Deployments are responsible for delivering configurations to devices within a device group. These tasks can be planned in the "Deployments" sub-module (see Deployments), in the "Configurations" sub-module (see Deploying a Configuration) but, also, in the "Device Groups" sub-module. More specifically, in the "Device Groups" page and/or a device group's own details page.
To Assign a Deployment to a Device Group in the "Device Groups" Page.
This method can be used to assign a deployment for one or more device groups as long as the selected device groups share the same device type/OS.
Step-by-step
1. In the Site Dashboard's "Control Panel", click  and, in the resulting row below, select
  to open the "Device Groups" page.
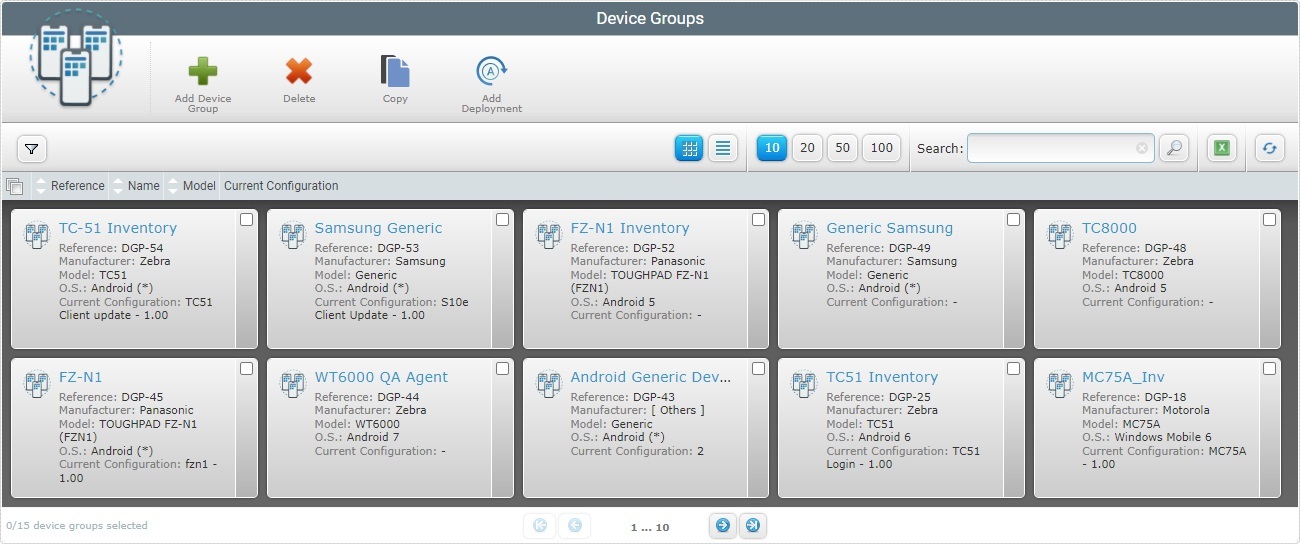
2. Check the corresponding ![]() of the device group(s) you want to assign a deployment to.
of the device group(s) you want to assign a deployment to.
3. Click ![]() . This opens a "New Deployment Plan" page.
. This opens a "New Deployment Plan" page.
If an error message appears, check Possible Error Message(s) to know how to proceed.
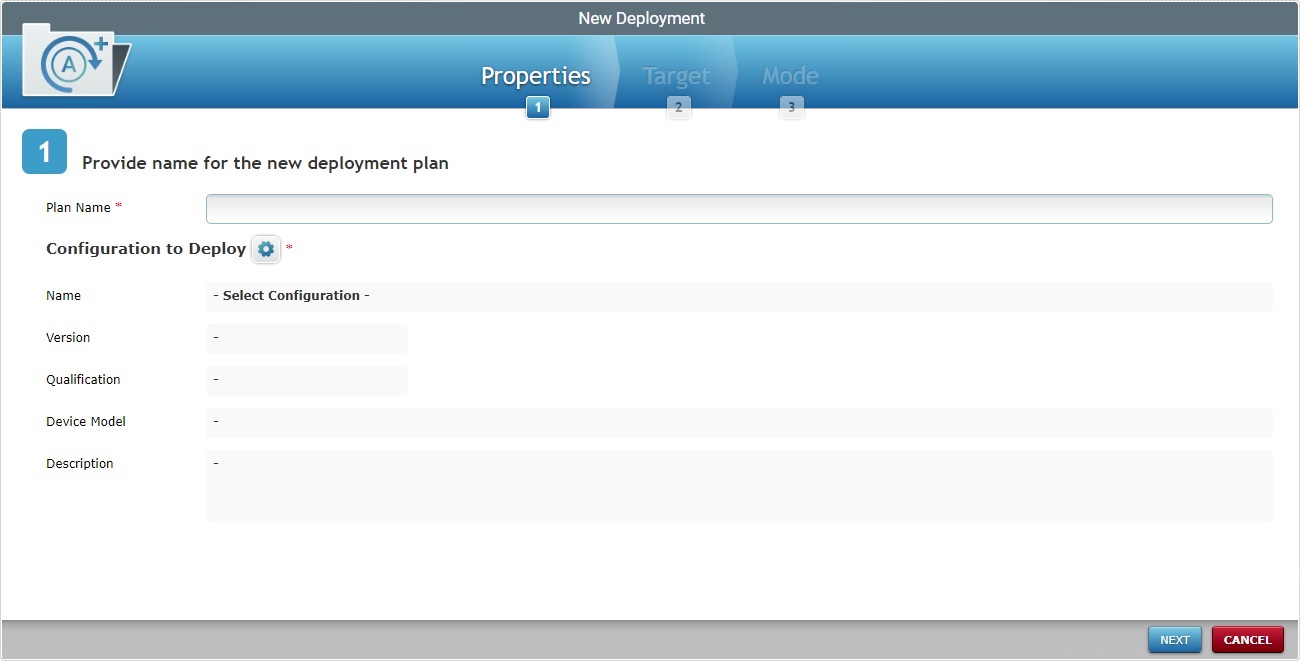
4. Fill in the options available (the fields marked with an asterisk are mandatory):
Plan Name * |
Enter a name for the deployment (minimum of 4 characters). |
Configuration to Deploy * |
Click Once the configuration is selected, the related fields below (the configuration's name, qualification, target device's model, etc.) are filled in, automatically, with its properties/information. |
Name |
The selected configuration's name. This field is NOT editable. |
Version |
The version of the selected configuration. This field is NOT editable. |
Qualification |
The selected configuration's qualification This field is NOT editable. |
Device Model |
The selected configuration's target device - manufacturer + device model + Operating System. This field is NOT editable. |
Description |
Information about the selected configuration.This field is NOT editable. |
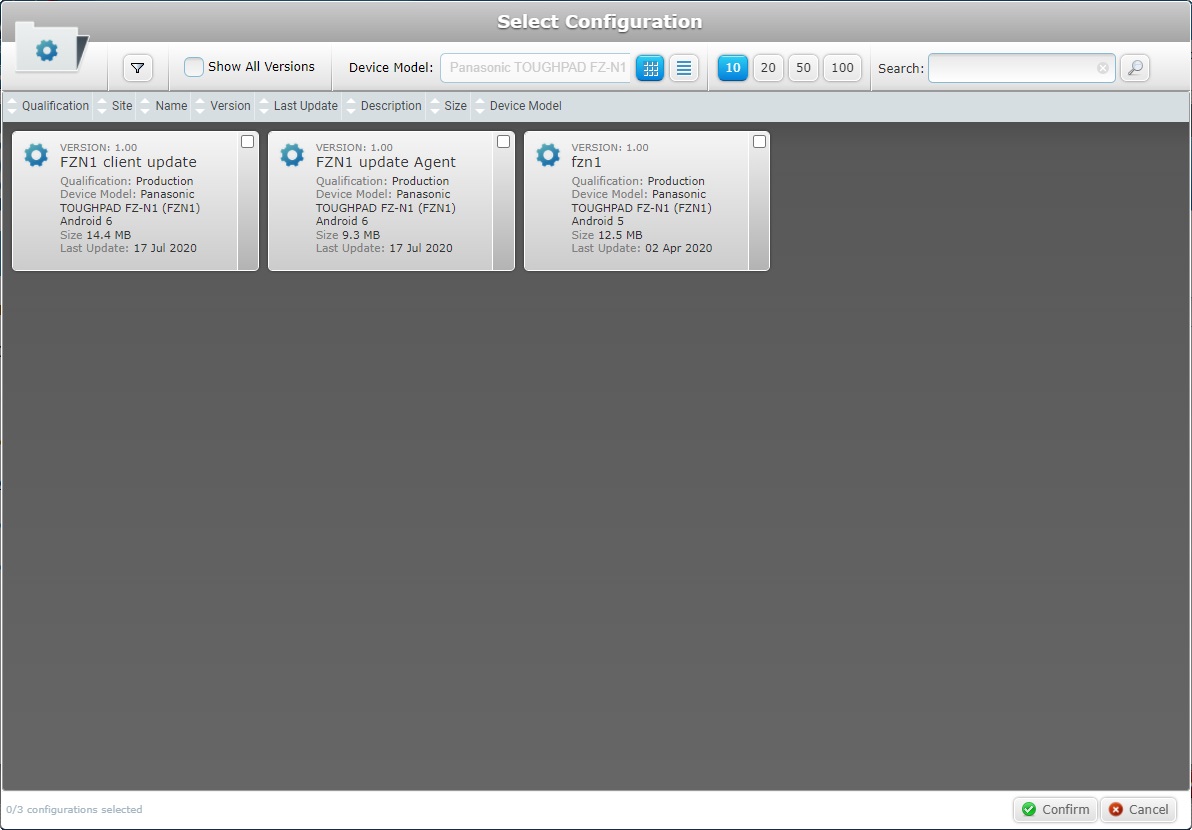
This window displays the available configurations that are compatible with the selected device group(s).
a. In the "New Deployment" page, click the
b. Select a configuration by checking the corresponding
c. Click
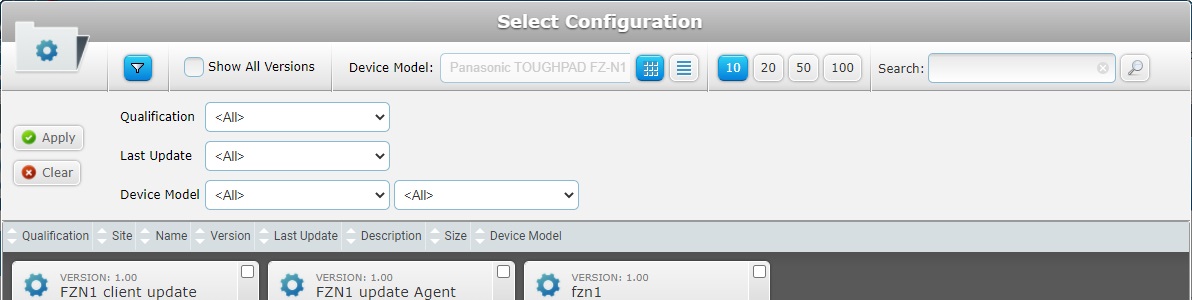
Use the following options to control the display of listed items:
•Use
I. Select the intended data from the drop-down. You can use as many filters, simultaneously, as necessary. II. Click III. Click
•Select the most appropriate view by either clicking
•Define how many items are displayed, at a time, by clicking one of the buttons
•
I. Enter what you want to search for. II. Click III. End the search operation by emptying the search box and clicking
•The
|
5. Click ![]() to continue.
to continue.

To return to step 1 ("Properties" tab) of the wizard's page, click ![]() or
or ![]() .
.
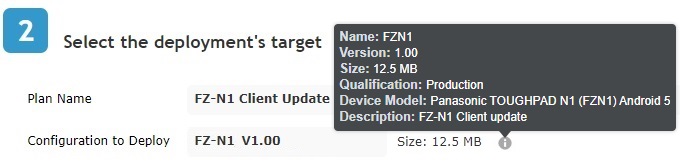
Target * |
|
|---|---|
Device Group(s) |
Not editable. Refers the current device group |
Device Model |
Not editable. Refers the current device group's device model. |
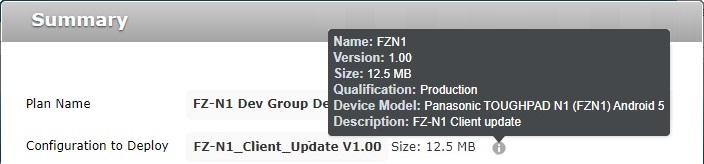
![]() Mouse over the
Mouse over the ![]() to see details on the configuration used in the deployment.
to see details on the configuration used in the deployment.
6. Click ![]() to continue.
to continue.
To return to the step 2 (Target tab) wizard page, click ![]() or
or ![]() .
.
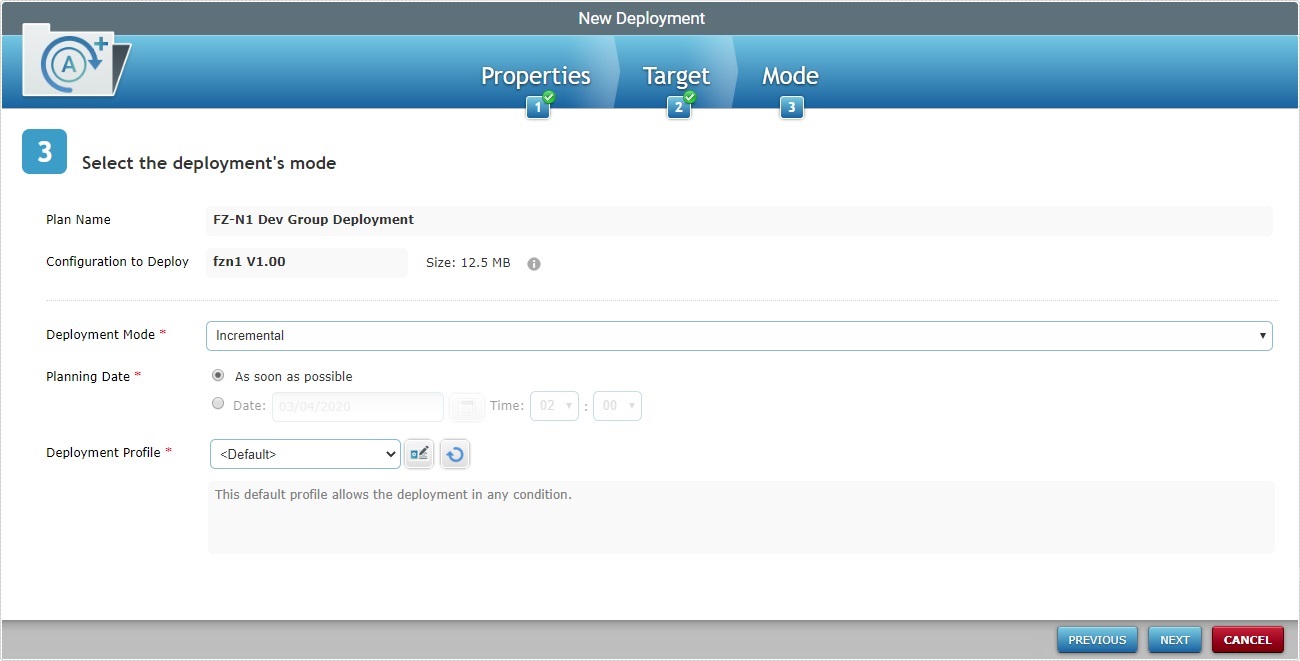
7. Fill in the available options:
Deployment Mode * |
Select the deployment mode from the drop-down. There are two available: Incremental: Only components present in the deployed configuration, that are not present on the device, will be implemented. Full install: Deletes all the applications/firmwares and forces the installation of the components present in the deployed configuration. |
|---|---|
Planning Date * |
Check the most appropriate scheduling for the deployment: As soon as possible: the deployment will happen as soon as the device contacts the account and the deployment criteria are met. Date: Click |
Deployment profile * |
Select the deployment profile from the drop-down list. Use the See Deployment Criteria Profile Details. Use the |
Description |
Select the deployment profile description. |
8. Complete the New Deployment wizard by clicking ![]() .
.
To return to the step 2 (Target tab) wizard page, click ![]() or
or ![]() .
.
To cancel the wizard, click ![]() .
.
If an error message appears, check Possible Error Message(s) below to know how to proceed.
9. A summary window is displayed with the deployment's details.
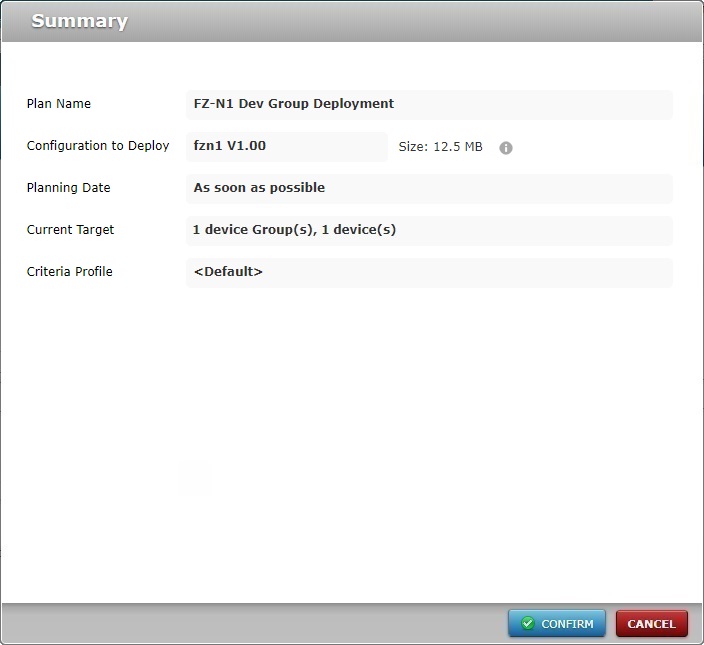
10. If all checks out, click ![]() .
.
The new deployment will be displayed in the "Deployment Plans" page.
![]() Mouse over the
Mouse over the ![]() to view the details on the Configuration used in the Deployment.
to view the details on the Configuration used in the Deployment.
To Assign a Deployment to a Device Group in its "Device Group Details" Page
This method is used to plan a deployment for the currently selected device group.
Step-by-step
1. In the Site Dashboard's "Control Panel", click and, in the resulting row below, select to open the "Device Groups" page.
2. Select the intended device group by clicking its name (displayed in light blue).
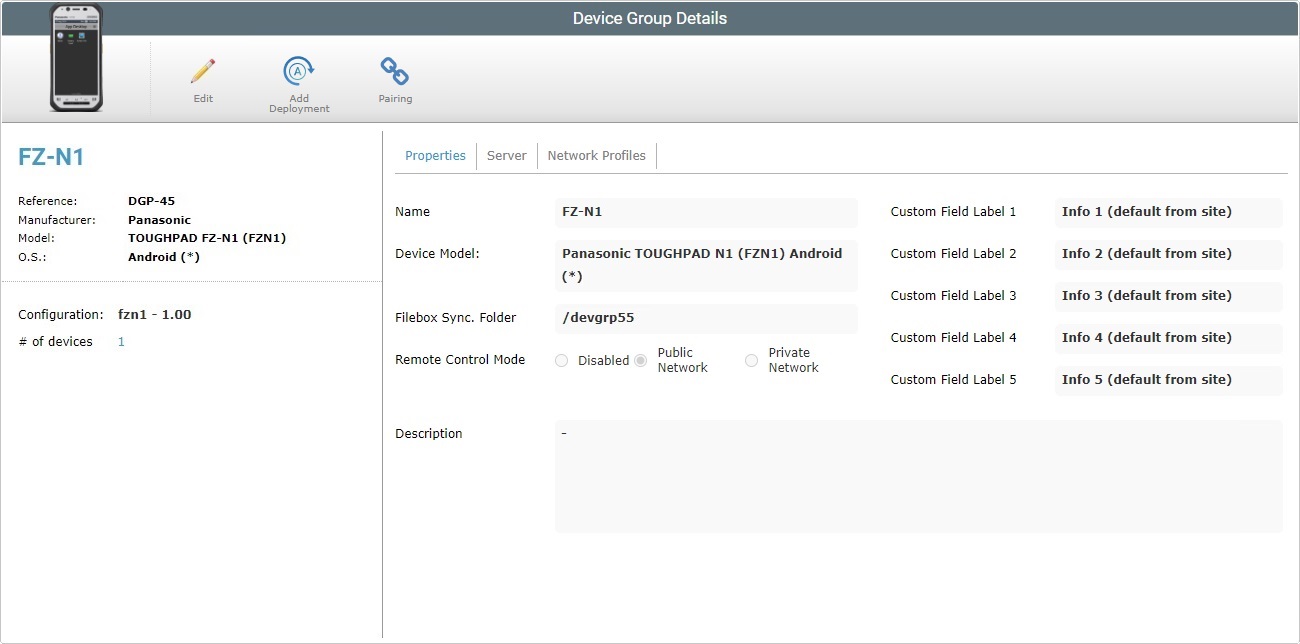
3. Click ![]() . This opens a "New Deployment Plan" page.
. This opens a "New Deployment Plan" page.
If an error message appears, check Possible Error Message(s) to know how to proceed.
4. In the "Properties" tab, fill in the options available (the fields marked with an asterisk are mandatory):
Plan Name * |
Enter a name for the deployment (minimum of 4 characters). |
Configuration to Deploy * |
Click Once the configuration is selected, the related fields below are, automatically, filled in. |
Name |
The name of the selected configuration. This field is NOT editable. |
Version |
The selected configuration's version and corresponding package size. This field is NOT editable. |
Qualification |
The selected configuration's qualification This field is NOT editable. |
Device Model |
The selected configuration's target device: manufacturer, device model and Operating System. This field is NOT editable. |
Description |
Information about the selected configuration.This field is NOT editable. |
This window displays the available configurations that are compatible with the selected device group(s).
a. In the "New Deployment" page, click the
b. Select a configuration by checking the corresponding
c. Click
Use the following options to control the display of listed items:
•Use
I. Select the intended data from the drop-down. You can use as many filters, simultaneously, as necessary. II. Click III. Click
•Select the most appropriate view by either clicking
•Define how many items are displayed, at a time, by clicking one of the buttons
•
I. Enter what you want to search for. II. Click III. End the search operation by emptying the search box and clicking
•The
|
5. Click ![]() to continue.
to continue.
To return to step 1 ("Properties" tab) of the wizard page, click ![]() or
or ![]() .
.
Target * |
|
|---|---|
Device Group(s) |
Not editable. Refers the current device group |
Device Model |
Not editable. Refers the current device group's device model. |
![]() Mouse over the
Mouse over the ![]() to see details on the configuration used in the deployment.
to see details on the configuration used in the deployment.
6. Click ![]() to continue.
to continue.
To return to the step 2 ("Target" tab) wizard page, click ![]() or
or ![]() .
.
7. Fill in the available options:
Deployment Mode * |
Select the deployment mode from the drop-down. There are two available: Incremental: Only components present in the deployed configuration, that are not present on the device, will be implemented. Full install: Deletes all the applications/firmwares and forces the installation of the components present in the deployed configuration. |
|---|---|
Planning Date * |
Check the most appropriate scheduling for the deployment: As soon as possible: the deployment will happen as soon as the device contacts the account and the deployment criteria are met. Date: Click |
Deployment profile * |
Select the deployment profile from the drop-down list. Use the See Deployment Criteria Profile Details. Use the |
Description |
Select the deployment profile description. |
8. Complete the New Deployment wizard by clicking ![]() .
.
To return to the step 2 (Target tab) wizard page, click ![]() or
or ![]() .
.
To cancel the wizard, click ![]() .
.
If an error message appears, check Possible Error Message(s) below to know how to proceed.
9. A summary window is displayed with the deployment's details.
10. If all checks out, click ![]() .
.
The new deployment will be displayed in the "Deployment Plans" page.
![]() Mouse over the
Mouse over the ![]() to view the details on the configuration used in the deployment.
to view the details on the configuration used in the deployment.
![]()
Deployments can be planned in other contexts and sub-modules. If you use any of the options below, you also open a "Deployment Plan" page:
•In the "Deployment Plans" page, click the name of a planned deployment ("Plan Name" displayed in light blue) and edit its details. For more information, see Editing a Deployment.
•In the "Configurations" page, select a configuration and click ![]() . For more information, see Deploying a Configuration.
. For more information, see Deploying a Configuration.
•In the "Device Groups" page, select a device group and click ![]() . For more information, see Planning a Deployment for a Device Group.
. For more information, see Planning a Deployment for a Device Group.
![]()
Occurrence: When clicking ![]() in the "New Deployment Plan" page.
in the "New Deployment Plan" page.
Cause: No configuration is selected.
Action: Click the ![]() button of the "Configuration to Deploy" option, select a configuration in the "Select a Configuration" window and, then, click
button of the "Configuration to Deploy" option, select a configuration in the "Select a Configuration" window and, then, click![]() to apply.
to apply.
![]()
Occurrence: When clicking ![]() in the "New Deployment Plan" page.
in the "New Deployment Plan" page.
Cause: Deployment name is less than 4 characters long.
Action: Enter a deployment name with 4 or more characters and, then, click ![]() .
.